2021 PEUGEOT 3008 emergency start
[x] Cancel search: emergency startPage 4 of 292
2
Contents
■
Overview
■
Eco-driving
1InstrumentsDigital instrument panels 9
Warning and indicator lamps 11
Indicators 17
Manual test 21
Distance recorders 21
Lighting dimmer 21
Trip computer 22
Touch screen 23
Remote functions (Rechargeable hybrid) 25
2AccessRemote control / Key 26
Keyless Entry and Starting 28
Central locking 30
Back-up procedures 30
Doors 32
Boot 32
Hands-free tailgate 33
Alarm 36
Electric windows 38
Panoramic sunroof 39
3Ease of use and comfortDriving position 42
Front seats 43
Steering wheel adjustment 47
Mirrors 47
Rear bench seat 49
Rear seats 50
Seat modularity 55
Heating and Ventilation 56
Dual-zone automatic air conditioning 57
Front demisting - defrosting 60
Heated windscreen 60
Rear screen demisting/defrosting 61
Temperature pre-conditioning
(Rechargeable hybrid)
61
Front fittings 62
Courtesy lamps 65
Interior ambient lighting 66
Rear fittings 66
Boot fittings 68
4Lighting and visibilityLighting control stalk 74
Direction indicators 75
Headlamp beam height adjustment 76
Automatic illumination of headlamps 76
Guide-me-home and welcome lighting 77
Automatic lighting systems - General
recommendations
77
Automatic headlamp dipping 77
Static cornering lighting 78
Night Vision 79
Wiper control stalk 80
Automatic wipers 81
Changing a wiper blade 83
5SafetyGeneral safety recommendations 84
Hazard warning lamps 84
Horn 85
Pedestrian horn (Rechargeable hybrid) 85
Emergency or assistance 85
Electronic stability control (ESC) 87
Advanced Grip Control 89
Hill Assist Descent Control 90
Seat belts 91
Airbags 95
Child seats 97
Deactivating the front passenger airbag 99
ISOFIX child seats 102
i-Size child seats 107
Child lock 108
6DrivingDriving recommendations 11 0
Starting/Switching off the engine 111
Starting rechargeable hybrid vehicles 11 2
Electric parking brake 11 4
6-speed manual gearbox 11 6
Automatic gearbox 11 6
Electric automatic gearbox
(Rechargeable hybrid)
11 9
Hill start assist 121
Driving modes 121
Gear shift indicator 123
Stop & Start 123
Tyre under-inflation detection 125
Driving and manoeuvring aids - General
recommendations
126
Memorising speeds 128
Speed Limit Recognition and
Recommendation
128
Speed limiter 132
Cruise control - Specific recommendations 133
Cruise control 134
Drive Assist Plus 135
Adaptive Cruise Control 136
Page 6 of 292

4
Overview
Presentation
These illustrations and descriptions are intended
as a guide. The presence and location of some
elements vary depending on the version or trim
level.
Instruments and controls
1.Sunroof and blind controls
Front courtesy/map reading lamps
Warning lamp display for seat belts and front
passenger airbag
Emergency call/Assistance call
2. Interior rear view mirror/Driving in Electric
mode indicator LED
3. Head-up digital display
4. Fusebox
5. Bonnet release
6. Door mirror and electric window control panel
7. Front passenger airbag
8. Glove box
Deactivation of the front passenger airbag
1.8" PEUGEOT Connect Radio (or 10" HD
PEUGEOT Connect Nav) touch screen
2. 12 V socket/USB socket
Wireless smartphone charger
3. "START/STOP" button
4. Gearbox control 5.
Electric parking brake
6. Hill Assist Descent Control
7. "SPORT" or “ECO” programme
or
Driving mode selector and/or Advanced Grip
Control
8. Advanced Grip Control
Steering-mounted controls
1.External lighting controls/Direction indicators
2. Wiper controls/Screenwash/Trip computer
3. Automatic gearbox control paddles
4. Horn/Driver front airbag
5. Controls for Cruise control/Speed limiter/
Adaptive Cruise Control
6. Instrument panel and audio system
adjustment controls
Page 17 of 292

15
Instruments
1Dynamic stability control (DSC)/Anti-slip
regulation (ASR)
Fixed.
The system is deactivated.
The DSC/ASR system is reactivated
automatically when the vehicle is restarted,
and at speeds above approximately 31 mph
(50
km/h).
At speeds below 31
mph (50 km/h), it can be
reactivated manually.
Flashing.
DSC/ASR regulation is activated in the
event of a loss of grip or trajectory.
Fixed.
The DSC/ASR system has a fault.
Carry out (3).
Emergency brake malfunction (with
electric parking brake)
Fixed, accompanied by the
message "Parking brake fault".
Emergency braking does not deliver optimal
performance.
If automatic release is not available, use manual
release or carry out (3).
Hill start assistFixed, accompanied by the
message "Anti roll-back system
fault".
The system has a fault.
Carry out (3).
Lane Departure Warning SystemFlashing, accompanied by an audible
signal.
A lane marking has been crossed on the left or
right.
Turn the steering wheel in the opposite direction
to return to the correct trajectory.
Fixed, accompanied by an onscreen
message.
The system has a fault.
Stay alert and drive carefully, then carry out (3).
Active Lane Keeping AssistanceFlashing.
You are about to cross a broken
lane marking without operating the direction
indicators.
The system is activated, then corrects the
trajectory on the side of the detected lane
marking.
For more information, refer to the Driving
section.
Fixed, accompanied by the display
of a message and an audible
signal.
The system has a fault.
Carry out (3).
Lane positioning assistFixed, accompanied by the
Service warning lamp.
The system has a fault.
Carry out (3).
AirbagsFixed.
One of the airbags or seat belt
pyrotechnic pretensioners is faulty.
Carry out (3).
Front passenger airbag (ON)Fixed.
The front passenger airbag is activated.
The control is in the "ON" position.
In this case, do NOT install a "rearward
facing" child seat on the front passenger seat
- risk of serious injury!
Front passenger airbag (OFF)Fixed.
The front passenger airbag is deactivated.
The control is set to the “OFF ” position.
A "rearward facing" child seat can be installed,
unless there is a fault with the airbags (Airbags
warning lamp on).
Under-inflationFixed.
The pressure in one or more tyres is too
low.
Check the pressure of the tyres as soon as
possible.
Reinitialise the detection system after adjusting
the pressure.
Under-inflation warning lamp
flashing then fixed and Service
warning lamp fixed.
The tyre pressure monitoring system is faulty.
Under-inflation detection is no longer monitored.
Page 30 of 292
28
Access
Locking the vehicle
Driving with the doors locked could make
it more difficult for the emergency services
to enter the passenger compartment in an
emergency.
As a safety precaution, take the electronic key
with you when leaving the vehicle, even for a
short time.
Purchasing a second-hand vehicle
Have the key codes memorised by a
PEUGEOT dealer, to ensure that the keys
in your possession are the only ones able to
start the vehicle.
Keyless Entry and
Starting
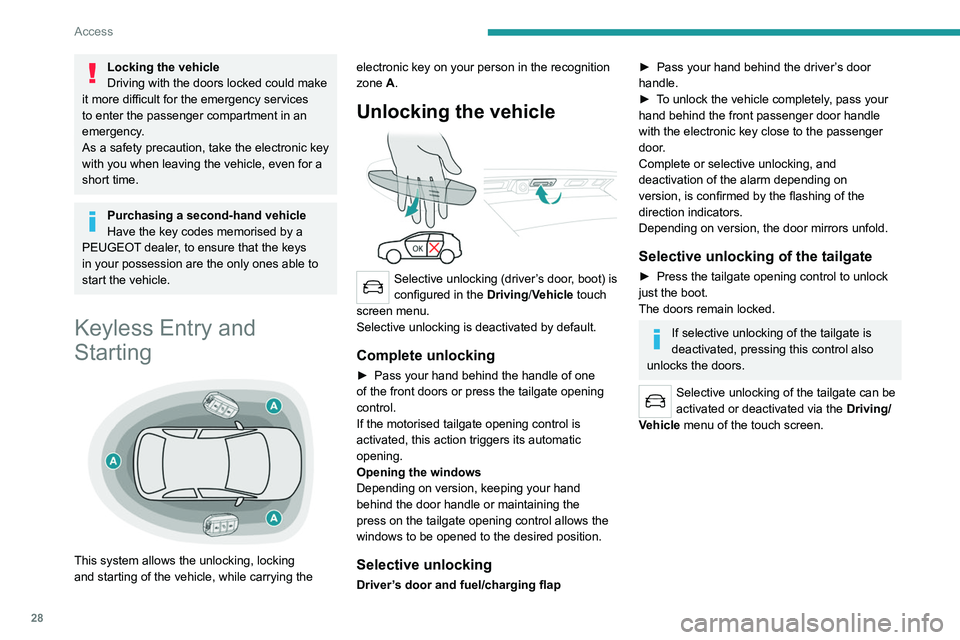
This system allows the unlocking, locking
and starting of the vehicle, while carrying the electronic key on your person in the recognition
zone A.
Unlocking the vehicle
Selective unlocking (driver’s door, boot) is
configured in the
Driving/Vehicle touch
screen menu.
Selective unlocking is deactivated by default.
Complete unlocking
► Pass your hand behind the handle of one
of the front doors or press the tailgate opening
control.
If the motorised tailgate opening control is
activated, this action triggers its automatic
opening.
Opening the windows
Depending on version, keeping your hand
behind the door handle or maintaining the
press on the tailgate opening control allows the
windows to be opened to the desired position.
Selective unlocking
Driver’s door and fuel/charging flap
► Pass your hand behind the driver ’s door
handle.
►
T
o unlock the vehicle completely, pass your
hand behind the front passenger door handle
with the electronic key close to the passenger
door.
Complete or selective unlocking, and
deactivation of the alarm
depending on
version,
is confirmed by the flashing of the
direction indicators.
Depending on version, the door mirrors unfold.
Selective unlocking of the tailgate
► Press the tailgate opening control to unlock
just the boot.
The doors remain locked.
If selective unlocking of the tailgate is
deactivated, pressing this control also
unlocks the doors.
Selective unlocking of the tailgate can be
activated or deactivated via the Driving/
Vehicle menu of the touch screen.
Locking the vehicle
Normal locking
► Press the handle on one of the front doors
(at the markings) or the locking control on the
tailgate.
It is not possible to lock the vehicle if one of the
electronic keys is left inside the vehicle.
Closing the windows and sunroof
Maintaining pressure on the door handle or
the tailgate control allows the windows and,
depending on version, the sunroof to be closed
to the desired position.
This operation also closes the sunroof blind.
Make sure that no item or person could
prevent the correct closing of the
windows and sunroof.
Pay particular attention to children when
operating windows.
The locking, and the activation of the alarm
depending on version, is confirmed by the
temporary lighting of the direction indicators.
Page 115 of 292
11 3
Driving
6Switching on the ignition
without starting the engine
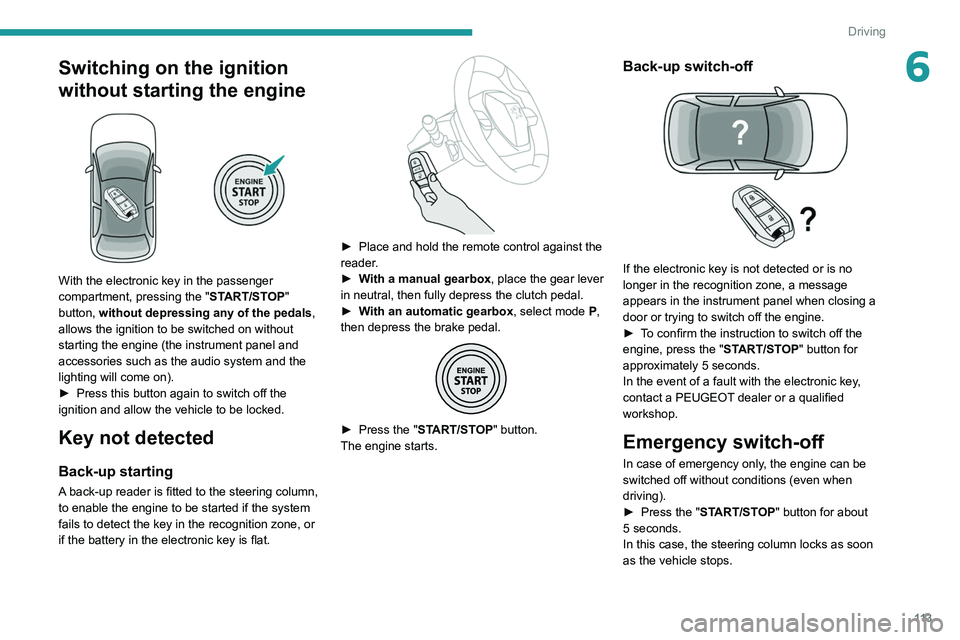
With the electronic key in the passenger
compartment, pressing the "START/STOP"
button, without depressing any of the pedals ,
allows the ignition to be switched on without
starting the engine (the instrument panel and
accessories such as the audio system and the
lighting will come on).
►
Press this button again to switch off the
ignition and allow the vehicle to be locked.
Key not detected
Back-up starting
A back-up reader is fitted to the steering column,
to enable the engine to be started if the system
fails to detect the key in the recognition zone, or
if the battery in the electronic key is flat.
► Place and hold the remote control against the
reader .
►
W
ith a manual gearbox, place the gear lever
in neutral, then fully depress the clutch pedal.
►
W
ith an automatic gearbox, select mode P,
then depress the brake pedal.
► Press the " START/STOP" button.
The engine starts.
Back-up switch-off
If the electronic key is not detected or is no
longer in the recognition zone, a message
appears in the instrument panel when closing a
door or trying to switch off the engine.
►
T
o confirm the instruction to switch off the
engine, press the " START/STOP" button for
approximately 5
seconds.
In the event of a fault with the electronic key,
contact a PEUGEOT dealer or a qualified
workshop.
Emergency switch-off
In case of emergency only, the engine can be
switched off without conditions (even when
driving).
►
Press the "
START/STOP" button for about
5
seconds.
In this case, the steering column locks as soon
as the vehicle stops.
Page 118 of 292
11 6
Driving
► Release the control.
► Depress and hold the brake pedal.
►
Pull the control in the application direction for
2
seconds.
This indicator lamp on the instrument panel comes on to confirm deactivation of
the automatic functions.
►
Release the control and the brake pedal.
From this point onwards, only the manual
functions, using the control, allow the parking
brake to be applied and released.
►
Follow this procedure again to reactivate
automatic operation (confirmed by the indicator
lamp on the instrument panel going out).
Emergency braking
If depressing the brake pedal fails to provide
effective braking or in exceptional circumstances
(e.g.
driver unwell, assisted driving), the vehicle
can be braked by sustained pulling on the
electric parking brake control. Braking continues
for as long as the control is kept pulled, and
ceases when the control is released.
The ABS and DSC systems stabilise the vehicle
during emergency braking.
If emergency braking malfunctions, the message
"Parking brake fault" will be displayed on the
instrument panel.
If the ABS and DSC systems
malfunction, indicated by lighting
one or both warning lamps on the instrument
panel, the vehicle’s stability is no longer ensured.
► In this case, ensure the vehicle's stability by
successive and repeated "pull-release" actions
on the electric parking brake control until the
vehicle comes to a complete stop.
6-speed manual gearbox
Engaging 5th or 6th gear
► Move the gear selector fully to the right to
engage 5th or 6th gear.
Failure to follow this instruction could
cause permanent damage to the gearbox
(inadvertent engagement of 3
rd or 4th gear).
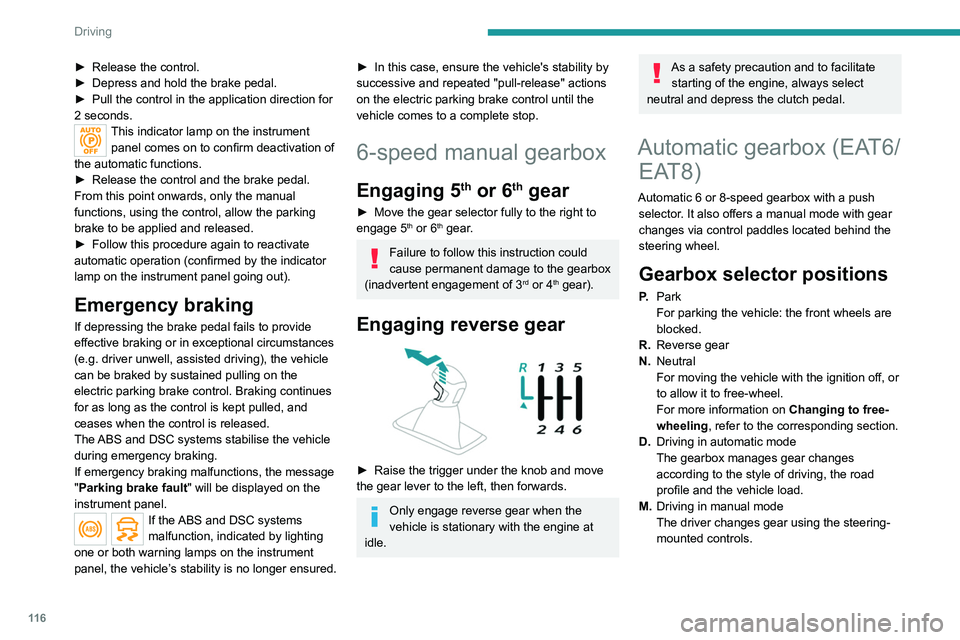
Engaging reverse gear
► Raise the trigger under the knob and move
the gear lever to the left, then forwards.
Only engage reverse gear when the
vehicle is stationary with the engine at
idle.
As a safety precaution and to facilitate starting of the engine, always select
neutral and depress the clutch pedal.
Automatic gearbox (EAT6/ EAT8)
Automatic 6 or 8-speed gearbox with a push
selector. It also offers a manual mode with gear
changes via control paddles located
behind the
steering wheel.
Gearbox selector positions
P. Park
For parking the vehicle: the front wheels are
blocked.
R. Reverse gear
N. Neutral
For moving the vehicle with the ignition off, or
to allow it to free-wheel.
For more information on Changing to free-
wheeling , refer to the corresponding section.
D. Driving in automatic mode
The gearbox manages gear changes
according to the style of driving, the road
profile and the vehicle load.
M. Driving in manual mode
The driver changes gear using the steering-
mounted controls.
Push selector
A.Button P
To put the gearbox into Park mode.
B. Unlock button To unlock the gearbox and come out of P or
to change to R, with the foot on the brake
pedal.
Press and hold this button before pushing the
selector.
C. Button M
To change from mode D to permanent
manual mode.
D. Gearbox state indicator lamps (R, N, D)
Page 150 of 292
148
Driving
It is the driver's responsibility to continuously
monitor traffic conditions in accordance with
applicable driving regulations.
As soon as the system detects a potential obstacle, it prepares the braking
circuit in case automatic braking is needed.
This may cause a slight noise and a slight
sensation of deceleration.
Deactivation/Activation
By default, the system is automatically activated
at every engine start.
The settings are changed via the Driving/Vehicle touch screen menu.
Deactivation of the system is signalled by
the illumination of this warning lamp,
accompanied by the display of a message.
Operating conditions and
limits
Vehicle moving forward.
ESC system operational.
DSC/ASR systems activated.
Seat belts fastened for all passengers.
Stabilised speed on roads with few bends.
In the following cases, deactivating the system
via the vehicle's configuration menu is advised:
–
T
owing a trailer.
–
Carrying long objects on roof bars.
–
V
ehicle with snow chains fitted.
– Before using an automatic car wash, with the
engine running.
–
Before placing the vehicle on a rolling road in
a workshop.
–
T
owed vehicle, engine running.
–
Damaged front bumper (version with radar).
–
Following
an impact to the windscreen close to
the detection camera.
The system is automatically deactivated once the use of a different diameter
"space-saver" type spare wheel is detected,
or if a fault with the two lateral brake lamps is
detected.
It can be dangerous to drive if the brake
lamps are not in perfect working order.
It is possible that warnings are not given,
are given too late or seem unjustified.
The driver must always stay in control of the
vehicle and be prepared to react at any time
to avoid an accident.
Following an impact, the system is
automatically deactivated.
Have it checked by a PEUGEOT dealer or a
qualified workshop.
Distance Alert
This function warns the driver that their vehicle
is at risk of a collision with the vehicle in front, or with a pedestrian or cyclist present in their traffic
lane.
Modifying the alert trigger threshold
This trigger threshold determines the sensitivity
with which the function warns of the risk of
collision.
The threshold is set via the
Driving/Vehicle touch screen menu.
►
Select one of the three pre-defined
thresholds: "Far", "Normal" or "Close".
The last threshold selected is memorised when
the ignition is switched off.
Operation
Depending on the degree of risk of collision
detected by the system and the alert trigger
threshold chosen by the driver, several different
levels of alert may be triggered and displayed on
the instrument panel.
The system takes account of the vehicle
dynamics, the speed of your vehicle and the one
in front, the environmental conditions and the
operation of the vehicle (actions on the pedals,
steering wheel, etc.) to trigger the alert at the
most relevant moment.
(orange)
Level 1: visual alert only, warning you that
the vehicle in front is very close.
The message
"Vehicle close" is displayed.
(red)
Level 2: visual and audible alert, warning
you that a collision is imminent.
The message "Brake! " is displayed.
Where the speed of your vehicle is too
high approaching another vehicle, the
first level of alert may not be displayed: the
level 2 alert may be displayed directly.
Important: the level 1 alert is not displayed
when there is a stationary obstacle or
when the "Near " trigger threshold has been
selected.
Intelligent emergency
braking assistance (iEBA)
This function supplements braking in the event
that the driver brakes, but not enough to avoid a
collision.
This assistance will only be provided if the driver
presses the brake pedal.
Page 184 of 292
182
Practical information
► Wait a few minutes before checking the level
again using the dipstick.
►
T
op up the level if necessary.
►
After checking the level, carefully screw the
oil filler cap back on
and replace the dipstick in
its tube.
The oil level indication displayed on the instrument panel when the ignition is
switched on is not valid for 30 minutes
following an addition of oil.
Brake fluid
The level of this fluid should be close to the "MAX" mark. If not, check the brake
pads for wear.
To know how often the brake fluid should be
replaced, refer to the manufacturer's servicing
schedule.
Clean the cap before removing it to refill.
Use only DOT4 brake fluid from a sealed
container.
Engine coolant
It is normal to top up this fluid between
two services.
The check and top-up must only be done with
the engine cold.
A level of coolant that is too low risks causing
major damage to the engine; the coolant level must be close to the "MAX" mark without ever
going above it.
If the level is close to or below the "
MIN" mark, it
is essential to top it up.
When the engine is hot, the temperature of the
coolant is regulated by the fan.
As the cooling system is pressurised, wait at
least one hour after switching off the engine
before carrying out any work.
In order to avoid the risk of scalding if you need
to top up in an emergency, wrap a cloth around
the cap and unscrew the cap by two turns to
allow the pressure to drop.
Once the pressure has dropped, remove the cap
and top up to the required level.
Screenwash fluid
Top up to the required level when necessary.
Capacity of the tank:
–
5.3 litres for "very cold climate" versions.
–
2.2 litres for other versions.
Fluid specification
The fluid must be topped up with a pre-mixed
product.
In winter (temperatures below zero), a fluid
containing an anti-freeze agent which is
appropriate for the temperature conditions
must be used in order to protect the system's
components (pump, tank, ducts, jets).
Filling with pure water is prohibited in all
circumstances (risk of freezing,
limescale, etc.).
Diesel fuel additive (Diesel
with particle filter)
On reaching the minimum level in the
particle filter additive tank, this warning
lamp comes on fixed, accompanied by an
audible signal and a warning message.
Topping up
The topping up of this additive must be carried
out quickly.
Go to a PEUGEOT dealer or a qualified
workshop.
AdBlue® (BlueHDi)
An alert is triggered when the reserve level is
reached.
For more information on the Indicators and in
particular the AdBlue range indicators, refer to
the corresponding section.
To avoid the vehicle being immobilised in
accordance with regulations, you must top up the
AdBlue tank.
For more information on AdBlue
® (BlueHDi),
and in particular the supply of AdBlue, refer to
the corresponding section.
Checks
Unless otherwise indicated, check these
components in accordance with the
manufacturer's service schedule and according
to your engine.
Otherwise, have them checked by a PEUGEOT
dealer or a qualified workshop.
Only use products recommended by
PEUGEOT or products of equivalent
quality and specification.
In order to optimise the operation of
components as important as those in the
braking system, PEUGEOT selects and offers
very specific products.
12 V battery
The battery does not require any maintenance.
Check regularly that the terminals are correctly
tightened (versions without quick-release
terminals) and that the connections are clean.
For more information on the precautions
to take before any work on the 12 V
battery, refer to the corresponding section.
Versions equipped with Stop & Start are
fitted with a 12 V lead-acid battery of
specific technology and specification.
Its replacement should be carried out only by
a PEUGEOT dealer or a qualified workshop.