2021 PEUGEOT 3008 window
[x] Cancel search: windowPage 62 of 292
60
Ease of use and comfort
The function is available on the secondary
page, which can be accessed by pressing the
“OPTIONS” button.
►
Press button
14 to activate the "REAR"
function; its status is displayed as " ON".
►
Press the “
large fan” or “small fan” button to
increase or decrease the air flow.
The corresponding indicator lamps come on.
If all of the indicator lamps are off, a slight air
flow can still be felt as a result of the vehicle's
movement.
Ventilation with the ignition
on
When the ignition is switched on, the ventilation
system and the air flow 2 and air distribution
3 settings in the passenger compartment are
activated, for a period which depends on the
battery charge.
This function does not include the air
conditioning system.
Switching the system off
► Press button 7; all the indicator lamps of the
system go out.
This action deactivates all of the functions of the
air conditioning system.
The temperature is no longer regulated. A slight
flow of air can still be felt, due to the forward
movement of the vehicle.
Interior air recirculation
The intake of exterior air prevents the formation
of mist on the windscreen and side windows.
Recirculating the interior air isolates the
passenger compartment from outside odours
and fumes and allows the desired passenger
compartment temperature to be achieved more
rapidly.
► Press this button to activate/deactivate
the function (confirmed by the
illumination/extinction of the indicator lamp).
This function is activated automatically when reverse gear is engaged.
Front demisting
- defrosting
Automatic Visibility programme
This mode allows the windscreen and side
windows to be demisted or defrosted as quickly
as possible.
► Press this button to activate/deactivate
the mode (confirmed by the illumination/
extinction of the
indicator lamp).
The programme automatically manages the air
conditioning (depending on version), air flow
and air intake, and provides optimum distribution
towards the windscreen and side windows.
It is possible to manually change the air flow
without deactivating the automatic Visibility
programme.
With Stop & Start, when demisting has
been activated, STOP mode is not
available.
In wintry conditions, before moving off,
remove all snow or ice on the windscreen
near the camera.
Otherwise, the operation of the equipment
using the camera may be affected.
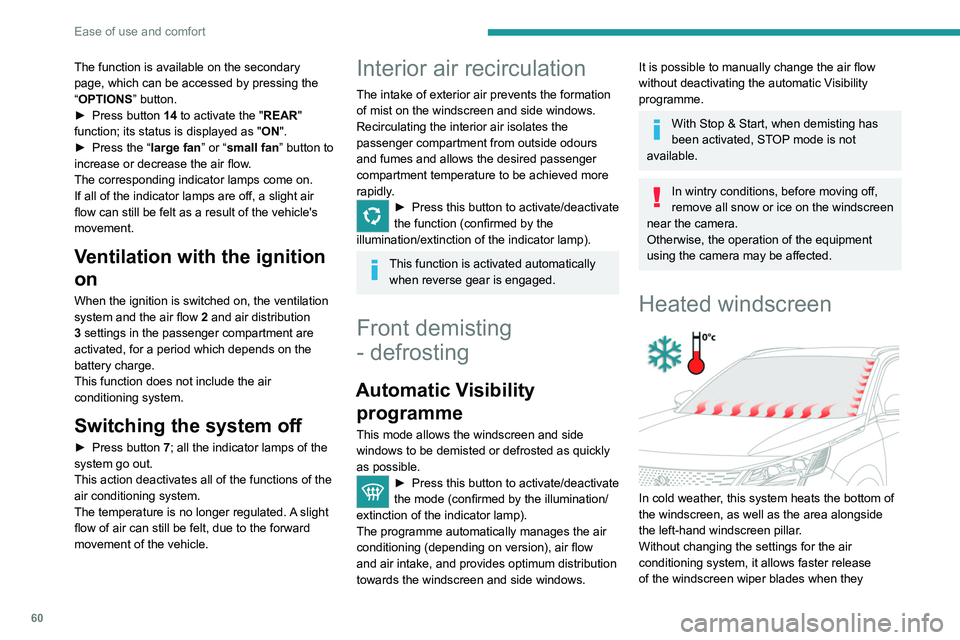
Heated windscreen
In cold weather, this system heats the bottom of
the windscreen, as well as the area alongside
the left-hand windscreen pillar.
Without changing the settings for the air
conditioning system, it allows faster release
of the windscreen wiper blades when they
are frozen to the windscreen and helps avoid
the accumulation of snow resulting from the
operation of the windscreen wipers.
Switching on/off
► With the engine running, press this button to
activate/deactivate the function (confirmed by an
indicator lamp).
The function is activated when the outside
temperature drops below 0°C. It is deactivated
automatically when the engine is switched off.
Rear screen
demisting/defrosting
This demisting/defrosting only works with the engine running.
Depending on version, it also demists/defrosts
the doors mirrors.
► Press this button to activate/deactivate
the function (confirmed by the
illumination/extinction of the indicator lamp).
Page 70 of 292
68
Ease of use and comfort
Side blinds
Fitted to the second row windows, they protect
the passenger compartment from the sun's rays.
►
Pull the central tab to unroll the blind.
►
Position the blind's clip on the hook.
Always guide the blind slowly, using the tab, while raising or lowering it.
Storage boxes
Depending on version, the storage boxes are
fitted in the floor, at the foot of the side seats on
the second row.
On the left-hand side, it may also contain the
temporary puncture repair kit.
►
T
o open them, lift the cover by the notch.
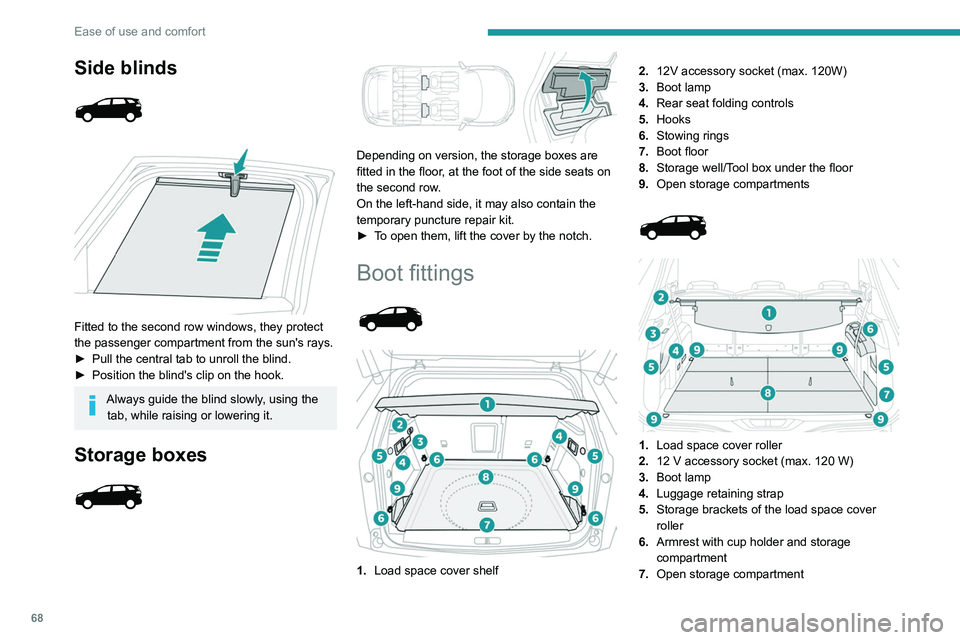
Boot fittings
1. Load space cover shelf 2.
12V accessory socket (max. 120W)
3. Boot lamp
4. Rear seat folding controls
5. Hooks
6. Stowing rings
7. Boot floor
8. Storage well/Tool box under the floor
9. Open storage compartments
1. Load space cover roller
2. 12 V accessory socket (max. 120 W)
3. Boot lamp
4. Luggage retaining strap
5. Storage brackets of the load space cover
roller
6. Armrest with cup holder and storage
compartment
7. Open storage compartment
8.Concertina panels
9. Stowing rings
The stowing rings are designed to secure
luggage using different types of retaining
nets.
These retaining nets are available as an
option or as an accessory.
For more information, contact a PEUGEOT
dealer or a qualified workshop.
For information on installing the High load
retaining net , refer to the corresponding
section.
Load space cover shelf
It consists of two sections:
– a fixed section with an open storage space.
Page 82 of 292
80
Lighting and visibility
The camera detection range is between 15 m
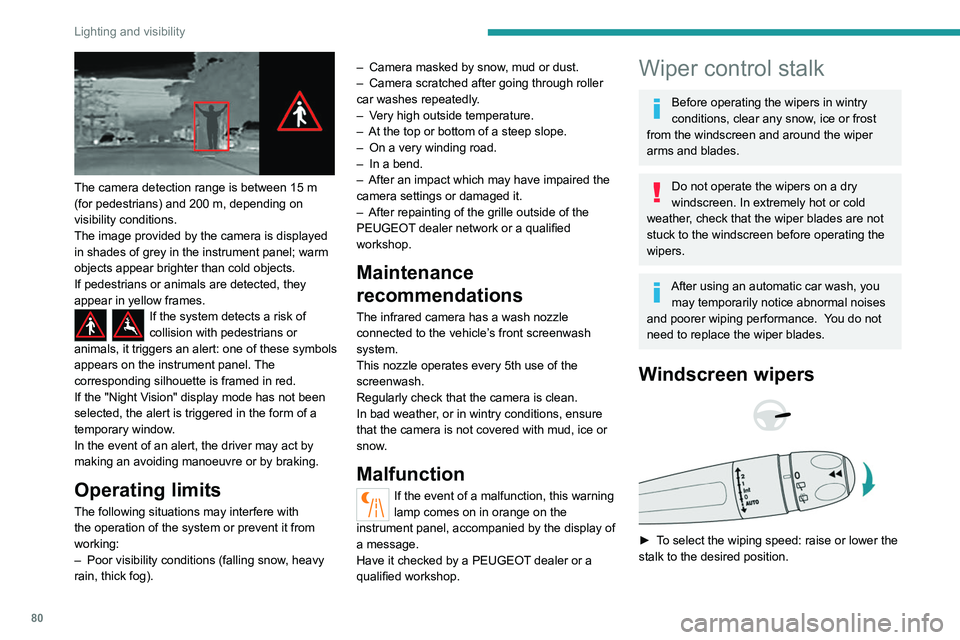
(for pedestrians) and 200 m, depending on
visibility conditions.
The image provided by the camera is displayed
in shades of grey in the instrument panel; warm
objects appear brighter than cold objects.
If pedestrians or animals are detected, they
appear in yellow frames.
If the system detects a risk of
collision with pedestrians or
animals, it triggers an alert: one of these symbols
appears on the instrument panel. The
corresponding silhouette is framed in red.
If the "Night Vision" display mode has not been
selected, the alert is triggered in the form of a
temporary window.
In the event of an alert, the driver may act by
making an avoiding manoeuvre or by braking.
Operating limits
The following situations may interfere with
the operation of the system or prevent it from
working:
–
Poor visibility conditions (falling snow
, heavy
rain, thick fog). –
Camera masked by snow
, mud or dust.
–
Camera scratched after going through roller
car washes repeatedly
.
–
V
ery high outside temperature.
–
At the top or bottom of a steep slope.
–
On a very winding road.
–
In a bend.
–
After an impact which may have impaired the
camera settings or damaged it.
–
After repainting of the grille outside of the
PEUGEOT
dealer network or a qualified
workshop.
Maintenance
recommendations
The infrared camera has a wash nozzle
connected to the vehicle’s front screenwash
system.
This nozzle operates every 5th use of the
screenwash.
Regularly check that the camera is clean.
In bad weather, or in wintry conditions, ensure
that the camera is not covered with mud, ice or
snow.
Malfunction
If the event of a malfunction, this warning
lamp comes on in orange on the
instrument panel, accompanied by the display of
a message.
Have it checked by a PEUGEOT dealer or a
qualified workshop.
Wiper control stalk
Before operating the wipers in wintry
conditions, clear any snow, ice or frost
from the windscreen and around the wiper
arms and blades.
Do not operate the wipers on a dry
windscreen. In extremely hot or cold
weather, check that the wiper blades are not
stuck to the windscreen before operating the
wipers.
After using an automatic car wash, you may temporarily notice abnormal noises
and poorer wiping performance.
You do not
need to replace the wiper blades.
Windscreen wipers
► To select the wiping speed: raise or lower the
stalk to the desired position.
Fast wiping (heavy rain)
Normal wiping (moderate rain)
Intermittent wiping (proportional to the
vehicle’s speed)
Switching off
Automatic wiping
Refer to the corresponding section.
Single wipe
► Pull the stalk briefly towards you.
In position 1 or 2, the wiping frequency is
automatically reduced when the speed of
the vehicle drops below 3 mph (5 km/h).
When the speed is above 6 mph (10 km/h)
again, the wiping frequency returns to the
original frequency (fast or normal).
Ha a gyújtást úgy vették le, hogy az
ablaktörlők jártak, működtesse újra a kart
a törlés ismételt bekapcsolásához, amint
visszakapcsolta a gyújtást (kivéve, ha a
gyújtás levétele egy percen belül történt).
After switching off the ignition, a slight movement of the windscreen wipers to
store them under the bonnet may occur.
Page 98 of 292

96
Safety
presence of a smaller occupant, with the seat
set in a forward longitudinal position.
Deployment
They deploy, except the front passenger airbag
if it is deactivated*, in the event of a serious front
impact to all or part of the front impact zone A.
The front airbag inflates between the thorax and
head of the front occupant of the vehicle and the
steering wheel, driver's side, and the dashboard,
passenger's side, to cushion their forward
movement.
Lateral airbags
In the event of a serious side impact, this system
protects the driver and front passenger to
mitigate the risk of injury to the chest, between
the hip and the shoulder.
* For more information on Deactivating the front passenger airbag, refer t\
o the corresponding section.Each lateral airbag is fitted in the seat backrest
frame, on the door side.
Deployment
The lateral airbags are deployed on one side in
the event of a serious side impact applied to all
or part of the side impact zone B.
The lateral airbag inflates between the chest of
the vehicle's occupant and the corresponding
door panel.
Curtain airbags
System contributing towards greater protection
for the driver and passengers (with the exception
of the rear centre passenger) in the event of a
serious side impact in order to limit the risk of
injury to the side of the head.
Each curtain airbag is built into the pillars and
the upper passenger compartment area.
Deployment
It deploys simultaneously with the corresponding
lateral airbag in the event of a serious side
impact applied to all or part of the side impact
zone B.
The curtain airbag inflates between the front
and rear occupants of the vehicle and the
corresponding windows.
Malfunction
In the event of a malfunction, this warning
lamp lights up on the instrument panel.
Contact a PEUGEOT dealer or a qualified
workshop to have the system checked.
The airbags may not be deployed in the event of
a serious impact.
In the event of a minor impact or bump at
the side of the vehicle or if the vehicle
rolls over, the airbags may not be deployed.
In the event of a rear or front collision, none of
the lateral airbags are deployed.
Advice
For the airbags to be fully effective,
observe the safety recommendations
below.
Adopt a normal and upright sitting position.
Fasten your seat belt and position it correctly.
Do not place anything between the occupants
and the airbags (e.g.
child, animal, object), do
not fix or attach anything near or in the path of
the airbags, as this could cause injuries when
they are deployed.
Never modify the original definition of the
vehicle, particularly in the area directly around
the airbags.
Even if all of the precautions mentioned are
observed, a risk of injury or of minor burns to
the head, chest or arms cannot be ruled out
when an airbag is deployed. The bag inflates
almost instantly (within a few milliseconds)
then deflates within the same time,
discharging the hot gas via openings provided
for this purpose.
After an accident or if the vehicle has been
stolen, have the airbag systems checked.
All work must be carried out only by a
PEUGEOT dealer or a qualified workshop.
Front airbags
Do not drive holding the steering wheel
by its spokes or resting your hands on the
centre part of the wheel.
Passengers must not place their feet on the
dashboard.
Do not smoke as deployment of the airbags
can cause burns or the risk of injury from a
cigarette or pipe.
Never remove or pierce the steering wheel or
hit it violently.
Do not fix or attach anything to the steering
wheel or dashboard, as this could cause
injuries when the airbags are deployed.
Lateral airbags
Use only approved seat covers
compatible with the deployment of these
airbags. For information on the range of seat
covers suitable for your vehicle, contact a
PEUGEOT dealer.
Page 100 of 292
98
Safety
Remember to fasten the seat belts or the
harness of child seats, keeping the slack
relative to the child's body to a minimum,
even for short journeys.
When installing a child seat using the seat
belt, ensure that the seat belt is tightened
correctly on the child seat and that it secures
the child seat firmly on the seat of the vehicle.
If the passenger seat is adjustable, move it
forwards if necessary.
Remove the head restraint before
installing a child seat with a backrest on a
passenger seat.
Ensure that the head restraint is stored or
attached securely to prevent it from being
thrown around the vehicle in the event of
sharp braking. Refit the head restraint once
the child seat has been removed.
Installing a booster seat
The chest part of the seat belt must be
positioned on the child's shoulder without
touching the neck.
Ensure that the lap part of the seat belt
passes correctly over the child's thighs.
Use a booster seat with backrest, equipped
with a belt guide at shoulder level.
Additional protections
To prevent accidental opening of the
doors and rear windows, use the "Child lock".
Take care not to open the rear windows by
more than one third.
To protect young children from the rays of the
sun, fit side blinds on the rear windows.
As a safety precaution, do not leave:
–
a child alone and unattended in a vehicle,
–
a child or an animal in a vehicle which is
exposed to the sun, with the windows closed,
–
the keys within reach of children inside the
vehicle.
Child seat at the rear
Forward-facing or rearward-facing
► Move the vehicle's front seat forward and
straighten the backrest so that the legs of the
child in the forward-facing or rearward-facing
child seat itself do not touch the vehicle's front
seat.
►
Check that the backrest of the forward-facing
child seat is as close as possible to the backrest
of the vehicle's rear seat, and ideally in contact
with it.
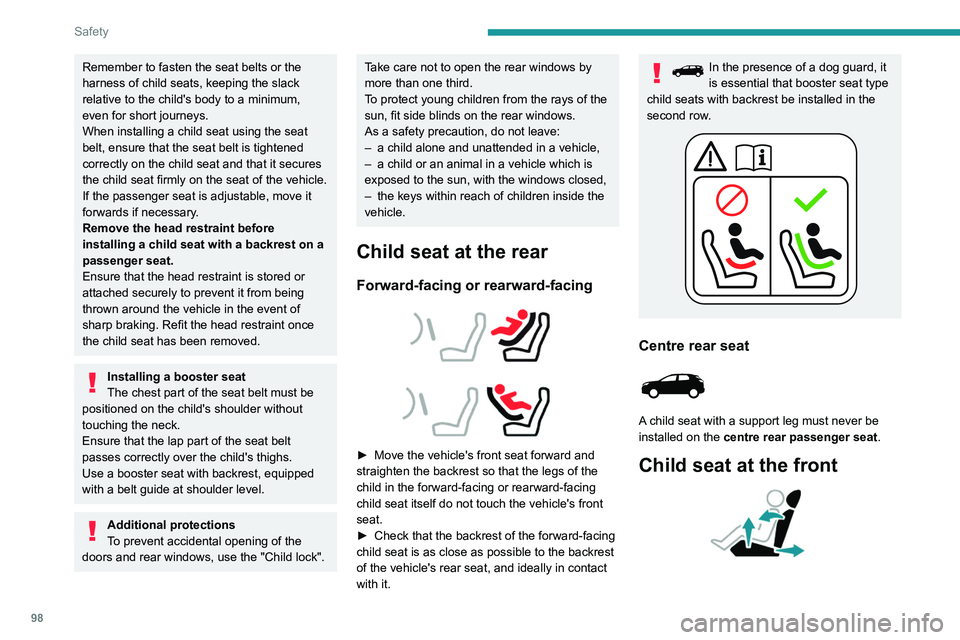
In the presence of a dog guard, it
is essential that booster seat type
child seats with backrest be installed in the
second row.
Centre rear seat
A child seat with a support leg must never be
installed on the centre rear passenger seat .
Child seat at the front
► Adjust the front passenger seat to the
highest and fully back longitudinal position ,
with the backrest straightened.
"Forward facing"
You must leave the front passenger airbag active.
"Rearward facing"
The front passenger airbag must be deactivated before installing a rearward
facing child seat. Otherwise, the child risks
being seriously injured or killed if the
airbag is deployed .
Page 110 of 292
108
Safety
Seat
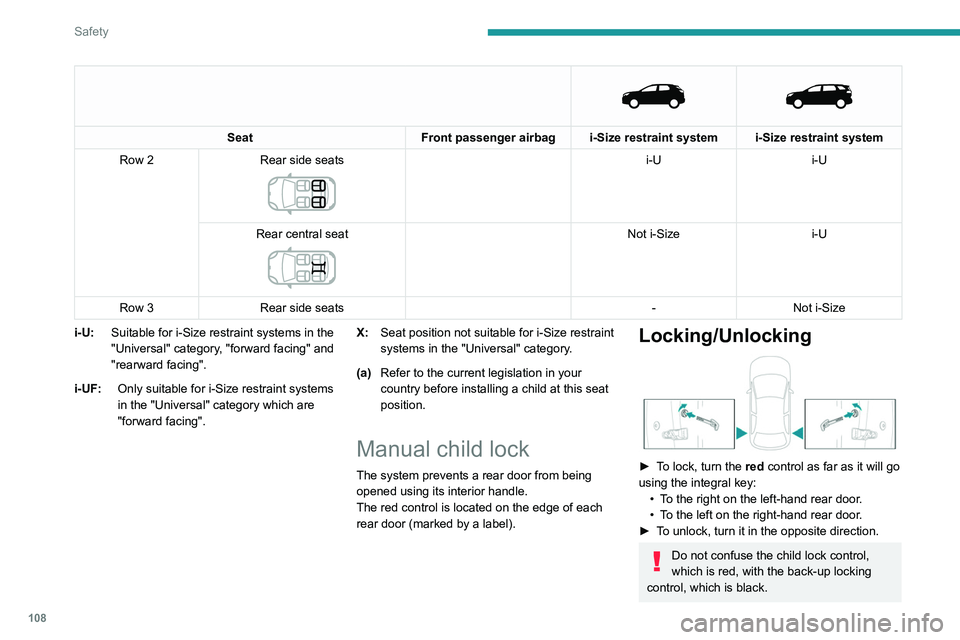
Front passenger airbag i-Size restraint system i-Size restraint system
Row 2 Rear side seats
i-U i-U
Rear central seat
Not i-Size i-U
Row 3 Rear side seats -Not i-Size
i-U: Suitable for i-Size restraint systems in the
"Universal" category, "forward facing" and
"rearward facing".
i-UF: Only suitable for i-Size restraint systems
in the "Universal" category which are
"forward facing". X:
Seat position not suitable for i-Size restraint
systems in the "Universal" category.
(a) Refer to the current legislation in your
country before installing a child at this seat
position.
Manual child lock
The system prevents a rear door from being
opened using its interior handle.
The red control is located on the edge of each
rear door (marked by a label).
Locking/Unlocking
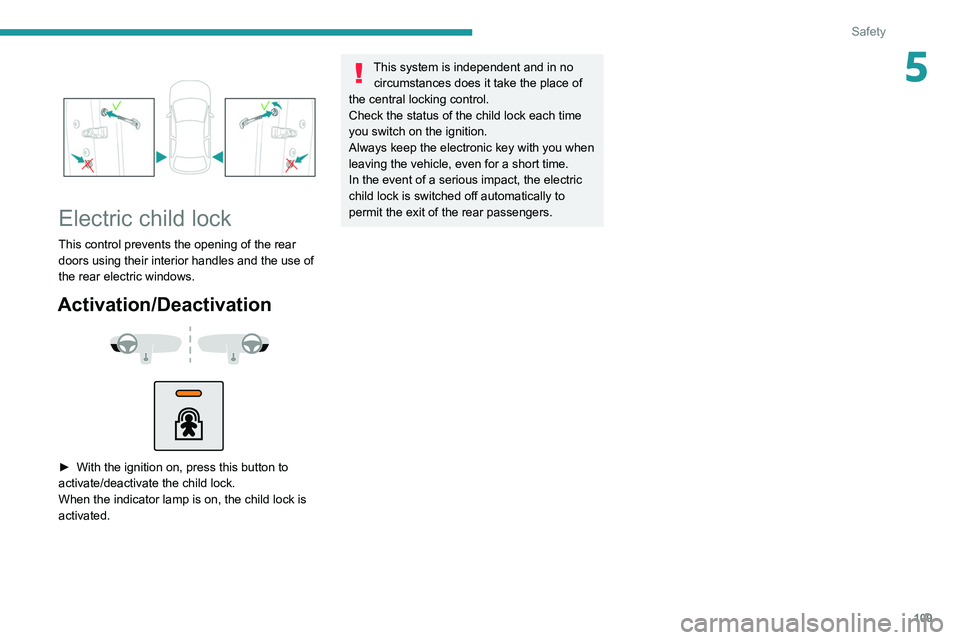
► To lock, turn the red control as far as it will go
using the integral key:
•
T
o the right on the left-hand rear door.
•
T
o the left on the right-hand rear door.
►
T
o unlock, turn it in the opposite direction.
Do not confuse the child lock control,
which is red, with the back-up locking
control, which is black.
Electric child lock
This control prevents the opening of the rear
doors using their interior handles and the use of
the rear electric windows.
Activation/Deactivation
► With the ignition on, press this button to
activate/deactivate the child lock.
When the indicator lamp is on, the child lock is
activated.
Page 111 of 292
109
Safety
5
Electric child lock
This control prevents the opening of the rear
doors using their interior handles and the use of
the rear electric windows.
Activation/Deactivation
► With the ignition on, press this button to
activate/deactivate the child lock.
When the indicator lamp is on, the child lock is
activated.
This system is independent and in no circumstances does it take the place of
the central locking control.
Check the status of the child lock each time
you switch on the ignition.
Always keep the electronic key with you when
leaving the vehicle, even for a short time.
In the event of a serious impact, the electric
child lock is switched off automatically to
permit the exit of the rear passengers.
Page 155 of 292

153
Driving
6Parking sensors
For more information, refer to the
General recommendations on the use
of driving and manoeuvring aids .
This system detects and signals the proximity of
obstacles (e.g.
pedestrian, vehicle, tree, barrier)
using sensors located in the bumper.
Rear parking sensors
► Engage reverse gear to start the system
(confirmed by an audible signal).
The system is switched off when reverse gear is
disengaged.
Audible assistance
The system signals the presence of obstacles
within the sensors’ detection zone.
The proximity information is given by an
intermittent audible signal, the frequency of
which increases as the vehicle approaches the
obstacle.
When the distance between the vehicle and
the obstacle becomes less than about thirty
centimetres, the audible signal becomes
continuous.
The sound emitted by the speaker (right or
left) indicates the side on which the obstacle is
located.
Adjusting the audible signalDepending on version, with
PEUGEOT Connect Radio or
PEUGEOT Connect Nav, pressing this button
opens the window for adjusting the volume of
the audible signal.
Visual assistance
This supplements the audible signal by
displaying bars on the screen that represent the
distance between the obstacle and the vehicle
(white: more distant, orange: close, red: very
close).
When the obstacle is very close, the "Danger"
symbol is displayed on the screen.
Front parking sensors
Supplementing the rear parking sensors, the
front parking sensors are triggered when an
obstacle is detected in front and the speed of the
vehicle is below 6 mph (10
km/h).
Front parking sensor operation is suspended if
the vehicle stops for more than three seconds in
forward gear, if an obstacle is no longer detected
or the vehicle speed exceeds 6
mph (10 km/h).
The sound emitted by the speaker (front or rear) locates the obstacle relative to
the vehicle, whether in front of or behind it on
its path.
Deactivation/Activation
The settings are changed via the Driving/Vehicle touch screen menu.
The system status is memorised when the
ignition is switched off.
The rear parking sensors system will be deactivated automatically if a trailer or
bicycle carrier is connected to a towing device
installed in accordance with the
manufacturer's recommendations.