2021 PEUGEOT 3008 park assist
[x] Cancel search: park assistPage 161 of 292
159
Driving
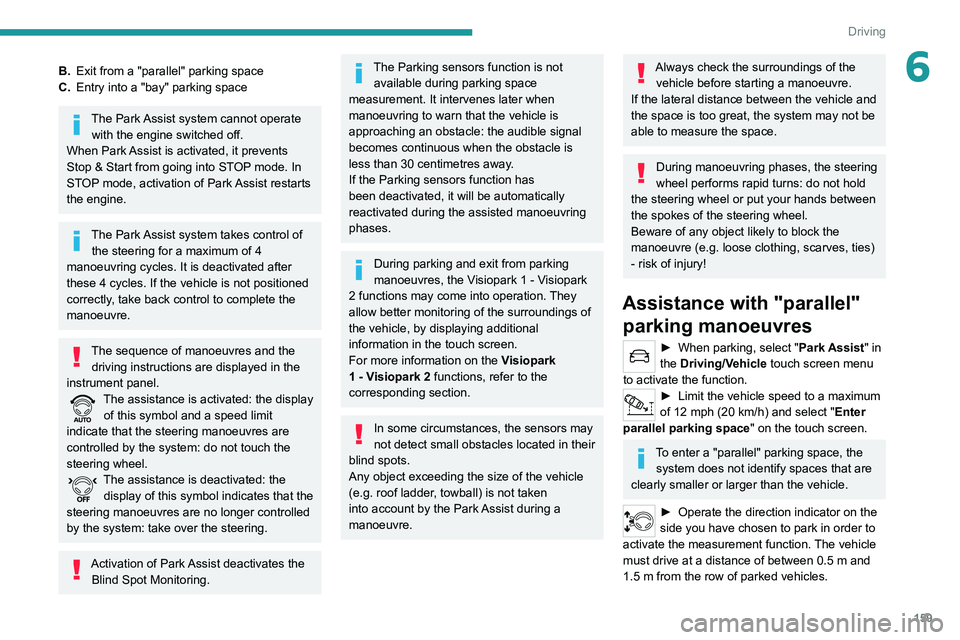
6B.Exit from a "parallel" parking space
C. Entry into a "bay" parking space
The Park Assist system cannot operate
with the engine switched off.
When Park Assist is activated, it prevents
Stop & Start from going into STOP mode. In
STOP mode, activation of Park Assist restarts
the engine.
The Park Assist system takes control of the steering for a maximum of 4
manoeuvring cycles. It is deactivated after
these 4 cycles. If the vehicle is not positioned
correctly, take back control to complete the
manoeuvre.
The sequence of manoeuvres and the driving instructions are displayed in the
instrument panel.
The assistance is activated: the display of this symbol and a speed limit
indicate that the steering manoeuvres are
controlled by the system: do not touch the
steering wheel.
The assistance is deactivated: the display of this symbol indicates that the
steering manoeuvres are no longer controlled
by the system: take over the steering.
Activation of Park Assist deactivates the Blind Spot Monitoring.
The Parking sensors function is not available during parking space
measurement. It intervenes later when
manoeuvring to warn that the vehicle is
approaching an obstacle: the audible signal
becomes continuous when the obstacle is
less than 30 centimetres away.
If the Parking sensors function has
been deactivated, it will be automatically
reactivated during the assisted manoeuvring
phases.
During parking and exit from parking
manoeuvres, the Visiopark 1 - Visiopark
2 functions may come into operation. They
allow better monitoring of the surroundings of
the vehicle, by displaying additional
information in the touch screen.
For more information on the Visiopark
1 - Visiopark 2
functions, refer to the
corresponding section.
In some circumstances, the sensors may
not detect small obstacles located in their
blind spots.
Any object exceeding the size of the vehicle
(e.g.
roof ladder, towball) is not taken
into account by the Park Assist during a
manoeuvre.
Always check the surroundings of the vehicle before starting a manoeuvre.
If the lateral distance between the vehicle and
the space is too great, the system may not be
able to measure the space.
During manoeuvring phases, the steering
wheel performs rapid turns: do not hold
the steering wheel or put your hands between
the spokes of the steering wheel.
Beware of any object likely to block the
manoeuvre (e.g.
loose clothing, scarves, ties)
- risk of injury!
Assistance with "parallel" parking manoeuvres
► When parking, select " Park Assist " in
the Driving/Vehicle touch screen menu
to activate the function.
► Limit the vehicle speed to a maximum
of 12 mph (20 km/h) and select " Enter
parallel parking space" on the touch screen.
To enter a "parallel" parking space, the system does not identify spaces that are
clearly smaller or larger than the vehicle.
► Operate the direction indicator on the
side you have chosen to park in order to
activate the measurement function.
The vehicle
must drive at a distance of between 0.5
m and
1.5
m from the row of parked vehicles.
Page 162 of 292
160
Driving
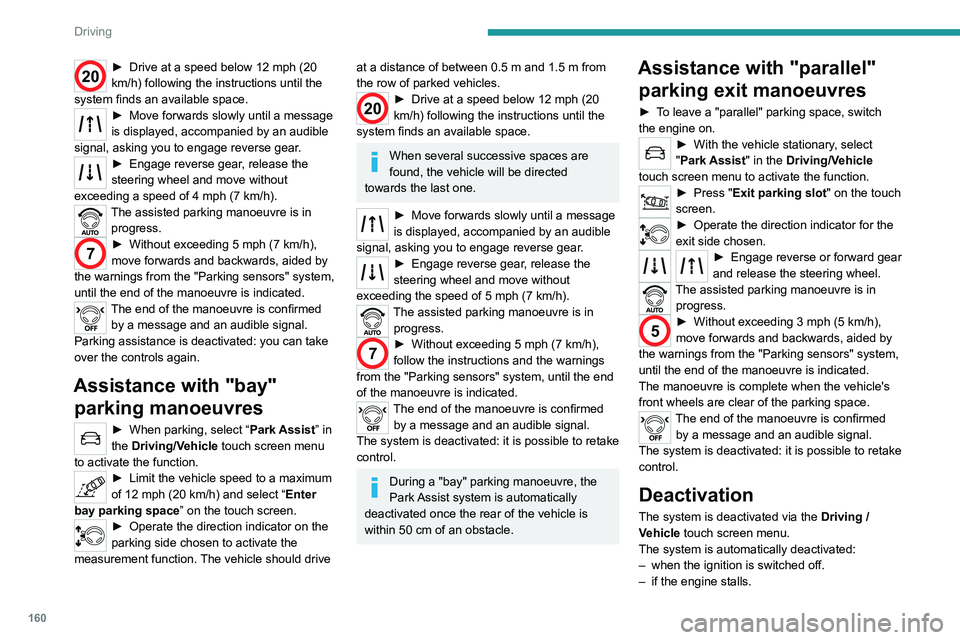
20► Drive at a speed below 12 mph (20
km/h) following the instructions until the
system finds an available space.
► Move forwards slowly until a message
is displayed, accompanied by an audible
signal, asking you to engage reverse gear
.
► Engage reverse gear, release the
steering wheel and move without
exceeding a speed of 4 mph (7 km/h).
The assisted parking manoeuvre is in progress.
7► Without exceeding 5 mph (7 km/h),
move forwards and backwards, aided by
the warnings from the "Parking sensors" system,
until the end of the manoeuvre is indicated.
The end of the manoeuvre is confirmed by a message and an audible signal.
Parking assistance is deactivated: you can take
over the controls again.
Assistance with "bay" parking manoeuvres
► When parking, select “ Park Assist ” in
the Driving/Vehicle touch screen menu
to activate the function.
► Limit the vehicle speed to a maximum
of 12 mph (20 km/h) and select “ Enter
bay parking space” on the touch screen.
► Operate the direction indicator on the
parking side chosen to activate the
measurement function.
The vehicle should drive
at a distance of between 0.5 m and 1.5 m from
the row of parked vehicles.
20► Drive at a speed below 12 mph (20
km/h) following the instructions until the
system finds an available space.
When several successive spaces are
found, the vehicle will be directed
towards the last one.
► Move forwards slowly until a message
is displayed, accompanied by an audible
signal, asking you to engage reverse gear
.
► Engage reverse gear, release the
steering wheel and move without
exceeding the speed of 5 mph (7 km/h).
The assisted parking manoeuvre is in progress.
7► Without exceeding 5 mph (7 km/h),
follow the instructions and the warnings
from the "Parking sensors" system, until the end
of the manoeuvre is indicated.
The end of the manoeuvre is confirmed by a message and an audible signal.
The system is deactivated: it is possible to retake
control.
During a "bay" parking manoeuvre, the
Park Assist system is automatically
deactivated once the rear of the vehicle is
within 50
cm of an obstacle.
Assistance with "parallel" parking exit manoeuvres
► To leave a "parallel" parking space, switch
the engine on.
► With the vehicle stationary , select
"Park Assist" in the Driving/Vehicle
touch screen menu to activate the function.
► Press " Exit parking slot " on the touch
screen.
► Operate the direction indicator for the
exit side chosen.
► Engage reverse or forward gear
and release the steering wheel.
The assisted parking manoeuvre is in progress.
5► Without exceeding 3 mph (5 km/h),
move forwards and backwards, aided by
the warnings from the "Parking sensors" system,
until the end of the manoeuvre is indicated.
The manoeuvre is complete when the vehicle's
front wheels are clear of the parking space.
The end of the manoeuvre is confirmed by a message and an audible signal.
The system is deactivated: it is possible to retake
control.
Deactivation
The system is deactivated via the Driving /
V ehicle touch screen menu.
The system is automatically deactivated:
–
when the ignition is switched off.
–
if the engine stalls.
– if the driver's seat belt is not fastened.
– on opening the driver's door.
– if no manoeuvre is performed within 5 minutes
of selecting the type of manoeuvre.
– after a prolonged stop of the vehicle during a
manoeuvre.
– if the wheel anti-slip regulation (ASR) is
triggered.
– if the speed of the vehicle exceeds the
authorised limit.
– when the driver interrupts the rotation of the
steering wheel.
– after 4 manoeuvring cycles.
– if one of the front wheels encounters an
obstacle.
Deactivation is confirmed by a message and an
audible signal.
The driver should then take back control of the
vehicle's steering.
If the system is deactivated during a
manoeuvre, the driver should reactivate
it to repeat the measurement.
Deactivation
The system is automatically deactivated:
– when towing a trailer, connected electrically;
– if the driver's door is opened;
– if the speed of the vehicle is above 43 mph
(70 km/h).
To switch the system off for a prolonged period,
contact a PEUGEOT dealer or a qualified
workshop.
Page 205 of 292
203
In the event of a breakdown
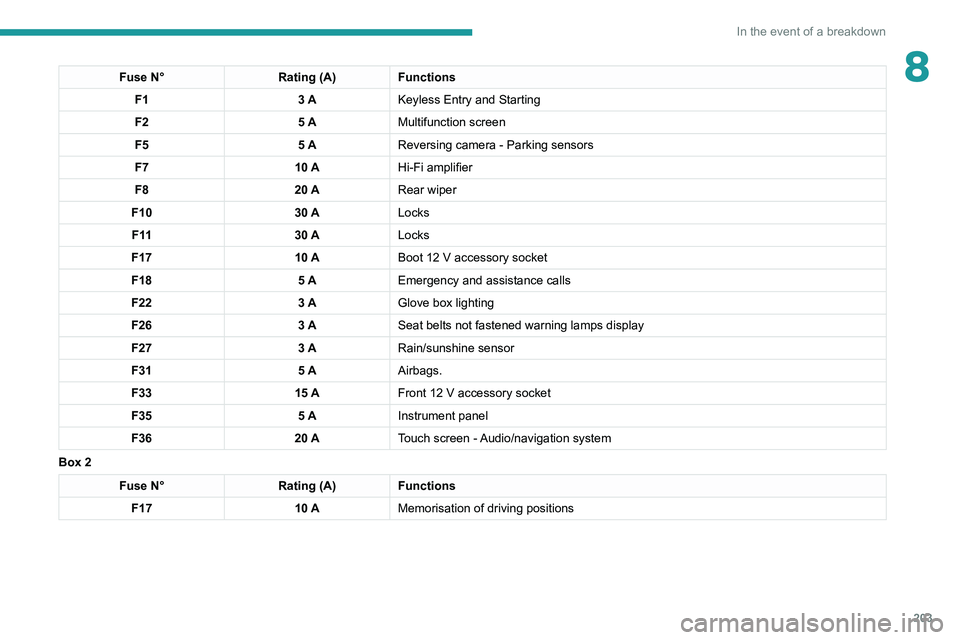
8Fuse N°Rating (A)Functions
F1 3 AKeyless Entry and Starting
F2 5 AMultifunction screen
F5 5 AReversing camera - Parking sensors
F7 10 AHi-Fi amplifier
F8 20 ARear wiper
F10 30 ALocks
F 11 30 ALocks
F17 10 ABoot 12
V accessory socket
F18 5 AEmergency and assistance calls
F22 3 AGlove box lighting
F26 3 ASeat belts not fastened warning lamps display
F27 3 ARain/sunshine sensor
F31 5 AAirbags.
F33 15 AFront 12
V accessory socket
F35 5 AInstrument panel
F36 20 ATouch screen - Audio/navigation system
Box 2
Fuse N° Rating (A)Functions
F17 10 AMemorisation of driving positions
Page 206 of 292
204
In the event of a breakdown
Accessing the fuses
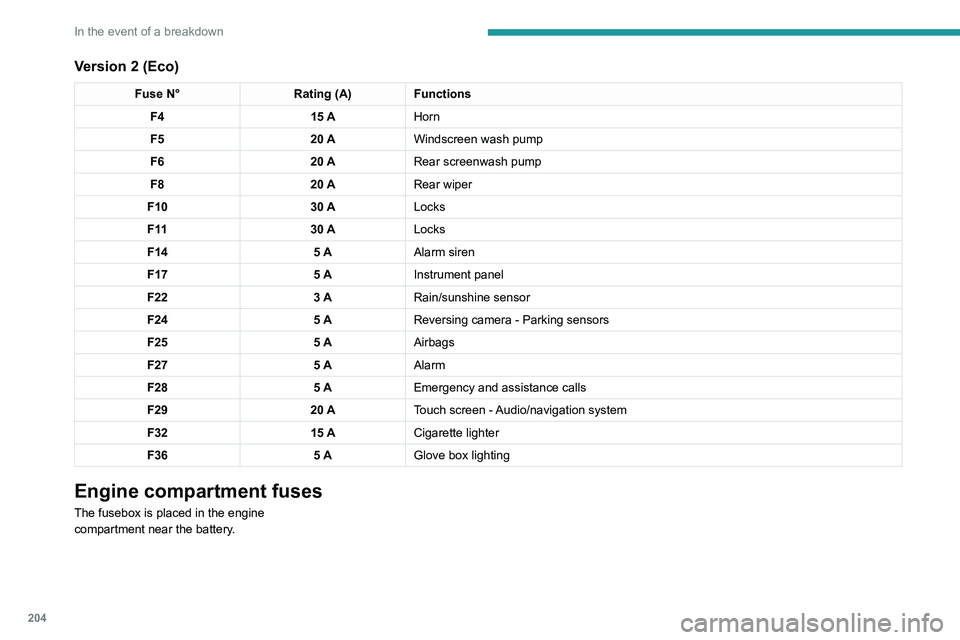
Version 1 (Full)
Box 1Fuse N° Rating (A)Functions
F14 15 AScreenwash pump.
F15 5 APower steering.
F20 25 AScreenwash pump.
F22 15 AHorn.
F23 15 ARight-hand main beam headlamp.
F24 15 ALeft-hand main beam headlamp.
Box 2 Fuse N° Rating (A)Functions
F8 30 ADiesel emissions control system (AdBlue)
F12 15 AAutomatic gearbox.
F14 5 AAutomatic gearbox.
Version 2 (Eco)
Fuse N° Rating (A)Functions
F4 15 AHorn
F5 20 AWindscreen wash pump
F6 20 ARear screenwash pump
F8 20 ARear wiper
F10 30 ALocks
F 11 30 ALocks
F14 5 AAlarm siren
F17 5 AInstrument panel
F22 3 ARain/sunshine sensor
F24 5 AReversing camera - Parking sensors
F25 5 AAirbags
F27 5 AAlarm
F28 5 AEmergency and assistance calls
F29 20 ATouch screen - Audio/navigation system
F32 15 ACigarette lighter
F36 5 AGlove box lighting
Engine compartment fuses
The fusebox is placed in the engine
compartment near the battery.
Page 209 of 292
207
In the event of a breakdown
8
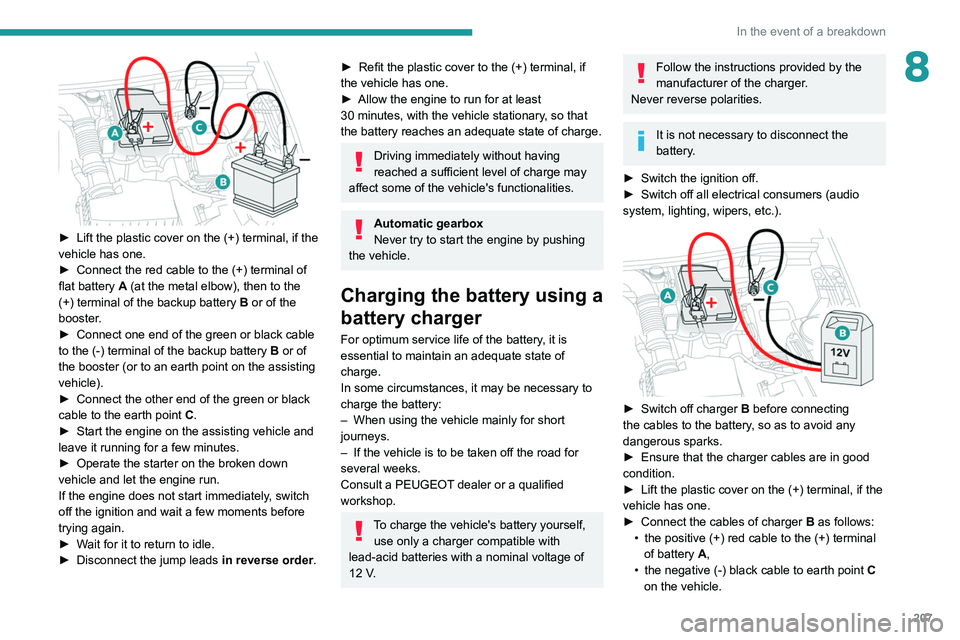
► Lift the plastic cover on the (+) terminal, if the
vehicle has one.
►
Connect the red cable to the (+) terminal of
flat battery
A (at the metal elbow), then to the
(+) terminal of the backup battery
B or of the
booster.
►
Connect one end of the green or black cable
to the (-) terminal of the backup battery
B or of
the booster (or to an earth point on the assisting
vehicle).
►
Connect the other end of the green or black
cable to the earth point
C
.
►
Start the engine on the assisting vehicle and
leave it running for a few minutes.
►
Operate the starter on the broken down
vehicle and let the engine run.
If the engine does not start immediately
, switch
off the ignition and wait a few moments before
trying again.
►
W
ait for it to return to idle.
►
Disconnect the jump leads in reverse order.
► Refit the plastic cover to the (+) terminal, if
the vehicle has one.
►
Allow the engine to run for at least
30
minutes, with the vehicle stationary, so that
the battery reaches an adequate state of charge.
Driving immediately without having
reached a sufficient level of charge may
affect some of the vehicle's functionalities.
Automatic gearbox
Never try to start the engine by pushing
the vehicle.
Charging the battery using a
battery charger
For optimum service life of the battery, it is
essential to maintain an adequate state of
charge.
In some circumstances, it may be necessary to
charge the battery:
–
When using the vehicle mainly for short
journeys.
–
If the vehicle is to be taken off the road for
several weeks.
Consult a PEUGEOT
dealer or a qualified
workshop.
To charge the vehicle's battery yourself, use only a charger compatible with
lead-acid batteries with a nominal voltage of
12
V.
Follow the instructions provided by the
manufacturer of the charger.
Never reverse polarities.
It is not necessary to disconnect the
battery.
►
Switch the ignition off.
►
Switch off all electrical consumers (audio
system, lighting, wipers, etc.).
► Switch off charger B before connecting
the cables to the battery, so as to avoid any
dangerous sparks.
►
Ensure that the charger cables are in good
condition.
►
Lift the plastic cover on the (+) terminal, if the
vehicle has one.
►
Connect the cables of charger B
as follows:
•
the positive (+) red cable to the (+) terminal
of battery
A,
•
the negative (-) black cable to earth point C
on the vehicle.
Page 214 of 292
212
In the event of a breakdown
Accessing the tools
General recommendations
Observe the legislation in force in the country where you are driving.
Check that the towing vehicle is heavier than the towed vehicle.
The driver must remain at the wheel of the towed vehicle and must have a\
valid driving licence.
When towing a vehicle with all four wheels on the ground, always use an \
approved towbar; ropes and straps are prohibited.
The towing vehicle must move off gently.
When the vehicle is towed with its engine off, there is no longer braking and steering assistance.
A professional recovery service must be called in the following cases:
– broken down on a motorway or main road;
–
not possible to put the gearbox into neutral, unlock the steering, or re\
lease the parking brake;
–
not possible to tow a vehicle with an automatic gearbox, with the engine\
running;
–
towing with only two wheels on the ground;
–
four-wheel drive vehicle;
–
no approved towbar available.
Rechargeable hybrid vehicles
Before any intervention, with the ignition
on, depress the brake pedal and select mode N, then switch off the hybrid system (READY
indicator lamp off).
Always call on professionals for recovery of
the vehicle on a flatbed lorry or trailer.Use the towing eye only to free the vehicle
if it is stuck, or to secure it for recovery on a
flatbed lorry or trailer.
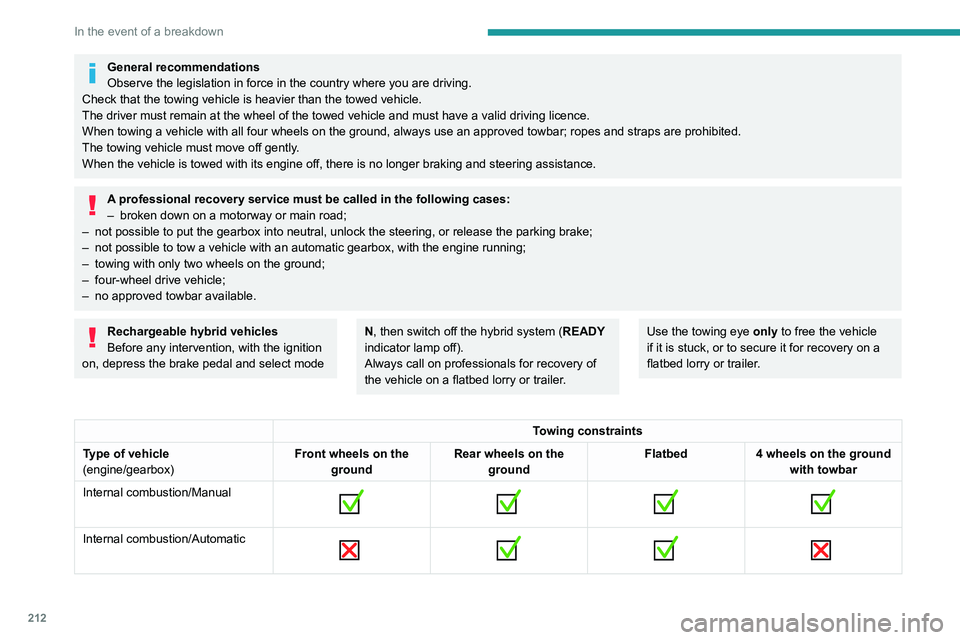
Towing constraints
Type of vehicle
(engine/gearbox) Front wheels on the
ground Rear wheels on the
ground Flatbed
4 wheels on the ground
with towbar
Internal combustion/Manual
Internal combustion/Automatic
Page 216 of 292
214
In the event of a breakdown
Towing your vehicle
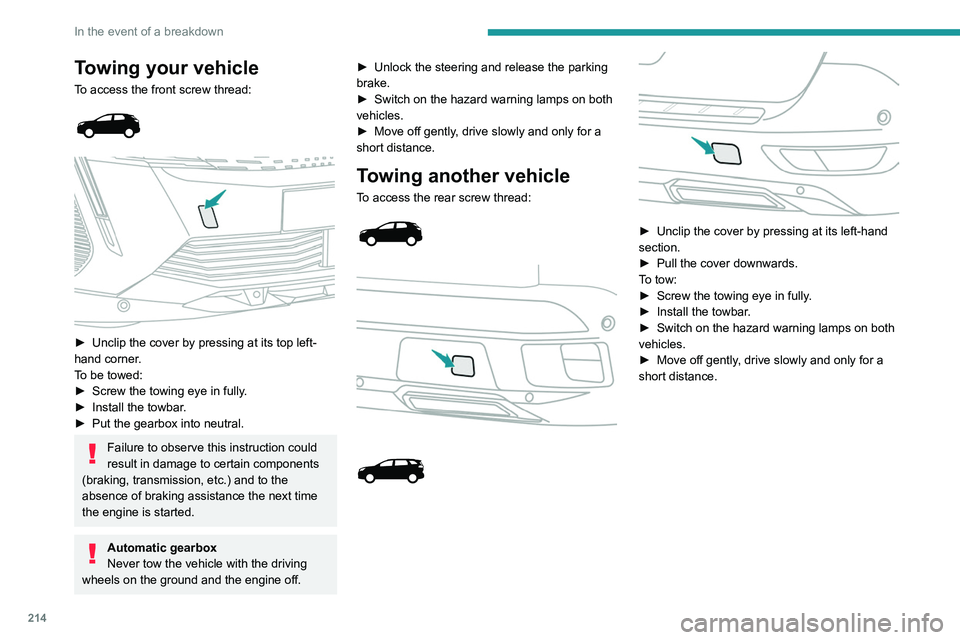
To access the front screw thread:
► Unclip the cover by pressing at its top left-
hand corner .
To be towed:
►
Screw the towing eye in fully
.
►
Install the towbar
.
►
Put the gearbox into neutral.
Failure to observe this instruction could
result in damage to certain components
(braking, transmission, etc.) and to the
absence of braking assistance the next time
the engine is started.
Automatic gearbox
Never tow the vehicle with the driving
wheels on the ground and the engine off. ►
Unlock the steering and release the parking
brake.
►
Switch on the hazard warning lamps on both
vehicles.
►
Move off gently
, drive slowly and only for a
short distance.
Towing another vehicle
To access the rear screw thread:
► Unclip the cover by pressing at its left-hand
section.
►
Pull the cover downwards.
T
o tow:
►
Screw the towing eye in fully
.
►
Install the towbar
.
►
Switch on the hazard warning lamps on both
vehicles.
►
Move off gently
, drive slowly and only for a
short distance.
Page 266 of 292
264
Alphabetical index
Histogramme, fuel consumption 24–25
Horn
85
Hybrid
220
I
i-Cockpit® amplify function 46
Ignition
113, 254
Ignition on
11 3
Immobiliser, electronic
111
Indicator, AdBlue® range
18
Indicator, coolant temperature
18
Indicator, engine oil level
17, 21
Indicators, direction
75
Inflating tyres
184, 222
Inflating tyres and accessories
(using the kit)
192, 195
Infrared camera
79, 127
Instrument panel
9–10, 21–22, 127
Instrument panel (Rechargeable hybrid)
9
Intelligent Traction Control
87
Internet browser
245, 248
ISOFIX mountings
102
J
Jack 192, 195–197, 251
Jump starting
206
K
Key 26–27, 30–31
Key, electronic
28–29
Keyless Entry and Starting
28–29, 111–112
Key not recognised
11 3
Key with remote control
26, 111
Kit, hands-free
231, 253
Kit, puncture repair
190–192
Kit, temporary puncture repair
190–193, 195
L
Labels, identification 222
Lamp, boot
73
Lamps, parking
75
Lamps, rear
201
Lams with Full LED technology
76, 78
Lane assist
135, 140–141
Lane departure warning active
144, 152
Lane Departure Warning System
(LDWS)
143–144
Leather (care)
188
LEDs - Light-emitting diodes
75, 200–201
Level, AdBlue®
182
Level, brake fluid
182
Level, Diesel additive
182–183
Level, engine coolant
18, 182
Level, engine oil
17, 181
Levels and checks
181–183
Level, screenwash fluid
81, 182
Light-emitting diodes - LEDs 75, 200–201
Lighting, cornering
78–79
Lighting dimmer
21
Lighting, exterior
74, 77
Lighting, guide-me home
27, 77
Lighting, interior
66–67
Lighting, mood
21, 66
Lighting, welcome
77
Loading
70–71, 176–177
Load reduction mode
179
Locating your vehicle
27
Locking
27, 29
Locking from the inside
30
Locking the doors
30
Long objects, transporting
67
Low fuel level
163
M
Mains socket (domestic network) 166
Maintenance (advice)
165, 187
Maintenance, routine
127, 183–184
Manoeuvring aids (recommendations)
126
Map reading lamps
66
Markings, identification
222
Massage function
46
Massage, multi-point
46
Mat
65, 127
Memorising a speed
128
Menu
230
Menu, main
23