2021 NISSAN TITAN reset
[x] Cancel search: resetPage 321 of 638

Reset
A master reset will return the RSI system
settings to the factory defaults. Any user
options and customization will be lost and
reset back to factory default settings. To
reset the system, select Yes when the dia-
log confirmation box appears.
Update
Displays the current sof tware version infor-
mation. Select Update to begin a sof tware
update (reserved for future use).
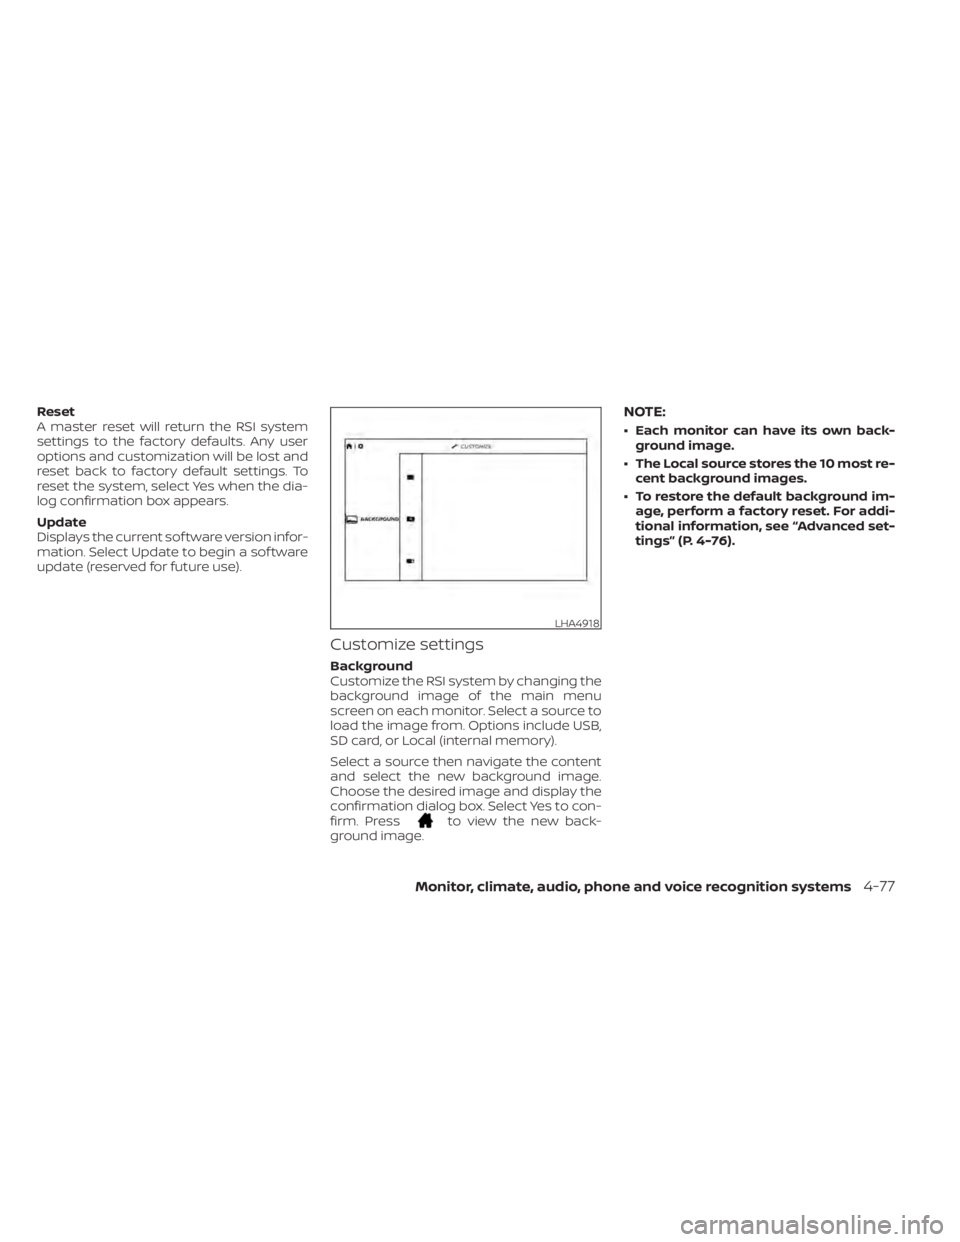
Customize settings
Background
Customize the RSI system by changing the
background image of the main menu
screen on each monitor. Select a source to
load the image from. Options include USB,
SD card, or Local (internal memory).
Select a source then navigate the content
and select the new background image.
Choose the desired image and display the
confirmation dialog box. Select Yes to con-
firm. Press
to view the new back-
ground image.
NOTE:
• Each monitor can have its own back- ground image.
• The Local source stores the 10 most re- cent background images.
• To restore the default background im- age, perform a factory reset. For addi-
tional information, see “Advanced set-
tings” (P. 4-76).
LHA4918
Monitor, climate, audio, phone and voice recognition systems4-77
Page 325 of 638

TROUBLESHOOTING
SymptomRemedy
Monitor does not power on Verif y the vehicle is in the ON or ACC position.
Verif y the battery is installed correctly in the remote control.
Verif y the in-line fuse protection is good. Refer to the RSI system installation instructions for vehicle-specific fuse location.
Monitor front panel controls
flash red For further diagnosis, it is recommended that you visit a NISSAN dealer.
System frozen - will not re-
spond Sof t reset the system by pressing and holding the power button on the top of the driver side monitor for 5 seconds.
Hard reset the system by turning the ignition off, then back on.
Disc will not play Insert the disc with label side facing the rear of the vehicle.
Check if the disc is defective by trying another disc.
Check the type of disc being played. This unit only plays DVD (Single, Dual Layer), DVD-R/+R, DVD+R Dual layer, DVD-RW/+RW, CD,
CD-R, and CD-RW.
The unit and the disc are coded by region. If the region codes don’t match, the DVD can’t be played.
Disc plays, but stops inter-
mittently The disc may be dirty and need cleaning.
Condensation may have formed inside the unit. Remove the disc and allow unit to dry out.
The disc may be scratched too badly to play.
No picture Check that the signal source is connected.
Check the menu source setting. Match your monitor mode with the source correctly.
Distorted picture Check the disc for fingerprints and clean with a sof t cloth, wiping from center to edge.
Cannot advance through a
DVD movie You cannot advance through the opening credits and warning information that appears at the beginning of DVDs because the
disc is programmed to prohibit these actions.
Some discs may not allow this function. Try another disc.
Monitor, climate, audio, phone and voice recognition systems4-81
Page 339 of 638

•When using a wheel without the
TPMS such as the spare tire, when a
spare tire is mounted or a wheel is
replaced, tire pressure will not be in-
dicated, the TPMS will not function
and the low tire pressure warning
light will flash for approximately 1
minute. The light will remain on af ter
1 minute. Have your tires replaced
and/or TPMS system reset as soon as
possible. It is recommended that you
visit a NISSAN dealer for this service.
• Replacing tires with those not origi-
nally specified by NISSAN could af-
fect the proper operation of the
TPMS.
• Do not inject any tire liquid or aerosol
tire sealant into the tires, as this may
cause a malfunction of the tire pres-
sure sensors.
CAUTION
Do not place metalized film or any
metal parts (antenna, etc.) on the win-
dows. This may cause poor reception of
the signals from the tire pressure sen-
sors, and the TPMS will not function
properly. Some devices and transmitters may tem-
porarily interfere with the operation of the
TPMS and cause the low tire pressure
warning light to illuminate.
Some examples are:
• Facilities or electric devices using similar
radio frequencies are near the vehicle.
• If a transmitter set to similar frequencies is being used in or near the vehicle.
• If a computer (or similar equipment) or a DC/AC converter is being used in or near
the vehicle.
The low tire pressure warning light may
illuminate in the following cases:
• If the vehicle is equipped with a wheel and tire without TPMS.
• If the TPMS has been replaced and the ID has not been registered.
• If the wheel is not originally specified by NISSAN.
FCC Notice:
For USA:
This device complies with Part 15 of the
FCC Rules. Operation is subject to the fol-
lowing two conditions: (1) This device
may not cause harmful interference, and
(2) this device must accept any interfer- ence received, including interference
that may cause undesired operation.
NOTE:
Changes or modifications not ex-
pressly approved by the party re-
sponsible for compliance could void
the user's authority to operate the
equipment.
For Canada:
This device complies with Industry
Canada licence-exempt RSS standard(s).
Operation is subject to the following two
conditions: (1) this device may not cause
harmful interference, and (2) this device
must accept any interference received,
including interference that may cause
undesired operation of the device.
TPMS with Easy-Fill Tire Alert
WARNING
Af ter rotating the tires, do not use the
Easy-Fill Tire Alert to adjust the tire
pressure. Instead use a gauge to adjust
the tires to the correct pressure in ac-
cordance with Tire and Loading Infor-
mation label.
Starting and driving5-7
Page 382 of 638

• If the(green) indicator blinks, push
the ON/OFF switch off and have the sys-
tem checked. It is recommended that
you visit a NISSAN dealer for this service.
• The
(green) indicator may blink
when the ON/OFF switch is pushed ON
while pushing the ACCEL/RES, COAST/
SET, or CANCEL switch. To properly set the
cruise control system, use the following
procedures.
WARNING
Do not use the cruise control when driv-
ing under the following conditions:
• When it is not possible to keep the
vehicle at a set speed.
• In heavy traffic or in traffic that varies
in speed.
• On winding or hilly roads.
• On slippery roads (rain, snow, ice,
etc.).
• In very windy areas.
Doing so could cause a loss of vehicle
control and result in an accident.
CRUISE CONTROL OPERATIONS
The cruise control allows driving at a speed
between 25 - 89 mph (40 - 144 km/h) with-
out keeping your foot on the accelerator
pedal.
To turn on the cruise control, push the
ON/OFF switch on. The
(white) indica-
tor in the vehicle information display will
illuminate.
To set cruising speed, accelerate the ve-
hicle to the desired speed, push the
COAST/SET switch and release it. The
(green) indicator in the vehicle infor-
mation display will illuminate. Take your
foot off the accelerator pedal. Your vehicle
maintains the set speed.
• To pass another vehicle, depress the ac-
celerator pedal. When you release the
pedal, the vehicle returns to the previ-
ously set speed.
• The vehicle may not maintain the set speed when going up or down steep hills.
If this happens, drive without the cruise
control.
To cancel the preset speed, use one of the
following three methods:
• Push the CANCEL switch; the
indica-
tor in the vehicle information display
goes out. • Tap the brake pedal; the
indicator
goes out.
• Push the ON/OFF switch off. The
indicator in the vehicle information dis-
play goes out.
The cruise control is automatically can-
celed and the
indicator in the vehicle
information display goes out if:
• You depress the brake pedal while push- ing the ACCEL/RES or COAST/SET switch.
The preset speed is deleted from
memory.
• The vehicle slows down more than 8 mph (13 km/h) below the set speed.
• You move the shif t lever to N (Neutral).
To reset at a faster cruising speed, use
one of the following three methods:
• Depress the accelerator pedal. When the vehicle attains the desired speed, push
and release the COAST/SET switch.
• Push and hold the ACCEL/RES switch. When the vehicle attains the speed you
desire, release the switch.
• Push and release the ACCEL/RES switch. Each time you do this, the set speed in-
creases by about 1 mph (1.6 km/h).
5-50Starting and driving
Page 383 of 638

To reset at a slower cruising speed,use
one of the following three methods:
• Lightly tap the brake pedal. When the ve- hicle attains the desired speed, push the
COAST/SET switch and release it.
• Push and hold the COAST/SET switch. Re- lease the switch when the vehicle slows
to the desired speed.
• Push and release the COAST/SET switch. Each time you do this, the set speed de-
creases by about 1 mph (1.6 km/h).
To resume the preset speed, push and
release the ACCEL/RES switch. The vehicle
returns to the last set cruising speed when
the vehicle speed is over 25 mph (40 km/h).
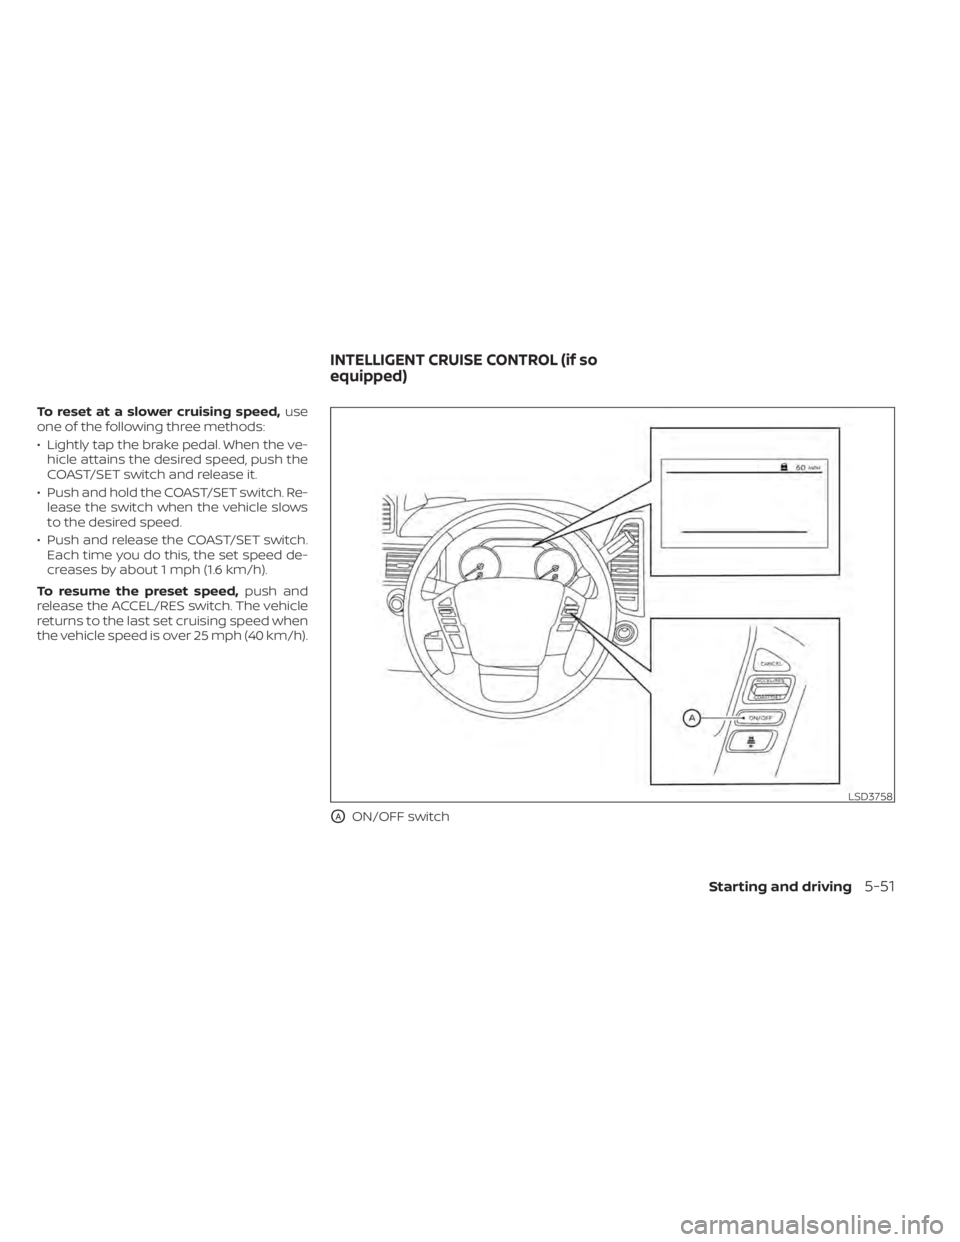
OAON/OFF switch
LSD3758
INTELLIGENT CRUISE CONTROL (if so
equipped)
Starting and driving5-51
Page 384 of 638

WARNING
Failure to follow the warnings and in-
structions for proper use of the ICC sys-
tem could result in serious injury or
death.
• The ICC system is only an aid to assist
the driver and is not a collision warn-
ing or avoidance device. It is the driv-
er’s responsibility to stay alert, drive
safely, and be in control of the vehicle
at all times.
• Always observe posted speed limits
and do not set the speed over them.
• Always drive carefully and atten-
tively when using the ICC system.
Read and understand the Owner’s
Manual thoroughly before using the
ICC system. To avoid serious injury or
death, do not rely on the system to
prevent accidents or to control the
vehicle’s speed in emergency situa-
tions. Do not use the ICC system ex-
cept in appropriate road and traffic
conditions. •
In the conventional (fixed speed)
cruise control mode, a warning
chime will not sound to warn you if
you are too close to the vehicle
ahead. Pay special attention to the
distance between your vehicle and
the vehicle ahead of you or a collision
could occur.
The ICC system maintains a selected dis-
tance from the vehicle in front of you within
the speed range of 0 to 90 mph (0 to 144
km/h) up to the set speed. The set speed
can be selected by the driver between 20 to
90 mph (32 to 144 km/h).
The vehicle travels at a set speed when the
road ahead is clear.
The ICC system can be set to one of two
cruise control modes:
• Vehicle-to-vehicle distance control
mode: For maintaining a selected dis-
tance between your vehicle and the ve-
hicle in front of you up to the preset speed
• Conventional (fixed speed) cruise con-
trol mode: For cruising at a preset speed
Always confirm the setting in the ON/OFF
switch display. For the vehicle-to-vehicle distance control
mode, see “Vehicle-to-vehicle distance
control mode” (P. 5-53).
For the conventional (fixed speed) cruise
control mode, see “Conventional (fixed
speed) cruise control mode” (P. 5-70).
5-52Starting and driving
Page 390 of 638

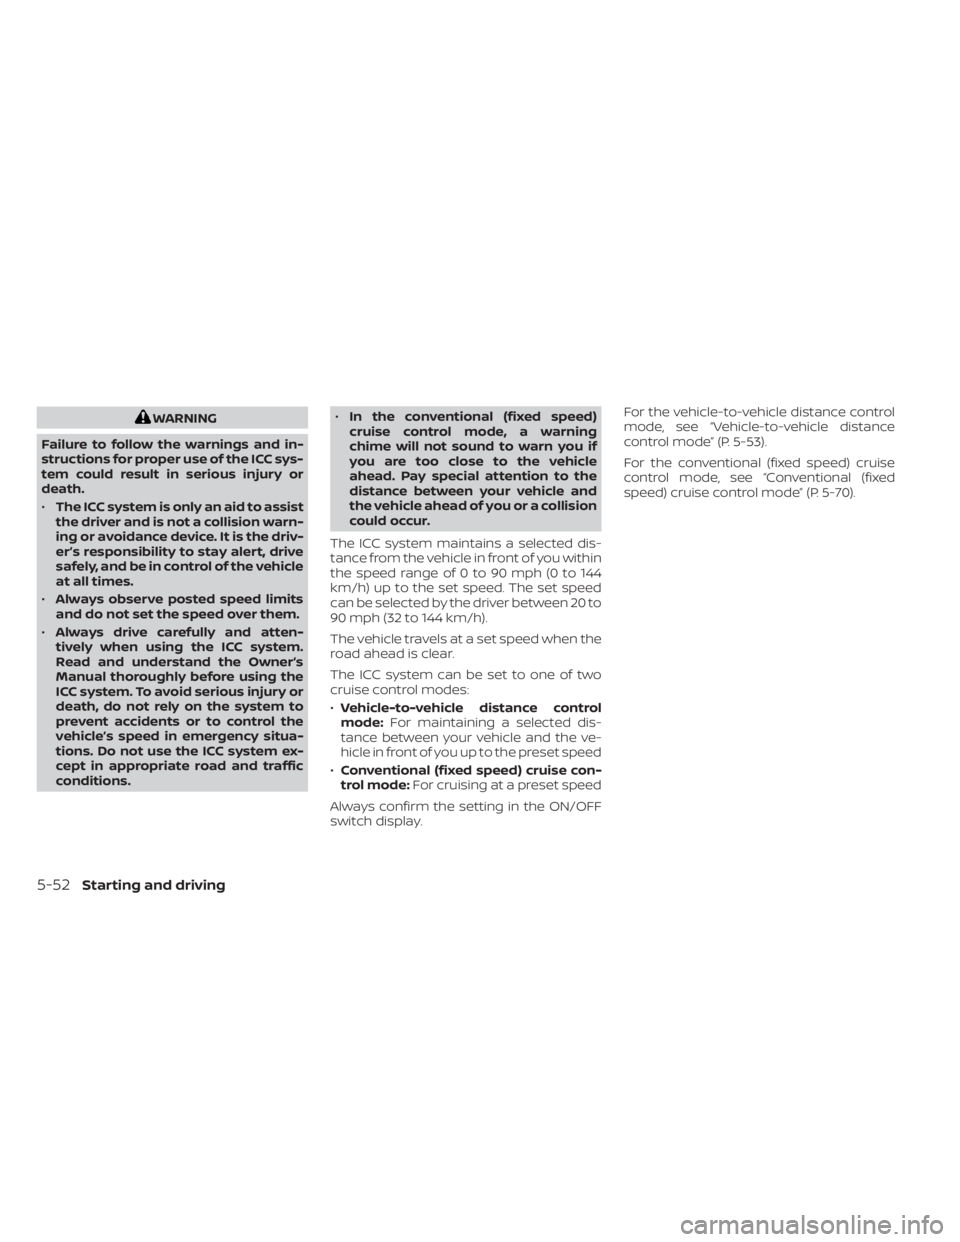
To set cruising speed,accelerate your ve-
hicle to the desired speed, push the
COAST/SET switch
OCand release it. The
ICC system set indicator (green), vehicle
ahead detection indicator, set distance in-
dicator and set vehicle speed indicator
OB
will come on. Take your foot off the accel-
erator pedal. Your vehicle will maintain the
set speed. When the COAST/SET switch is pushed un-
der the following conditions, the system
cannot be set and the ICC indicators will
blink for approximately 2 seconds:
• When traveling below 20 mph (32 km/h)
and a vehicle ahead is not detected
• When the shif t lever is not in the D (Drive) or Manual mode
• When the parking brake is applied
• When the brakes are operated by the driver
When the COAST/SET switch is pushed un-
der the following conditions, the system
cannot be set. A warning chime will sound and a message
will pop up:
• When the VDC system is off (To use the
ICC system, turn on the VDC system. Push
the ON/OFF switch to turn off the ICC
system and reset the ON/OFF switch by
pushing the ON/OFF switch again.)
For additional information about the
VDC system, see “Vehicle Dynamic Con-
trol (VDC) system” (P. 5-118).
• When VDC is operating
• When a wheel is slipping (To use the ICC system, make sure the wheels are no lon-
ger slipping.)
LSD3762LSD3102
5-58Starting and driving
Page 392 of 638

When passing another vehicle,the set
speed indicator
OAwill flash when the ve-
hicle speed exceeds the set speed. The ve-
hicle detect indicator will turn off when the
area ahead of the vehicle is open. When the
pedal is released, the vehicle will return to
the previously set speed.
Even though your vehicle speed is set in the
ICC system, you can depress the accelera-
tor pedal when it is necessary to accelerate
your vehicle rapidly.
How to change the set vehicle
speed
To cancel the preset speed, use one of the
following methods:
• Push the CANCEL switch. The set vehicle speed indicator will go out.
• Tap the brake pedal. The set vehicle speed indicator will go out.
• Turn the ON/OFF switch off. The ICC indi- cators will go out.
To reset at a faster cruising speed, use
one of the following methods:
• Depress the accelerator pedal. When the vehicle attains the desired speed, push
and release the COAST/SET switch.
• Push and hold the ACCEL/RES switch. The set vehicle speed will increase by ap-
proximately 5 mph (5 km/h).
• Push, then quickly release the ACCEL/RES switch. Each time you do this, the set
speed will increase by approximately
1 mph (1 km/h). To reset at a slower cruising speed,
use
one of the following methods:
• Lightly tap the brake pedal. When the ve- hicle attains the desired speed, push the
COAST/SET switch and release it.
• Push and hold the COAST/SET switch. The set vehicle speed will decrease by
approximately 5 mph (5 km/h).
• Push, then quickly release the COAST/SET switch. Each time you do this, the set
speed will decrease by approximately
1 mph (1 km/h).
To resume the preset speed, push and
release the ACCEL/RES switch. The vehicle
will resume the last set cruising speed
when the vehicle speed is over 20 mph
(32 km/h).
LSD3267
5-60Starting and driving