Page 91 of 300
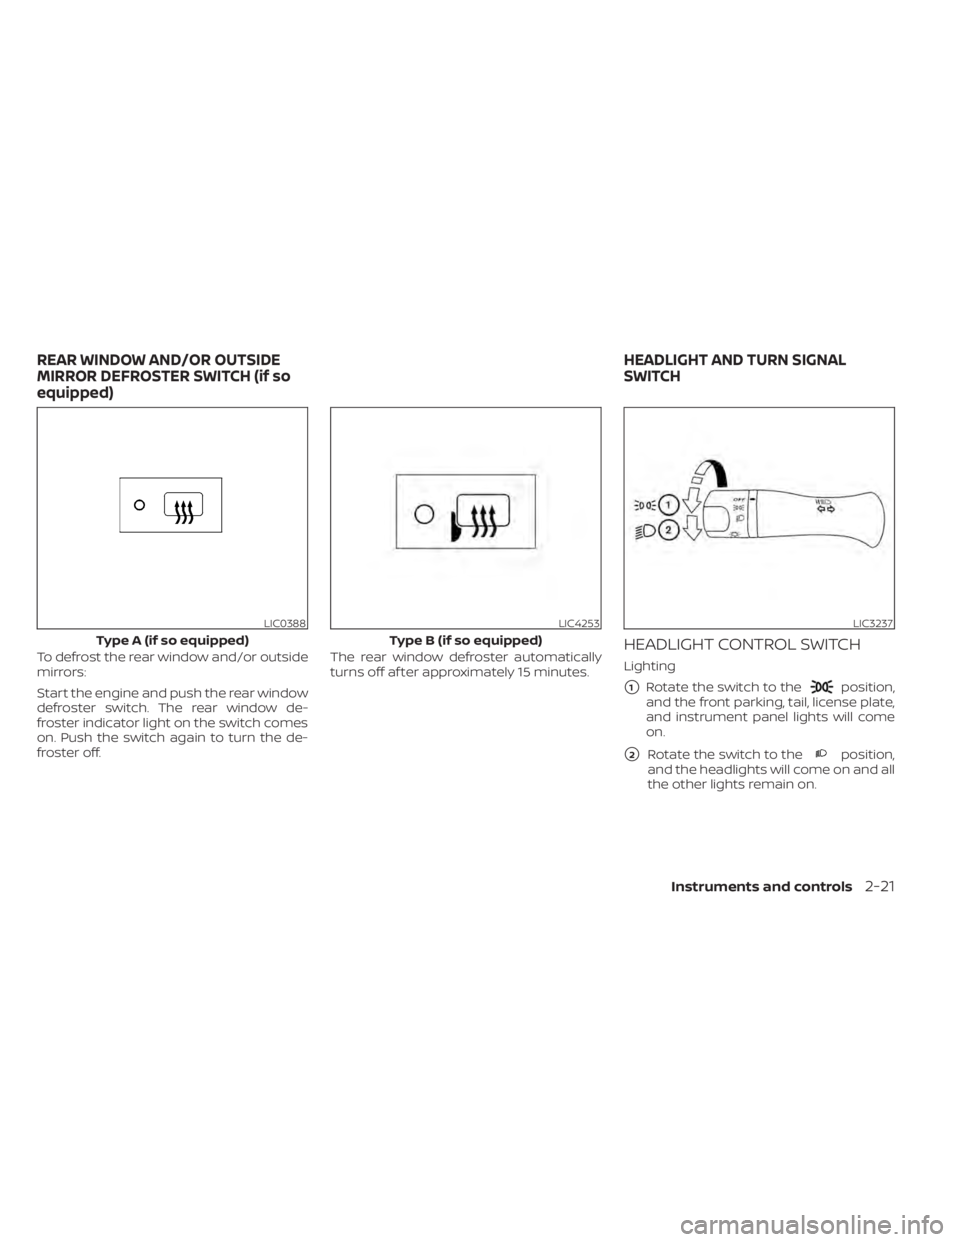
position,
and the front parking, tail, license plate,
and instrument panel lights will come
on.
�2Rotate the switch to theposition,
and the headlights will come on and all
the other lights remain on.
LIC0388
Type A (if so equipped)
Instruments and controls2-21
Page 92 of 300
CAUTION
Use the headlights with the engine run-
ning to avoid discharging the vehicle
battery.
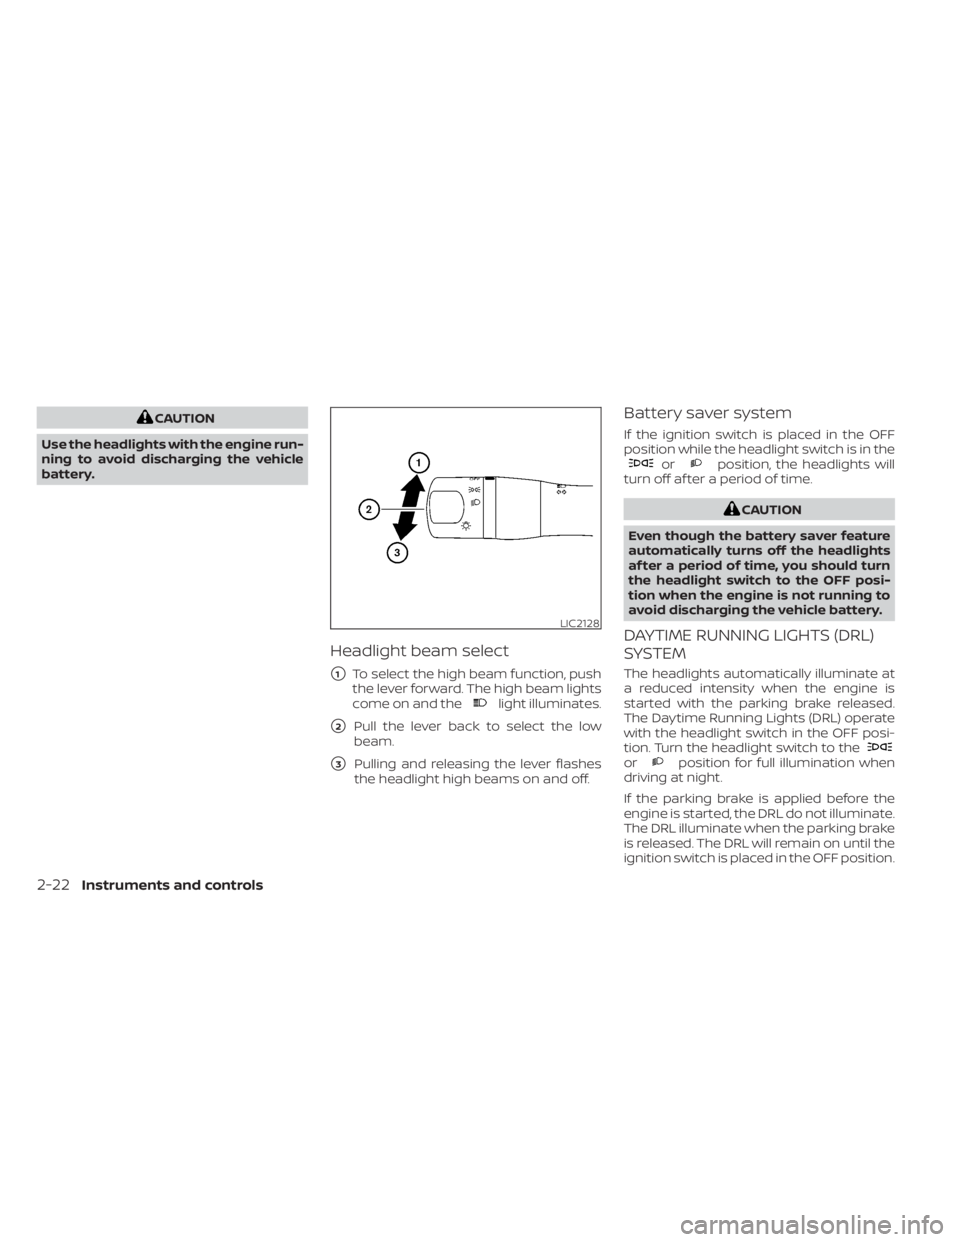
Headlight beam select
�1To select the high beam function, push
the lever forward. The high beam lights
come on and the
light illuminates.
�2Pull the lever back to select the low
beam.
�3Pulling and releasing the lever flashes
the headlight high beams on and off.
Battery saver system
If the ignition switch is placed in the OFF
position while the headlight switch is in the
orposition, the headlights will
turn off af ter a period of time.
orposition for full illumination when
driving at night.
If the parking brake is applied before the
engine is started, the DRL do not illuminate.
The DRL illuminate when the parking brake
is released. The DRL will remain on until the
ignition switch is placed in the OFF position.
LIC2128
2-22Instruments and controls
Page 93 of 300
WARNING
When the DRL system is active, tail
lights on your vehicle are not on. It is
necessary at dusk to turn on your
headlights. Failure to do so could cause
an accident injuring yourself and
others.
INSTRUMENT BRIGHTNESS
CONTROL
The instrument brightness control oper-
ates when the headlight control switch is in
the
orposition.
Push the control
OAto adjust the bright-
ness of the instrument panel lights.
TURN SIGNAL SWITCH
Turn signal
Move the lever up or down to signal the
turning direction. When the turn is com-
pleted, the turn signals cancel
automatically.
LIC2289LIC2473
Page 102 of 300
Page 115 of 300
.
• Do not attach the key fob with a key
holder that contains a magnet.
• Do not place the")
•Do not place the key fob for an ex-
tended period in an area where tem-
peratures exceed 140°F (60°C).
• Do not attach the key fob with a key
holder that contains a magnet.
• Do not place the key fob near equip-
ment that produces a magnetic field,
such as a TV, audio equipment and
personal computers.
If a key fob is lost or stolen, NISSAN rec-
ommends erasing the ID code of that
key fob. This will prevent the key fob
from unauthorized use to unlock the
vehicle. For information regarding the
erasing procedure, it is recommended
that you visit a NISSAN dealer.
HOW TO USE REMOTE KEYLESS
ENTRY SYSTEM
1.(lock) button
2.
(panic) button
3.
(unlock) button
Locking doors
1. Close all windows.
2. Remove the key from the ignition switch.
3. Close all doors. 4. Press the
button on the key fob.
All the doors lock. The hazard indicator
lights flash twice and the horn beeps
once to indicate all doors are locked.
• When the
button is pressed
with all doors locked, the hazard indi-
cator lights flash twice and the horn
beeps once as a reminder that the
doors are already locked.
• If a door is open and you press the
button, the doors will lock but
the horn will not beep and the hazard
indicator lights will not flash.
The horn may or may not beep. For addi-
tional information, see “Silencing the horn
beep feature” (P. 3-12).
Unlocking doors
Press thebutton on the key fob once.
• Only the driver's door unlocks.
• The hazard indicator lights flash once if all doors are completely closed with the ig-
nition switch in any position except the
ON position.
• Press the
button on the key fob
again within 5 seconds. All doors unlock.
• The hazard indicator lights flash once if all doors are completely closed.
LPD3500
Page 116 of 300

button on the key fob once
to turn on the interior lights.
The interior lights can be turned off without
waiting a period of time by inserting the key
into the ignition switch and placing the ig-
nition switch in the ON or START position,
locking the doors with the key fob, power
door lock switch or pushing the interior
light switch to the OFF position.
For additional information, see
lightsŽ (P. 2-32).
Auto relock
When thebutton on the key fob is
pressed, all doors will lock automatically
within one minute unless one of the follow-
ing operations is performed:
€ Any door is opened.
€ A key is inserted into the ignition switch and the switch is cycled from OFF to ON.
€ Press key fob
button.
Using the panic alarm
If you are near your vehicle and feel threat-
ened, you may activate the panic alarm to call attention by pressing and holding the
button on the key fob for
longer than
0.5 seconds.
The panic alarm and headlights will stay on
for a period of time.
The panic alarm stops when:
• It has run for a period of time.
• Any button is pressed on the key fob.
Silencing the horn beep feature
If desired, the horn beep feature can be
deactivated using the key fob.
To deactivate: Press and hold the
andbuttonsfor at least 2 seconds.
The hazard indicator lights will flash three
times to confirm that the horn beep fea-
ture has been deactivated.
To activate: Press and hold the
andbuttonsfor at least 2 seconds once
more.
The hazard indicator lights will flash once
and the horn will sound once to confirm
that the horn beep feature has been
reactivated.
Deactivating the horn beep feature does
not silence the horn if the alarm is
triggered.
3-12Pre-driving checks and adjustments
Page 121 of 300
CARD HOLDER (driver's side only)
To access the card holder, pull the sun visor
down and slide card in the card holder
OA.
Do not view information while operating
the vehicle.
MANUAL ANTI-GLARE REARVIEW
MIRROR (if so equipped)
Use the night positionO1to reduce glare
from the headlights of vehicles behind you
at night.
Use the day position
O2when driving in
daylight hours.
WPD0126
MIRRORS
Pre-driving checks and adjustments3-17
Page 161 of 300
,
follow these recommendations to ob-
tain maximum engine performance
and ensure the future reliability and
economy of your new vehicle. Failure to
follo")
CAUTION
During the first 1,200 miles (2,000 km),
follow these recommendations to ob-
tain maximum engine performance
and ensure the future reliability and
economy of your new vehicle. Failure to
follow these recommendations may
result in shortened engine life and re-
duced engine performance.
• Avoid driving for long periods at constant speed, either fast or slow, and do not run
the engine over 4,000 rpm.
• Do not accelerate at full throttle in any gear.
• Avoid quick starts.
• Avoid hard braking as much as possible. Follow these easy-to-use Fuel Efficient
Driving Tips to help you achieve the most
fuel economy from your vehicle.
1.
Use Smooth Accelerator and Brake
Pedal Application
• Avoid rapid starts and stops.
• Use smooth, gentle accelerator and brake application whenever possible.
• Maintain constant speed while com- muting and coast whenever possible.
2. Maintain Constant Speed
• Look ahead to try and anticipate and minimize stops.
• Synchronizing your speed with traffic lights allows you to reduce your num-
ber of stops.
• Maintaining a steady speed can mini- mize red light stops and improve fuel
efficiency.
3. Use Air Conditioning (A/C) at Higher
Vehicle Speeds
• Below 40 mph (64 km/h), it is more efficient to open windows to cool the
vehicle due to reduced engine load.
• Above 40 mph (64 km/h), it is more efficient to use A/C to cool the vehicle
due to increased aerodynamic drag. • Recirculating the cool air in the cabin
when the A/C is on reduces cooling
load.
4. Drive at Economical Speeds and
Distances
• Observing the speed limit and not ex- ceeding 60 mph (97 km/h) (where le-
gally allowed) can improve fuel effi-
ciency due to reduced aerodynamic
drag.
• Maintaining a safe following distance behind other vehicles reduces unnec-
essary braking.
• Safely monitoring traffic to anticipate changes in speed permits reduced
braking and smooth acceleration
changes.
• Select a gear range suitable to road conditions.
5. Use Cruise Control
• Using cruise control during highway driving helps maintain a steady speed.
• Cruise control is particularly effective in providing fuel savings when driving
on flat terrains.
6. Plan for the Shortest Route
• Utilize a map or navigation system to determine the best route to save time.
BREAK-IN SCHEDULE FUEL EFFICIENT DRIVING TIPS
Starting and driving5-19


To access the card holder, pull the sun visor
down and slide card in the card holder
OA.
Do not view information while operating
the vehicle.
MANUAL ANTI-GLARE REA")