2021 NISSAN MURANO change time
[x] Cancel search: change timePage 246 of 508

FCC Notice:
For USA:
This device complies with Part 15 of the
FCC Rules. Operation is subject to the fol-
lowing two conditions: (1) This device
may not cause harmful interference, and
(2) this device must accept any interfer-
ence received, including interference
that may cause undesired operation.
NOTE:
Changes or modifications not ex-
pressly approved by the party re-
sponsible for compliance could void
the user's authority to operate the
equipment.
For Canada:
This device complies with Industry
Canada licence-exempt RSS standard(s).
Operation is subject to the following two
conditions: (1) this device may not cause
interference, and (2) this device must ac-
cept any interference, including interfer-
ence that may cause undesired opera-
tion of the device.
TPMS with Easy-Fill Tire Alert
When adding air to an under-inflated tire,
the TPMS with Easy-Fill Tire Alert provides
visual and audible signals outside the ve-
hicle to help you inflate the tires to the rec-
ommended COLD tire pressure.
Vehicle set-up
1. Park the vehicle in a safe and level place.
2. Apply the parking brake and place theshif t lever in the P (Park) position.
3. Place the ignition switch in the ON posi- tion. Do not start the engine.
Operation
1. Add air to the tire.
2. Af ter a few seconds, the hazard indica- tors will start flashing.
3. When the designated pressure is reached, the horn beeps once and the
hazard indicators stop flashing.
4. Perform the above steps for each tire. • If the tire is over-inflated more thanapproximately 4 psi (30 kPa), the horn
beeps and the hazard indicators flash
three times. To correct the pressure,
push the core of the valve stem on the
tire briefly to release pressure. When the pressure reaches the designated
pressure, the horn beeps once.
• If the hazard indicator does not flash within approximately 15 seconds af ter
starting to inflate the tire, it indicates
that the Easy-Fill Tire Alert is not
operating.
• The TPMS will not activate the Easy-Fill Tire Alert under the following
conditions:– If there is interference from an exter- nal device or transmitter.
– The air pressure from the inflation device is not sufficient to inflate the
tire.
– There is a malfunction in the TPMS.
– There is a malfunction in the horn or hazard indicators.
– The identification code of the tire pressure sensor is not registered to
the system.
– The battery of the tire pressure sen- sor is low.
• If the Easy-Fill Tire Alert does not oper- ate due to TPMS interference, move
the vehicle about 3 f t (1 m) backward
or forward and try again.
If the Easy-Fill Tire Alert is not working, use a
tire pressure gauge.
5-8Starting and driving
Page 248 of 508
6. When it is safe to do so, gradually turnthe steering wheel until both tires return
to the road surface. When all tires are on
the road surface, steer the vehicle to
stay in the appropriate driving lane.
• If you decide that it is not safe to return the vehicle to the road surface based
on vehicle, road or traffic conditions,
gradually slow the vehicle to a stop in
a safe place off the road.
RAPID AIR PRESSURE LOSS
Rapid air pressure loss or a “blow-out” can
occur if the tire is punctured or is damaged
due to hitting a curb or pothole. Rapid air
pressure loss can also be caused by driving
on under-inflated tires.
Rapid air pressure loss can affect the han-
dling and stability of the vehicle, especially
at highway speeds.
Help prevent rapid air pressure loss by
maintaining the correct air pressure and
visually inspecting the tires for wear and
damage. For additional information, see
“Wheels and tires” (P. 8-27). If a tire rapidly
loses air pressure or “blows-out” while driv-
ing, maintain control of the vehicle by fol-
lowing the procedure below. Please note
that this procedure is only a general guide. The vehicle must be driven as appropriate
based on the conditions of the vehicle, road
and traffic.
WARNING
If there is a sudden loss of tire air pres-
sure, the vehicle will generally move or
pull in the direction of the flat tire. In
this situation, losing control of the ve-
hicle may cause a collision and result in
personal injury.
To help avoid loss of control:
• Do not rapidly apply the brakes.
• Do not rapidly release the accelerator
pedal.
• Do not rapidly turn the steering
wheel.
1. Remain calm and do not overreact.
2. Maintain a firm grip on the steering wheel with both hands and try to hold a
straight course.
3. When appropriate, slowly release the ac- celerator pedal to gradually slow the
vehicle.
4. Gradually steer the vehicle to a safe lo- cation off the road and away from traffic
if possible. 5. Lightly apply the brake pedal to gradu-
ally stop the vehicle.
6. Turn on the hazard warning flashers and contact a roadside emergency service
to change the tire. For additional infor-
mation, see “Changing a flat tire” (P. 6-4).
DRINKING ALCOHOL/DRUGS AND
DRIVING
WARNING
Never drive under the influence of alco-
hol or drugs. Alcohol in the blood-
stream reduces coordination, delays
reaction time and impairs judgement.
Driving af ter drinking alcohol increases
the likelihood of being involved in an
accident injuring yourself and others.
Additionally, if you are injured in an ac-
cident, alcohol can increase the sever-
ity of the injury.
5-10Starting and driving
Page 251 of 508
•Whenever you drive off-road through
sand, mud or water as deep as the
wheel hub, more frequent mainte-
nance may be required. For addi-
tional information, see “Maintenance
schedules” (P. 9-7).
WARNING
Do not operate the push-button igni-
tion switch while driving the vehicle ex-
cept in an emergency. (The engine will
stop when the ignition switch is pushed
three consecutive times in less than 1.5
seconds or the ignition switch is
pushed and held for more than 2 sec-
onds.) If the engine stops while the ve-
hicle is being driven, this could lead to a
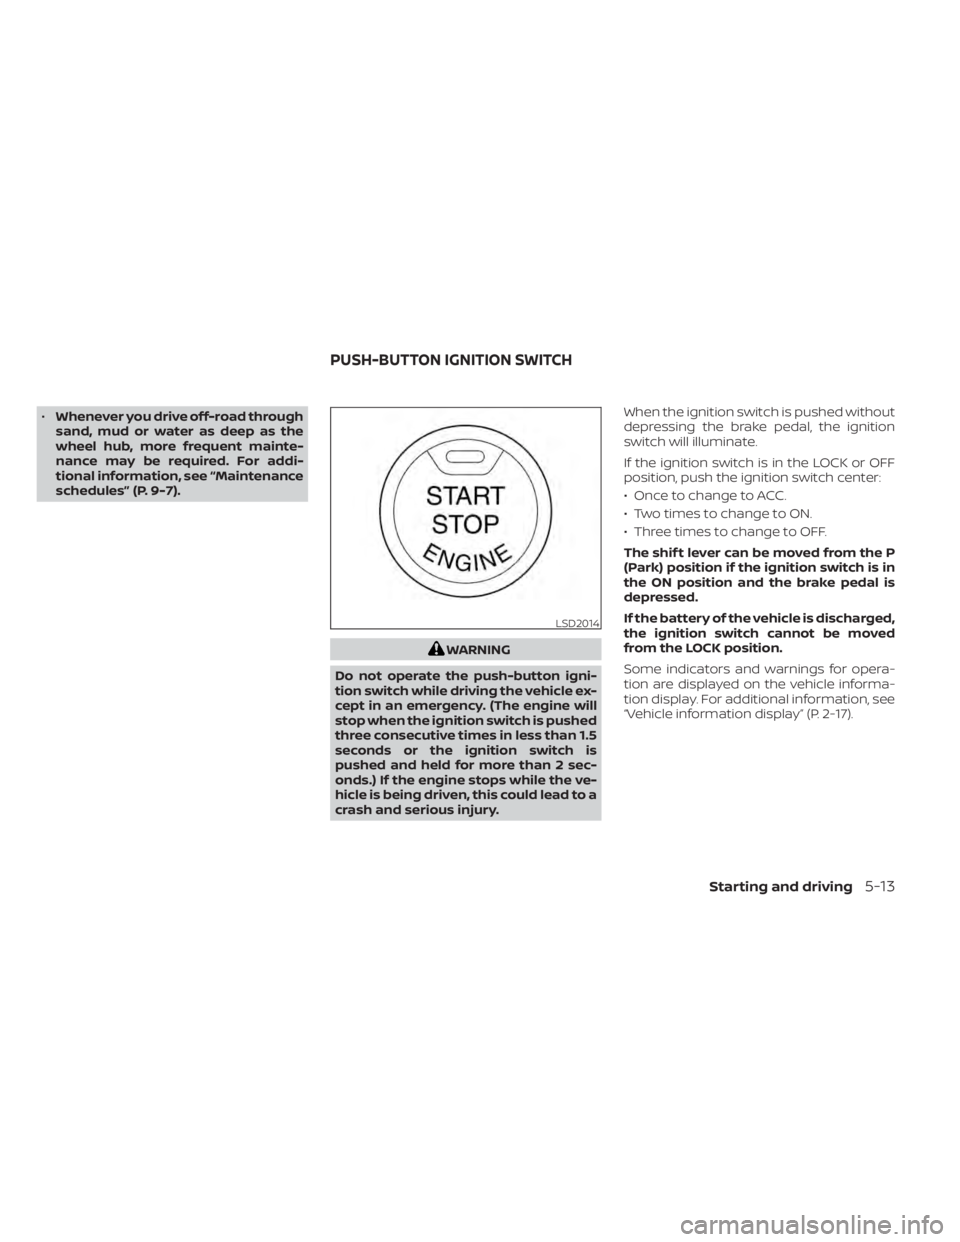
crash and serious injury. When the ignition switch is pushed without
depressing the brake pedal, the ignition
switch will illuminate.
If the ignition switch is in the LOCK or OFF
position, push the ignition switch center:
• Once to change to ACC.
• Two times to change to ON.
• Three times to change to OFF.
The shif t lever can be moved from the P
(Park) position if the ignition switch is in
the ON position and the brake pedal is
depressed.
If the battery of the vehicle is discharged,
the ignition switch cannot be moved
from the LOCK position.
Some indicators and warnings for opera-
tion are displayed on the vehicle informa-
tion display. For additional information, see
“Vehicle information display” (P. 2-17).
LSD2014
PUSH-BUTTON IGNITION SWITCH
Starting and driving5-13
Page 252 of 508
OPERATING RANGE
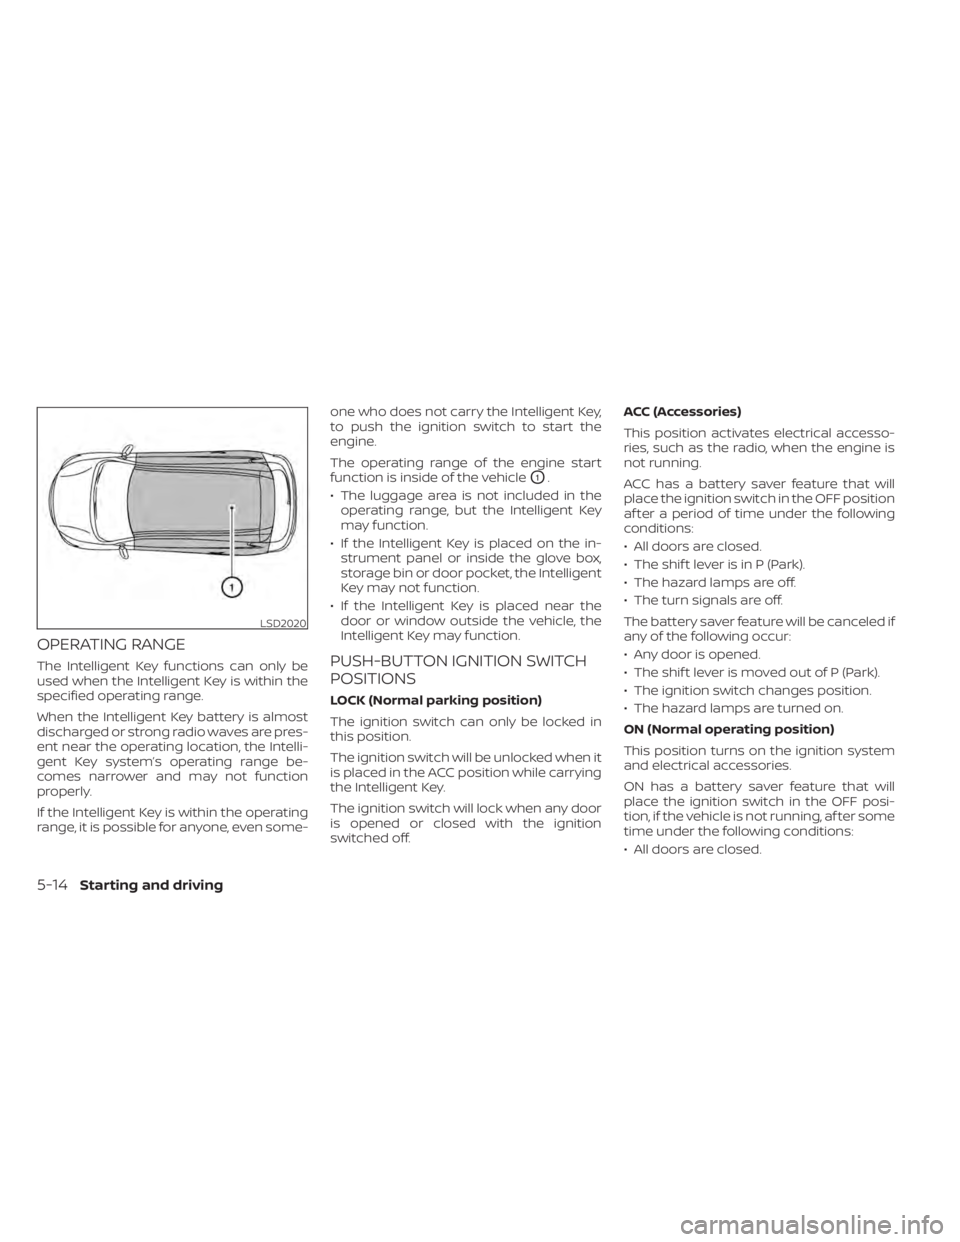
The Intelligent Key functions can only be
used when the Intelligent Key is within the
specified operating range.
When the Intelligent Key battery is almost
discharged or strong radio waves are pres-
ent near the operating location, the Intelli-
gent Key system’s operating range be-
comes narrower and may not function
properly.
If the Intelligent Key is within the operating
range, it is possible for anyone, even some-one who does not carry the Intelligent Key,
to push the ignition switch to start the
engine.
The operating range of the engine start
function is inside of the vehicle
O1.
• The luggage area is not included in the operating range, but the Intelligent Key
may function.
• If the Intelligent Key is placed on the in- strument panel or inside the glove box,
storage bin or door pocket, the Intelligent
Key may not function.
• If the Intelligent Key is placed near the door or window outside the vehicle, the
Intelligent Key may function.
PUSH-BUTTON IGNITION SWITCH
POSITIONS
LOCK (Normal parking position)
The ignition switch can only be locked in
this position.
The ignition switch will be unlocked when it
is placed in the ACC position while carrying
the Intelligent Key.
The ignition switch will lock when any door
is opened or closed with the ignition
switched off. ACC (Accessories)
This position activates electrical accesso-
ries, such as the radio, when the engine is
not running.
ACC has a battery saver feature that will
place the ignition switch in the OFF position
af ter a period of time under the following
conditions:
• All doors are closed.
• The shif t lever is in P (Park).
• The hazard lamps are off.
• The turn signals are off.
The battery saver feature will be canceled if
any of the following occur:
• Any door is opened.
• The shif t lever is moved out of P (Park).
• The ignition switch changes position.
• The hazard lamps are turned on.
ON (Normal operating position)
This position turns on the ignition system
and electrical accessories.
ON has a battery saver feature that will
place the ignition switch in the OFF posi-
tion, if the vehicle is not running, af ter some
time under the following conditions:
• All doors are closed.
LSD2020
5-14Starting and driving
Page 253 of 508
• The shif t lever is in P (Park).
• The hazard lamps are off.
• The turn signals are off.
The battery saver feature will be canceled if
any of the following occur:
• Any door is opened.
• The shif t lever is moved out of the P (Park)position.
• The ignition switch changes position.
• The hazard lamps are turned on.
• The turn signals are turned on.
CAUTION
Do not leave the vehicle with the igni-
tion switch in the ACC or ON position
when the engine is not running for an
extended period. This can discharge
the battery.
OFF
The ignition switch is in the OFF position
when the engine is turned off using the
ignition switch. The ignition switch heart
beat function (pulsed illumination) may ac-
tivate for a period of time when any door is
unlocked and when the door opened/
closed status changes in the OFF and ACC
positions.
EMERGENCY ENGINE SHUT OFF
To shut off the engine in an emergency
situation while driving, perform the follow-
ing procedure:
• Rapidly push the ignition switch three consecutive times in less than 1.5 sec-
onds, or
• Push and hold the ignition switch for more than 2 seconds.
NISSAN INTELLIGENT KEY®
BATTERY DISCHARGE
If the battery of the NISSAN Intelligent Key®
is discharged, or environmental conditions
interfere with the Intelligent Key operation,
start the engine according to the following
procedure:
1. Place the shif t lever in the P (Park) position.
2. Firmly apply the foot brake.
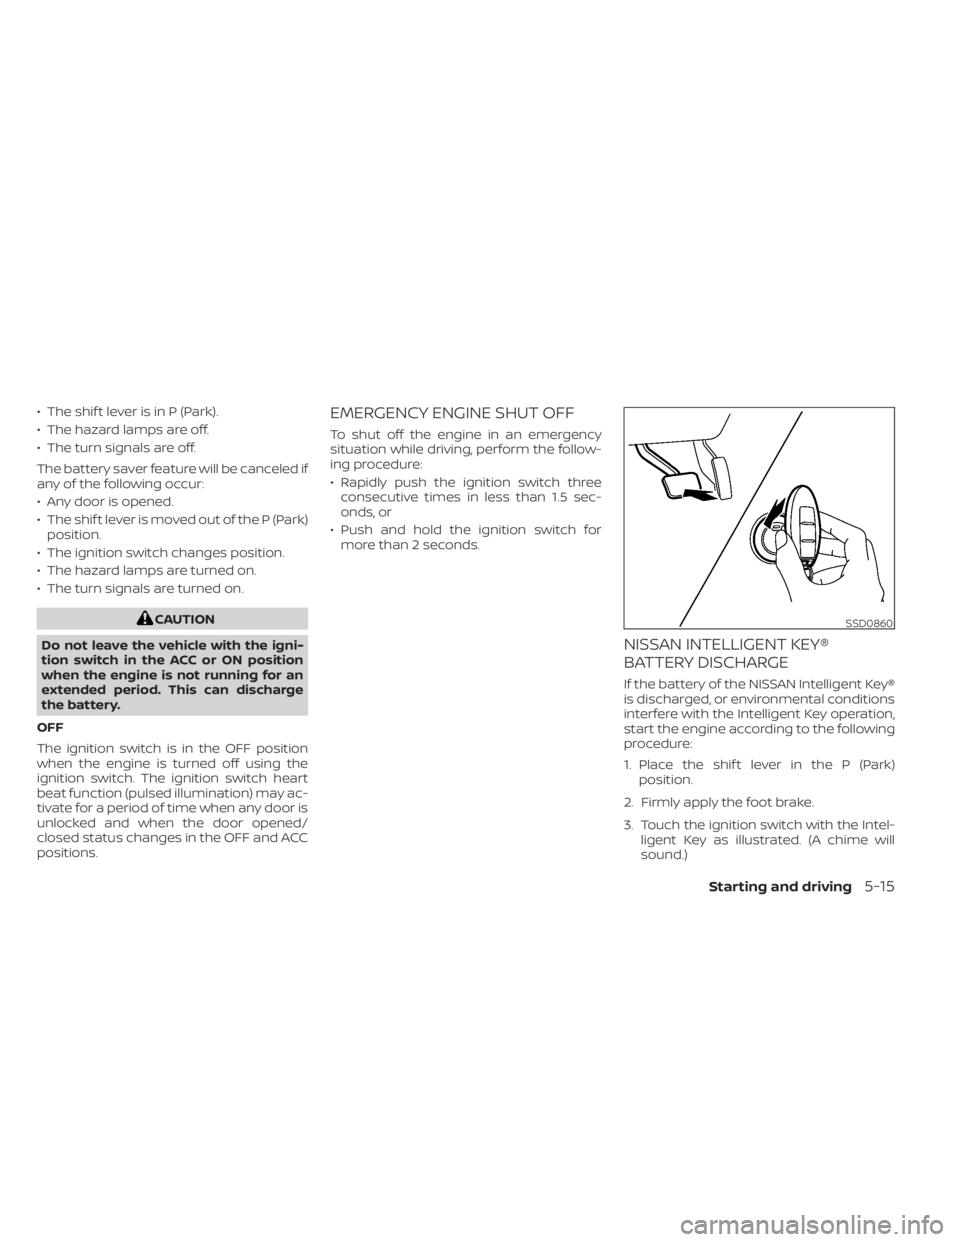
3. Touch the ignition switch with the Intel- ligent Key as illustrated. (A chime will
sound.)
SSD0860
Starting and driving5-15
Page 273 of 508
3. Select “Lane Departure Prevention” andpress the OK button to turn the system
on or off.
I-LI SYSTEM LIMITATIONS
WARNING
Listed below are the system limitations
for the I-LI system. Failure to follow the
warnings and instructions for proper
use of the I-LI system could result in
serious injury or death.
• The I-LI system may activate if you
change lanes without first activating
your turn signal or, for example, if a
construction zone directs traffic to
cross an existing lane marker. If this
occurs you may need to apply correc-
tive steering to complete your lane
change.
• Because the I-LI may not activate un-
der the road, weather, and lane
marker conditions described in this
section, it may not activate every
time your vehicle begins to leave its
lane and you will need to apply cor-
rective steering. •
When the I-LI system is operating,
avoid excessive or sudden steering
maneuvers. Otherwise, you could
lose control of the vehicle.
• The I-LI system will not operate at
speeds below approximately 37 mph
(60 km/h) or if it cannot detect lane
markers.
• Do not use the I-LI system under the
following conditions as it may not
function properly:
– During bad weather (rain, fog,
snow, etc.).
– When driving on slippery roads,
such as on ice or snow.
– When driving on winding or un-
even roads.
– When there is a lane closure due to
road repairs.
– When driving in a makeshif t or
temporary lane.
– When driving on roads where the
lane width is too narrow.
– When driving without normal tire
conditions (for example, tire wear,
low tire pressure, installation of
spare tire, tire chains, non-
standard wheels). –
When the vehicle is equipped with
nonoriginal brake parts or sus-
pension parts.
– When you are towing a trailer or
other vehicle.
– On roads where there are multiple
parallel lane markers; lane mark-
ers that are faded or not painted
clearly; yellow painted lane mark-
ers; non-standard lane markers;
or lane markers covered with wa-
ter, dirt, snow, etc.
– On roads where discontinued lane
markers are still detectable.
– On roads where there are sharp
curves.
– On roads where there are sharply
contrasting objects, such as shad-
ows, snow, water, wheel ruts,
seams or lines remaining af ter
road repairs. (The I-LI system
could detect these items as lane
markers.)
– On roads where the traveling lane
merges or separates.
– When the vehicle’s traveling direc-
tion does not align with the lane
marker.
Starting and driving5-35
Page 306 of 508
How to change the set vehicle
speed
To cancel the preset speed,use one of the
following methods:
• Push the CANCEL switch. The set vehicle speed indicator will go out.
• Tap the brake pedal. The set vehicle speed indicator will go out.
• If the Cruise Control Alerts are enabled in the Driving Aids menu, the “Cruise ON:
Press SET to engage speed control” mes-
sage will reappear in the vehicle informa-
tion display to let you know the cruise
control system is still on if you set the
target speed again.
• Turn the CRUISE ON/OFF switch off. The ICC indicators will go out, and the Cruise
Control Alert messages will not appear.
To reset at a faster cruising speed, use
one of the following methods:
• Depress the accelerator pedal. When the vehicle attains the desired speed, push
and release the SET/– switch.
• Push and hold the RES/+ switch. The set vehicle speed will increase by approxi-
mately 5 mph (5 km/h for Canada). • Push, then quickly release the RES/+
switch. Each time you do this, the set
speed will increase by approximately 1
mph (1 km/h for Canada).
To reset at a slower cruising speed, use
one of the following methods:
• Lightly tap the brake pedal. When the ve- hicle attains the desired speed, push the
SET/– switch and release it.
• Push and hold the SET/– switch. The set vehicle speed will decrease by approxi-
mately 5 mph (5 km/h for Canada).
• Push, then quickly release the SET/– switch. Each time you do this, the set
speed will decrease by approximately 1
mph (1 km/h for Canada).
To resume the preset speed, push and
release the RES/+ switch. The vehicle will
resume the last set cruising speed when
the vehicle speed is over 20 mph (32 km/h).
How to change the set distance
to the vehicle ahead
The distance to the vehicle ahead can be
selected at any time depending on the traf-
fic conditions.
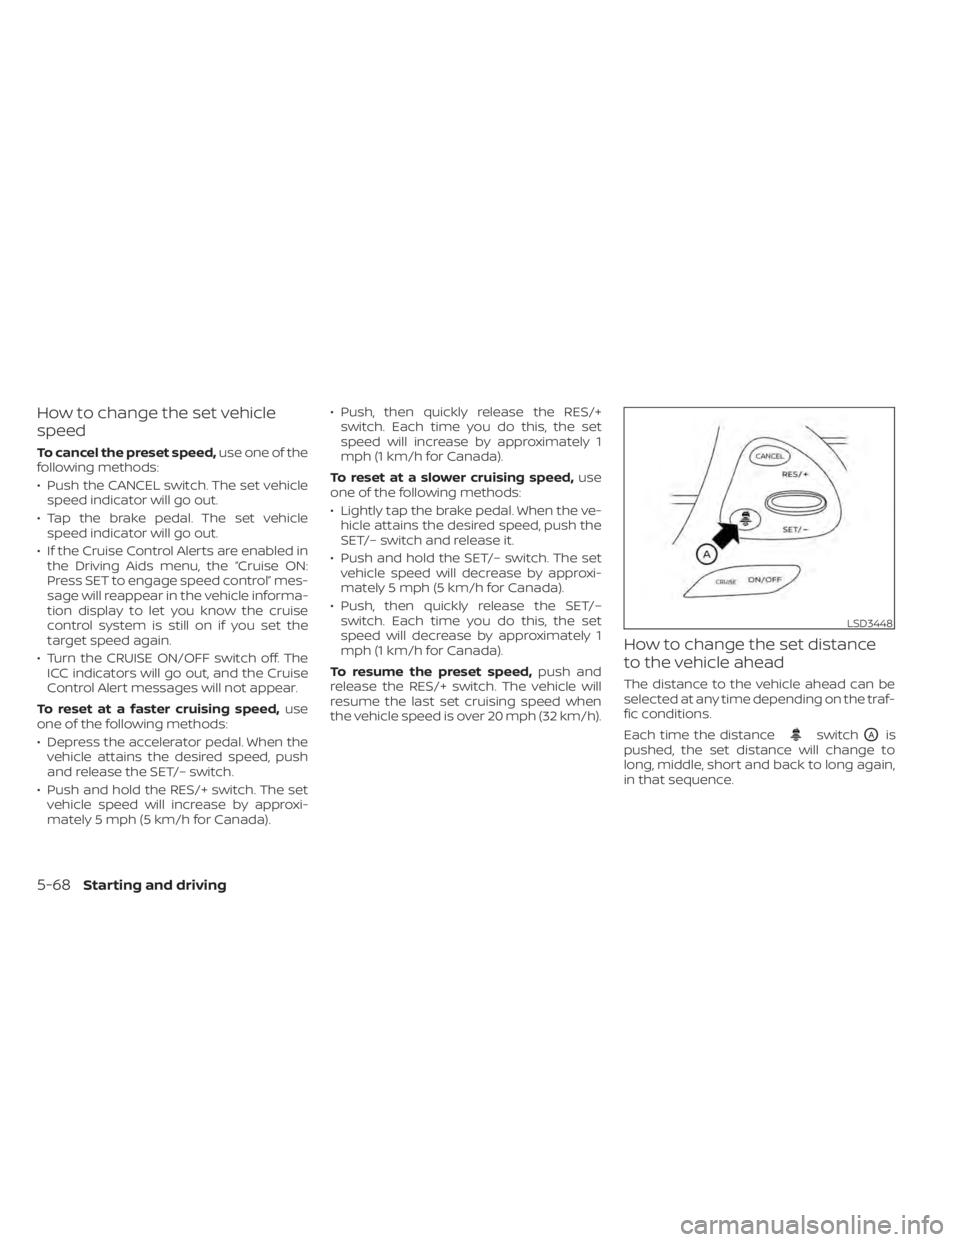
Each time the distance
switchOAis
pushed, the set distance will change to
long, middle, short and back to long again,
in that sequence.
LSD3448
5-68Starting and driving
Page 318 of 508
ICC system display turns off. The cruise in-
dicator appears. You can now set your de-
sired cruising speed. Pushing the CRUISE
ON/OFF switch again will turn the system
completely off. When the ignition switch is
placed in the OFF position, the system is
also automatically turned off.
To use the ICC system again, quickly push
and release the CRUISE ON/OFF switch
(vehicle-to vehicle distance control mode)
or push and hold it (conventional cruise
control mode) again to turn it on.
CAUTION
To avoid accidentally engaging cruise
control, make sure to turn the ICC
switch off when not using the ICC
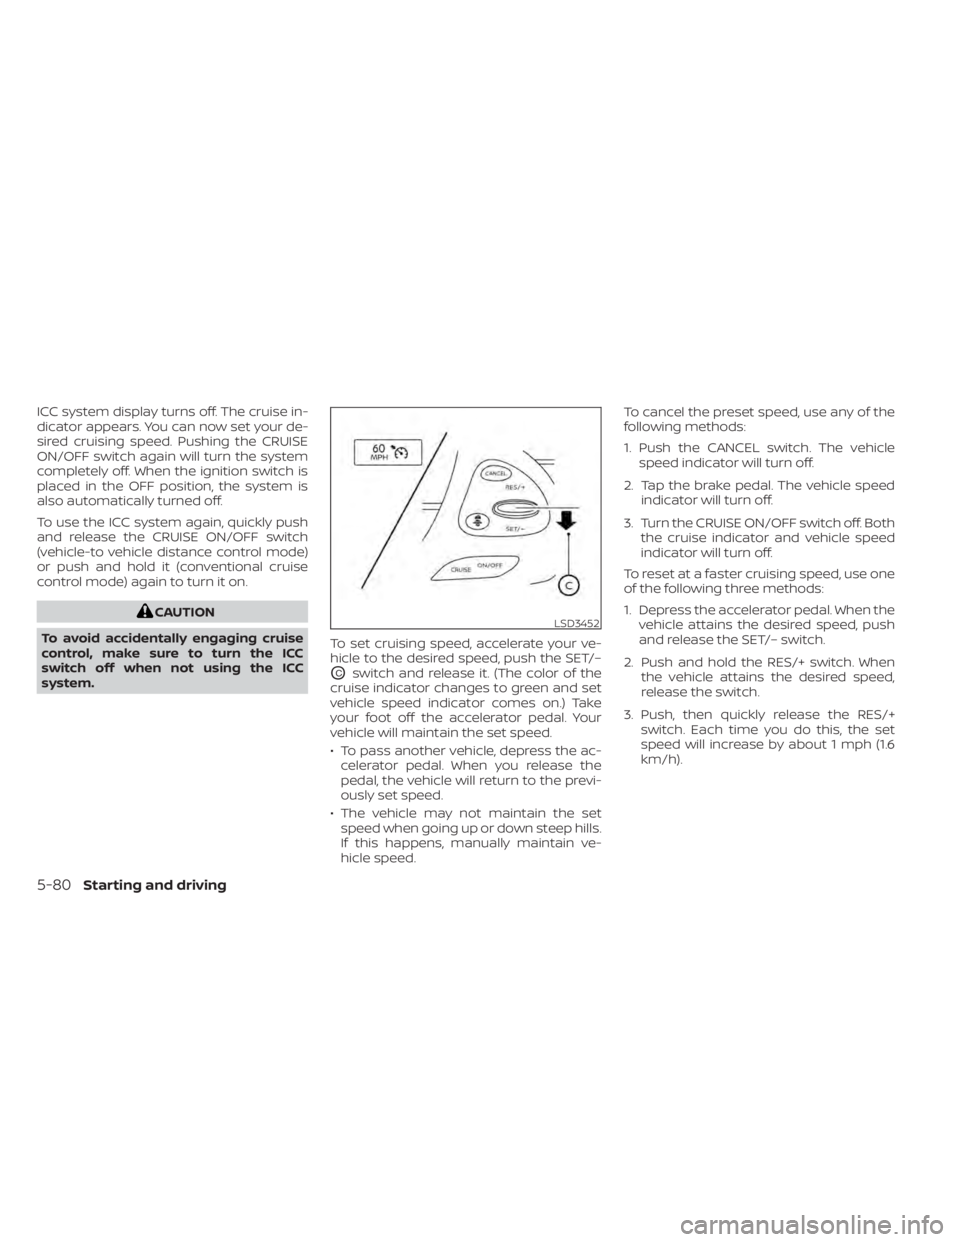
system. To set cruising speed, accelerate your ve-
hicle to the desired speed, push the SET/–
OCswitch and release it. (The color of the
cruise indicator changes to green and set
vehicle speed indicator comes on.) Take
your foot off the accelerator pedal. Your
vehicle will maintain the set speed.
• To pass another vehicle, depress the ac- celerator pedal. When you release the
pedal, the vehicle will return to the previ-
ously set speed.
• The vehicle may not maintain the set speed when going up or down steep hills.
If this happens, manually maintain ve-
hicle speed. To cancel the preset speed, use any of the
following methods:
1. Push the CANCEL switch. The vehicle
speed indicator will turn off.
2. Tap the brake pedal. The vehicle speed indicator will turn off.
3. Turn the CRUISE ON/OFF switch off. Both the cruise indicator and vehicle speed
indicator will turn off.
To reset at a faster cruising speed, use one
of the following three methods:
1. Depress the accelerator pedal. When the vehicle attains the desired speed, push
and release the SET/– switch.
2. Push and hold the RES/+ switch. When the vehicle attains the desired speed,
release the switch.
3. Push, then quickly release the RES/+ switch. Each time you do this, the set
speed will increase by about 1 mph (1.6
km/h).
LSD3452
5-80Starting and driving