Page 32 of 346

3. Position the lap belt portionlow and
snug on the hips
�Bas shown.
4. Pull the shoulder belt portion toward the retractor to take up extra slack
�C.
Be sure the shoulder belt is routed over
your shoulder and across your chest.
The front passenger seat and the rear
seating positions’ three-point seat belts
have two modes of operation: ∙ Emergency Locking Retractor (ELR)
∙ Automatic Locking Retractor (ALR) The ELR mode allows the seat belt to ex-
tend and retract to allow the driver and
passengers some freedom of movement
in the seat. The ELR locks the seat belt
when the vehicle slows down rapidly or
during certain impacts.
The ALR mode (child restraint mode) locks
the seat belt for child restraint installation.
When the ALR mode is activated, the seat
belt cannot be extended again until the
seat belt tongue is detached from the
buckle and fully retracted. The seat belt re-
turns to the ELR mode af ter the seat belt
fully retracts. For additional information, re-
fer to “Child restraints” in this section.
The ALR mode should be used only for
child restraint installation. During nor-
mal seat belt use by an occupant, the ALR
mode should not be activated. If it is ac-
tivated, it may cause uncomfortable seat
belt tension. It can also change the op-
eration of the front passenger air bag.
For additional information, refer to
“Front passenger air bag and status
light” in this section.
Page 34 of 346
WARNING
∙ Always fasten the connector tongueand the seat belt in the order shown.
∙ Always make sure both the connector tongue and the seat belt tongue are
secured when using the seat belt or
installing a child restraint. Do not use
the seat belt or child restraint with
only the seat belt tongue attached.
This could result in serious personal
injury in case of an accident or a sud-
den stop. Stowing the center seat belt
When folding down the rear seat, the rear
center seat belt can be retracted into a
stowed position. 1. Hold the connector tongue
�1so that
the seat belt does not retract suddenly
when the tongue is released from the
connector buckle. Release the connec-
tor tongue by inserting a suitable tool
such as a key
�2into the connector
buckle.
2. Retract the seat belt and store the seat belt tongue on the stowed position
�3.
Page 35 of 346
Attaching the center seat belt
Always be sure the center seat belt con-
nector tongue and connector buckle are
attached. Disconnect only when folding
down the rear seat.To connect the buckle:
1. Pull the seat belt tongue and connector tongue from the stowed position
�1.
2. Pull the seat belt and secure the con- nector buckle until it clicks
�2.
The center seat belt connector tongue can
be attached only into the rear center seat
belt connector buckle.
To fasten the seat belt, refer to “Fastening
the seat belts” in this section.
Page 76 of 346

∙ Tampering with the front air bag sys-tem may result in serious personal in-
jury. Tampering includes changes to
the steering wheel and the instru-
ment panel assembly by placing ma-
terial over the steering wheel pad and
above the instrument panel or by in-
stalling additional trim material
around the air bag system.
∙ Removing or modif ying the front pas- senger seat may affect the function of
the air bag system and result in seri-
ous personal injury.
∙ Modif ying or tampering with the front passenger seat may result in serious
personal injury. For example, do not
change the front seats by placing ma-
terial on the seat cushion or by install-
ing additional trim material, such as
seat covers, on the seat that are not
specifically designed to assure proper
air bag operation. Additionally, do not
stow any objects under the front pas-
senger seat or the seat cushion and
seatback. Such objects may interfere
with the proper operation of the occu-
pant classification sensor (weight
sensor). ∙ No unauthorized changes should be
made to any components or wiring of
the seat belt system. This may affect
the front air bag system. Tampering
with the seat belt system may result
in serious personal injury.
∙ It is recommended that you visit a NISSAN dealer for work on and around
the front air bag. It is also recom-
mended that you visit a NISSAN dealer
for installation of electrical equip-
ment. The Supplemental Restraint
System (SRS) wiring harnesses*
should not be modified or discon-
nected. Unauthorized electrical test
equipment and probing devices
should not be used on the air bag
system.
∙ A cracked windshield should be re- placed immediately by a qualified re-
pair facility. A cracked windshield
could affect the function of the
supplemental air bag system.
*The SRS wiring harness connectors are
yellow and orange for easy identifica-
tion. When selling your vehicle, we request that
you inform the buyer about the front air
bag system and guide the buyer to the
appropriate sections in this Owner’s
Manual.
Safety—Seats, seat belts and supplemental restraint system1-59
Page 94 of 346
– Avoid hard acceleration or decelera-tion.
– Avoid steep uphill grades.
– If possible, reduce the amount of cargo being hauled or towed.
The MIL may stop blinking and come on
steady. Have the vehicle inspected. It is rec-
ommended that you visit a NISSAN dealer
for this service. You do not need to have
your vehicle towed to the dealer.
Page 98 of 346
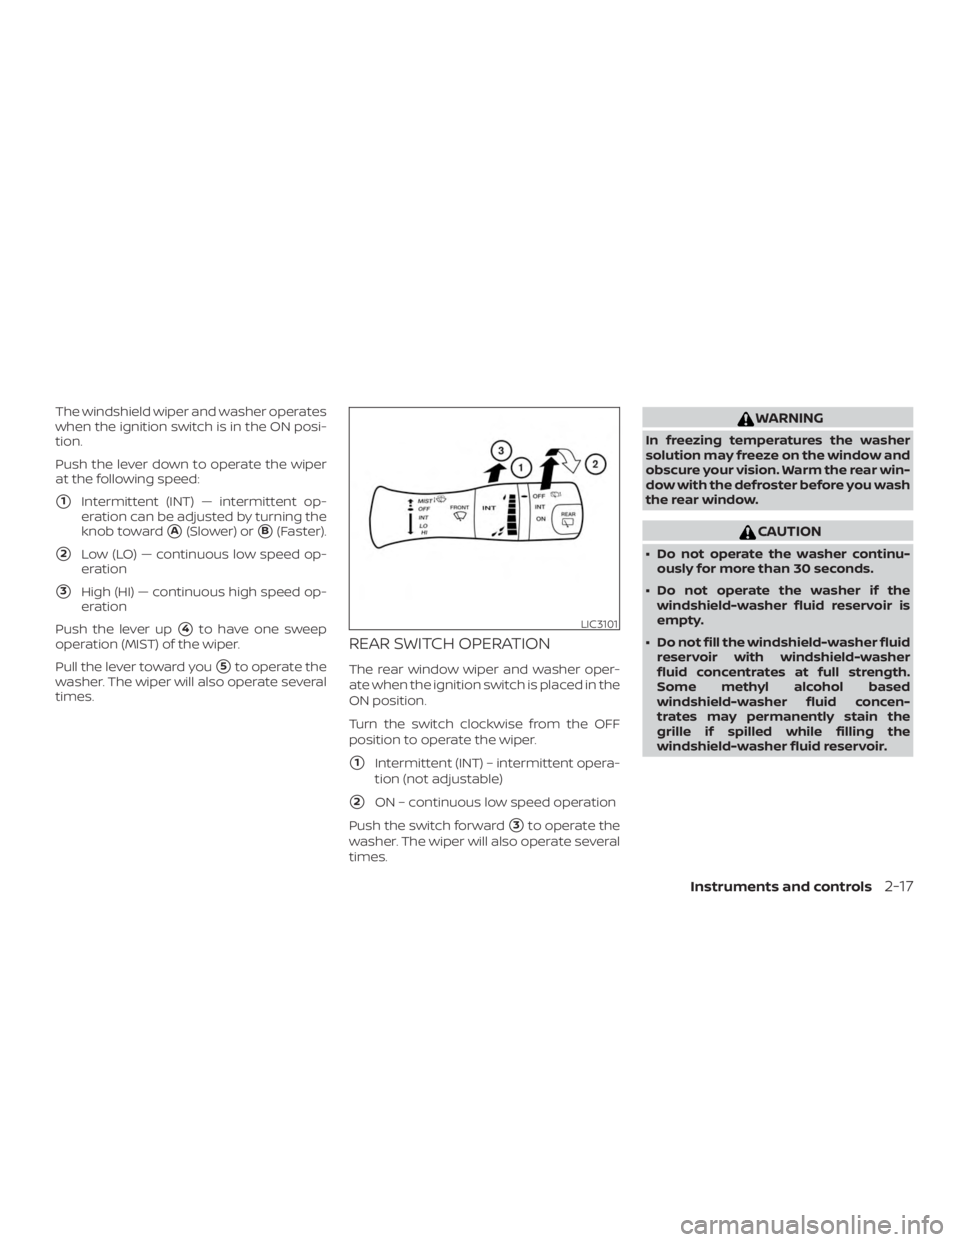
The windshield wiper and washer operates
when the ignition switch is in the ON posi-
tion.
Push the lever down to operate the wiper
at the following speed:
�1Intermittent (INT) — intermittent op-
eration can be adjusted by turning the
knob toward
�A(Slower) or�B(Faster).
�2Low (LO) — continuous low speed op-
eration
�3High (HI) — continuous high speed op-
eration
Push the lever up
�4to have one sweep
operation (MIST) of the wiper.
Pull the lever toward you
�5to operate the
washer. The wiper will also operate several
times.
REAR SWITCH OPERATION
The rear window wiper and washer oper-
ate when the ignition switch is placed in the
ON position.
Turn the switch clockwise from the OFF
position to operate the wiper.
�1Intermittent (INT) – intermittent opera-
tion (not adjustable)
�2ON – continuous low speed operation
Push the switch forward
�3to operate the
washer. The wiper will also operate several
times.
Page 115 of 346

∙ To help avoid risk of injury or deaththrough unintended operation of the
vehicle and/or its systems, including
entrapment in windows or inadver-
tent door lock activation, do not leave
children, people who require the as-
sistance of others or pets unattended
in your vehicle. Additionally, the tem-
perature inside a closed vehicle on a
warm day can quickly become high
enough to cause a significant risk of
injury or death to people and pets.
LOCKING WITH KEY
To lock or unlock the vehicle, turn the key as
shown.
Manual
To lock a door, turn the key toward the front
of the vehicle
�1. To unlock, turn the key
toward the rear
�2.
Selective open (if so equipped)
The power door lock system allows you to
lock or unlock all doors at the same time.
Turning the key toward the front
�1of the
vehicle locks all doors.
Turning the key toward the rear
�2of the
vehicle unlocks that door. From that posi-
tion, returning the key to neutral
�3(where
the key can only be removed and inserted)
and turning it toward the rear again within
5 seconds unlocks all doors
�4.
Page 221 of 346
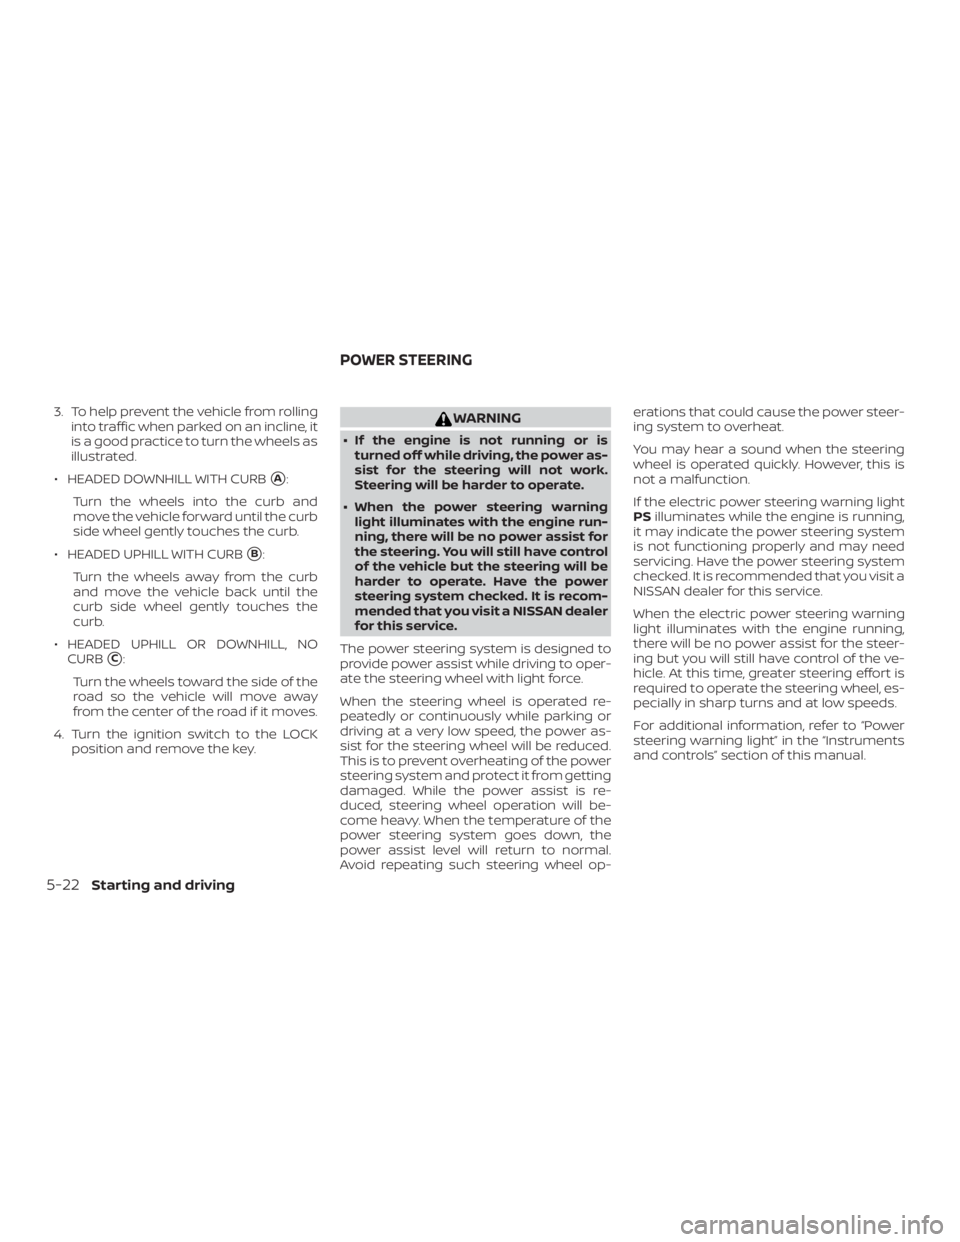
3. To help prevent the vehicle from rollinginto traffic when parked on an incline, it
is a good practice to turn the wheels as
illustrated.
∙ HEADED DOWNHILL WITH CURB
�A:
Turn the wheels into the curb and
move the vehicle forward until the curb
side wheel gently touches the curb.
∙ HEADED UPHILL WITH CURB
�B:
Turn the wheels away from the curb
and move the vehicle back until the
curb side wheel gently touches the
curb.
∙ HEADED UPHILL OR DOWNHILL, NO CURB
�C:
Turn the wheels toward the side of the
road so the vehicle will move away
from the center of the road if it moves.
4. Turn the ignition switch to the LOCK position and remove the key.