Page 177 of 346
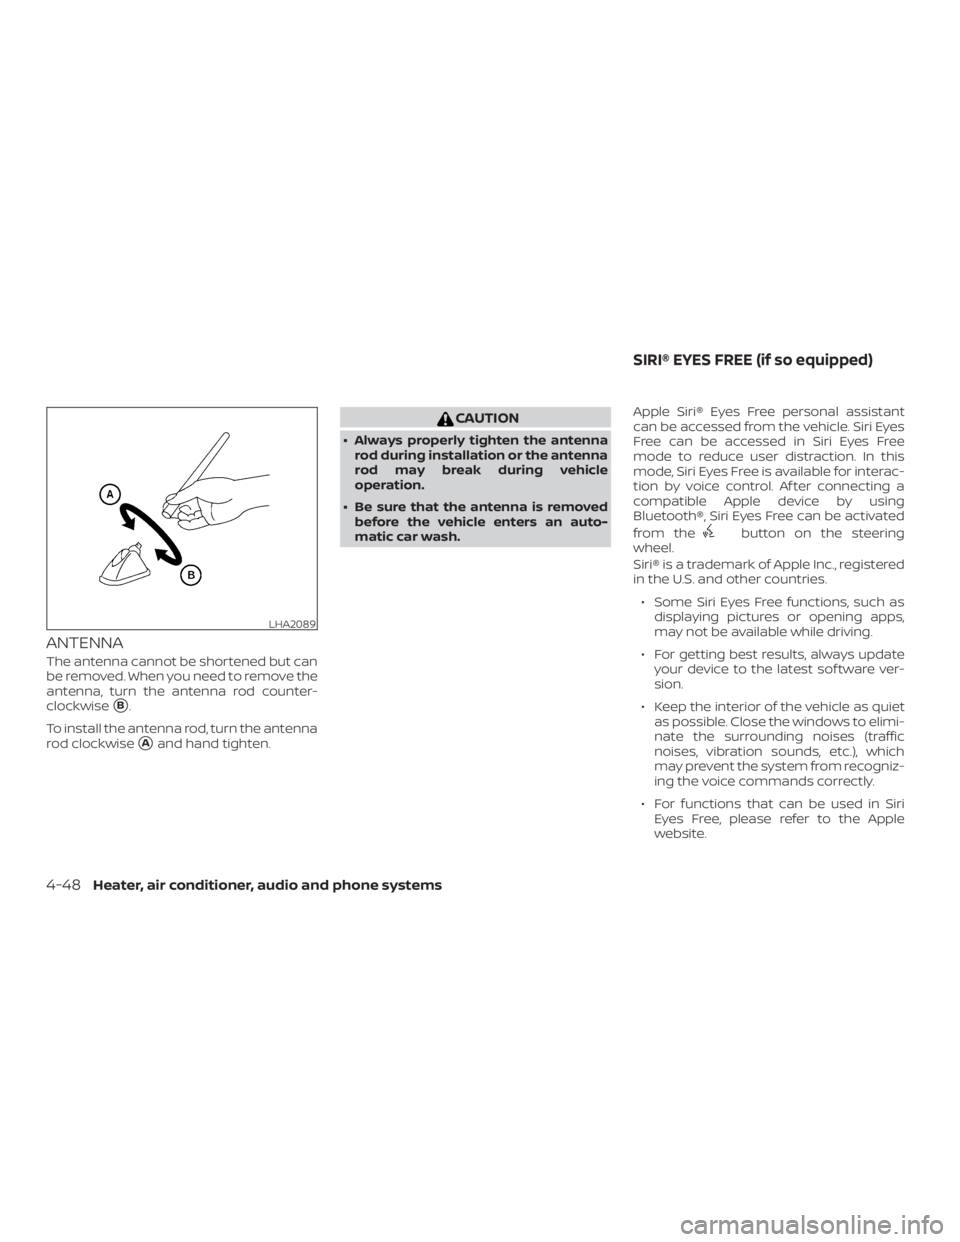
ANTENNA
The antenna cannot be shortened but can
be removed. When you need to remove the
antenna, turn the antenna rod counter-
clockwise
�B.
To install the antenna rod, turn the antenna
rod clockwise
�Aand hand tighten.
Page 207 of 346
, and windshield-washer fluid
as frequently as possible, o")
∙ Make sure the area around the vehicle isclear.
∙ Check fluid levels such as engine oil, coolant, brake and clutch fluid (if so
equipped), and windshield-washer fluid
as frequently as possible, or at least
whenever you refuel.
∙ Check that all windows and lights are clean.
∙ Visually inspect tires for their appear- ance and condition. Also check tires for
proper inflation.
∙ Lock all doors.
∙ Position seat and adjust head re- straints.
∙ Adjust inside and outside mirrors.
∙ Fasten seat belts and ask all passen- gers to do likewise.
∙ Check the operation of warning lights when the key is turned to the ON posi-
tion. For additional information, refer to
“Warning lights, indicator lights and au-
dible reminders” in the “Instruments
and controls” section of this manual. 1. Apply the parking brake.
2.
Automatic transmission:
Move the shif t lever to P (Park) or N
(Neutral). P (Park) is recommended.
The shif t lever cannot be moved out
of the P (Park) position and into any
of the other gear positions if the ig-
nition switch is placed in the OFF po-
sition or if the key is removed from
the ignition switch.
The starter is designed not to oper-
ate if the shif t lever is in any of the
driving positions.
Manual transmission:
Move the shif t lever to N (Neutral). De-
press the clutch pedal to the floor
while cranking the engine.
3. Crank the engine with your foot off
the accelerator pedal by placing the
ignition switch in the START position.
Release the key when the engine
starts. If the engine starts, but fails to
run, repeat the above procedure.
∙ If the engine is very hard to start in extremely cold weather or when re-
starting, depress the accelerator
pedal a little (approximately 1/3 to the floor) and hold it and then crank the
engine. Release the key and the ac-
celerator pedal when the engine
starts.
∙ If the engine is very hard to start be- cause it is flooded, depress the accel-
erator pedal all the way to the floor
and hold it. Crank the engine for
5-6 seconds. Af ter cranking the en-
gine, release the accelerator pedal.
Crank the engine with your foot off
the accelerator pedal by placing the
ignition in the START position. Re-
lease the key when the engine starts.
If the engine starts, but fails to run,
repeat the above procedure.
Page 209 of 346
 position
to any driving position.
∙ To avoid possible damage to your ve- hicle, when stopping the vehicle on an
uphill grade,")
∙ Keep the engine at idling speed whileshif ting from the N (Neutral) position
to any driving position.
∙ To avoid possible damage to your ve- hicle, when stopping the vehicle on an
uphill grade, do not hold the vehicle by
depressing the accelerator pedal. The
foot brake should be used for this
purpose.
Starting the vehicle
1. Af ter starting the engine, fully depress the foot brake pedal before moving the
shif t lever out of the P (Park) position.
2. Keep the foot brake pedal depressed and move the shif t lever to a drive po-
sition.
3. Release the parking brake, the foot brake pedal, and then gradually start
the vehicle in motion.
The automatic transmission is designed
so the foot brake pedal MUST be de-
pressed before shif ting from P (Park) to
any drive position while the ignition
switch is in the ON position. The shif t lever cannot be moved out of P
(Park) and into any of the other gear po-
sitions if the ignition switch is turned to
the LOCK, OFF or ACC position or if the
keyisremoved.
Page 221 of 346
3. To help prevent the vehicle from rollinginto traffic when parked on an incline, it
is a good practice to turn the wheels as
illustrated.
∙ HEADED DOWNHILL WITH CURB
�A:
Turn the wheels into the curb and
move the vehicle forward until the curb
side wheel gently touches the curb.
∙ HEADED UPHILL WITH CURB
�B:
Turn the wheels away from the curb
and move the vehicle back until the
curb side wheel gently touches the
curb.
∙ HEADED UPHILL OR DOWNHILL, NO CURB
�C:
Turn the wheels toward the side of the
road so the vehicle will move away
from the center of the road if it moves.
4. Turn the ignition switch to the LOCK position and remove the key.
Page 223 of 346

– When replacing tires, install thespecified size of tires on all four
wheels.
– When installing a spare tire, make sure that it is the proper size and
type as specified on the Tire and
Loading Information label. For ad-
ditional information, refer to “Tire
and Loading Information label” in
the “Technical and consumer infor-
mation” section of this manual.
– For additional information, refer to “Wheels and tires” in the “Do-it-
yourself ” section of this manual.
The ABS controls the brakes so the wheels
do not lock during hard braking or when
braking on slippery surfaces. The system
detects the rotation speed at each wheel
and varies the brake fluid pressure to pre-
vent each wheel from locking and sliding.
By preventing each wheel from locking, the
system helps the driver maintain steering
control and helps to minimize swerving
and spinning on slippery surfaces.
Using the system
Depress the brake pedal and hold it down.
Depress the brake pedal with firm steady
pressure, but do not pump the brakes. The Anti-lock Braking System will operate to
prevent the wheels from locking up. Steer
the vehicle to avoid obstacles.
Page 228 of 346
ENGINE BLOCK HEATER (if so
equipped)
Engine block heaters are used to assist
with cold temperature starting.
The engine block heater should be used
when the outside temperature is -7°C (20°F)
or lower.
Page 232 of 346
WARNING
∙ Make sure the parking brake is se-curely applied and the automatic
transmission (if so equipped) is
shif ted to P (Park) or the manual
transmission (if so equipped) is
shif ted to R (Reverse).
∙ Never change tires when the vehicle is on a slope, ice or slippery areas. This is
hazardous.
∙ Never change tires if oncoming traffic is close to your vehicle. Wait for pro-
fessional road assistance.
A. Blocks
B. Flat tire
Blocking wheels
Place suitable blocks at both the front and
back of the wheel diagonally opposite the
flat tire to prevent the vehicle from moving
when it is jacked up.
Page 235 of 346

∙ Use the correct jack-up points. Neveruse any other part of the vehicle for
jack support.
∙ Never jack up the vehicle more than necessary.
∙ Never use blocks on or under the jack.
∙ Do not start or run the engine while vehicle is on the jack. It may cause the
vehicle to move. This is especially true
for vehicles with limited slip
differentials.
∙ Do not allow passengers to stay in the vehicle while it is on the jack.
∙ Never run the engine with a wheel(s) off the ground. It may cause the ve-
hicle to move. Always refer to the proper illustrations for
the correct placement and jack-up points
for your specific vehicle model and jack
type.
Carefully read the caution label attached
to the jack body and the following in-
structions.
1. Loosen each wheel nut 1 or 2 turns by turning counterclockwise with the
wheel nut wrench. Do not remove the
wheel nuts until the tire is off the
ground. 2. Place the jack directly under the
jack-up point as illustrated so the top
of the jack contacts the vehicle at the
jack-up point. Align the jack head be-
tween the 2 notches in the front or the
rear. Also fit the groove of the jack head
between the notches.
The jack should be used on firm and
level ground.
3. To lif t the vehicle, securely hold the jack lever and rod with both hands. Carefully
raise the vehicle until the tire clears the
ground. Remove the wheel nuts, and
then remove the tire.

Engine block heaters are used to assist
with cold temperature starting.
The engine block heater should be used
when the outside temperature is -7°C (20°F)
or low")
 is
shif ted to P (Park) or the manual
transmission (if so equipped) is
shif ted to R (Rever")