2021 NISSAN KICKS phone
[x] Cancel search: phonePage 210 of 500
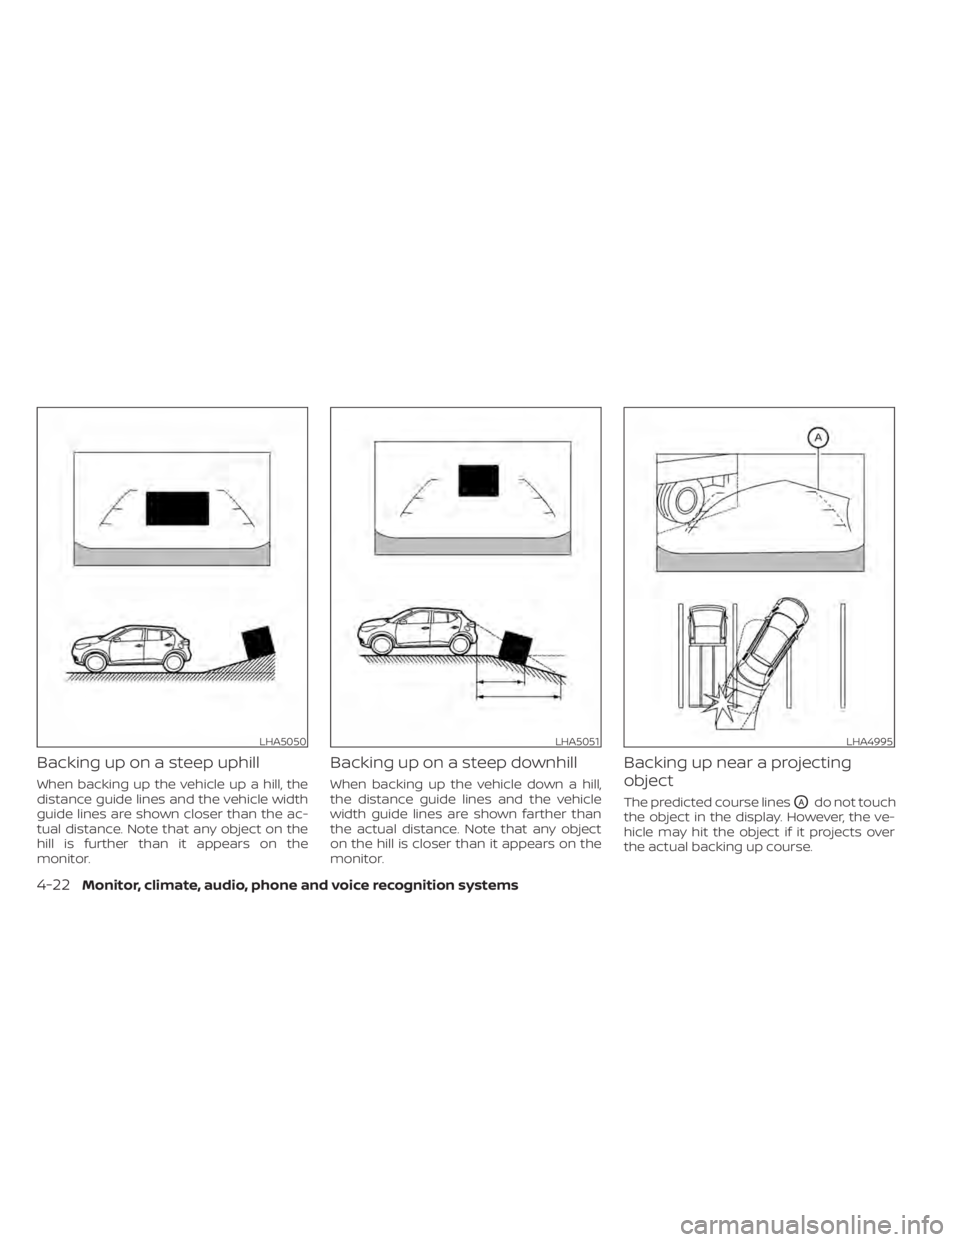
Backing up on a steep uphill
When backing up the vehicle up a hill, the
distance guide lines and the vehicle width
guide lines are shown closer than the ac-
tual distance. Note that any object on the
hill is further than it appears on the
monitor.
Backing up on a steep downhill
When backing up the vehicle down a hill,
the distance guide lines and the vehicle
width guide lines are shown farther than
the actual distance. Note that any object
on the hill is closer than it appears on the
monitor.
Backing up near a projecting
object
The predicted course linesOAdo not touch
the object in the display. However, the ve-
hicle may hit the object if it projects over
the actual backing up course.
LHA5050LHA5051LHA4995
4-22Monitor, climate, audio, phone and voice recognition systems
Page 212 of 500
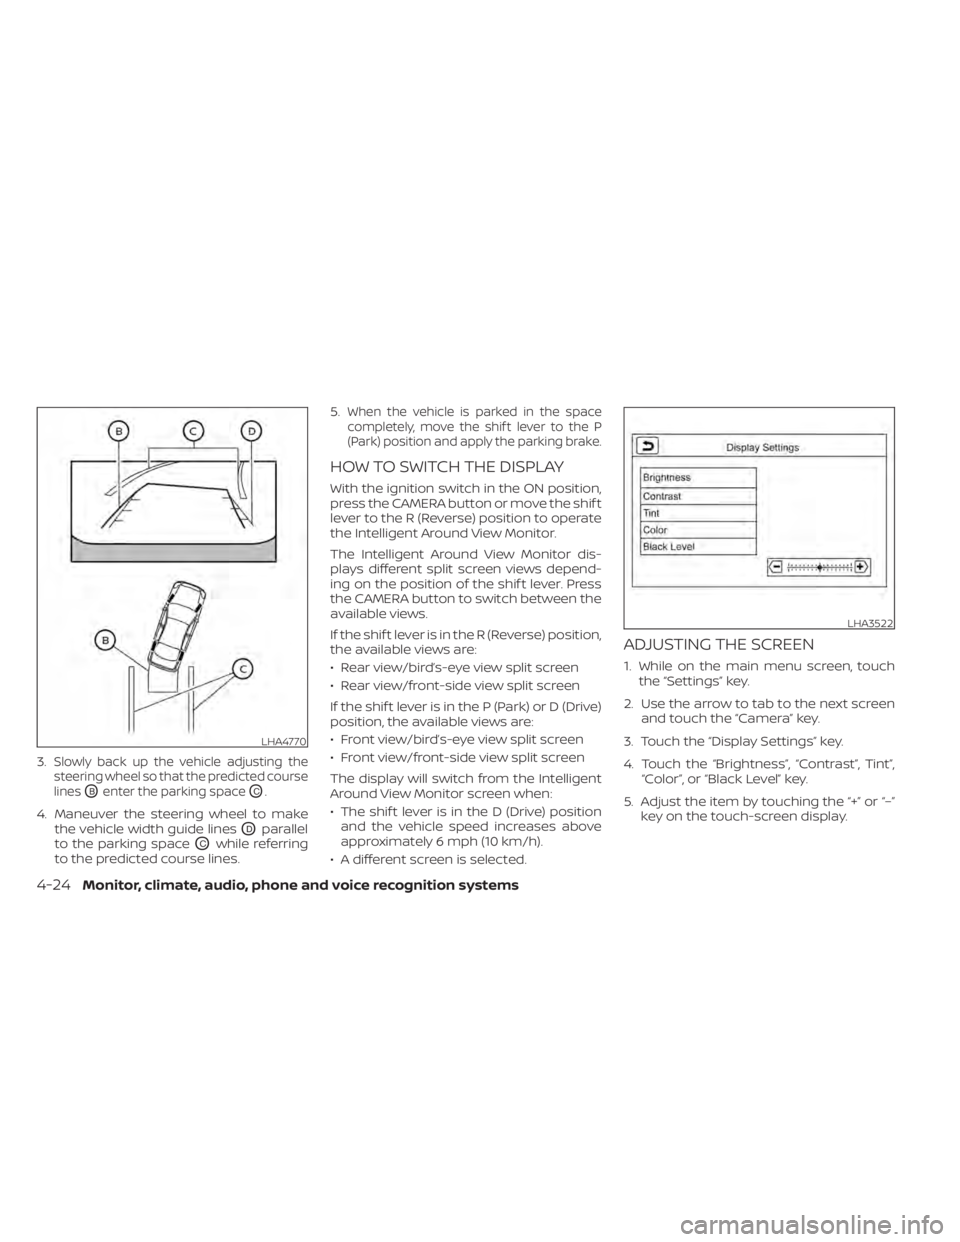
3.Slowly back up the vehicle adjusting the
steering wheel so that the predicted course
lines
OBenter the parking spaceOC.
4. Maneuver the steering wheel to make the vehicle width guide lines
ODparallel
to the parking space
OCwhile referring
to the predicted course lines. 5.
When the vehicle is parked in the space
completely, move the shif t lever to the P
(Park) position and apply the parking brake.
HOW TO SWITCH THE DISPLAY
With the ignition switch in the ON position,
press the CAMERA button or move the shif t
lever to the R (Reverse) position to operate
the Intelligent Around View Monitor.
The Intelligent Around View Monitor dis-
plays different split screen views depend-
ing on the position of the shif t lever. Press
the CAMERA button to switch between the
available views.
If the shif t lever is in the R (Reverse) position,
the available views are:
• Rear view/bird’s-eye view split screen
• Rear view/front-side view split screen
If the shif t lever is in the P (Park) or D (Drive)
position, the available views are:
• Front view/bird’s-eye view split screen
• Front view/front-side view split screen
The display will switch from the Intelligent
Around View Monitor screen when:
• The shif t lever is in the D (Drive) position and the vehicle speed increases above
approximately 6 mph (10 km/h).
• A different screen is selected.
ADJUSTING THE SCREEN
1. While on the main menu screen, touch the “Settings” key.
2. Use the arrow to tab to the next screen and touch the “Camera” key.
3. Touch the “Display Settings” key.
4. Touch the “Brightness”, “Contrast”, Tint”, “Color”, or “Black Level” key.
5. Adjust the item by touching the “+” or “–” key on the touch-screen display.
LHA4770
LHA3522
4-24Monitor, climate, audio, phone and voice recognition systems
Page 214 of 500
•Do not strike the cameras. They are
precision instruments. Doing so
could cause a malfunction or cause
damage resulting in a fire or an elec-
tric shock.
There are some areas where the system
will not show objects and the system does
not warn of moving objects. When in the
front or rear view display, an object below
the bumper or on the ground may not be
viewed
O1. When in the bird’s-eye view, a tall
object near the seam
O2of the camera
viewing areas will not appear in the moni-
tor.
The following are operating limitations and
do not represent a system malfunction:
• There may be a delay when switching between views.
• When the temperature is extremely high or low, the screen may not display objects
clearly.
• When strong light directly shines on the camera, objects may not be displayed
clearly.
• The screen may flicker under fluorescent light.
• The colors of objects on the Intelligent Around View Monitor may differ some-
what from the actual color of objects. • Objects on the Intelligent Around View
Monitor may not be clear and the color of
the object may differ in a dark environ-
ment.
• There may be differences in sharpness between each camera view of the bird's-
eye view.
• Do not use wax on the camera lens. Wipe off any wax with a clean cloth that has
been dampened with a diluted mild
cleaning agent, then wipe with a dry
cloth.
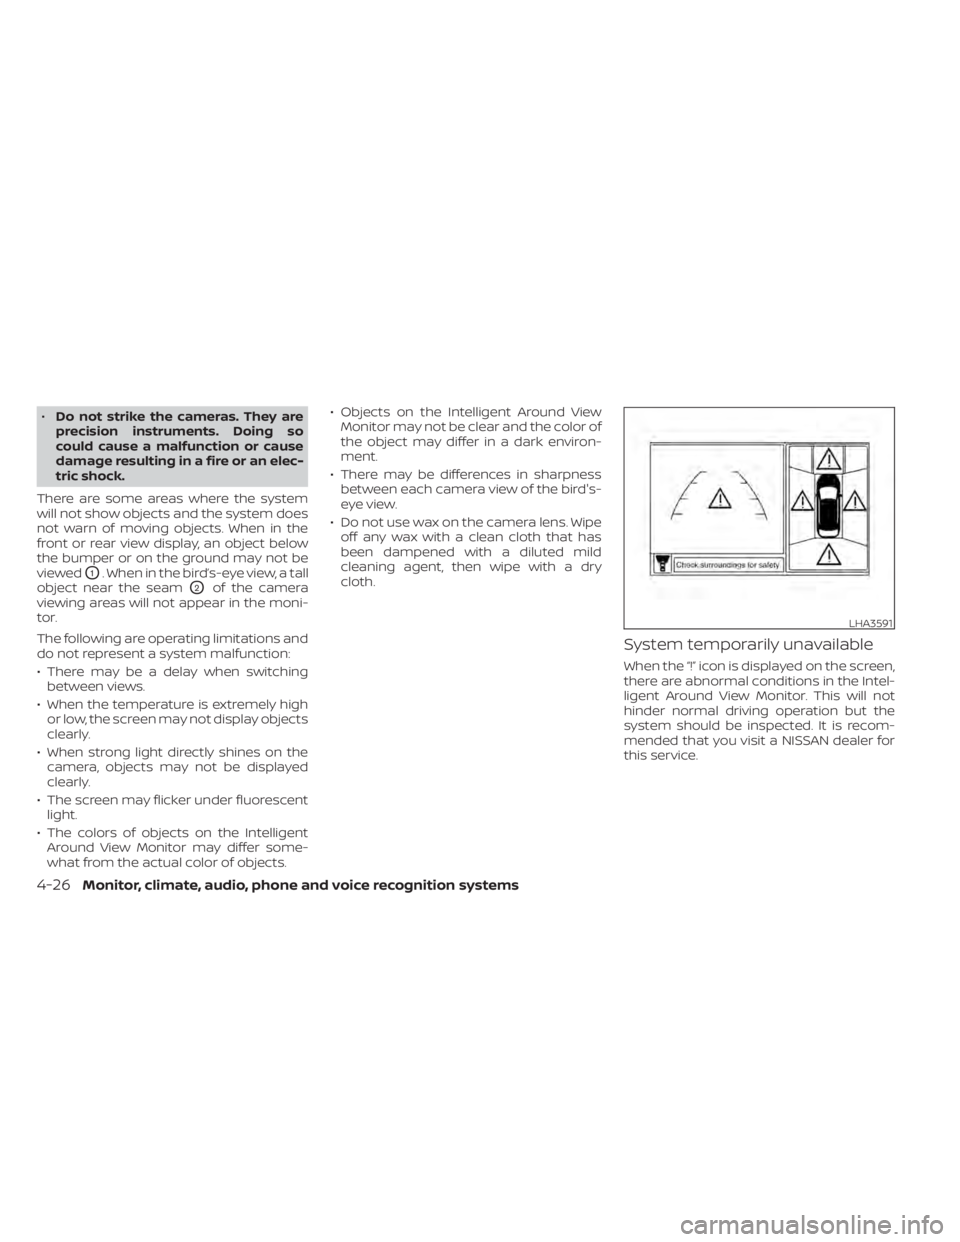
System temporarily unavailable
When the “!” icon is displayed on the screen,
there are abnormal conditions in the Intel-
ligent Around View Monitor. This will not
hinder normal driving operation but the
system should be inspected. It is recom-
mended that you visit a NISSAN dealer for
this service.
LHA3591
4-26Monitor, climate, audio, phone and voice recognition systems
Page 217 of 500
WARNING
• Failure to follow the warnings and in-
structions for proper use of the Mov-
ing Object Detection (MOD) system
could result in serious injury or death.
• The MOD system is not a substitute
for proper vehicle operation and is
not designed to prevent contact with
objects surrounding the vehicle.
When maneuvering, always use the
outside mirrors and rearview mirror
and turn and check the surroundings
to ensure it is safe to maneuver.
• The system is deactivated at speeds
above 5 mph (8 km/h) . It is reacti-
vated at lower speeds.
• The MOD system is not designed to
detect surrounding stationary
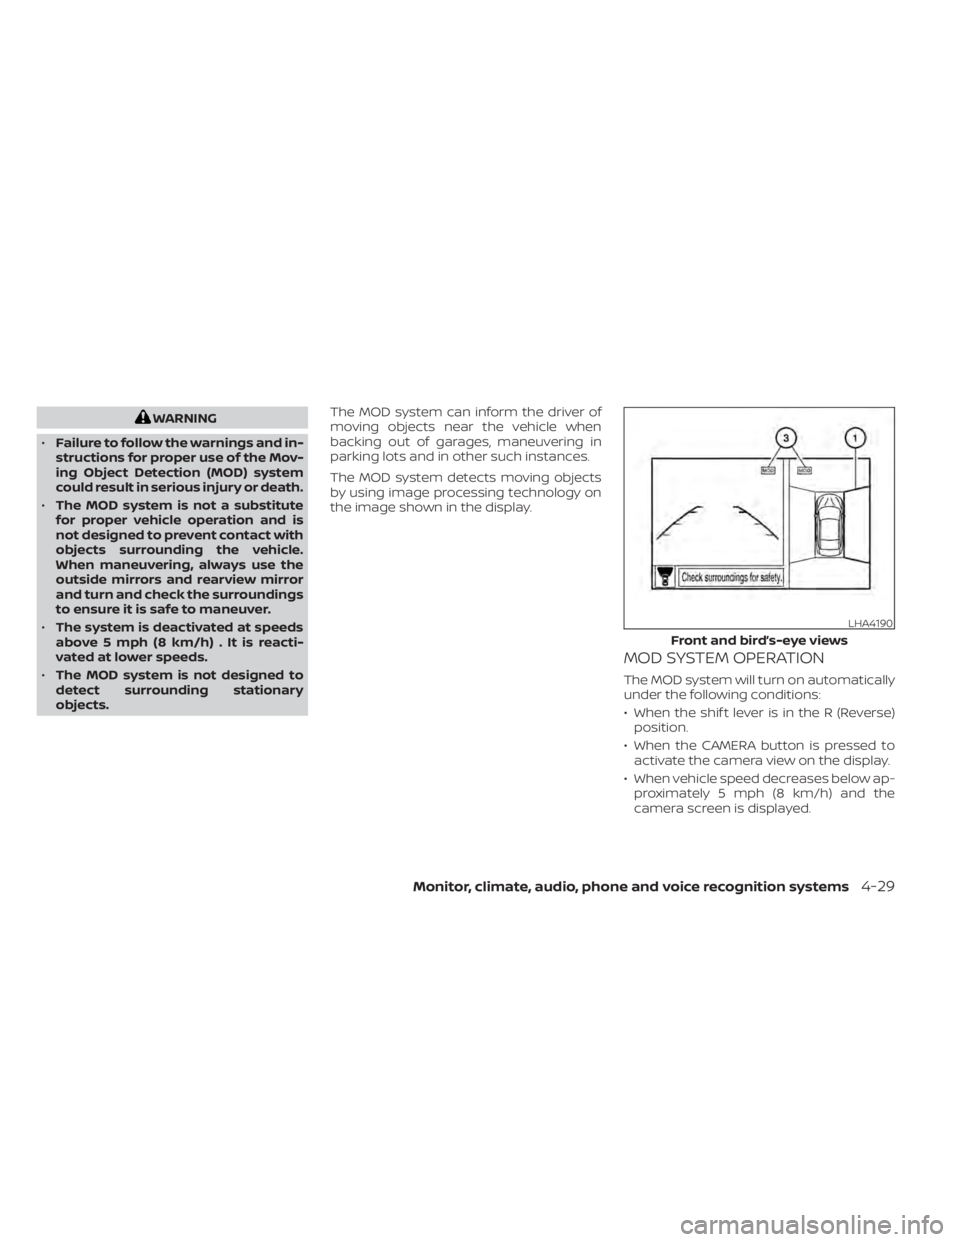
objects. The MOD system can inform the driver of
moving objects near the vehicle when
backing out of garages, maneuvering in
parking lots and in other such instances.
The MOD system detects moving objects
by using image processing technology on
the image shown in the display.
MOD SYSTEM OPERATION
The MOD system will turn on automatically
under the following conditions:
• When the shif t lever is in the R (Reverse)
position.
• When the CAMERA button is pressed to activate the camera view on the display.
• When vehicle speed decreases below ap- proximately 5 mph (8 km/h) and the
camera screen is displayed.
LHA4190
Front and bird’s-eye views
Monitor, climate, audio, phone and voice recognition systems4-29
Page 221 of 500
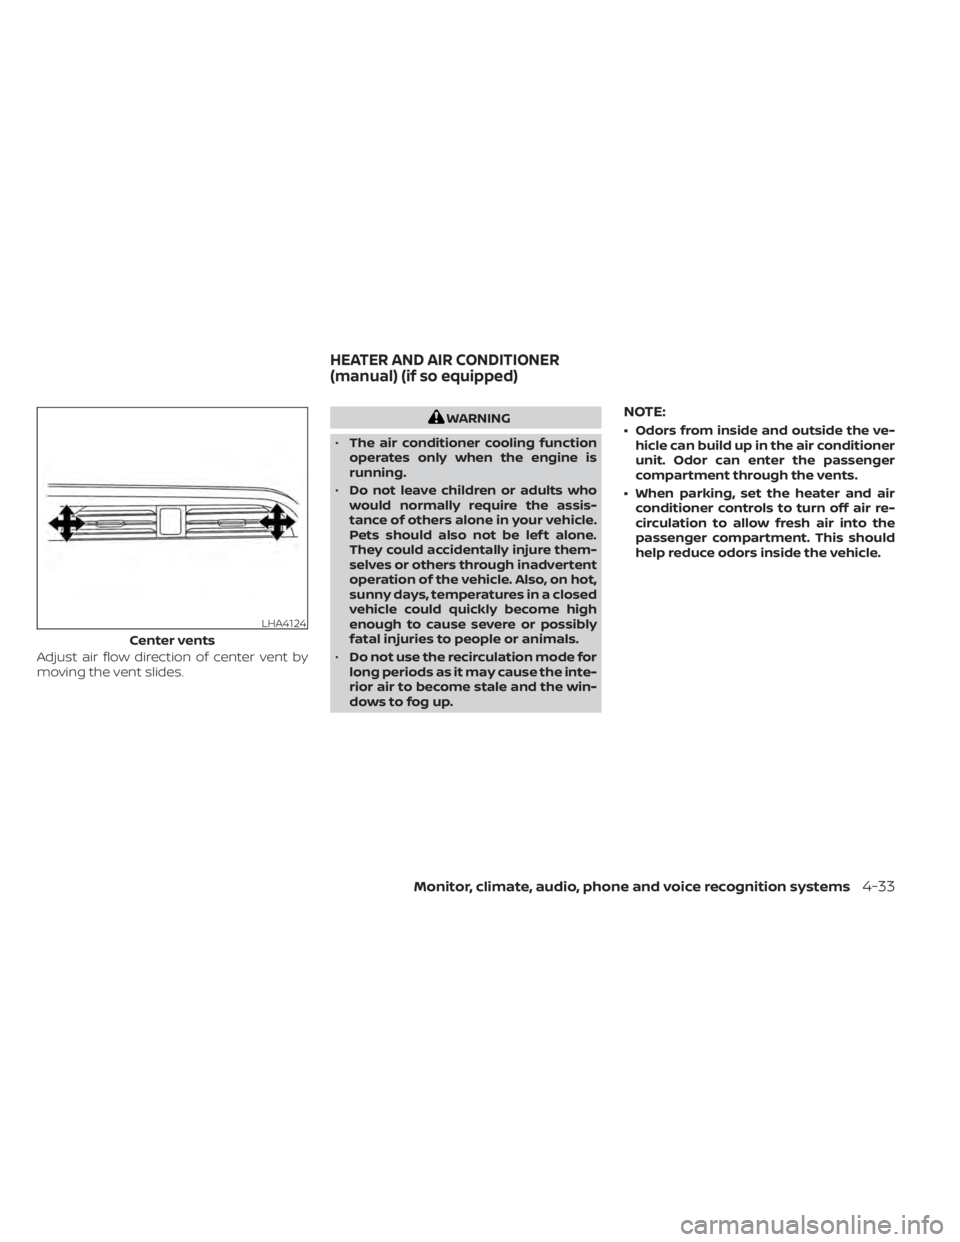
Adjust air flow direction of center vent by
moving the vent slides.
Monitor, climate, audio, phone and voice recognition systems4-33
Page 222 of 500
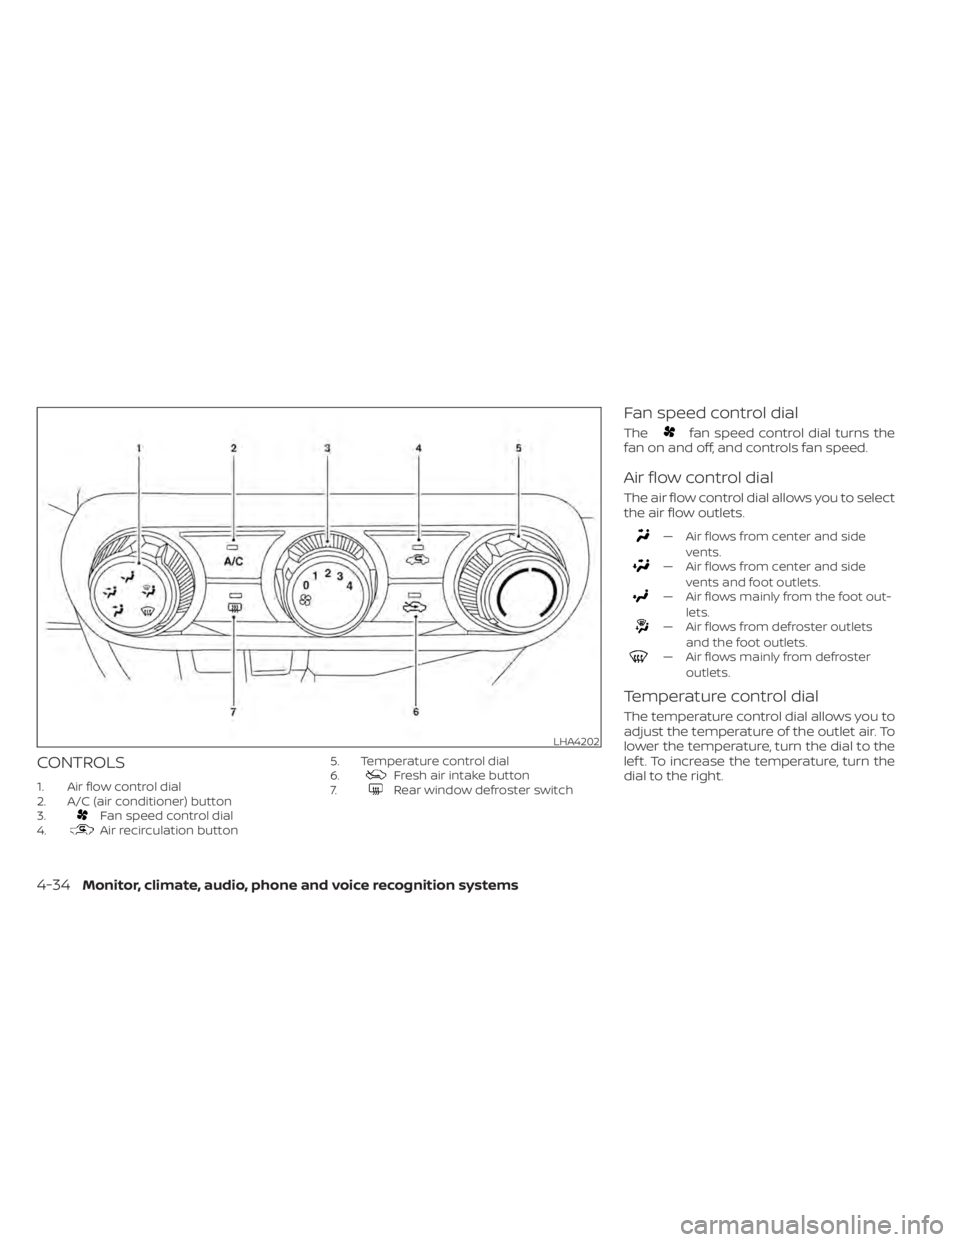
CONTROLS
1. Air flow control dial
2. A/C (air conditioner) button
3.
Fan speed control dial
4.Air recirculation button 5. Temperature control dial
6.
Fresh air intake button
7.Rear window defroster switch
Fan speed control dial
Thefan speed control dial turns the
fan on and off, and controls fan speed.
Air flow control dial
The air flow control dial allows you to select
the air flow outlets.
— Air flows from center and side
vents.
— Air flows from center and sidevents and foot outlets.
— Air flows mainly from the foot out-lets.
— Air flows from defroster outletsand the foot outlets.
— Air flows mainly from defrosteroutlets.
Temperature control dial
The temperature control dial allows you to
adjust the temperature of the outlet air. To
lower the temperature, turn the dial to the
lef t. To increase the temperature, turn the
dial to the right.
LHA4202
4-34Monitor, climate, audio, phone and voice recognition systems
Page 223 of 500
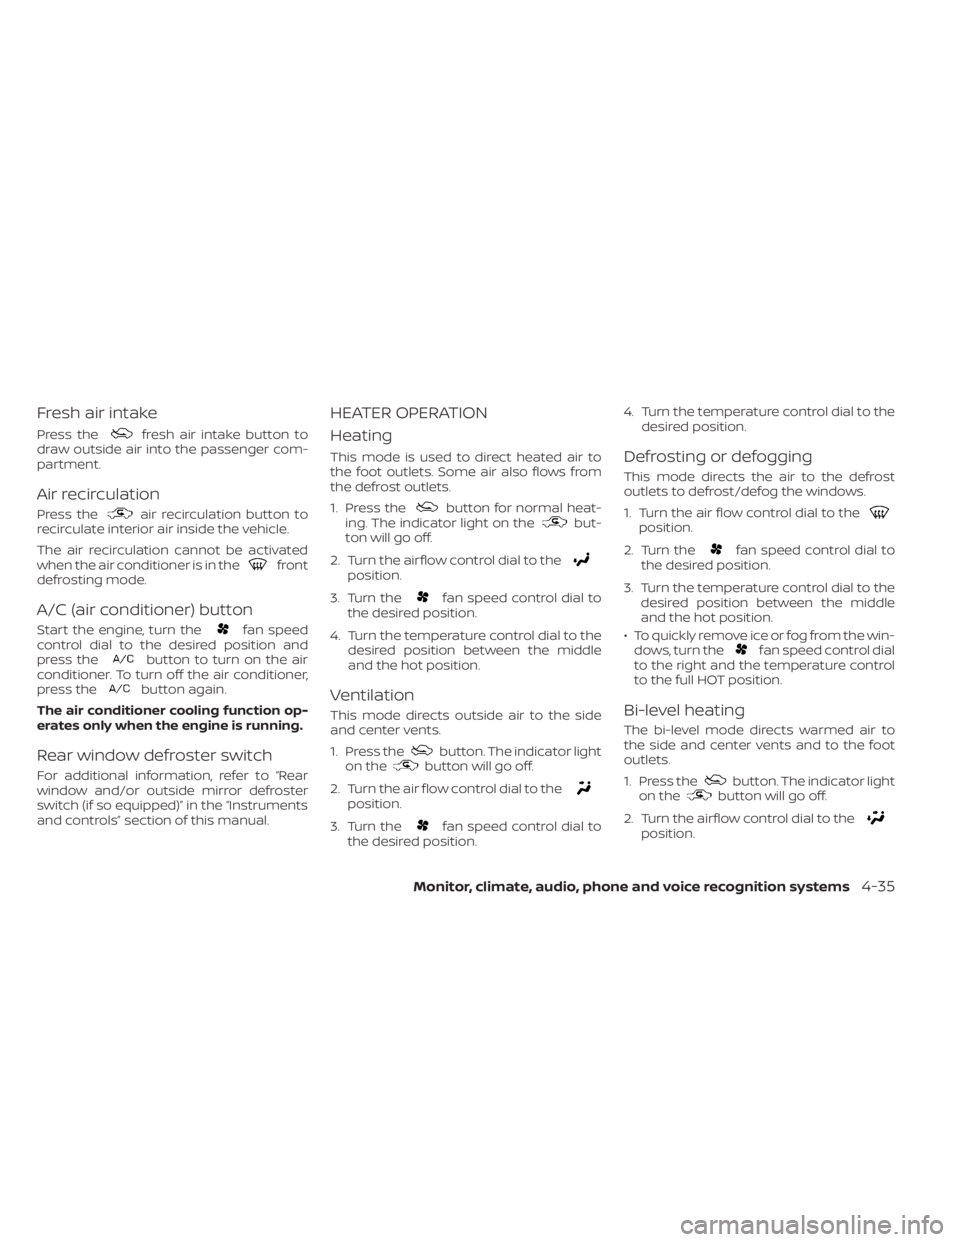
Fresh air intake
Press thefresh air intake button to
draw outside air into the passenger com-
partment.
Air recirculation
Press theair recirculation button to
recirculate interior air inside the vehicle.
The air recirculation cannot be activated
when the air conditioner is in the
front
defrosting mode.
A/C (air conditioner) button
Start the engine, turn thefan speed
control dial to the desired position and
press the
button to turn on the air
conditioner. To turn off the air conditioner,
press the
button again.
The air conditioner cooling function op-
erates only when the engine is running.
Rear window defroster switch
For additional information, refer to “Rear
window and/or outside mirror defroster
switch (if so equipped)” in the “Instruments
and controls” section of this manual.
HEATER OPERATION
Heating
This mode is used to direct heated air to
the foot outlets. Some air also flows from
the defrost outlets.
1. Press the
button for normal heat-
ing. The indicator light on thebut-
ton will go off.
2. Turn the airflow control dial to the
position.
3. Turn the
fan speed control dial to
the desired position.
4. Turn the temperature control dial to the desired position between the middle
and the hot position.
Ventilation
This mode directs outside air to the side
and center vents.
1. Press the
button. The indicator light
on thebutton will go off.
2. Turn the air flow control dial to the
position.
3. Turn the
fan speed control dial to
the desired position. 4. Turn the temperature control dial to the
desired position.
Defrosting or defogging
This mode directs the air to the defrost
outlets to defrost/defog the windows.
1. Turn the air flow control dial to the
position.
2. Turn the
fan speed control dial to
the desired position.
3. Turn the temperature control dial to the desired position between the middle
and the hot position.
• To quickly remove ice or fog from the win- dows, turn the
fan speed control dial
to the right and the temperature control
to the full HOT position.
Bi-level heating
The bi-level mode directs warmed air to
the side and center vents and to the foot
outlets.
1. Press the
button. The indicator light
on thebutton will go off.
2. Turn the airflow control dial to the
position.
Monitor, climate, audio, phone and voice recognition systems4-35
Page 224 of 500
3. Turn thefan speed control dial to
the desired position.
4. Turn the temperature control dial to the desired position.
Heating and defogging
This mode heats the interior and defogs
the windshield.
1. Turn the air flow control dial to the
position.
2. Turn the
fan speed control dial to
the desired position.
3. Turn the temperature control dial to the desired position between the middle
and the hot position.
•Ifinthe
mode for more than 1
minute, the air conditioning system will
continue to operate until the vehicle is
shut off. This dehumidifies the air which
helps defog the windshield. The
mode automatically turns off, allowing
outside air to be drawn into the passen-
ger compartment to further improve the
defogging performance.
Operating tips
Clear snow and ice from the wiper blades
and air inlet in front of the windshield.
This improves heater operation.
AIR CONDITIONER OPERATION
Start the engine, turn thefan speed
control dial to the desired position, and
press the
button to activate the air
conditioner. When the air conditioner is on,
cooling and dehumidif ying functions are
added to the heater operation.
The air conditioner cooling function op-
erates only when the engine is running.
Cooling
This mode is used to cool and dehumidif y
the air.
1. Press the
button.
2. Turn the air flow control dial to the
position.
3. Turn the
fan speed control dial to
the desired position. 4. Press the
button.
5. Turn the temperature control dial to the desired position.
• For quick cooling when the outside tem- perature is high, press the
button.
The indicator light on thebutton will
come on. Press thebutton for nor-
mal cooling. The indicator light on the
button will go off.
Dehumidified heating
This mode is used to heat and dehumidif y
the air.
1. Press the
button. The indicator light
on thebutton will go off.
2. Turn the air flow control dial to the
position.
3. Turn the
fan speed control dial to
the desired position.
4. Press the
button on.
5. Turn the temperature control dial to the desired position.
4-36Monitor, climate, audio, phone and voice recognition systems