Page 188 of 492
AUTOMATIC ANTI-GLARE
REARVIEW MIRROR
The inside mirror is designed so that it au-
tomatically dims during nighttime condi-
tions and according to the intensity of the
headlights of the vehicle following you. The
automatic anti-glare feature is activated
when the ignition switch is in the ON posi-
tion.
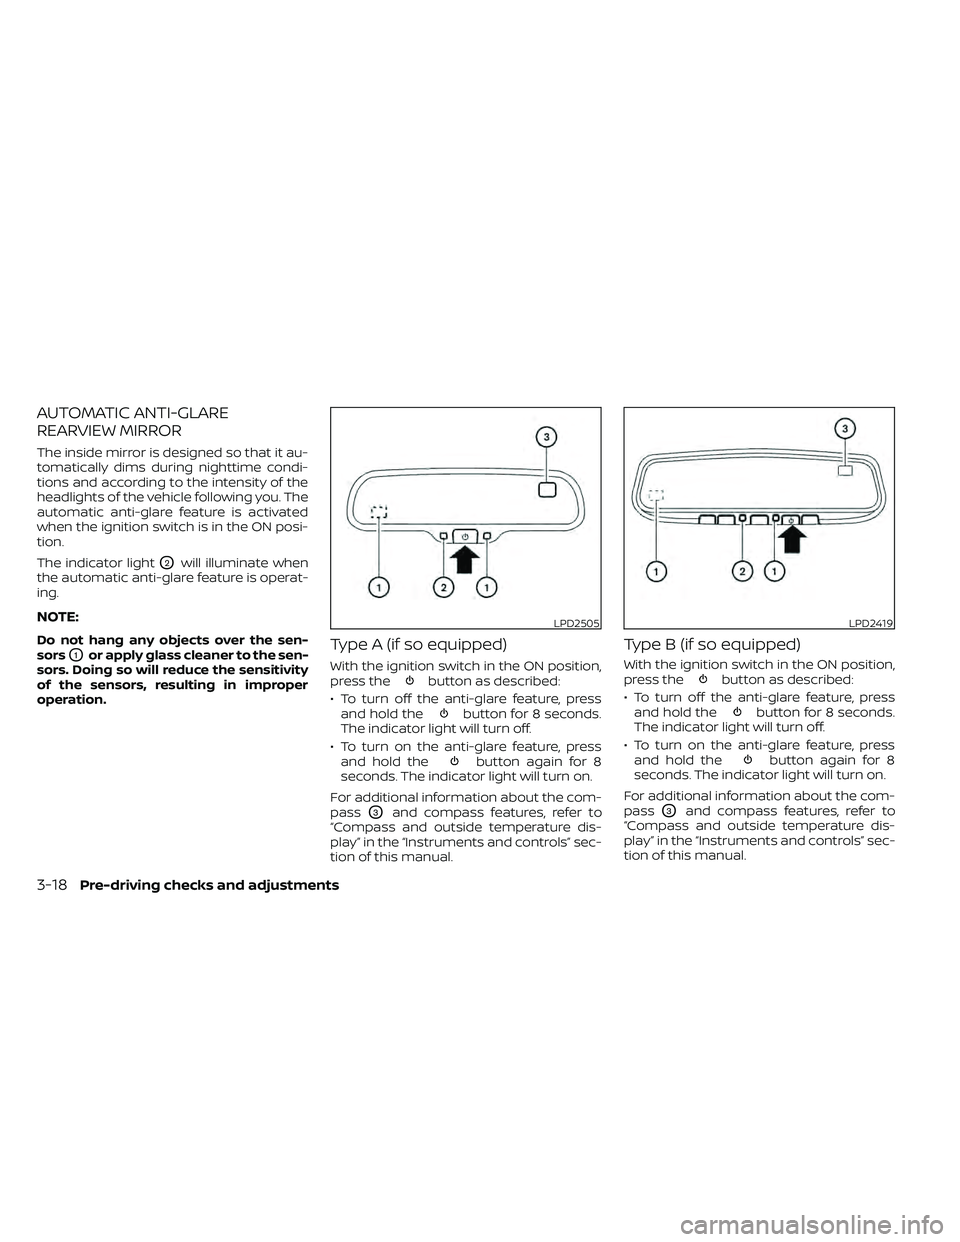
The indicator light
O2will illuminate when
the automatic anti-glare feature is operat-
ing.
NOTE:
Do not hang any objects over the sen-
sors
O1or apply glass cleaner to the sen-
sors. Doing so will reduce the sensitivity
of the sensors, resulting in improper
operation.Type A (if so equipped)
With the ignition switch in the ON position,
press thebutton as described:
• To turn off the anti-glare feature, press and hold the
button for 8 seconds.
The indicator light will turn off.
• To turn on the anti-glare feature, press and hold the
button again for 8
seconds. The indicator light will turn on.
For additional information about the com-
pass
O3and compass features, refer to
“Compass and outside temperature dis-
play” in the “Instruments and controls” sec-
tion of this manual.
Type B (if so equipped)
With the ignition switch in the ON position,
press thebutton as described:
• To turn off the anti-glare feature, press and hold the
button for 8 seconds.
The indicator light will turn off.
• To turn on the anti-glare feature, press and hold the
button again for 8
seconds. The indicator light will turn on.
For additional information about the com-
pass
O3and compass features, refer to
“Compass and outside temperature dis-
play” in the “Instruments and controls” sec-
tion of this manual.
LPD2505LPD2419
3-18Pre-driving checks and adjustments
Page 189 of 492
For additional information on HomeLink®
Universal Transceiver operation, refer to
the “HomeLink® Universal Transceiver” in
the “Instruments and controls” section of
this manual.
OUTSIDE MIRRORS
LPD2825LPD0237
Page 190 of 492
Foldable outside mirrors
Pull the outside mirror toward the door to
fold it.
Heated mirrors (if so equipped)
Some outside mirrors can be heated to
defog, defrost or de-ice for improved visibil-
ity. For additional information, refer to “Rear
window and outside mirror (if so equipped)
defroster switch” in the “Instruments and
controls” section of this manual.
TAILGATE
Opening the tailgate
Pull the tailgate handle upward and lower
the tailgate. The support cables hold the
tailgate open.
When closing the tailgate, make sure the
latches are securely locked.
Do not drive the vehicle with the tailgate
down, unless equipped with NISSAN's
Bed Extender (accessory) or equivalent
in the extended position.For additional information on proper truck
box loading, refer to “Vehicle loading infor-
mation” in the “Technical and consumer in-
formation” section of this manual.
LPD0270
TRUCK BOX
Page 217 of 492
•Objects viewed in the RearView
Monitor differ from actual distance
because a wide-angle lens is used.
• Objects in the RearView Monitor will
appear visually opposite compared
to when viewed in the rearview and
outside mirrors.
• Use the displayed lines as a refer-
ence. The lines are highly affected by
the number of occupants, fuel level,
vehicle position, road conditions and
road grade.
• Make sure that the tailgate is se-
curely closed when backing up.
• Do not put anything on the rearview
camera. The rearview camera is in-
stalled on the tailgate.
• When washing the vehicle with high
pressure water, be sure not to spray it
around the camera. Otherwise, water
may enter the camera unit causing
water condensation on the lens, a
malfunction, fire or an electric shock.
• Do not strike the camera. It is a preci-
sion instrument. Otherwise, it may
malfunction or cause damage result-
ing in a fire or an electric shock. The following are operating limitations and
do not represent a system malfunction:
• When the temperature is extremely high
or low, the screen may not clearly display
objects.
• When strong light directly shines on the camera, objects may not be displayed
clearly.
• Vertical lines may be seen in objects on the screen. This is due to strong reflected
light from the bumper.
• The screen may flicker under fluorescent light.
• The colors of objects on the RearView Monitor may differ somewhat from the
actual color of objects.
• Objects on the monitor may not be clear in a dark environment.
• There may be a delay when switching between views.
• If dirt, rain or snow accumulate on the camera, RearView Monitor may not dis-
play objects clearly. Clean the camera.
• Do not use wax on the camera lens. Wipe off any wax with a clean cloth dampened
with a diluted mild cleaning agent, then
wipe with a dry cloth.
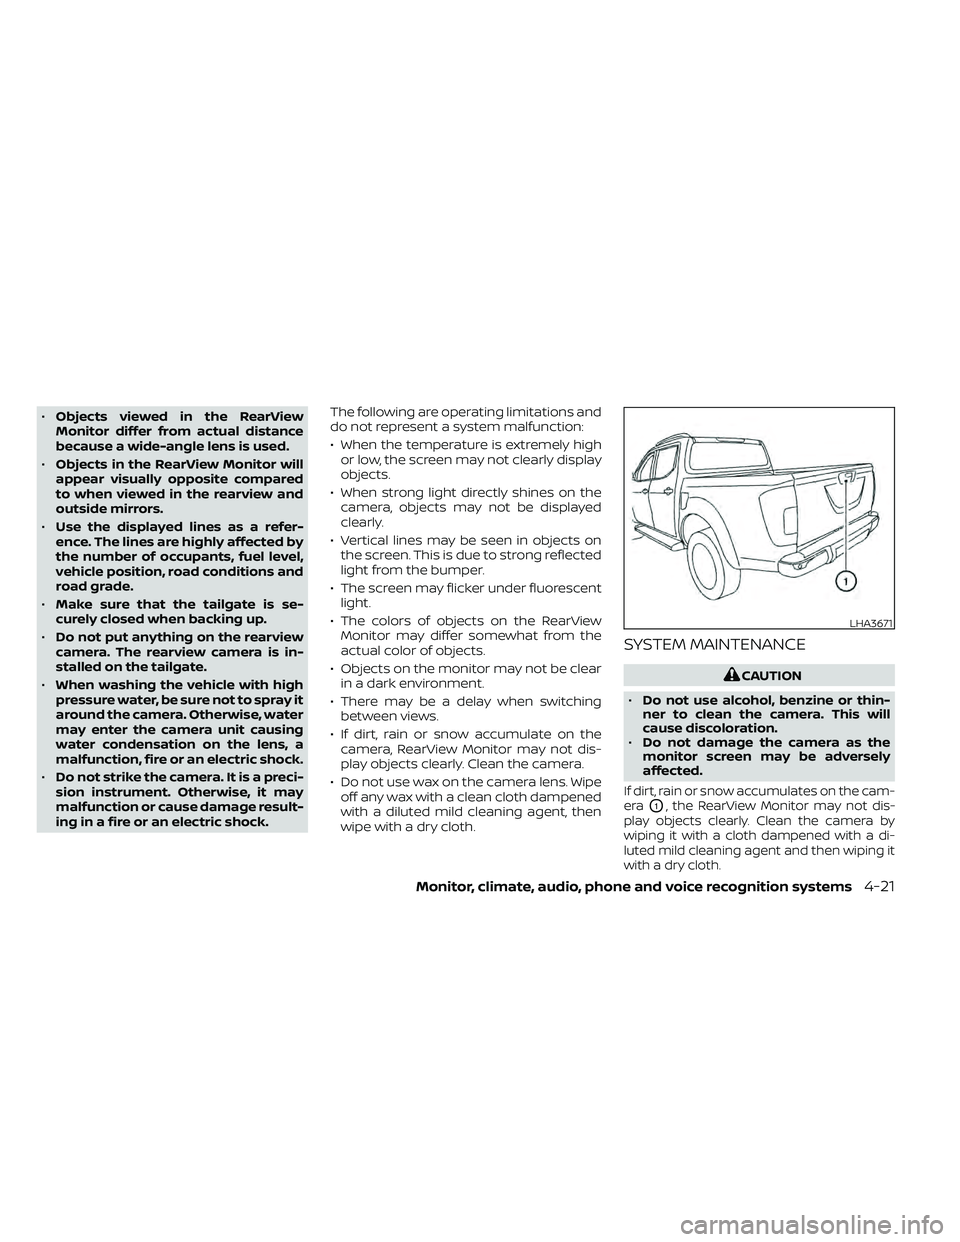
SYSTEM MAINTENANCE
LHA3671
Page 220 of 492
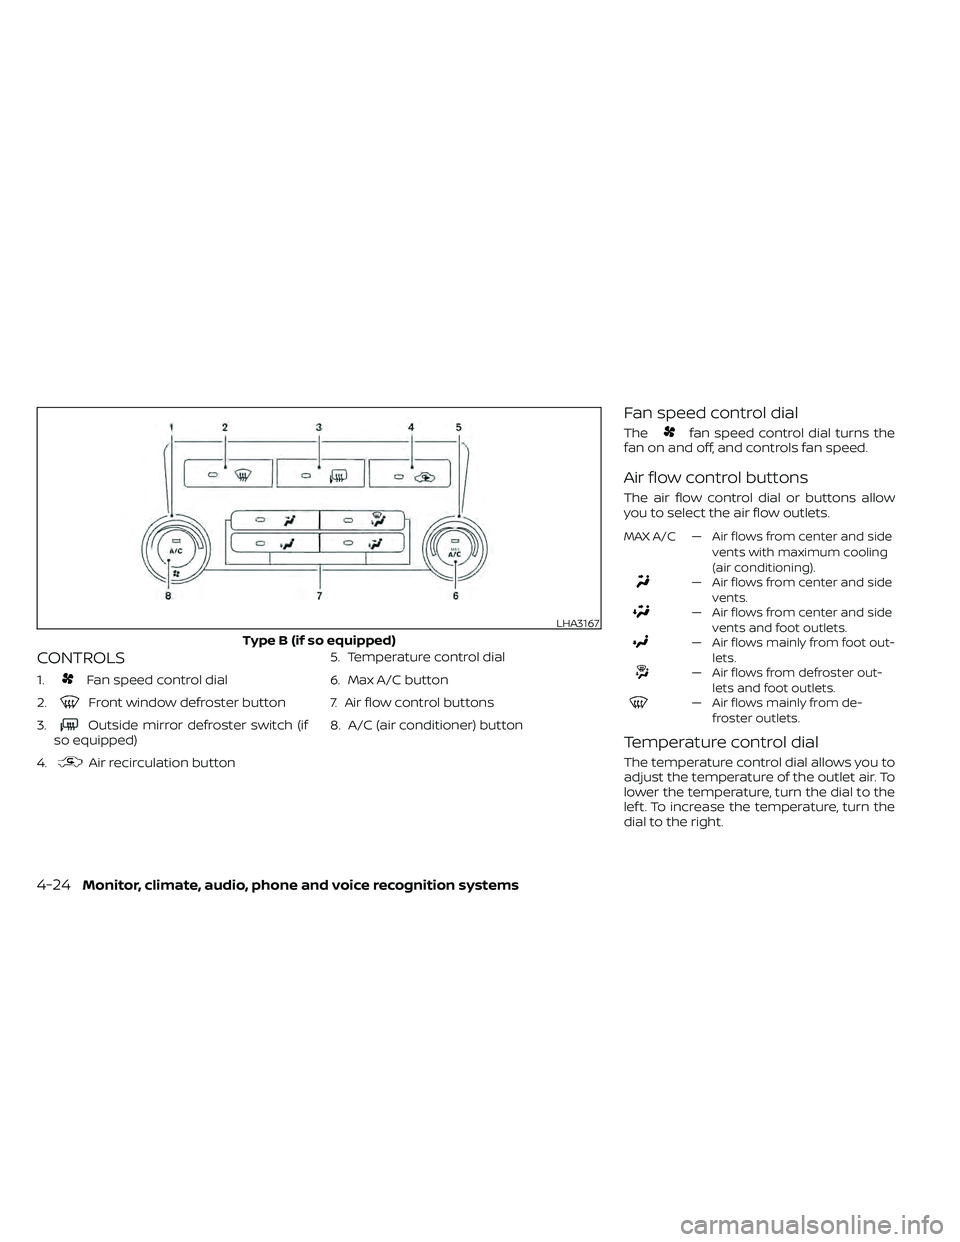
CONTROLS
1.Fan speed control dial
2.
Front window defroster button
3.
Outside mirror defroster switch (if
so equipped)
4.
Air recirculation button 5. Temperature control dial
6. Max A/C button
7. Air flow control buttons
8. A/C (air conditioner) button
Fan speed control dial
Thefan speed control dial turns the
fan on and off, and controls fan speed.
Air flow control buttons
The air flow control dial or buttons allow
you to select the air flow outlets.
MAX A/C — Air flows from center and side
vents with maximum cooling
(air conditioning).
— Air flows from center and sidevents.
— Air flows from center and sidevents and foot outlets.
— Air flows mainly from foot out-lets.
— Air flows from defroster out-lets and foot outlets.
— Air flows mainly from de-froster outlets.
Temperature control dial
The temperature control dial allows you to
adjust the temperature of the outlet air. To
lower the temperature, turn the dial to the
lef t. To increase the temperature, turn the
dial to the right.
LHA3167
Type B (if so equipped)
Page 221 of 492
Air recirculation button
ON position (Indicator light on)
Interior air is recirculated inside the vehicle.
Press the
button to the ON position
when:
• driving on a dusty road.
• to prevent traffic fumes from entering passenger compartment.
• for maximum cooling when using the air conditioner.
OFF position (Indicator light off )
Outside air is drawn into the passenger
compartment and distributed through the
selected outlet.
Use the OFF position for normal heater or
air conditioner operation.
A/C (air conditioner) button
Start the engine, turn thefan speed
control dial to the desired position and
press the
button to turn on the air
conditioner. To turn off the air conditioner,
press the
button again.
The air conditioner cooling function op-
erates only when the engine is running.
Rear window or outside mirror
defroster switch (if so equipped)
For additional information about the rear
window or outside mirror defroster switch,
refer to “Rear window or outside mirror de-
froster switch.” in the “Instruments and
controls” section of this manual.
HEATER OPERATION
Heating
This mode is used to direct heated air to
the foot outlets. Some air also flows from
the defrost outlets.
1. Press the
air flow control button.
2. Turn the
fan speed control dial to
the desired position.
3. Turn the temperature control dial to the desired position between the middle
and the hot position.
Ventilation
This mode directs outside air to the side
and center vents.
1. Press the
button to the OFF posi-
tion. The indicator light on thebut-
ton will go off.
2. Press the
air flow control button.
3. Turn the
fan speed control dial to
the desired position.
4. Turn the temperature control dial to the desired position.
Defrosting or defogging
This mode directs the air to the defrost
outlets to defrost/defog the windows.
1. Press the
defrost/defog button.
2. Turn the
fan speed control dial to
the desired position.
3. Turn the temperature control dial to the desired position between the middle
and the hot position.
• To quickly remove ice or fog from the win- dows, turn the
fan speed control dial
to the highest setting and the tempera-
ture control to the full HOT position.
Monitor, climate, audio, phone and voice recognition systems4-25
Page 229 of 492
1. Driver temperature control dial
2. A/C (air conditioner) button
3.
Front window defroster button
4.
Fan speed control dial
5. OFF button
6.
Outside mirror defroster switch 7.
Air recirculation button
8. Passenger temperature control dial
9. DUAL button
10. Air flow control buttons
11. AUTO button
LHA3168
Type C (if so equipped)
Monitor, climate, audio, phone and voice recognition systems4-33
Page 231 of 492
MANUAL OPERATION
Fan speed control
Turn thefan speed control dial to
manually control the fan speed.
Press the AUTO button to return to auto-
matic control of the fan speed.
Air recirculation
Press the air recirculation buttonto
recirculate interior air inside the vehicle.
Press the AUTO button to return to auto-
matic mode.
The air recirculation cannot be activated
when the air conditioner is in the
front
defogging mode.
Fresh air intake (if so equipped)
Press thefresh air intake button to
draw outside air into the passenger com-
partment. The
indicator light on the
button will come on.
A/C (air conditioner) button
Start the engine, turn thefan speed
control dial to the desired position and
press the
button to turn on the air
conditioner. To turn off the air conditioner,
press the
button again. The air conditioner cooling function op-
erates only when the engine is running.
Air flow control
Press the air flow control buttons to manu-
ally control air flow and select the air outlet:
— Air flows from center and side
vents.
— Air flows from center and sidevents and foot outlets.
— Air flows mainly from foot outlets.— Air flows from defroster and footoutlets.
— Air flows from defroster outlets.
To turn system off
Press the OFF button.
Rear window or outside mirror
defroster switch (if so equipped)
For additional information, refer to “Rear
window or outside mirror defroster switch”
in the “Instruments and controls” section of
this manual.
OPERATING TIPS
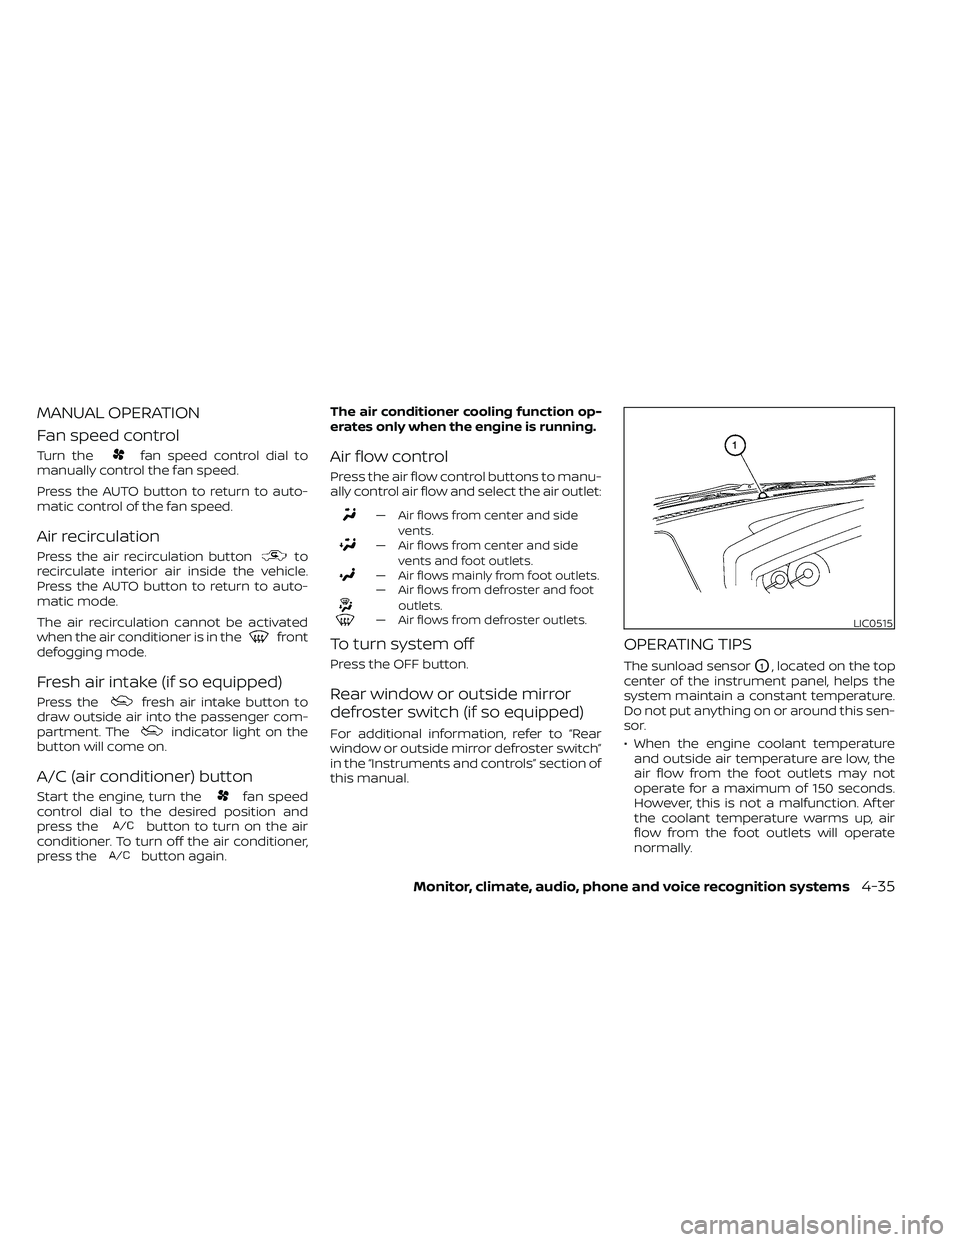
The sunload sensorO1, located on the top
center of the instrument panel, helps the
system maintain a constant temperature.
Do not put anything on or around this sen-
sor.
• When the engine coolant temperature and outside air temperature are low, the
air flow from the foot outlets may not
operate for a maximum of 150 seconds.
However, this is not a malfunction. Af ter
the coolant temperature warms up, air
flow from the foot outlets will operate
normally.
LIC0515