2021 NISSAN FRONTIER display
[x] Cancel search: displayPage 300 of 492
![NISSAN FRONTIER 2021 Owners Manual PHONE SETTINGS
To access the phone settings:
1. Press the [
] button.
2. Touch the “Settings” key.
3. Touch the “Phone & Bluetooth” key.
4. Touch the “Phone Settings” key and ad- just the NISSAN FRONTIER 2021 Owners Manual PHONE SETTINGS
To access the phone settings:
1. Press the [
] button.
2. Touch the “Settings” key.
3. Touch the “Phone & Bluetooth” key.
4. Touch the “Phone Settings” key and ad- just the](/manual-img/5/56721/w960_56721-299.png)
PHONE SETTINGS
To access the phone settings:
1. Press the [
] button.
2. Touch the “Settings” key.
3. Touch the “Phone & Bluetooth” key.
4. Touch the “Phone Settings” key and ad- just the following settings as desired:
• Start Siri® by: Touch “Short Press” or “Long Press” to set
how Siri® is operated on the steering
wheel.
• Sort Phonebook By: Touch “First Name” or “Last Name” to
choose how phonebook entries are al-
phabetically displayed on the screen.
• Use Phonebook From: Touch “Handset” to use the phone's
phonebook. Touch “SIM” to use the
phonebook on the SIM card. Select “Both”
to use both sources. • Download Phonebook Now:
Touch to download the phonebook to
the vehicle from the chosen source.
• Record Name for Phonebook Entry: Touch to record a name for a phonebook
entry for use with the NISSAN Voice Rec-
ognition System.
• Phone Notifications for: Notifications may be displayed on the
center display screen.
• Text Messaging (if so equipped): Touch to toggle the text message func-
tionality on or off.
• Show Incoming Text for: Text notifications may be displayed on
the center display screen. Touch “Off ” to
turn off all text notifications.
• Auto Reply: Touch to toggle the auto reply functional-
ity on or off. • Auto Reply Message:
Touch to indicate preferred message to
be sent when “Auto Reply” function is ac-
tivated.
• Use Vehicle's Signature: Touch to toggle on or off the addition of
the vehicle signature to outgoing mes-
sages.
• Custom Text Messages: Touch this option to select a custom
message to edit. There are 4 customer
message slots available.
4-104Monitor, climate, audio, phone and voice recognition systems
Page 302 of 492
The NISSAN Voice Recognition System al-
lows hands-free operation of the systems
equipped on this vehicle, such as the
phone and navigation systems.
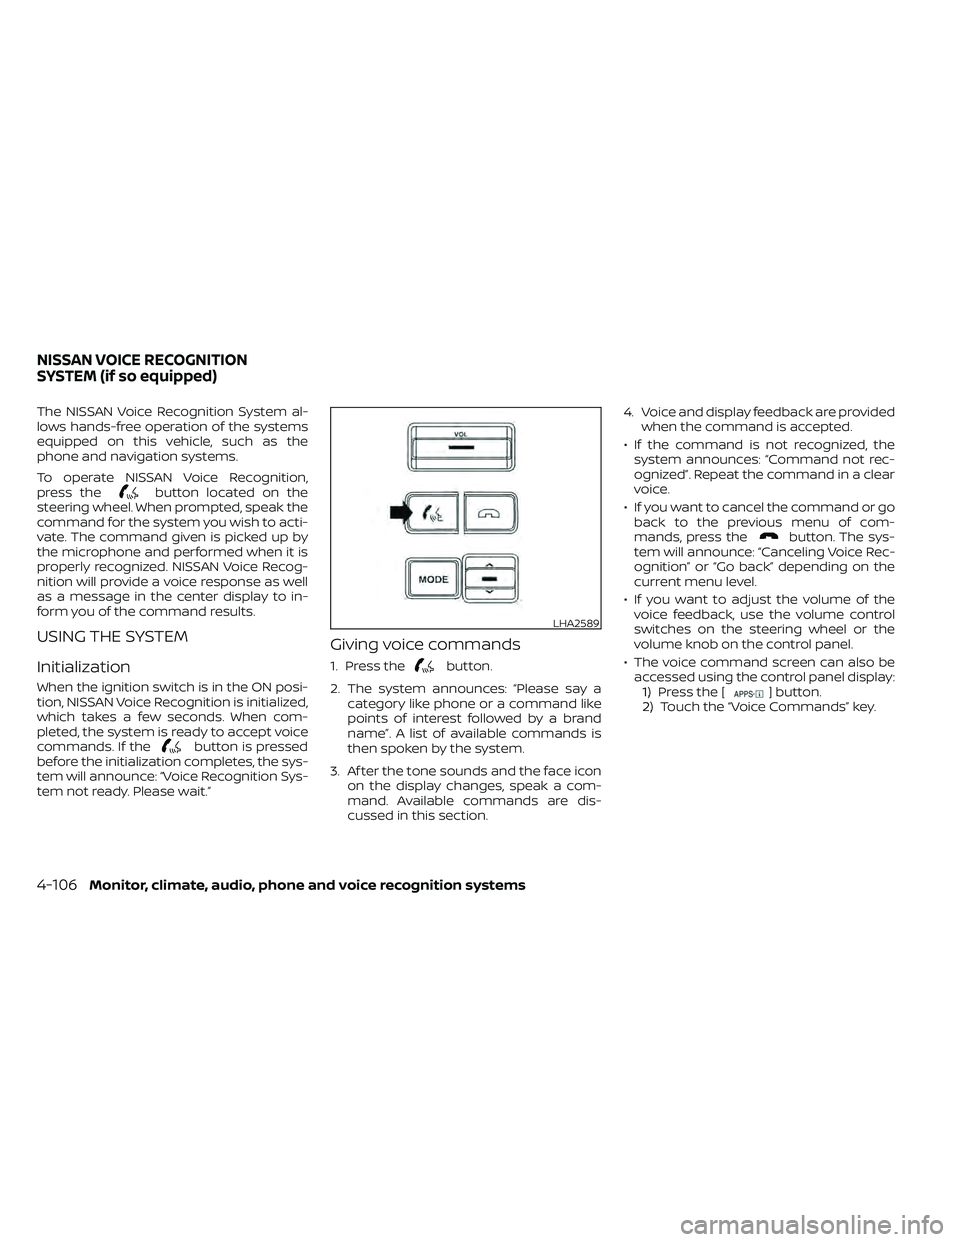
To operate NISSAN Voice Recognition,
press the
button located on the
steering wheel. When prompted, speak the
command for the system you wish to acti-
vate. The command given is picked up by
the microphone and performed when it is
properly recognized. NISSAN Voice Recog-
nition will provide a voice response as well
as a message in the center display to in-
form you of the command results.
USING THE SYSTEM
Initialization
When the ignition switch is in the ON posi-
tion, NISSAN Voice Recognition is initialized,
which takes a few seconds. When com-
pleted, the system is ready to accept voice
commands. If the
button is pressed
before the initialization completes, the sys-
tem will announce: “Voice Recognition Sys-
tem not ready. Please wait.”
Giving voice commands
1. Press thebutton.
2. The system announces: “Please say a category like phone or a command like
points of interest followed by a brand
name”. A list of available commands is
then spoken by the system.
3. Af ter the tone sounds and the face icon on the display changes, speak a com-
mand. Available commands are dis-
cussed in this section. 4. Voice and display feedback are provided
when the command is accepted.
• If the command is not recognized, the system announces: “Command not rec-
ognized”. Repeat the command in a clear
voice.
• If you want to cancel the command or go back to the previous menu of com-
mands, press the
button. The sys-
tem will announce: “Canceling Voice Rec-
ognition” or “Go back” depending on the
current menu level.
• If you want to adjust the volume of the voice feedback, use the volume control
switches on the steering wheel or the
volume knob on the control panel.
• The voice command screen can also be accessed using the control panel display:1.1) Press the [
] button.
2.2) Touch the “Voice Commands” key.
LHA2589
NISSAN VOICE RECOGNITION
SYSTEM (if so equipped)
Page 304 of 492
BLUETOOTH® HANDS-FREE
PHONE SYSTEM VOICE
COMMANDS
To access the Bluetooth® Hands-Free
Phone System voice commands:
1. Press the
button.
2. Say “Call” and then a name in the vehicle phonebook to call that entry. Otherwise,
say “Phone” to access various phone
commands.
If the Bluetooth® has been set to “Off ”, the
system announces: “Bluetooth® is off.
Would you like to turn Bluetooth® on?”
If no phone is connected to the system and
the vehicle is stationary, the system an-
nounces: “There is no phone connected.
Would you like to connect a phone now?”
Say “Yes” to connect a phone. All further
Bluetooth® Hands-Free Phone System
voice commands are only available if a
phone is connected.
If a phone is connected and Bluetooth® is
set to “On”, the following voice commands
are available:
• Call (a name)
Speak the name of the contact in which
you are trying to call. System will confirm
correct contact. Say “Dial” to initiate dialing.
• Dial Number Allows for up to 24 digits to be dialed.
Af ter the number is entered, say “Dial” to
initiate dialing. Say “Correction” to cor-
rect the number entered. Say “Go Back”
to return to the main menu.
• List Phonebook Starting with the first alphabetical entry
in the vehicle phonebook, the system
prompts for an additional command.
Say “Dial” to call the number of the
phonebook entry. Say “Send Text” to
send a text message to the number of
the phonebook entry. Say “Next Entry” to
skip to the next alphabetical entry in the
vehicle phonebook, where the same op-
tions will then be available.
• Recent Calls The system prompts for an additional
command. Say “Missed Calls”, “Incoming
Calls” or “Outgoing Calls” to display a list
of such calls on the screen.
Speak the number of the entry displayed
on the screen to dial that number or say
“Next Page” to view entries on the next
page (if available). • Redial
Redials the last called number.
• Read Text Reads an incoming text message.
• Send Text Sends a text message.
• Select Phone The system replies “Please use manual
controls to continue”. Use manual con-
trols to change the active phone from
among the listed phones connected to
the vehicle.
• Siri (if so equipped) The system replies “starting Siri”. For ad-
ditional information, refer to “Siri® Eyes
Free (models with Navigation System)” in
this section.
For additional information, refer to
“Bluetooth® Hands-Free Phone System
with Navigation System” in this section.
4-108Monitor, climate, audio, phone and voice recognition systems
Page 312 of 492
the telltale will flash for approximately 1
minute and then remain continuously illu-
minated. This sequence will continue upon
subsequent vehicle start-ups as long as
the malfunction exists. When the malfunc-
tion indicator is illuminated, the system
may not be able to detect or signal low tire
pressure as intended. TPMS malfunctions
may occur for a variety of reasons, includ-
ing the installation of replacement or alter-
nate tires or wheels on the vehicle that
prevent the TPMS from functioning prop-
erly. Always check the TPMS malfunction
telltale af ter replacing one or more tires or
wheels on your vehicle to ensure that the
replacement or alternate tires and wheels
allow the TPMS to continue to function
properly.
Additional information:
• When replacing a wheel without theTPMS such as the spare tire, the TPMS
does not monitor the tire pressure of the
spare tire.
• The TPMS will activate only when the ve- hicle is driven at speeds above 16 mph (25
km/h). Also, this system may not detect a
sudden drop in tire pressure (for example,
a flat tire while driving). • The low tire pressure warning light does
not automatically turn off when the tire
pressure of your tires are adjusted. Af ter
the tires are inflated to the recom-
mended pressure, the vehicle must be
driven at speeds above 16 mph (25 km/h)
to activate the TPMS and turn off the low
tire pressure warning light. Use a tire
pressure gauge to check the tire pres-
sure.
• The CHECK TIRE PRES (pressure) warning message is displayed in the odometer
when the low tire pressure warning light
is illuminated and low tire pressure is de-
tected. The CHECK TIRE PRES warning
message turns off when the low tire pres-
sure warning light turns off. The low tire
pressure warning light remains illumi-
nated until the tires are inflated to the
recommended COLD tire pressure. The
CHECK TIRE PRES warning message is
displayed each time the ignition switch is
placed in the ON position as long as the
low tire pressure warning light remains
illuminated. For additional information,
refer to “Check tire pressure warning
message” in the “Instruments and con-
trols” section of this manual. • The CHECK TIRE PRES warning is not dis-
played if the low tire pressure warning
light illuminates to indicate a TPMS mal-
function.
• The CHECK TIRE PRES warning appears each time the ignition switch is placed in
the ON position as long as the low tire
pressure warning light remains illumi-
nated.
• Tire pressure rises and falls depending on the heat caused by the vehicle’s opera-
tion and the outside temperature. Do not
reduce the tire pressure af ter driving be-
cause the tire pressure rises af ter driving.
Low outside temperature can lower the
temperature of the air inside the tire
which can cause a lower tire inflation
pressure. This may cause the low tire
pressure warning light to illuminate. If the
warning light illuminates, check the tire
pressure for all four tires.
• The Tire and Loading Information label is located in the driver's door opening.
For additional information, refer to “Low tire
pressure warning light” in the “Instruments
and controls” section and “Tire Pressure
Monitoring System (TPMS)” in the “In case of
emergency” section of this manual.
5-4Starting and driving
Page 318 of 492
•Always use tires of the same type,
size, brand, construction (bias, bias-
belted, or radial), and tread pattern
on all four wheels. Install tire chains
on the rear wheels when driving on
slippery roads and drive carefully.
• Be sure to check the brakes immedi-
ately af ter driving in mud or water.
For additional information, refer to
“Wet brakes” in this section.
• Avoid parking your vehicle on steep
hills. If you get out of the vehicle and
it rolls forward, backward or side-
ways, you could be injured.
• Whenever you drive off-road through
sand, mud or water as deep as the
wheel hub, more frequent mainte-
nance may be required. For addi-
tional information, refer to “Mainte-
nance under severe operating
conditions” in the “Maintenance and
schedules” section of this manual.
WARNING
Do not operate the push-button igni-
tion switch while driving the vehicle ex-
cept in an emergency. (The engine will
stop when the ignition switch is pushed
three consecutive times in quick suc-
cession or the ignition switch is pushed
and held for more than 2 seconds.) If
the engine stops while the vehicle is
being driven, this could lead to a crash
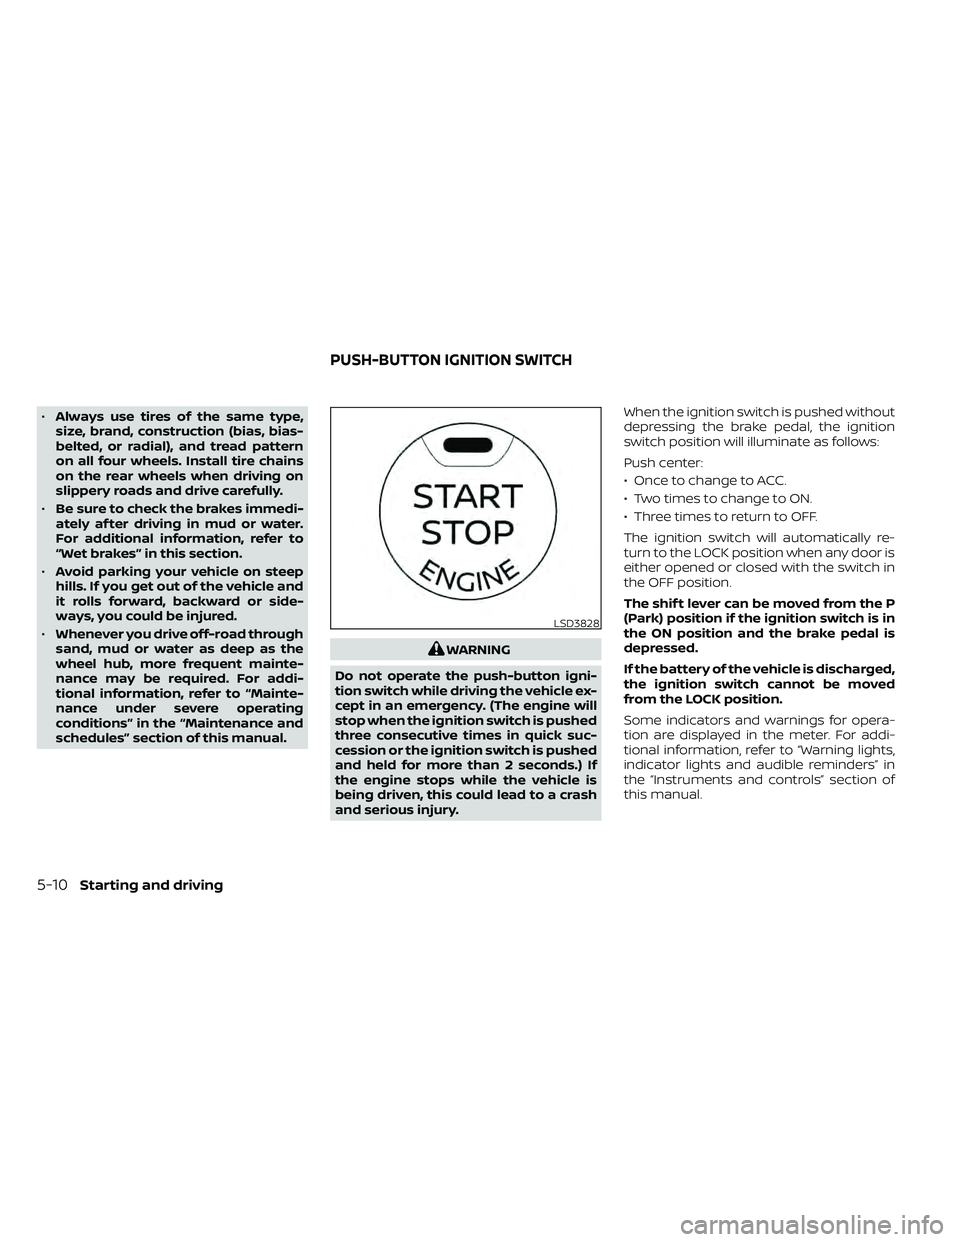
and serious injury. When the ignition switch is pushed without
depressing the brake pedal, the ignition
switch position will illuminate as follows:
Push center:
• Once to change to ACC.
• Two times to change to ON.
• Three times to return to OFF.
The ignition switch will automatically re-
turn to the LOCK position when any door is
either opened or closed with the switch in
the OFF position.
The shif t lever can be moved from the P
(Park) position if the ignition switch is in
the ON position and the brake pedal is
depressed.
If the battery of the vehicle is discharged,
the ignition switch cannot be moved
from the LOCK position.
Some indicators and warnings for opera-
tion are displayed in the meter. For addi-
tional information, refer to “Warning lights,
indicator lights and audible reminders” in
the “Instruments and controls” section of
this manual.
LSD3828
PUSH-BUTTON IGNITION SWITCH
Page 325 of 492
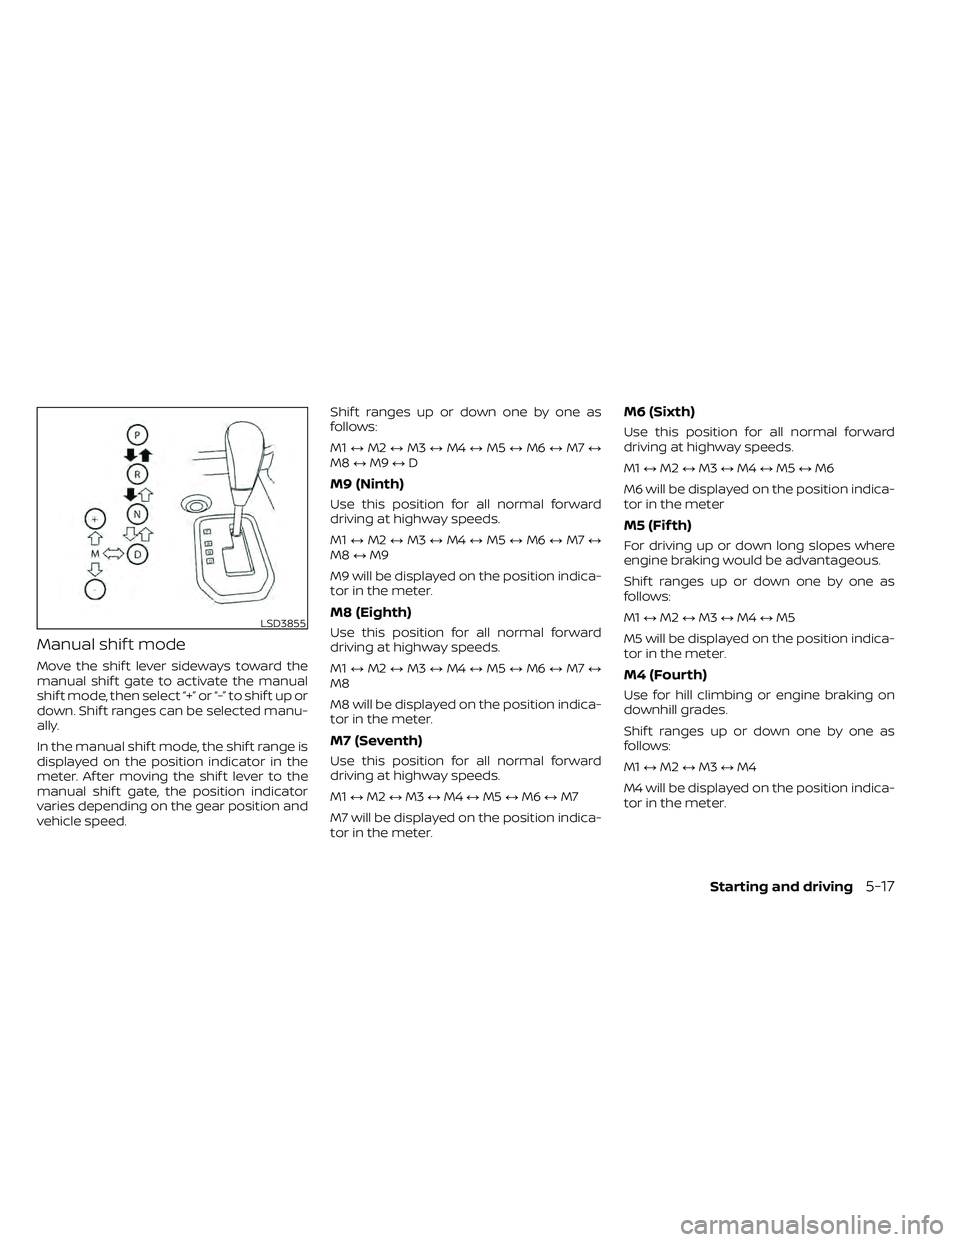
Manual shif t mode
Move the shif t lever sideways toward the
manual shif t gate to activate the manual
shif t mode, then select “+” or “-” to shif t up or
down. Shif t ranges can be selected manu-
ally.
In the manual shif t mode, the shif t range is
displayed on the position indicator in the
meter. Af ter moving the shif t lever to the
manual shif t gate, the position indicator
varies depending on the gear position and
vehicle speed.Shif t ranges up or down one by one as
follows:
M1
↔M2 ↔M3 ↔M4 ↔M5 ↔M6 ↔M7 ↔
M8 ↔M9 ↔D
M9 (Ninth)
Use this position for all normal forward
driving at highway speeds.
M1 ↔M2 ↔M3 ↔M4 ↔M5 ↔M6 ↔M7 ↔
M8 ↔M9
M9 will be displayed on the position indica-
tor in the meter.
M8 (Eighth)
Use this position for all normal forward
driving at highway speeds.
M1 ↔M2 ↔M3 ↔M4 ↔M5 ↔M6 ↔M7 ↔
M8
M8 will be displayed on the position indica-
tor in the meter.
M7 (Seventh)
Use this position for all normal forward
driving at highway speeds.
M1 ↔M2 ↔M3 ↔M4 ↔M5 ↔M6 ↔M7
M7 will be displayed on the position indica-
tor in the meter.
M6 (Sixth)
Use this position for all normal forward
driving at highway speeds.
M1 ↔M2 ↔M3 ↔M4 ↔M5 ↔M6
M6 will be displayed on the position indica-
tor in the meter
M5 (Fif th)
For driving up or down long slopes where
engine braking would be advantageous.
Shif t ranges up or down one by one as
follows:
M1 ↔M2 ↔M3 ↔M4 ↔M5
M5 will be displayed on the position indica-
tor in the meter.
M4 (Fourth)
Use for hill climbing or engine braking on
downhill grades.
Shif t ranges up or down one by one as
follows:
M1 ↔M2 ↔M3 ↔M4
M4 will be displayed on the position indica-
tor in the meter.
LSD3855
Page 326 of 492
M3 (Third)
Use for hill climbing or engine braking on
downhill grades.
Shif t ranges up or down one by one as
follows:
M1↔M2 ↔M3
M3 will be displayed on the position indica-
tor in the meter.
M2 (Second)
Use for hill climbing or engine braking on
downhill grades.
Shif t ranges up or down one by one as
follows:
M1 ↔M2
M2 will be displayed on the position indica-
tor in the meter.
M1 (First)
Use this position when climbing steep hills
slowly or driving slowly through deep snow,
sand or mud, or for maximum engine brak-
ing on steep downhill grades.
M1 will be displayed on the position indica-
tor on the meter. • Remember not to drive at high speeds for
extended periods of time in lower than
M4 range. This reduces fuel economy.
When shif ting up
Move the shif t lever to the + (up) side. (Shif ts
to higher range.)
When shif ting down
Move the shif t lever to the − (down) side.
(Shif ts to lower range.)
• The transmission will automatically downshif t the gears. (For example, if you
select the 3rd range, the transmission will
shif t down between the 3rd and 1st
gears.)
• Moving the shif t lever rapidly to the same side twice will shif t the ranges in succes-
sion.
When canceling the manual shif t mode
Return the shif t lever to the D (Drive) posi-
tion to return the transmission to the nor-
mal driving mode. •
In the manual shif t mode, the trans-
mission may not shif t to the selected
gear immediately because of vehicle
speed. The transmission will upshif t or
downshif t when vehicle speed
matches the programmed transmis-
sion shif t points. This helps maintain
driving performance and reduces the
chance of vehicle damage or loss of
control.
• In the manual shif t mode, the trans-
mission will not upshif t to a higher
gear than is manually selected. When
the vehicle speed decreases, the trans-
mission automatically shif ts down and
shif ts to 1st gear before the vehicle
comes to a stop.
Accelerator downshif t
— in D (Drive) position —
For passing or hill climbing, depress the
accelerator pedal to the floor. This shif ts
the transmission down into a lower gear,
depending on the vehicle speed.
5-18Starting and driving
Page 336 of 492
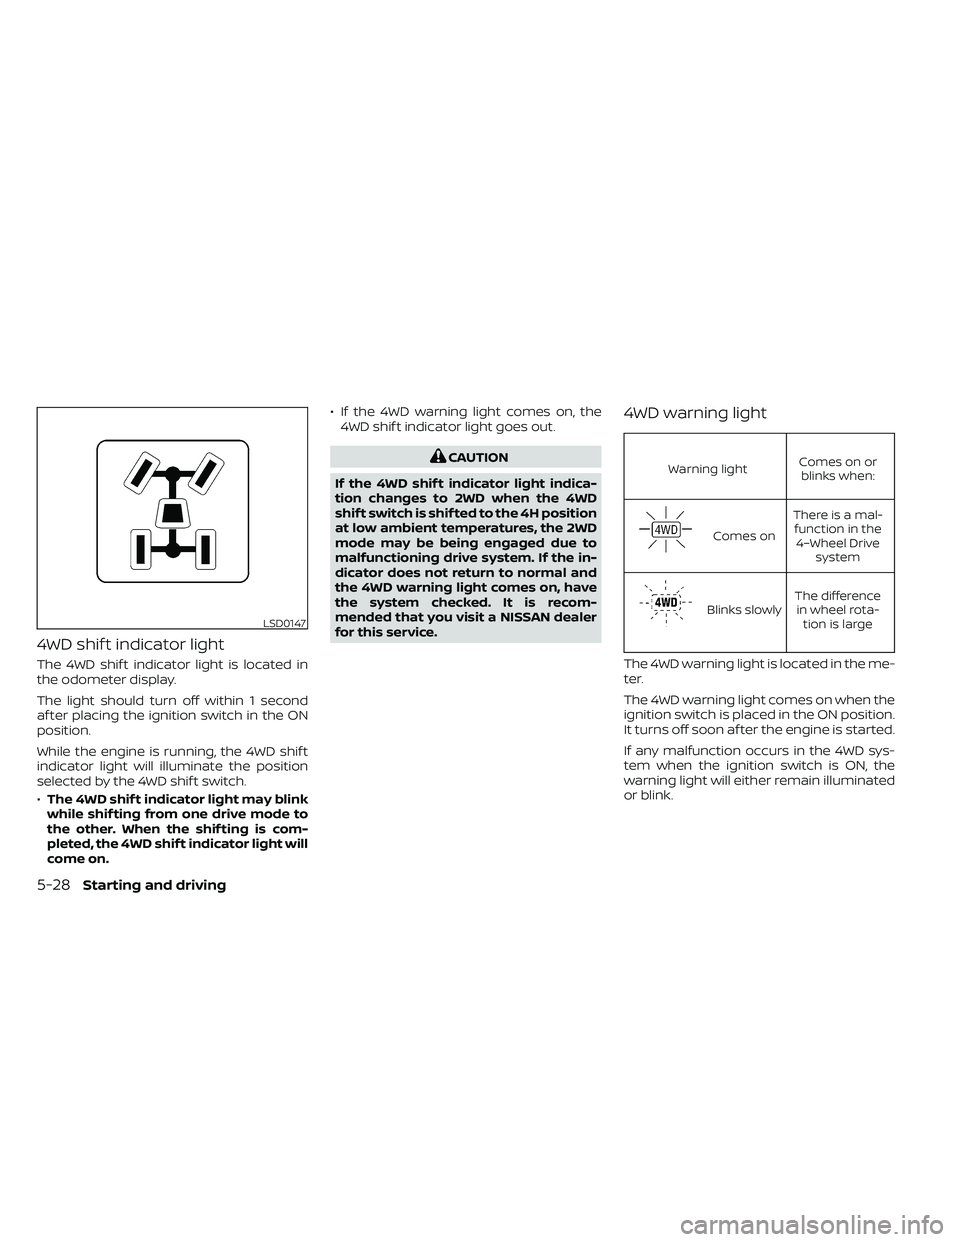
4WD shif t indicator light
The 4WD shif t indicator light is located in
the odometer display.
The light should turn off within 1 second
af ter placing the ignition switch in the ON
position.
While the engine is running, the 4WD shif t
indicator light will illuminate the position
selected by the 4WD shif t switch.
•The 4WD shif t indicator light may blink
while shif ting from one drive mode to
the other. When the shif ting is com-
pleted, the 4WD shif t indicator light will
come on. • If the 4WD warning light comes on, the
4WD shif t indicator light goes out.
Warning light Comes on or
blinks when:
Comes on There is a mal-
function in the 4–Wheel Drive system
Blinks slowly The difference
in wheel rota- tion is large
The 4WD warning light is located in the me-
ter.
The 4WD warning light comes on when the
ignition switch is placed in the ON position.
It turns off soon af ter the engine is started.
If any malfunction occurs in the 4WD sys-
tem when the ignition switch is ON, the
warning light will either remain illuminated
or blink.
LSD0147
5-28Starting and driving