2021 NISSAN ARMADA audio
[x] Cancel search: audioPage 261 of 603
and fan speed are also controlled
automatically.
NOTE:
. Do not set the temperature lower
than the outside air temperature or
the system may not work properly.
. Not recommended if windows fog
up.
Dehumidified defrosting or defogging:
1. Push the
button. (The indicator
light on the button will illuminate.)
2. Turn the temperature control dial on the corresponding side to set the
desired temperature.
.To quickly remove ice from theoutside of the windows, use the
button to set the fan speed to
maximum.
.As soon as possible after the wind- shield is cleared, push the AUTO
button to return to the automatic
mode.
Manual operation
Fan speed control:
Push the
buttons to manually control
the fan speed.
Air intake control:
. Push the
button to recirculate
interior air inside the vehicle. (The
indicator light on the button will
illuminate.)
. Push the
button to draw outside
air into the passenger compartment.
(The indicator light on the button will
illuminate.)
. To control the air intake automatically,
push and hold either the
button
or thebutton. The indicator light
will blink, and then the air intake will
switch to automatic control. When the
automatic control is set, the system
automatically alternates between the
outside air circulation and the air
recirculation modes. (The indicator
light of the active mode will illumi-
nate.)
Air flow control:
Pushing the
button manually con-
trols air flow and selects the air outlet:
— Air flows mainly from center and side ventilators.
— Air flows mainly from center and sideventilators and foot outlets.
— Air flows mainly from the foot outletand partly from the defroster.
— Air flows mainly from the defrosterand foot outlets.
Synchronize temperature settings:
Push the SYNC button to turn on the
SYNC mode. (The indicator light on the
button will illuminate.)
When the SYNC mode is active, the
driver’s side temperature control dial will
control the driver’s side, front passenger’s
side and rear temperatures.
When the passenger’s side temperature
setting or the rear temperature setting is
changed, it will cancel the SYNC mode of
the operated individual zone. (The indica-
tor light on the SYNC button will turn off.)
Changing both the passenger’s side tem-
perature setting and the rear tempera-
ture setting will completely turn off the
SYNC mode.
Monitor, heater, air conditioner, audio, phone and voice recognition systems4-37
Page 262 of 603
4-38Monitor, heater, air conditioner, audio, phone and voice recognition systems
Turning the system on/off
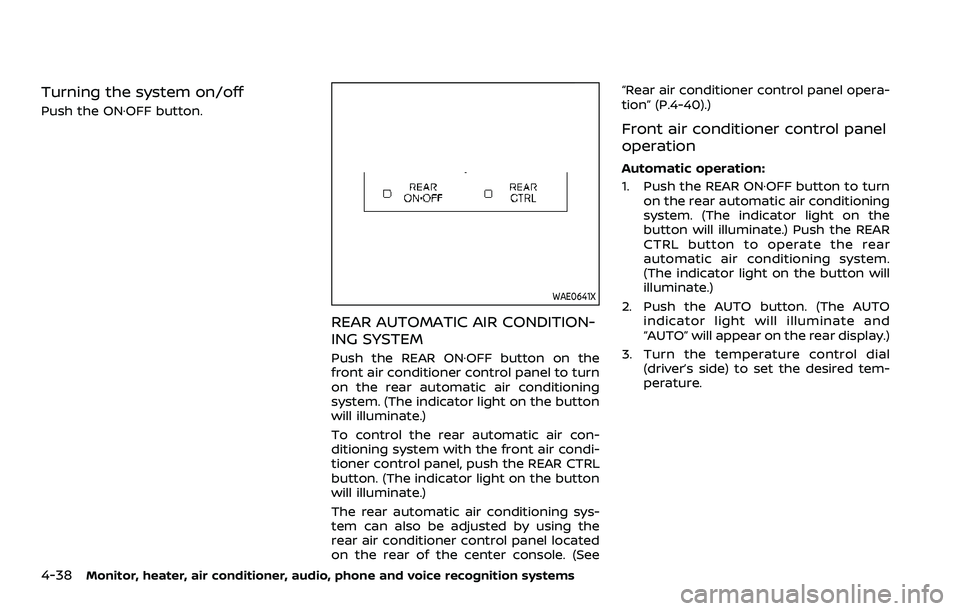
Push the ON·OFF button.
WAE0641X
REAR AUTOMATIC AIR CONDITION-
ING SYSTEM
Push the REAR ON·OFF button on the
front air conditioner control panel to turn
on the rear automatic air conditioning
system. (The indicator light on the button
will illuminate.)
To control the rear automatic air con-
ditioning system with the front air condi-
tioner control panel, push the REAR CTRL
button. (The indicator light on the button
will illuminate.)
The rear automatic air conditioning sys-
tem can also be adjusted by using the
rear air conditioner control panel located
on the rear of the center console. (See“Rear air conditioner control panel opera-
tion” (P.4-40).)
Front air conditioner control panel
operation
Automatic operation:
1. Push the REAR ON·OFF button to turn
on the rear automatic air conditioning
system. (The indicator light on the
button will illuminate.) Push the REAR
CTRL button to operate the rear
automatic air conditioning system.
(The indicator light on the button will
illuminate.)
2. Push the AUTO button. (The AUTO indicator light will illuminate and
“AUTO” will appear on the rear display.)
3. Turn the temperature control dial (driver’s side) to set the desired tem-
perature.
Page 263 of 603
Cooling and dehumidified heating:
1. Push the REAR ON·OFF button to turnon the rear automatic air conditioning
system. (The indicator light on the
button will illuminate.) Push the REAR
CTRL button to operate the rear
automatic air conditioning system.
(The indicator light on the button will
illuminate.)
2. Turn the temperature control dial (driver’s side) to set the desired tem-
perature.
3. Switch the air flow mode to
by
pushing thebutton.
4. Push the A/C button. (The indicator light on the button will illuminate.)
NOTE:
When the front air conditioner is off, the
rear automatic air conditioning system
only operates the fan. When you would
like to use the air conditioner, be sure to
push the A/C button on the front air
conditioner control panel to turn on the
A/C indicator light.
Manual operation:
Perform the following when the indicator
lights on the REAR ON·OFF button and the
REAR CTRL button are illuminated.
. Temperature control
Turn the temperature control dial (driver’s side) to set the desired tem-
perature.
. Fan speed control
Push the fan speed control
but-
tons to manually control the fan
speed.
. Air flow control
Push the
button to change the air
flow mode.
: The air outlet is fixed at foot level.
: The air outlet is fixed at both the head and foot levels.
: The air outlet is fixed at the head level.
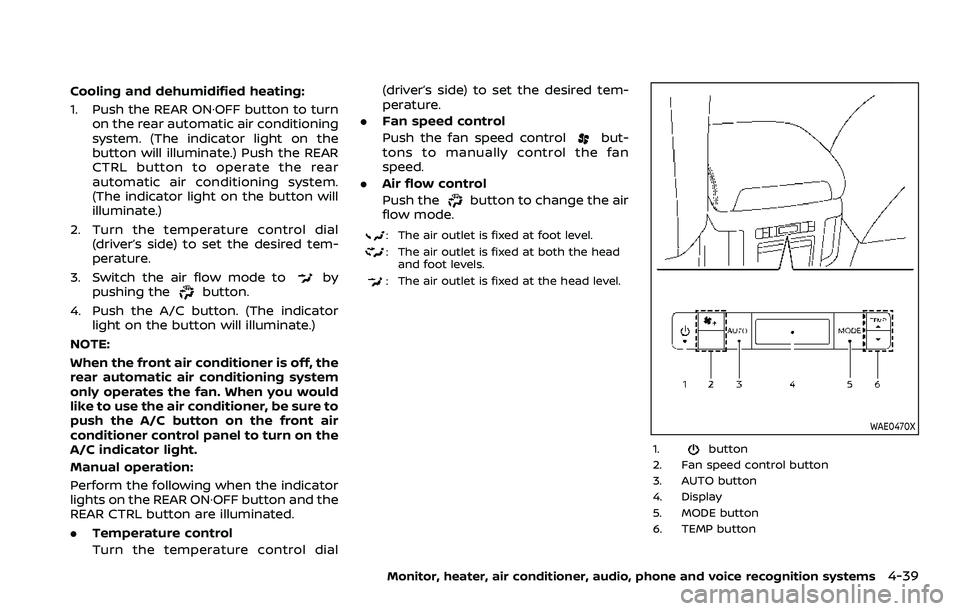
WAE0470X
1.button
2. Fan speed control button
3. AUTO button
4. Display
5. MODE button
6. TEMP button
Monitor, heater, air conditioner, audio, phone and voice recognition systems4-39
Page 264 of 603
4-40Monitor, heater, air conditioner, audio, phone and voice recognition systems
Rear air conditioner control panel
operation
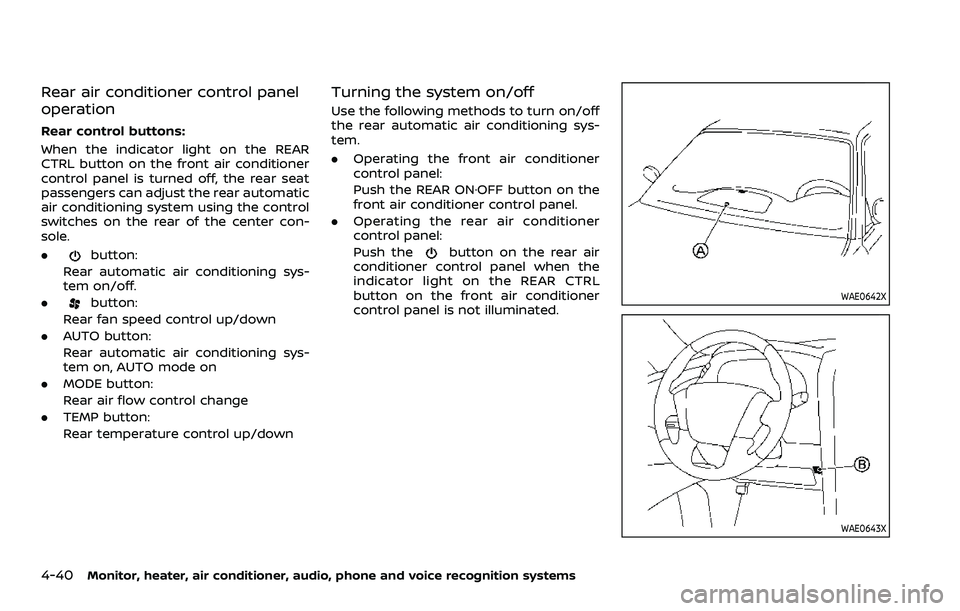
Rear control buttons:
When the indicator light on the REAR
CTRL button on the front air conditioner
control panel is turned off, the rear seat
passengers can adjust the rear automatic
air conditioning system using the control
switches on the rear of the center con-
sole.
.
button:
Rear automatic air conditioning sys-
tem on/off.
.
button:
Rear fan speed control up/down
. AUTO button:
Rear automatic air conditioning sys-
tem on, AUTO mode on
. MODE button:
Rear air flow control change
. TEMP button:
Rear temperature control up/down
Turning the system on/off
Use the following methods to turn on/off
the rear automatic air conditioning sys-
tem.
.Operating the front air conditioner
control panel:
Push the REAR ON·OFF button on the
front air conditioner control panel.
. Operating the rear air conditioner
control panel:
Push the
button on the rear air
conditioner control panel when the
indicator light on the REAR CTRL
button on the front air conditioner
control panel is not illuminated.
WAE0642X
WAE0643X
Page 265 of 603

OPERATING TIPS
When the engine coolant temperature
and outside air temperature are low, the
air flow from the foot outlets may not
operate. However, this is not a malfunc-
tion. After the coolant temperature
warms up, the air flow from the foot
outlets will operate normally.
The sensors
andlocated on the
instrument panel help maintain a con-
stant temperature. Do not put anything
on or around the sensors.
LINKING INTELLIGENT KEY (if so
equipped)
The air conditioner system settings can
be memorized for each Intelligent Key.
For more details, see “Setting memory
function” (P.3-42).
IN-CABIN MICROFILTER
The air conditioner system is equipped
with an in-cabin microfilter which collects
dirt, pollen, dust, etc.
To make sure the air conditioner heats,
defogs, and ventilates efficiently, replace
the filter in accordance with the specified
maintenance intervals listed in the “9.
Maintenance and schedules” section. It is
recommended to see a NISSAN dealer to
replace the filter.
The filter should be replaced if the air flow decreases significantly or if win-
dows fog up easily when operating the
heater or air conditioner.
SERVICING AIR CONDITIONER
The air conditioner system in your NISSAN
is charged with a refrigerant designed
with the environment in mind.
This re-
frigerant will not harm the earth’s
ozone layer. However, special charging
equipment and lubricant are required
when servicing your NISSAN air condi-
tioner. Using improper refrigerants or
lubricants will cause severe damage to
your air conditioner system. (See “Capa-
cities and recommended fluids/lubri-
cants” (P.10-2) for air conditioner system
refrigerant and lubricant recommenda-
tions.)
Your NISSAN dealer will be able to service
your environmentally friendly air condi-
tioner system.
WARNING
The system contains refrigerant un-
der high pressure. To avoid personal
injury, any air conditioner service
should be done only by an experi-
enced technician with the proper
equipment.
WINDOW ANTENNA
The antenna pattern is printed inside the
rear side glass.
CAUTION
. Do not place metalized film near
the 3rd row seat window or at-
tach any metal parts to it. This
may cause poor reception or
noise.
. When cleaning the inside of the
rear side window, be careful not
to scratch or damage the rear
side window antenna. Lightly
wipe along the antenna with a
dampened soft cloth.
Monitor, heater, air conditioner, audio, phone and voice recognition systems4-41
ANTENNA
Page 266 of 603
4-42Monitor, heater, air conditioner, audio, phone and voice recognition systems
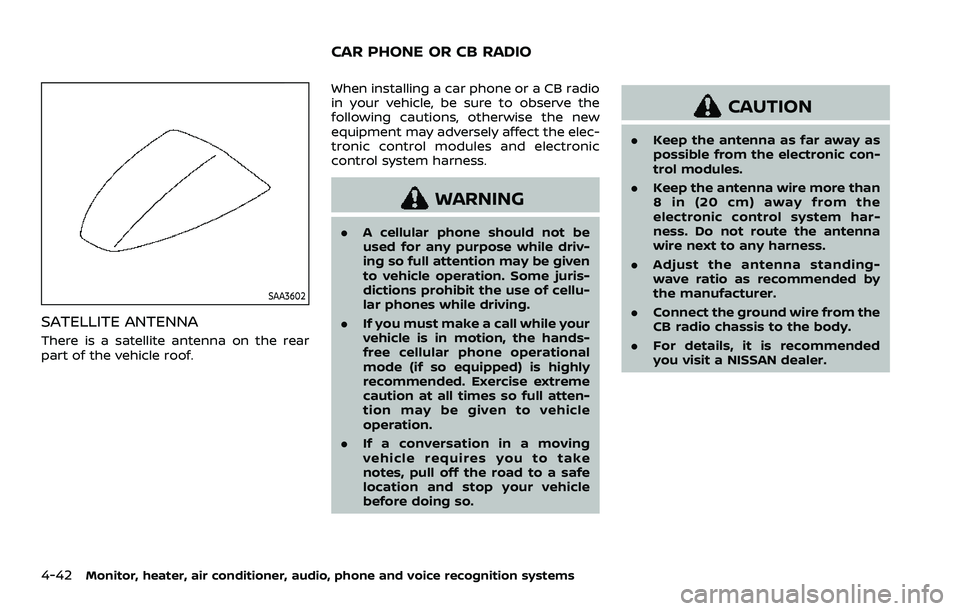
SAA3602
SATELLITE ANTENNA
There is a satellite antenna on the rear
part of the vehicle roof.When installing a car phone or a CB radio
in your vehicle, be sure to observe the
following cautions, otherwise the new
equipment may adversely affect the elec-
tronic control modules and electronic
control system harness.
WARNING
.
A cellular phone should not be
used for any purpose while driv-
ing so full attention may be given
to vehicle operation. Some juris-
dictions prohibit the use of cellu-
lar phones while driving.
. If you must make a call while your
vehicle is in motion, the hands-
free cellular phone operational
mode (if so equipped) is highly
recommended. Exercise extreme
caution at all times so full atten-
tion may be given to vehicle
operation.
. If a conversation in a moving
vehicle requires you to take
notes, pull off the road to a safe
location and stop your vehicle
before doing so.
CAUTION
.Keep the antenna as far away as
possible from the electronic con-
trol modules.
. Keep the antenna wire more than
8 in (20 cm) away from the
electronic control system har-
ness. Do not route the antenna
wire next to any harness.
. Adjust the antenna standing-
wave ratio as recommended by
the manufacturer.
. Connect the ground wire from the
CB radio chassis to the body.
. For details, it is recommended
you visit a NISSAN dealer.
CAR PHONE OR CB RADIO
Page 307 of 603

.The radar sensors may not be
able to detect and activate BSW
when certain objects are present
such as:
— Pedestrians, bicycles, animals.
— Vehicles such as motorcycles,
low height vehicles, or high
ground clearance vehicles.
— Oncoming vehicles.
— Vehicles remaining in the de- tection zone when you accel-
erate from a stop.
— A vehicle merging into an adjacent lane at a speed ap-
proximately the same as your
vehicle.
— A vehicle approaching rapidly from behind.
— A vehicle which your vehicle overtakes rapidly.
— A vehicle that passes through the detection zone quickly.
— When overtaking several vehi- cles in a row, the vehicles after
the first vehicle may not be
detected if they are traveling
close together. .
The radar sensor’s detection zone
is designed based on a standard
lane width. When driving in a
wider lane, the radar sensors
may not detect vehicles in an
adjacent lane. When driving in a
narrow lane, the radar sensors
may detect vehicles driving two
lanes away.
. The radar sensors are designed
to ignore most stationary objects,
however objects such as guard-
rails, walls, foliage and parked
vehicles may occasionally be de-
tected. This is a normal operation
condition.
. The following conditions may re-
duce the ability of the radar to
detect other vehicles:
— Severe weather
— Road spray
— Ice/frost/dirt build-up on the
vehicle
. Do not attach stickers (including
transparent material), install ac-
cessories or apply additional
paint near the radar sensors.
These conditions may reduce the
ability of the radar to detect other
vehicles. .
When towing a trailer or other
vehicle, turn the BSW system off
to prevent the occurrence of an
unexpected accident resulting
from sudden system operation.
. Excessive noise (for example,
audio system volume, open vehi-
cle window) will interfere with the
chime sound, and it may not be
heard.
BSW DRIVING SITUATIONS
Indicator on
Indicator off
Indicator flashing
Starting and driving5-41
Page 316 of 603

5-50Starting and driving
standard lane markers; lane
markers covered with water,
dirt, snow, etc.
— On roads where discontinued lane markers are still detect-
able.
— On roads where there are sharp curves.
— On roads where there are sharply contrasting objects,
such as shadows, snow,
water, wheel ruts, seams or
lines remaining after road re-
pairs.
— On roads where the traveling lane merges or separates.
— When the vehicle’s traveling direction does not align with
the lane markers.
— When traveling close to the vehicle in front of you, which
obstructs the lane camera
unit detection range.
— When rain, snow or dirt ad- heres to the windshield in
front of a lane camera unit.
— When the headlights are not bright due to dirt on the lens
or if aiming is not adjusted properly.
— When strong light enters a lane camera unit. (For exam-
ple: light directly shines on the
front of the vehicle at sunrise
or sunset.)
— When a sudden change in brightness occurs. (For exam-
ple: when the vehicle enters or
exits a tunnel or under a
bridge.)
. Do not use the I-BSI system under
the following conditions because
the system may not function
properly.
— During bad weather. (For ex-
ample: rain, fog, snow, etc.)
— When driving on slippery roads, such as on ice or snow,
etc.
— When driving on winding or uneven roads.
— When there is a lane closure due to road repairs.
— When driving in a makeshift or temporary lane.
— When driving on roads where the lane width is too narrow. — When driving with a tire that is
not within normal tire condi-
tions (for example, tire wear,
low tire pressure, installation
of spare tire, tire chains, non-
standard wheels).
— When the vehicle is equipped with non-original steering
parts or suspension parts.
— When towing a trailer or other vehicle.
. Excessive noise (for example,
audio system volume, open vehi-
cle window) will interfere with the
chime sound, and it may not be
heard.