2021 NISSAN ARMADA brake
[x] Cancel search: brakePage 157 of 603
be used in the following condi-
tions:
— Emergency functions and ser-vices will not be available
without a paid subscription
to NissanConnect® Services.
— The NissanConnect® Services network system is disabled.
— The vehicle moves outside the service area where the TCU
(Telematics Control Unit) is
connected to the system.
— The vehicle is outside the area where the cellular network
service is receivable.
— The vehicle is in a location with poor signal reception
such as tunnels, underground
parking garages, behind
buildings or in mountainous
areas.
— The line is busy.
— The TCU (Telematics Control Unit) or other systems of your
vehicle are not working prop-
erly.
— It may not be possible to make an emergency call de-
pending on the severity of a collision and/or emergency.
. Park the vehicle in a safe location
and set the parking brake before
operating the Emergency Call
(SOS) button.
. Only use this service in case of an
emergency. There may be a pen-
alty for inappropriate use of the
service.
. Radio waves could adversely af-
fect electric medical equipment.
Individuals who use a pacemaker
should contact the device manu-
facturer regarding any possible
effects before using the system.
. The TCU (Telematics Control Unit)
antenna is installed inside the
upper central part of the instru-
ment panel. An occupant should
not get any closer to the antenna
than specified by the pacemaker
manufacturer. The radio waves
from the TCU antenna may ad-
versely affect the operation of the
pacemaker while using the Nis-
sanConnect® Services.
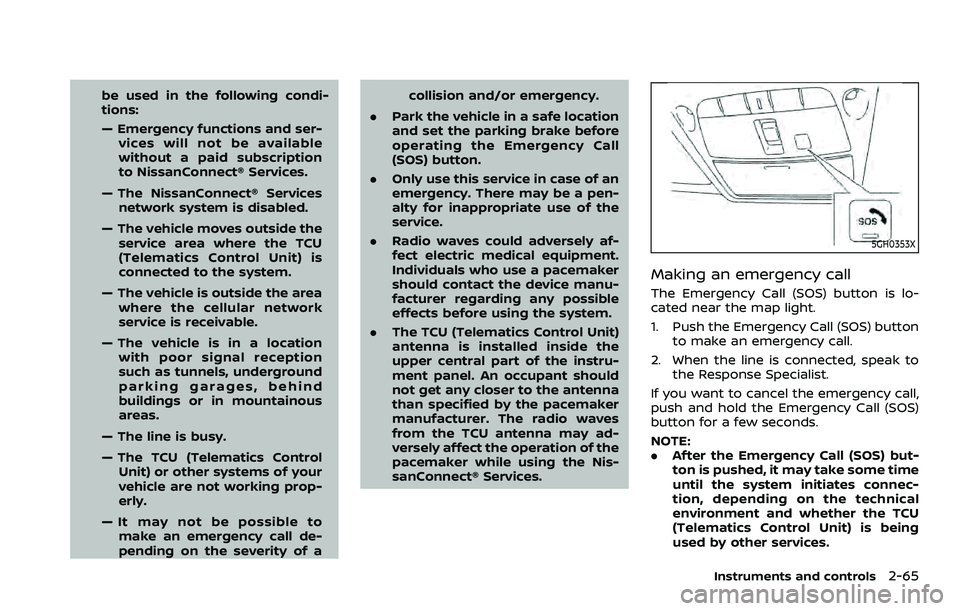
5GH0353X
Making an emergency call
The Emergency Call (SOS) button is lo-
cated near the map light.
1. Push the Emergency Call (SOS) button
to make an emergency call.
2. When the line is connected, speak to the Response Specialist.
If you want to cancel the emergency call,
push and hold the Emergency Call (SOS)
button for a few seconds.
NOTE:
. After the Emergency Call (SOS) but-
ton is pushed, it may take some time
until the system initiates connec-
tion, depending on the technical
environment and whether the TCU
(Telematics Control Unit) is being
used by other services.
Instruments and controls2-65
Page 202 of 603

3-20Pre-driving checks and adjustments
3. Within 5 seconds push and hold theremote engine startbutton until
the turn signal lights flash and the tail
lights illuminate. If the vehicle is not
within view, push and hold the remote
engine start
button for at least 2
seconds.
The following events will occur when the
engine starts:
. The front parking lights will turn on
and remain on as long as the engine is
running.
. The doors will be locked and the air
conditioner system may turn on.
. The engine will continue to run for
about 10 minutes. Repeat the steps to
extend the time for an additional 10
minutes. See “Extending engine run
time” (P.3-20).
Depress and hold the brake pedal, then
place the ignition switch in the ON posi-
tion before driving. For further instruc-
tions, see “Driving the vehicle” (P.5-17).
EXTENDING ENGINE RUN TIME
The remote engine start function can be
extended one time by performing the
steps listed in “Remote starting the en-
gine” (P.3-19). Run time will be calculated
as follows:
. The first 10 minute run time will start
when the remote engine start func- tion is performed.
. The second 10 minutes will start im-
mediately when the remote engine
start function is performed. For exam-
ple, if the engine has been running for
5 minutes, and 10 minutes are added,
the engine will run for a total of 15
minutes.
. Extending engine run time will count
towards the two remote engine start
limit.
A maximum of two remote engine starts,
or a single start with an extension, are
allowed between ignition cycles.
The ignition switch must be cycled to the
ON position and then back to the OFF
position before the remote engine start
procedure can be used again.
CANCELING A REMOTE ENGINE
START
To cancel a remote engine start, perform
one of the following:
. Aim the Intelligent Key at the vehicle
and push and hold the remote engine
start
button until the front park-
ing lights turn off.
. Turn on the hazard indicator flashers.
. Cycle the ignition switch ON and then
OFF. .
The extended engine run time has
expired.
. The first 10 minute timer has expired.
. The engine hood has been opened.
. The shift lever is moved out of the P
(Park) position.
. The theft alarm sounds due to illegal
entry into the vehicle.
. The ignition switch is pushed without
an Intelligent Key in the vehicle.
. The ignition switch is pushed with an
Intelligent Key in the vehicle but the
brake pedal is not depressed.
CONDITIONS THE REMOTE ENGINE
START WILL NOT WORK
The remote engine start will not operate
if any of the following conditions are
present:
.The ignition switch is placed in the ON
position.
. The hood is not securely closed.
. The hazard indicator flashers are on.
. The engine is still running. The engine
must be completely stopped. Wait at
least 6 seconds if the engine goes
from running to off. This is not applic-
able when extending engine run time.
. The remote engine start
button is
not pushed and held for at least 2
seconds.
Page 203 of 603

.The remote engine startbutton is
not pushed and held within 5 seconds
of pushing the “LOCK”
button.
. The brake pedal is depressed.
. The doors are not closed and locked.
. The liftgate is open.
. The Key System Error warning light
remains on in the vehicle information
display.
. An Intelligent Key is left inside the
vehicle.
. The theft alarm sounds due to illegal
entry into the vehicle.
. Two remote engine starts, or a single
remote engine start with an exten-
sion, have already been used.
. The shift lever is not in the P (Park)
position.
The remote engine start may display a
warning or indicator in the vehicle infor-
mation display. For an explanation of the
warning or indicator, see “Operational
indicators” (P.2-29).
WAD0267X
1. Pull the hood lock release handlelocated below the instrument panel;
the hood will then spring up slightly.
2. Pull the lever
up at the front of the
hood with your fingertips and raise
the hood.
3. When closing the hood, slowly close the hood down and make sure it locks
into place.
WARNING
.Make sure the hood is completely
closed and latched before driving.
Failure to do so could cause the hood to fly open and result in an
accident.
. If you see steam or smoke com-
ing from the engine compart-
ment, to avoid injury do not
open the hood.
Pre-driving checks and adjustments3-21
HOOD
Page 226 of 603

4-2Monitor, heater, air conditioner, audio, phone and voice recognition systems
For models with NissanConnect® and
Services, refer to the NissanConnect®
Owner’s Manual regarding the following
information.
.Audio system
. Bluetooth® Hands-Free Phone
. NissanConnect® Services
. SiriusXM Traffic
TM
.SiriusXM® Travel Link
. SiriusXM® Radio
. Navigation system
. Voice Recognition System
. Information and settings viewable on
NissanConnect®
. Android Auto
TM
.Apple CarPlay®
WARNING
.Do not disassemble or modify
this system. If you do, it may
result in accidents, fire, or electric
shock.
. Do not use this system if you
notice any abnormality, such as
a frozen screen or lack of sound.
Continued use of the system may
result in accident, fire or electric
shock.
. In case you notice any foreign
object in the system hardware,
spill liquid on it, or notice smoke
or smell coming from it, stop
using the system immediately. It
is recommended you visit a
NISSAN dealer for servicing.
Ignoring such conditions may
lead to accidents, fire, or electric
shock.
. Park the vehicle in a safe location
and apply the parking brake to
view the images on the touch
screen display.
CAUTION
Do not use the system when the
engine is not running for extended
periods of time to prevent battery
discharge.
Do not attempt to operate the system in
extreme temperature conditions [below
−4°F (−20°C) and above 158°F (70°C)].
Operating this system under these con-
ditions may result in system malfunc-
tions.
NISSANCONNECT® OWNER’S MANUALSAFETY NOTE
Page 232 of 603
4-8Monitor, heater, air conditioner, audio, phone and voice recognition systems
5. When the vehicle is parked in thespace completely, place the shift lever
in the P (Park) position and apply the
parking brake.
REARVIEW MONITOR SETTINGS
The RearView Monitor settings can be
changed using the following procedure.
1. Push the MENU button on the DisplayCommander.
2. Touch the “Settings” key on the touch screen display.
3. Touch the “Camera” key. Available setting items:
Setting items
Action
Predictive Course Lines Display the predictive course lines.
Display
Settings Brightness
Adjust display settings by touching the “+”/“-” key.
Contrast
Tint
Color
Black Level
REARVIEW MONITOR SYSTEM LIM-
ITATIONS
WARNING
Listed below are the system limita-
tions for RearView Monitor. Failure to
operate the vehicle in accordance
with these system limitations could
result in serious injury or death.
. The system cannot completely
eliminate blind spots and may
not show every object.
. Underneath the bumper and the
corner areas of the bumper can-
not be viewed on the RearView
Monitor because of its monitoring
range limitation. The system will
not show small objects below the
bumper, and may not show ob-
jects close to the bumper or on the ground.
. Objects viewed in the RearView
Monitor differ from actual dis-
tance because a wide-angle lens
is used.
. Objects in the RearView Monitor
will appear visually opposite
compared to when viewed in the
rearview and outside mirrors.
. Use the displayed lines as a re-
ference. The lines are highly af-
fected by the number of
occupants, fuel level, vehicle po-
sition, road conditions and road
grade.
. Make sure that the liftgate is
securely closed when backing up.
. Do not put anything on the rear-
view camera. The rearview cam-
era is installed above the license
Page 242 of 603
4-18Monitor, heater, air conditioner, audio, phone and voice recognition systems
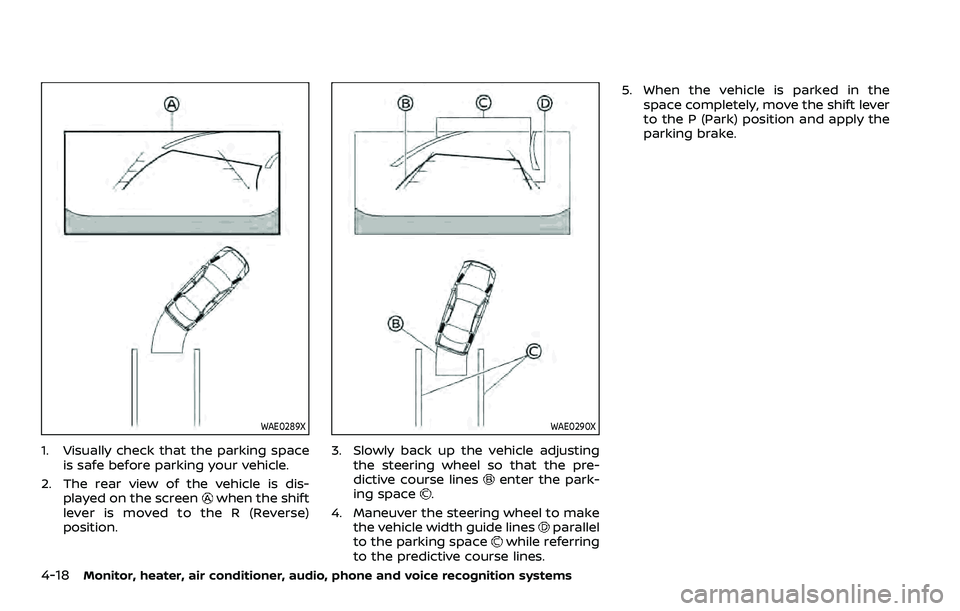
WAE0289X
1. Visually check that the parking spaceis safe before parking your vehicle.
2. The rear view of the vehicle is dis- played on the screen
when the shift
lever is moved to the R (Reverse)
position.
WAE0290X
3. Slowly back up the vehicle adjusting the steering wheel so that the pre-
dictive course lines
enter the park-
ing space.
4. Maneuver the steering wheel to make the vehicle width guide lines
parallel
to the parking spacewhile referring
to the predictive course lines. 5. When the vehicle is parked in the
space completely, move the shift lever
to the P (Park) position and apply the
parking brake.
Page 244 of 603
4-20Monitor, heater, air conditioner, audio, phone and voice recognition systems
Available setting items:
Setting itemAction
Display Settings Brightness Adjust display settings by touching the “+”/“-” key.
Contrast
Tint
Color
Black Level
Camera Moving Object Detection Turn the MOD system on/off. (See “Moving Object Detection (MOD)” (P.4-
29).)
Unviewable Area Reminder When this item is turned on, the unviewable area is highlighted in yellow
for several seconds after the bird’s-eye view is displayed for the first time
when the ignition switch is placed in the ON position.
Predictive Course Lines When this item is turned on, the predictive course lines are displayed in the
front, rear and bird’s-eye view screen.
Auto Show Sonar Image The automatic sonar display can be turned on/off.
NOTE:
Do not adjust any of the Intelligent Around View® Monitor settings while the vehicle is moving. Make sure the parking brake is
firmly applied.
Page 251 of 603
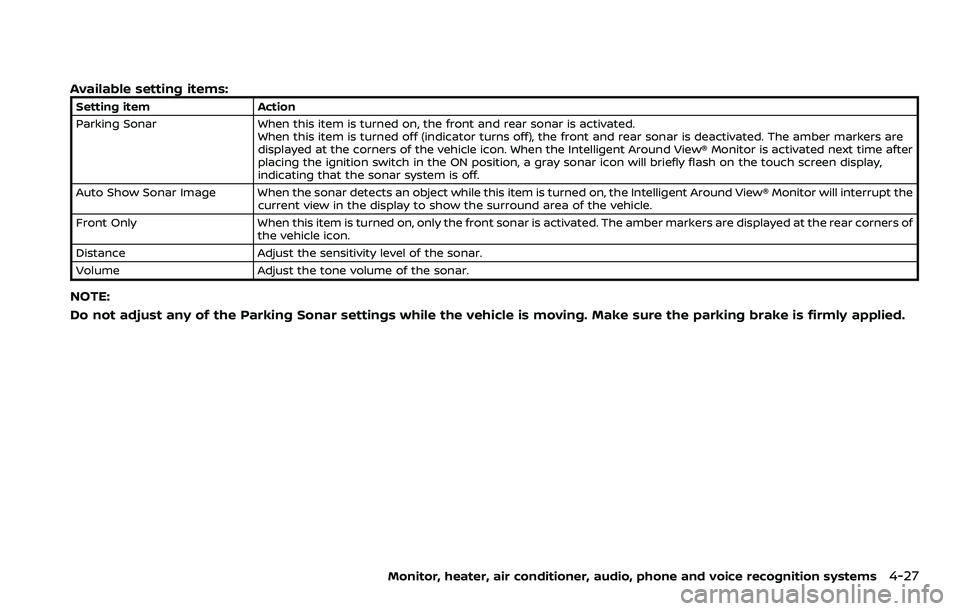
Available setting items:
Setting itemAction
Parking Sonar When this item is turned on, the front and rear sonar is activated.
When this item is turned off (indicator turns off), the front and rear sonar is deactivated. The amber markers are
displayed at the corners of the vehicle icon. When the Intelligent Around View® Monitor is activated next time after
placing the ignition switch in the ON position, a gray sonar icon will briefly flash on the touch screen display,
indicating that the sonar system is off.
Auto Show Sonar Image When the sonar detects an object while this item is turned on, the Intelligent Around View® Monitor will interrupt the current view in the display to show the surround area of the vehicle.
Front Only When this item is turned on, only the front sonar is activated. The amber markers are displayed at the rear corners of
the vehicle icon.
Distance Adjust the sensitivity level of the sonar.
Volume Adjust the tone volume of the sonar.
NOTE:
Do not adjust any of the Parking Sonar settings while the vehicle is moving. Make sure the parking brake is firmly applied.
Monitor, heater, air conditioner, audio, phone and voice recognition systems4-27