2021 NISSAN ARMADA mirror controls
[x] Cancel search: mirror controlsPage 179 of 603
.If the indicator light rapidly flashesin green, firmly press, hold for two
seconds and release the
HomeLink® button up to three
times to complete the program-
ming process. Do not press the
HomeLink® button rapidly. At this
point if your device operates, pro-
gramming is complete. If the device
does not operate or operates but
no door status indicator with Two-
Way Communication
*1, continue
with the next step of the program-
ming instructions.
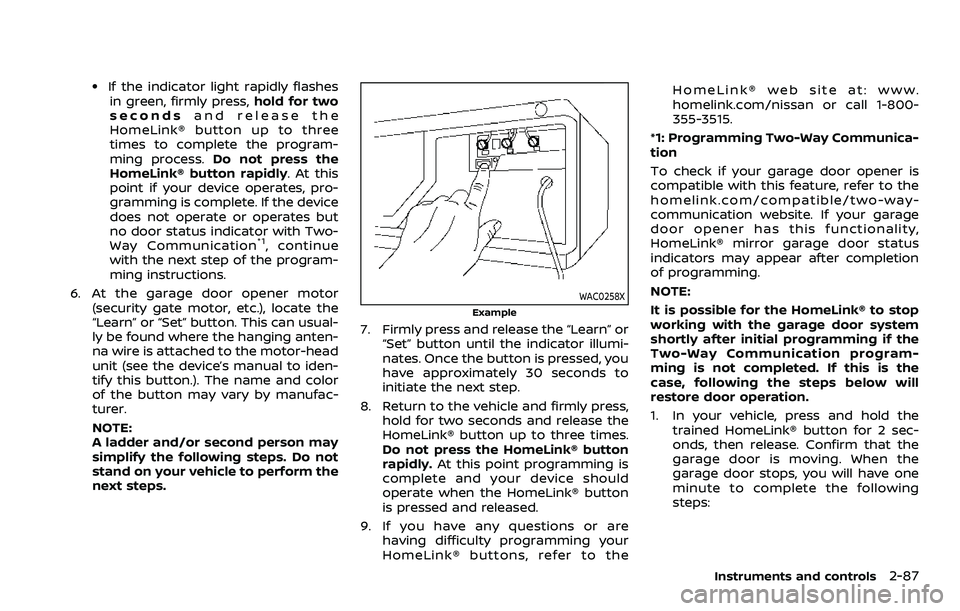
6. At the garage door opener motor (security gate motor, etc.), locate the
“Learn” or “Set” button. This can usual-
ly be found where the hanging anten-
na wire is attached to the motor-head
unit (see the device’s manual to iden-
tify this button.). The name and color
of the button may vary by manufac-
turer.
NOTE:
A ladder and/or second person may
simplify the following steps. Do not
stand on your vehicle to perform the
next steps.
WAC0258X
Example
7. Firmly press and release the “Learn” or“Set” button until the indicator illumi-
nates. Once the button is pressed, you
have approximately 30 seconds to
initiate the next step.
8. Return to the vehicle and firmly press, hold for two seconds and release the
HomeLink® button up to three times.
Do not press the HomeLink® button
rapidly. At this point programming is
complete and your device should
operate when the HomeLink® button
is pressed and released.
9. If you have any questions or are having difficulty programming your
HomeLink® buttons, refer to the HomeLink® web site at: www.
homelink.com/nissan or call 1-800-
355-3515.
*1: Programming Two-Way Communica-
tion
To check if your garage door opener is
compatible with this feature, refer to the
homelink.com/compatible/two-way-
communication website. If your garage
door opener has this functionality,
HomeLink® mirror garage door status
indicators may appear after completion
of programming.
NOTE:
It is possible for the HomeLink® to stop
working with the garage door system
shortly after initial programming if the
Two-Way Communication program-
ming is not completed. If this is the
case, following the steps below will
restore door operation.
1. In your vehicle, press and hold the trained HomeLink® button for 2 sec-
onds, then release. Confirm that the
garage door is moving. When the
garage door stops, you will have one
minute to complete the following
steps:
Instruments and controls2-87
Page 181 of 603
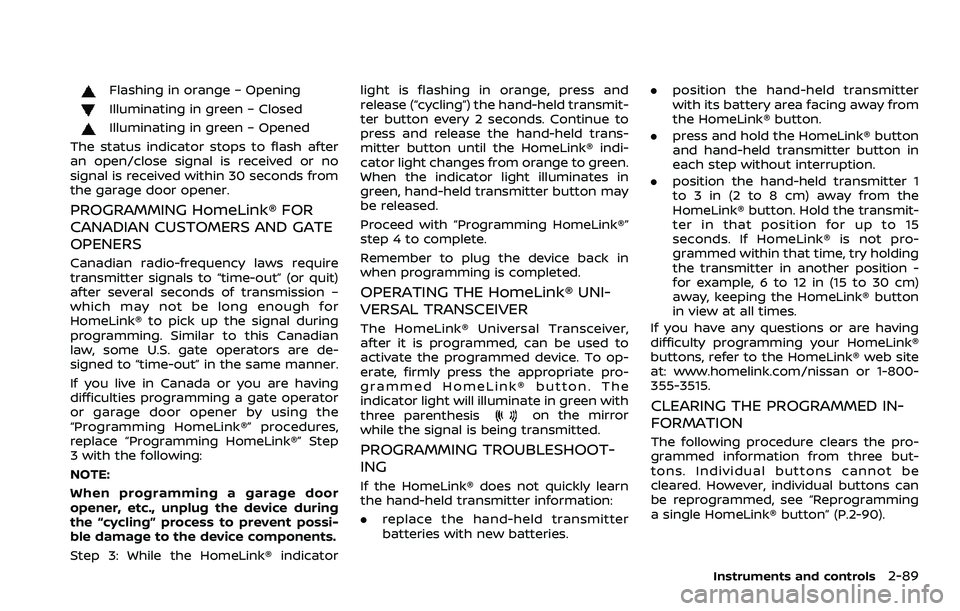
Flashing in orange – Opening
Illuminating in green – Closed
Illuminating in green – Opened
The status indicator stops to flash after
an open/close signal is received or no
signal is received within 30 seconds from
the garage door opener.
PROGRAMMING HomeLink® FOR
CANADIAN CUSTOMERS AND GATE
OPENERS
Canadian radio-frequency laws require
transmitter signals to “time-out” (or quit)
after several seconds of transmission –
which may not be long enough for
HomeLink® to pick up the signal during
programming. Similar to this Canadian
law, some U.S. gate operators are de-
signed to “time-out” in the same manner.
If you live in Canada or you are having
difficulties programming a gate operator
or garage door opener by using the
“Programming HomeLink®” procedures,
replace “Programming HomeLink®” Step
3 with the following:
NOTE:
When programming a garage door
opener, etc., unplug the device during
the “cycling” process to prevent possi-
ble damage to the device components.
Step 3: While the HomeLink® indicator light is flashing in orange, press and
release (“cycling”) the hand-held transmit-
ter button every 2 seconds. Continue to
press and release the hand-held trans-
mitter button until the HomeLink® indi-
cator light changes from orange to green.
When the indicator light illuminates in
green, hand-held transmitter button may
be released.
Proceed with “Programming HomeLink®”
step 4 to complete.
Remember to plug the device back in
when programming is completed.
OPERATING THE HomeLink® UNI-
VERSAL TRANSCEIVER
The HomeLink® Universal Transceiver,
after it is programmed, can be used to
activate the programmed device. To op-
erate, firmly press the appropriate pro-
grammed HomeLink® button. The
indicator light will illuminate in green with
three parenthesis
on the mirror
while the signal is being transmitted.
PROGRAMMING TROUBLESHOOT-
ING
If the HomeLink® does not quickly learn
the hand-held transmitter information:
. replace the hand-held transmitter
batteries with new batteries. .
position the hand-held transmitter
with its battery area facing away from
the HomeLink® button.
. press and hold the HomeLink® button
and hand-held transmitter button in
each step without interruption.
. position the hand-held transmitter 1
to 3 in (2 to 8 cm) away from the
HomeLink® button. Hold the transmit-
ter in that position for up to 15
seconds. If HomeLink® is not pro-
grammed within that time, try holding
the transmitter in another position -
for example, 6 to 12 in (15 to 30 cm)
away, keeping the HomeLink® button
in view at all times.
If you have any questions or are having
difficulty programming your HomeLink®
buttons, refer to the HomeLink® web site
at: www.homelink.com/nissan or 1-800-
355-3515.
CLEARING THE PROGRAMMED IN-
FORMATION
The following procedure clears the pro-
grammed information from three but-
tons. Individual buttons cannot be
cleared. However, individual buttons can
be reprogrammed, see “Reprogramming
a single HomeLink® button” (P.2-90).
Instruments and controls2-89
Page 182 of 603
2-90Instruments and controls
To clear all programming
1. Press and hold the two outerHomeLink® buttons until the indicator
light begins to flash in green and
“CLEARED” is displayed on the mirror,
in approximately 10 seconds. Do not
hold for longer than 20 seconds.
2. Release both buttons.
HomeLink® is now in the programming
mode and can be programmed at any
time beginning with “Programming
HomeLink®” - Step 1.
REPROGRAMMING A SINGLE
HomeLink® BUTTON
To reprogram a HomeLink® button, com-
plete the following.
1. Press and hold the desired HomeLink® button. DO NOT release the button.
2. The indicator light will illuminate in green, and after 20 seconds it will
begin to flash in orange and “TRAIN-
ING” is displayed on the mirror.
3. Release the HomeLink® button and proceed with “Programming
HomeLink®” — Step 3.
For questions or comments, contact
HomeLink® at: www.homelink.com/
nissan or 1-800-355-3515.
The HomeLink® button has now been
reprogrammed. The new device can be activated by pressing the HomeLink®
button that was just programmed. This
procedure will not affect any other pro-
grammed HomeLink® buttons.
If a new device is not programmed to the
HomeLink® button, it will revert to the
previously stored programming.
IF YOUR VEHICLE IS STOLEN
If your vehicle is stolen, you should
change the codes of any non-rolling code
device that has been programmed into
HomeLink®. Consult the Owner’s Manual
of each device or call the manufacturer or
dealer of those devices for additional
information.
When your vehicle is recovered, you will
need to reprogram the HomeLink® Uni-
versal Transceiver with your new trans-
mitter information.
FCC Notice:
For USA:
This device complies with Part 15 of the
FCC Rules. Operation is subject to the
following two conditions: (1) This device
may not cause harmful interference,
and (2) this device must accept any
interference received, including inter-
ference that may cause undesired op-
eration.
NOTE:
Changes or modifications not expressly
approved by the party responsible for
compliance could void the user’s
authority to operate the equipment.
For Canada:
This device complies with Industry Ca-
nada licence-exempt RSS standard(s).
Operation is subject to the following
two conditions: (1) this device may not
cause interference, and (2) this device
must accept any interference, including
interference that may cause undesired
operation of the device.
Page 293 of 603
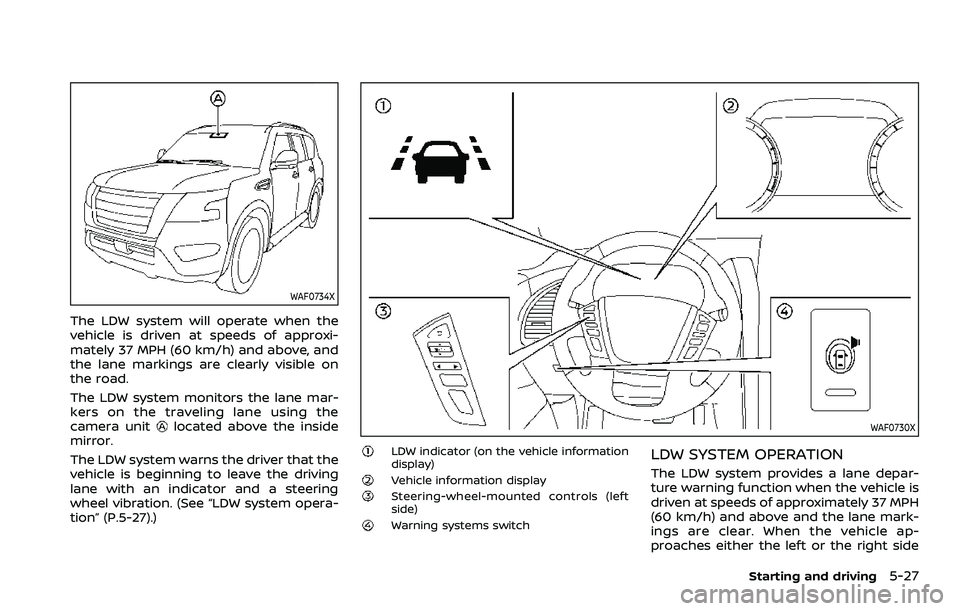
WAF0734X
The LDW system will operate when the
vehicle is driven at speeds of approxi-
mately 37 MPH (60 km/h) and above, and
the lane markings are clearly visible on
the road.
The LDW system monitors the lane mar-
kers on the traveling lane using the
camera unit
located above the inside
mirror.
The LDW system warns the driver that the
vehicle is beginning to leave the driving
lane with an indicator and a steering
wheel vibration. (See “LDW system opera-
tion” (P.5-27).)WAF0730X
LDW indicator (on the vehicle information
display)
Vehicle information displaySteering-wheel-mounted controls (left
side)
Warning systems switch
LDW SYSTEM OPERATION
The LDW system provides a lane depar-
ture warning function when the vehicle is
driven at speeds of approximately 37 MPH
(60 km/h) and above and the lane mark-
ings are clear. When the vehicle ap-
proaches either the left or the right side
Starting and driving5-27
Page 323 of 603
WARNING
Failure to follow the warnings and
instructions for proper use of the
RCTA system could result in serious
injury or death.
.The RCTA system is not a replace-
ment for proper driving proce-
dures and is not designed to
prevent contact with vehicles or
objects. When backing out of a
parking space, always use the
side and rear mirrors and turn
and look in the direction your
vehicle will move. Never rely so-
lely on the RCTA system.
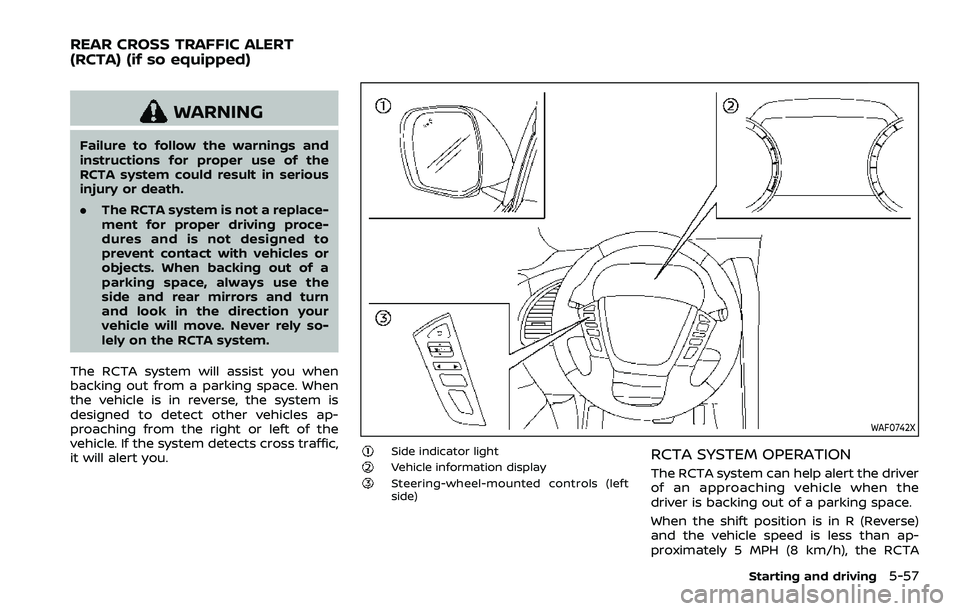
The RCTA system will assist you when
backing out from a parking space. When
the vehicle is in reverse, the system is
designed to detect other vehicles ap-
proaching from the right or left of the
vehicle. If the system detects cross traffic,
it will alert you.
WAF0742X
Side indicator lightVehicle information displaySteering-wheel-mounted controls (left
side)
RCTA SYSTEM OPERATION
The RCTA system can help alert the driver
of an approaching vehicle when the
driver is backing out of a parking space.
When the shift position is in R (Reverse)
and the vehicle speed is less than ap-
proximately 5 MPH (8 km/h), the RCTA
Starting and driving5-57
REAR CROSS TRAFFIC ALERT
(RCTA) (if so equipped)