2021 NISSAN ARMADA maintenance
[x] Cancel search: maintenancePage 117 of 603

15).)
Maintenance
The maintenance mode allows user to set
alerts for the reminding of maintenance
intervals. To change an item:
Select “Maintenance” using the
but-
tonsand press the OKbutton.
. Oil and Filter
. Tire
. Other
Oil and Filter:
This indicator appears when user set
distance comes for changing the engine
oil and filter. You can set or reset the
distance for checking or replacing these
items. For scheduled maintenance items
and intervals, refer to the “9. Maintenance
and schedules” section.
Tire:
This indicator appears when the user set
distance comes for replacing tires. You
can set or reset the distance for replacing
tires.
WARNING
The tire replacement indicator is not
a substitute for regular tire checks,
including tire pressure checks. (See “Changing wheels and tires” (P.8-
36).) Many factors including tire in-
flation, alignment, driving habits and
road conditions affect tire wear and
when tires should be replaced.
Setting the tire replacement indica-
tor for a certain driving distance
does not mean your tires will last
that long. Use the tire replacement
indicator as a guide only and always
perform regular tire checks. Failure
to perform regular tire checks, in-
cluding tire pressure checks could
result in tire failure. Serious vehicle
damage could occur and may lead to
a collision, which could result in
serious personal injury or death.
Other:
This indicator appears when the user set
distance comes for checking or replacing
maintenance items other than the engine
oil, oil filter and tires. Other maintenance
items can include such things as air filter
or tire rotation. You can set or reset the
distance for checking or replacing the
items.
Customize Display
The display settings allows user to
choose from the various meter selections.
The display settings can be changed
using the
buttons.
Main Menu Selection:
Displays available screens that can be
shown in the vehicle information display.
Route Guidance (if so equipped):
To change the setting, use the
buttonsand press the OKbutton.
. Alerts
The “Alerts” allows user to turn the Route
Guidance alerts on or off.
Welcome Effect:
The “Welcome Effect” displays the avail-
able welcome effect settings.
. gauges (if so equipped)
. Animation
Instruments and controls2-25
Page 141 of 603

To turn off the high beam assist system,
turn the headlight switch to the
position or select the low beam position
by placing the lever in the neutral posi-
tion.
WAC0618X
Ambient image sensor maintenance:
The ambient image sensor
for the high
beam assist system is located as shown.
To keep the proper operation of the high
beam assist system and prevent a system
malfunction, be sure to observe the
following:
. Always keep the windshield clean.
. Do not attach a sticker (including
transparent material) or install an
accessory near the ambient image
sensor.
. Do not strike or damage the areas
around the ambient image sensor. Do
not touch the sensor lens that is
located on the ambient image sensor. If the ambient image sensor is damaged
due to an accident, contact a NISSAN
dealer.
Battery saver system
A chime will sound when the driver side
door is opened with the light switch in the
orposition and the ignition
switch in the OFF or LOCK position.
When the headlight switch is in the
orposition while the ignition switch is in
the ON position, the lights will automati-
cally turn off after a period of time when
the ignition switch has been pushed to
the OFF position.
When the headlight switch remains in the
orposition after the lights auto-
matically turn off, the lights will turn on
when the ignition switch is pushed to the
ON position.
CAUTION
. When you turn on the headlight
switch again after the lights auto-
matically turn off, the lights will
not turn off automatically. Be
sure to turn the light switch to
the OFF position when you leave
the vehicle for extended periods
of time, otherwise the battery will
Instruments and controls2-49
Page 220 of 603
3-38Pre-driving checks and adjustments
.The color of an object in the distance
or in the dark may be difficult to be
recognized. This is not a malfunc-
tion.
System maintenance (Intelligent Rear
View Mirror):
. Always keep the mirror and camera
area of the rear window clean.
. Clean the mirror and the camera lens
with a dry soft cloth.
. When clean the camera area of the
rear window, using a soft cloth dam-
pend with water and a few neutral
detergent. And after, the dry it up with
dry soft cloth.
. If the image on the Intelligent Rear
View Mirror display screen is still un-
clear even after cleaning the camera
area of the rear window, an oil film
may be adhering to the rear window
glass. Clean the rear window glass
with an oil film remover.
. Never use alcohol, benzine, thinner, or
any similar material to clean the
mirror or camera lens. It will cause a
discoloration, deterioration or a sys-
tem malfunction.
. Do not attach a sticker (including
transparent material) on the camera
area of the rear window.
OUTSIDE MIRRORS
WARNING
.Objects viewed in the outside
mirror on the passenger side are
closer than they appear. Be care-
ful when moving to the right.
Using only this mirror could cause
an accident. Use the inside mirror
or glance over your shoulder to
properly judge distances to other
objects.
. Do not adjust the mirrors while
driving. You could lose control of
your vehicle and cause an acci-
dent.
SPA2739
Adjusting outside mirrors
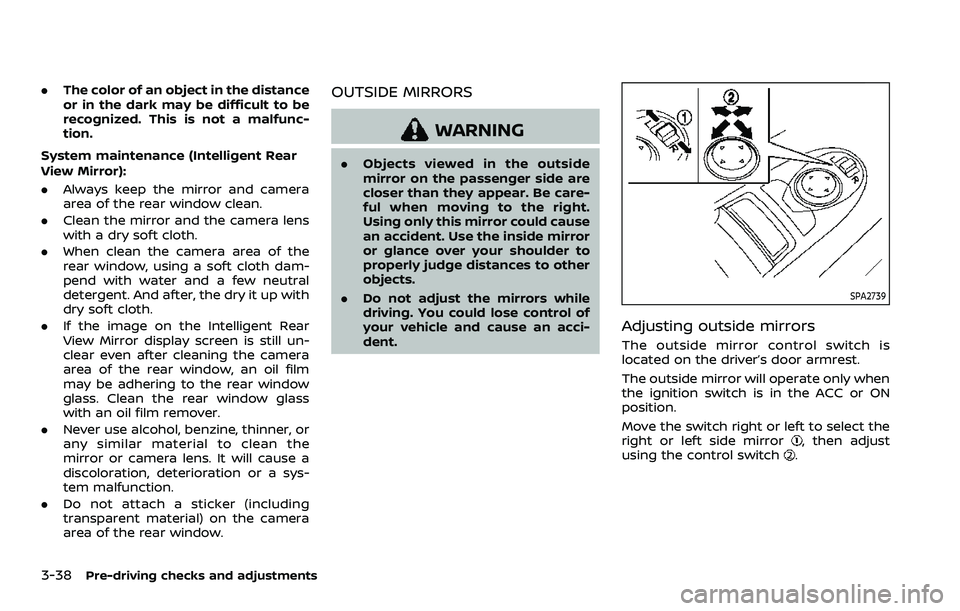
The outside mirror control switch is
located on the driver’s door armrest.
The outside mirror will operate only when
the ignition switch is in the ACC or ON
position.
Move the switch right or left to select the
right or left side mirror
, then adjust
using the control switch.
Page 225 of 603
4 Monitor, heater, air conditioner, audio,phone and voice recognition systems
NissanConnect® Owner’s Manual .................................... 4-2
Safety note ........................................................................\
................ 4-2
RearView Monitor (if so equipped) ................................. 4-3
RearView Monitor system operation ..................... 4-4
How to read the displayed lines ................................ 4-4
Difference between predictive and
actual distances ...................................................................... 4-5
How to park with predictive course lines .......... 4-6
RearView Monitor settings ............................................. 4-8
RearView Monitor system limitations .................... 4-8
System maintenance .......................................................... 4-9
Intelligent Around View® Monitor (if
so equipped) ........................................................................\
.......... 4-10
Intelligent Around View® Monitor
system operation ................................................................ 4-11
Intelligent Around View® Monitor settings ...... 4-19
Intelligent Around View® Monitor
system limitations .............................................................. 4-21
System maintenance ....................................................... 4-23
Camera aiding sonar function (models with
Intelligent Around View® Monitor) ............................... 4-24 Sonar system operation ................................................ 4-24
Turning on and off the sonar function ............. 4-25
Sonar function settings ................................................. 4-26 Sonar system limitations ........................................... 4-28
System maintenance .................................................... 4-28
Moving Object Detection (MOD) ................................... 4-29
MOD system operation ................................................ 4-30
Turning on and off the MOD system ............... 4-31
MOD function settings ................................................. 4-32
MOD system limitations .............................................. 4-32
System maintenance .................................................... 4-33
Ventilators ........................................................................\
.............. 4-34 Center ventilators ............................................................ 4-34
Side ventilators .................................................................. 4-34
Rear ventilators .................................................................. 4-34
Heater and air conditioner ................................................ 4-35
Automatic air conditioner ......................................... 4-36
Rear automatic air conditioning system ....... 4-38
Operating tips ..................................................................... 4-41
Linking Intelligent Key (if so equipped) ........... 4-41
In-cabin microfilter .......................................................... 4-41
Servicing air conditioner ............................................. 4-41
Antenna ........................................................................\
.................... 4-41 Window antenna ............................................................... 4-41
Satellite antenna ............................................................... 4-42
Car phone or CB radio ......................................................... 4-42
Page 233 of 603
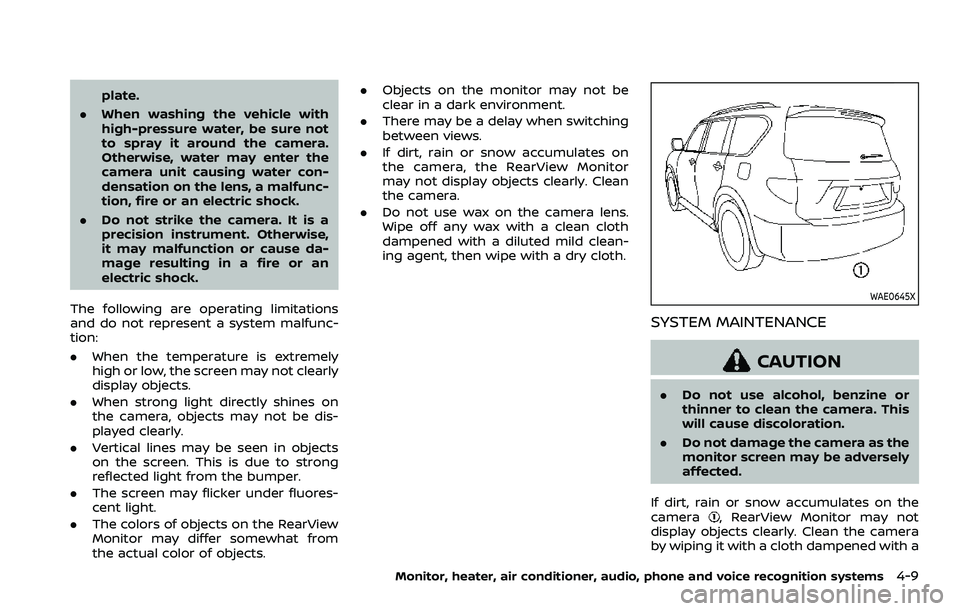
plate.
. When washing the vehicle with
high-pressure water, be sure not
to spray it around the camera.
Otherwise, water may enter the
camera unit causing water con-
densation on the lens, a malfunc-
tion, fire or an electric shock.
. Do not strike the camera. It is a
precision instrument. Otherwise,
it may malfunction or cause da-
mage resulting in a fire or an
electric shock.
The following are operating limitations
and do not represent a system malfunc-
tion:
. When the temperature is extremely
high or low, the screen may not clearly
display objects.
. When strong light directly shines on
the camera, objects may not be dis-
played clearly.
. Vertical lines may be seen in objects
on the screen. This is due to strong
reflected light from the bumper.
. The screen may flicker under fluores-
cent light.
. The colors of objects on the RearView
Monitor may differ somewhat from
the actual color of objects. .
Objects on the monitor may not be
clear in a dark environment.
. There may be a delay when switching
between views.
. If dirt, rain or snow accumulates on
the camera, the RearView Monitor
may not display objects clearly. Clean
the camera.
. Do not use wax on the camera lens.
Wipe off any wax with a clean cloth
dampened with a diluted mild clean-
ing agent, then wipe with a dry cloth.
WAE0645X
SYSTEM MAINTENANCE
CAUTION
.Do not use alcohol, benzine or
thinner to clean the camera. This
will cause discoloration.
. Do not damage the camera as the
monitor screen may be adversely
affected.
If dirt, rain or snow accumulates on the
camera
, RearView Monitor may not
display objects clearly. Clean the camera
by wiping it with a cloth dampened with a
Monitor, heater, air conditioner, audio, phone and voice recognition systems4-9
Page 247 of 603
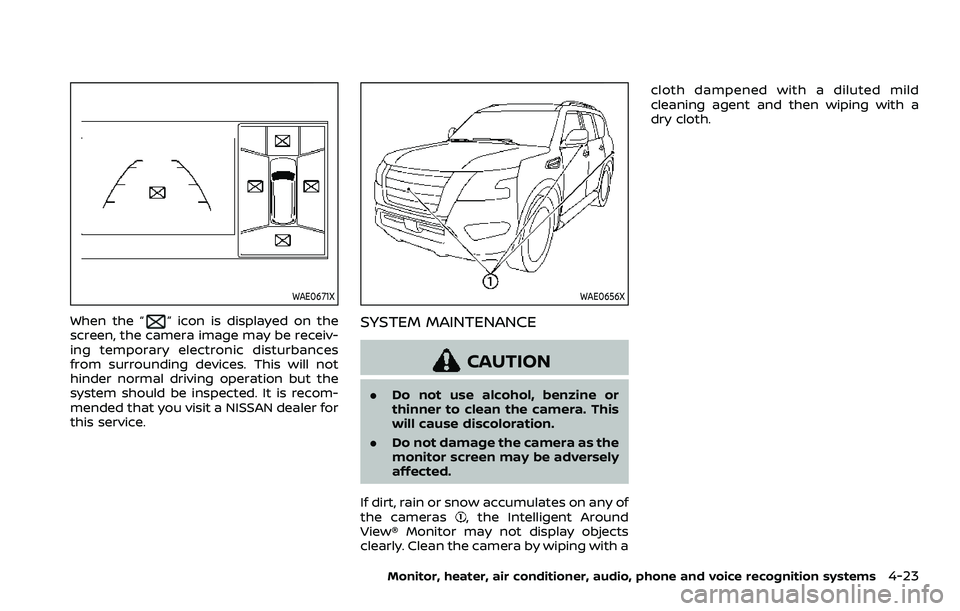
WAE0671X
When the “” icon is displayed on the
screen, the camera image may be receiv-
ing temporary electronic disturbances
from surrounding devices. This will not
hinder normal driving operation but the
system should be inspected. It is recom-
mended that you visit a NISSAN dealer for
this service.
WAE0656X
SYSTEM MAINTENANCE
CAUTION
. Do not use alcohol, benzine or
thinner to clean the camera. This
will cause discoloration.
. Do not damage the camera as the
monitor screen may be adversely
affected.
If dirt, rain or snow accumulates on any of
the cameras
, the Intelligent Around
View® Monitor may not display objects
clearly. Clean the camera by wiping with a cloth dampened with a diluted mild
cleaning agent and then wiping with a
dry cloth.
Monitor, heater, air conditioner, audio, phone and voice recognition systems4-23
Page 252 of 603

4-28Monitor, heater, air conditioner, audio, phone and voice recognition systems
SONAR SYSTEM LIMITATIONS
WARNING
Listed below are the system limita-
tions for the sonar function. Failure
to operate the vehicle in accordance
with these system limitations could
result in serious injury or death.
.Inclement weather or ultrasonic
sources such as an automatic car
wash, a truck’s compressed-air
brakes or a pneumatic drill may
affect the function of the system,
including reduced performance
or a false activation.
. The system is not designed to
prevent contact with small or
moving objects.
. The system will not detect small
objects below the bumper, and
may not detect objects close to
the bumper or on the ground.
. The system may not detect the
following objects:
— Fluffy objects such as snow,
cloth, cotton, grass or wool.
— Thin objects such as rope, wire or chain. — Wedge-shaped objects.
. If your vehicle sustains damage
to the bumper fascia, leaving it
misaligned or bent, the sensing
zone may be altered causing in-
accurate measurement of objects
or false alarms.
CAUTION
Excessive noise (such as audio sys-
tem volume or an open vehicle win-
dow) will interfere with the tone and
it may not be heard.
See “Front and rear sonar system” (P.5-
135) for more information on the sonar
system and limitations.
System temporarily unavailable
When the amber markers are displayed at
the corners of the vehicle icon and the
function cannot be activated from the
Parking sonar settings menu (the setting
items are grayed out), the sonar system
may be malfunctioning.
SYSTEM MAINTENANCE
CAUTION
Keep the surface of the sonar (lo-
cated on the front and rear bumper
fascia) free from accumulations of
snow, ice and dirt. Do not scratch the
surface of the sonar when cleaning.
If the sensors are covered, the accu-
racy of the sonar function will be
diminished.
Page 257 of 603
.The MOD system might detect
flowing water droplets on the
camera lens, white smoke from
the muffler, moving shadows, etc.
. The MOD system may not func-
tion properly depending on the
speed, direction, distance or
shape of the moving objects.
. If your vehicle sustains damage
to the parts where the camera is
installed, leaving it misaligned or
bent, the sensing zone may be
altered and the MOD system may
not detect objects properly.
. When the temperature is extre-
mely high or low, the screen may
not display objects clearly. This is
not a malfunction.
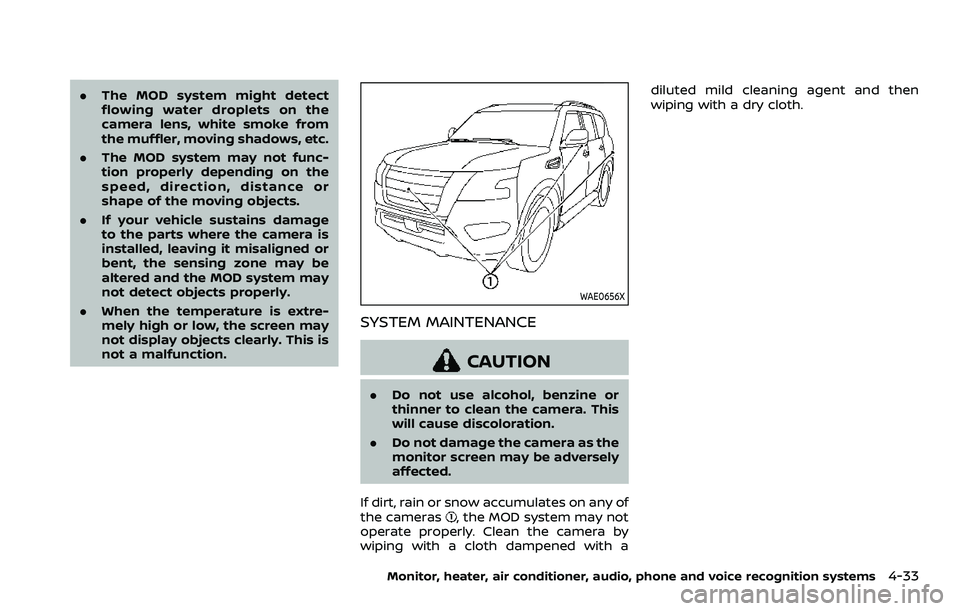
WAE0656X
SYSTEM MAINTENANCE
CAUTION
.Do not use alcohol, benzine or
thinner to clean the camera. This
will cause discoloration.
. Do not damage the camera as the
monitor screen may be adversely
affected.
If dirt, rain or snow accumulates on any of
the cameras
, the MOD system may not
operate properly. Clean the camera by
wiping with a cloth dampened with a diluted mild cleaning agent and then
wiping with a dry cloth.
Monitor, heater, air conditioner, audio, phone and voice recognition systems4-33