Page 144 of 559
When the vehicle speed lowers to less than
approximately 16 mph (25 km/h), the head-
light uses the low beam.
To turn off the High Beam Assist system,
turn the headlight switch to the
Page 145 of 559
LED DAYTIME RUNNING LIGHTS
(DRL) SYSTEM (if so equipped)
The LED DRL automatically illuminate at
100% intensity when the engine is started
and the parking brake released. The LED
Daytime Running Lights (DRL) operate with
the headlight switch in the OFF position.
When you turn the headlight switch to
the
Page 155 of 559
CAUTION
∙ Do not use for anything other thansunglasses.
∙ Do not leave sunglasses in the sun- glasses holder while parking in direct
sunlight. The heat may damage the
sunglasses.
CUP HOLDERS
The rear center cup holders are located in
the rear fold-down armrest.
Page 161 of 559
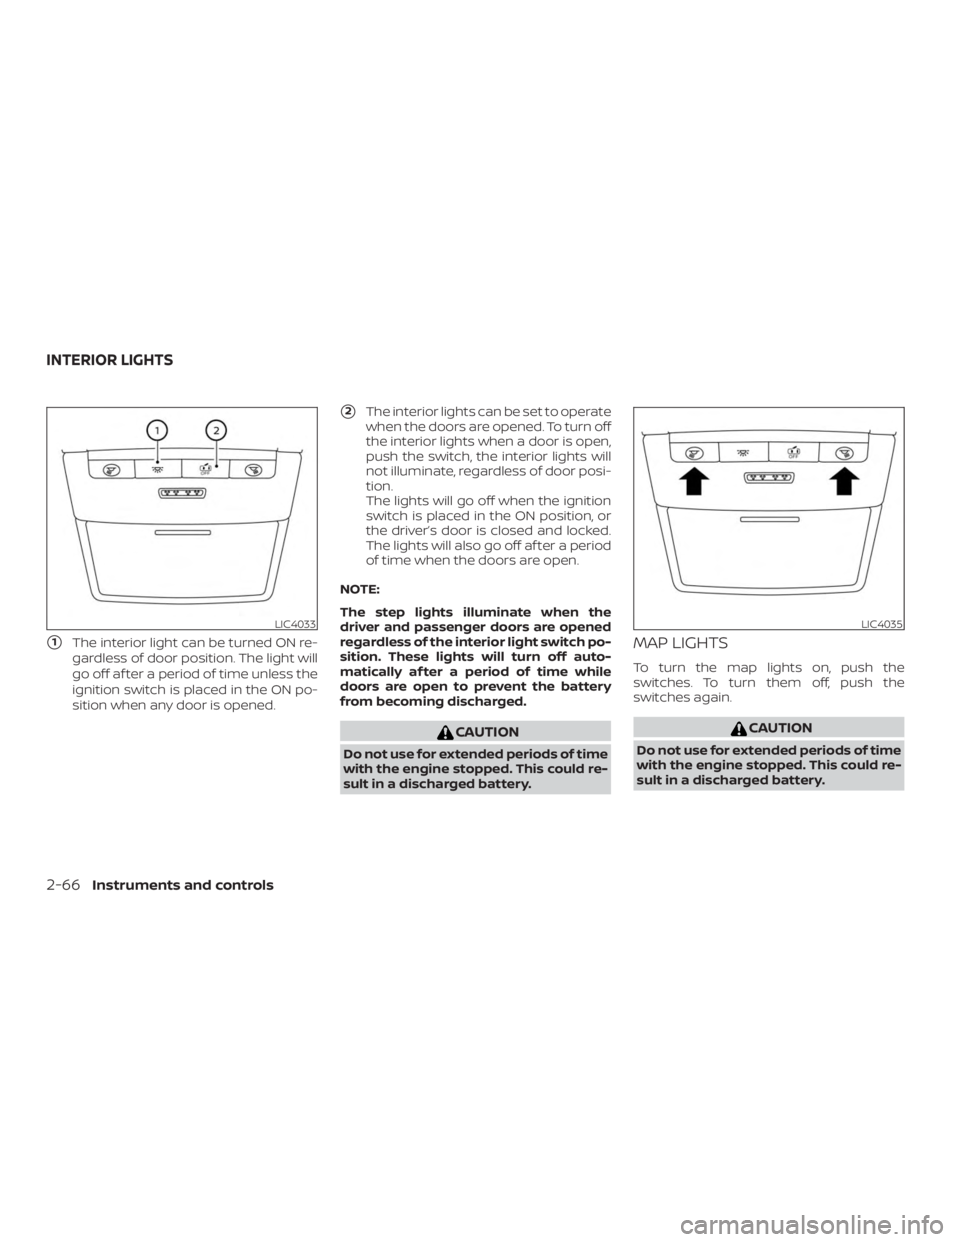
�1The interior light can be turned ON re-
gardless of door position. The light will
go off af ter a period of time unless the
ignition switch is placed in the ON po-
sition when any door is opened.
�2The interior lights can be set to operate
when the doors are opened. To turn off
the interior lights when a door is open,
push the switch, the interior lights will
not illuminate, regardless of door posi-
tion.
The lights will go off when the ignition
switch is placed in the ON position, or
the driver’s door is closed and locked.
The lights will also go off af ter a period
of time when the doors are open.
NOTE:
The step lights illuminate when the
driver and passenger doors are opened
regardless of the interior light switch po-
sition. These lights will turn off auto-
matically af ter a period of time while
doors are open to prevent the battery
from becoming discharged.
Page 163 of 559

WARNING
∙ Your vehicle’s engine should beturned off while programming the
HomeLink® Universal Transceiver. For
additional information, refer to
“Push-button ignition switch” in the
“Starting and driving” section of this
manual. Do not breathe exhaust
gases; they contain colorless and
odorless carbon monoxide. Carbon
monoxide is dangerous. It can cause
unconsciousness or death.
∙ Do not use the HomeLink® Universal Transceiver with any garage door
opener that lacks safety stop and re-
verse features as required by federal
safety standards. (These standards
became effective for opener models
manufactured af ter April 1, 1982.) A
garage door opener which cannot de-
tect an object in the path of a closing
garage door and then automatically
stop and reverse does not meet cur-
rent federal safety standards. Using a
garage door opener without these
features increases the risk of serious
injury or death. ∙ During the programming procedure
your garage door or security gate will
open and close (if the transmitter is
within range). Make sure that people
or objects are clear of the garage door,
gate, etc., that you are programming.
PROGRAMMING HOMELINK®
If you have any questions or are having
difficulty programming your HomeLink®
buttons, refer to the HomeLink® web site at:
www.homelink.com or call 1-800-355-3515.
NOTE:
Place the ignition switch in the ON posi-
tion (without starting the engine) when
programming HomeLink®. It is also rec-
ommended that a new battery be placed
in the hand-held transmitter of the de-
vice being programmed to HomeLink®
for quicker programming and accurate
transmission of the radio frequency. 1. Position the end of your hand-held
transmitter 1–3 in (2–8 cm) away from
the HomeLink® surface, keeping the
HomeLink® indicator light
�1in view.
Page 189 of 559
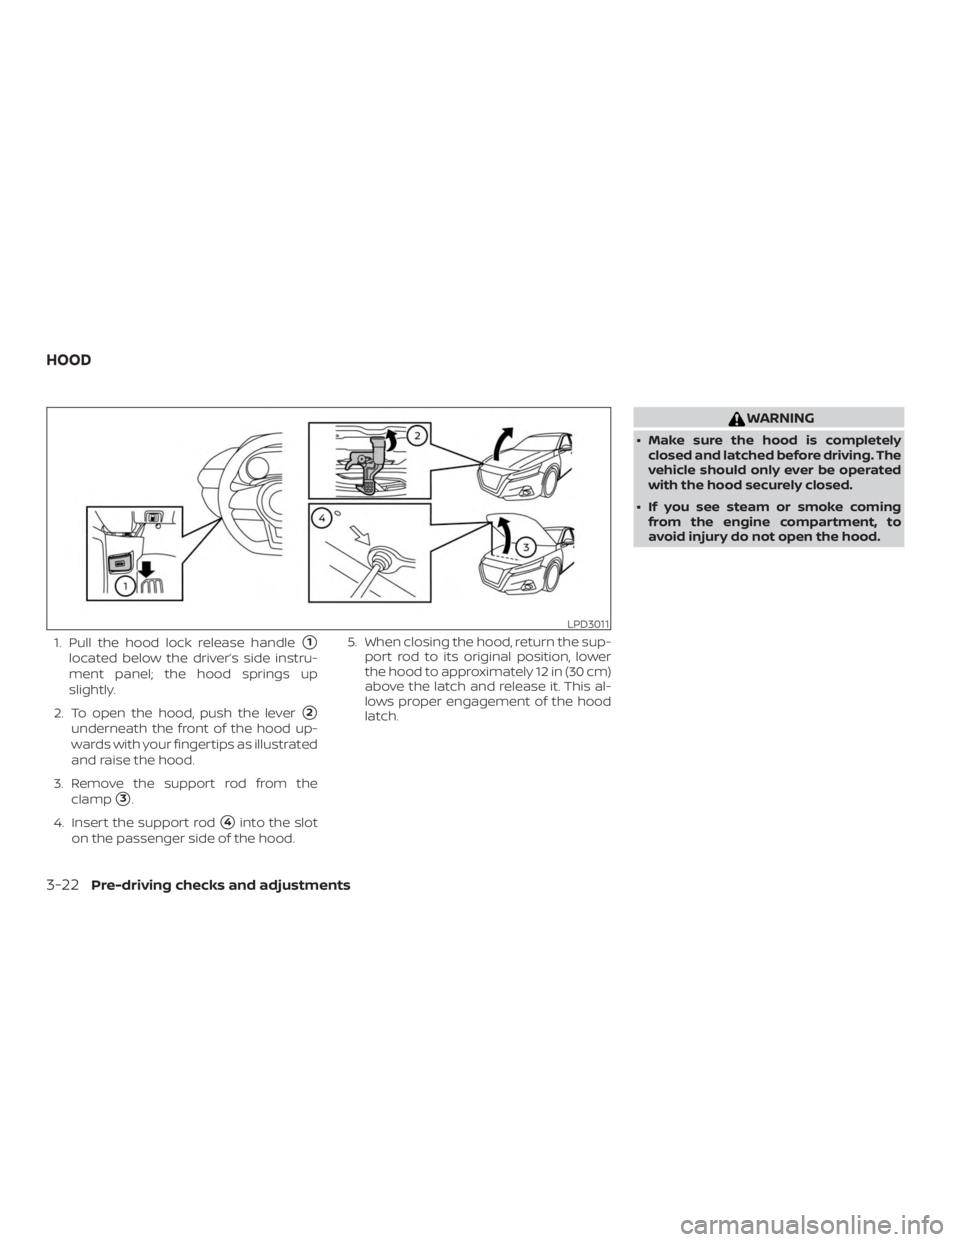
1. Pull the hood lock release handle�1
located below the driver’s side instru-
ment panel; the hood springs up
slightly.
2. To open the hood, push the lever
�2
underneath the front of the hood up-
wards with your fingertips as illustrated
and raise the hood.
3. Remove the support rod from the clamp
�3.
4. Insert the support rod
�4into the slot
on the passenger side of the hood. 5. When closing the hood, return the sup-
port rod to its original position, lower
the hood to approximately 12 in (30 cm)
above the latch and release it. This al-
lows proper engagement of the hood
latch.
Page 197 of 559
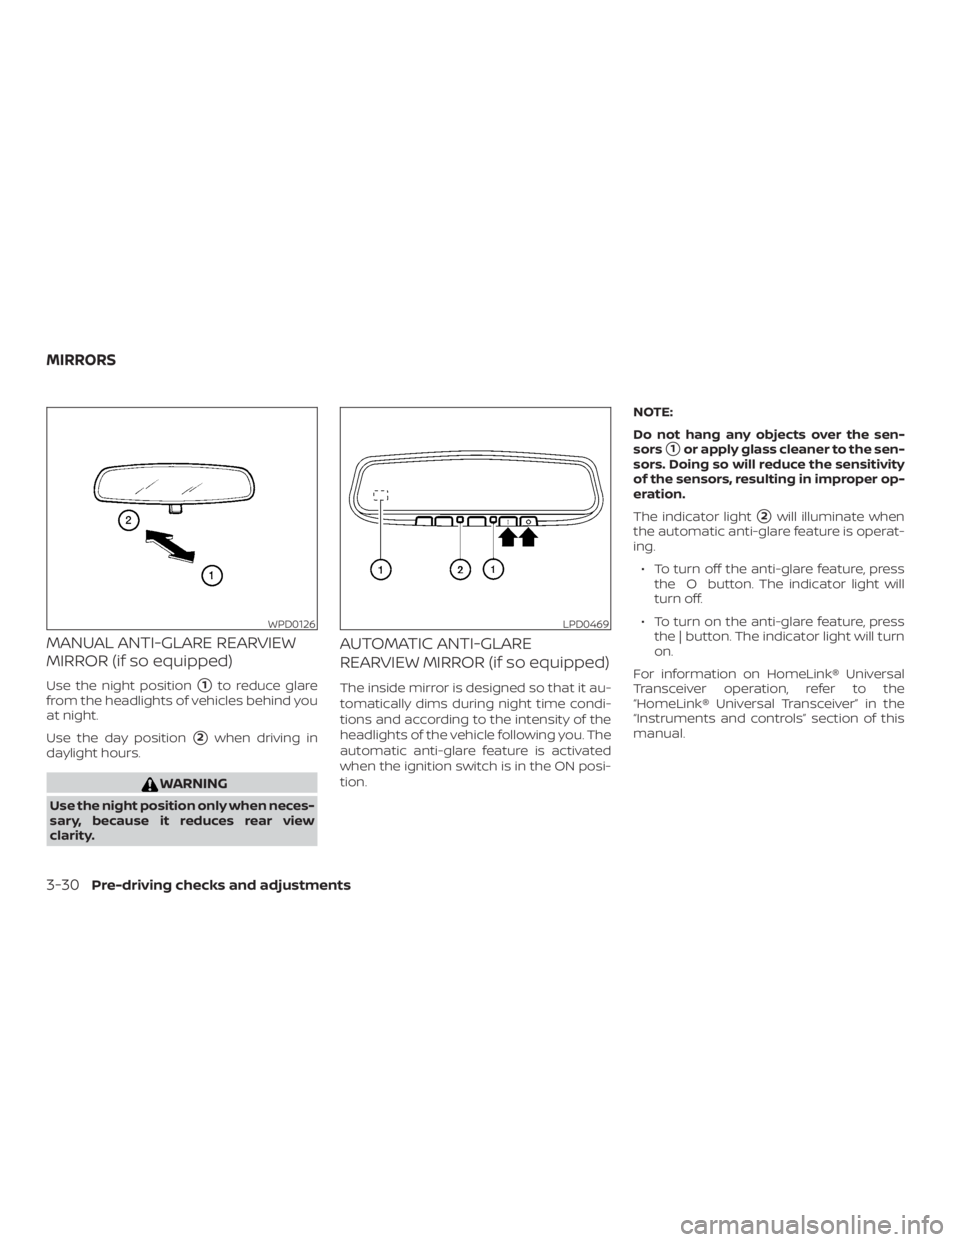
MANUAL ANTI-GLARE REARVIEW
MIRROR (if so equipped)
Use the night position�1to reduce glare
from the headlights of vehicles behind you
at night.
Use the day position
�2when driving in
daylight hours.
Page 218 of 559

The non-viewable area�2is highlighted in
yellow for several seconds af ter the bird’s-
eye view is displayed. It will be shown only
the first time af ter the ignition switch is
placed in the ON position.
In addition, the non-viewable corners are
displayed in red and blink for the first 3 sec-
onds
�3to remind the driver to be cau-
tious. Predicted course lines
�4indicate the pre-
dicted course when operating the vehicle.
The predicted course lines will be displayed
on the monitor when the steering wheel is
turned. The predicted course lines will
move depending on how much the steer-
ing wheel is turned and will not be dis-
played while the steering wheel is in the
neutral position.
When the monitor displays the front view
and the steering wheel turns about 90 de-
grees or less from the neutral position, the
two green predicted course lines are
shown in front of the vehicle.
When the steering wheel turns about 90
degrees or more, one green predicted
course line is shown in front of the vehicle
and the other predicted course line is
shown at the side of the vehicle.
When the monitor displays the rear view,
the predicted course lines are shown at the
back of the vehicle.
, the head-
light uses the low beam.
To turn off the High Beam Assist system,
turn the headlight switch to the")
 SYSTEM (if so equipped)
The LED DRL automatically illuminate at
100% intensity when the engine is started
and the parking brake released. The LED
Daytime Running Light")