2021 MERCEDES-BENZ GLE COUPE warning
[x] Cancel search: warningPage 130 of 525
#
Do not use me tallic or hard objects. #
Carefully fold co vers 1 upwards in the
direction of the ar row. #
Secu rethero of luggage rack tothefast ening
points beneath co vers 1 . #
Comply with the ins tallation instructions of
th ero of luggage rack manufacturer. #
Secure the load on thero of luggage rack. Cup holders
Swit
ching the cooling or heating function for
th etemp erature-cont rolled cup holder on or
off &
WARNING Risk of injury bytouching the
heating elements
The cup holder's heating elements may be
ve ry hot.
Yo u can burn yourself on them. #
Do not touch the cup holder's hot heat‐
ing elements. #
Ensure that no children can access the
cup holder's hot heating elements. #
Never lea vechildren unat tended in the
ve hicle. *
NO
TEDama getoobjects in thete mp era‐
ture-contro lled cupholder If
yo u place objects into thete mp erature-
controlled cup holder, they may become
dama ged. #
Do not place objects into thete mp era‐
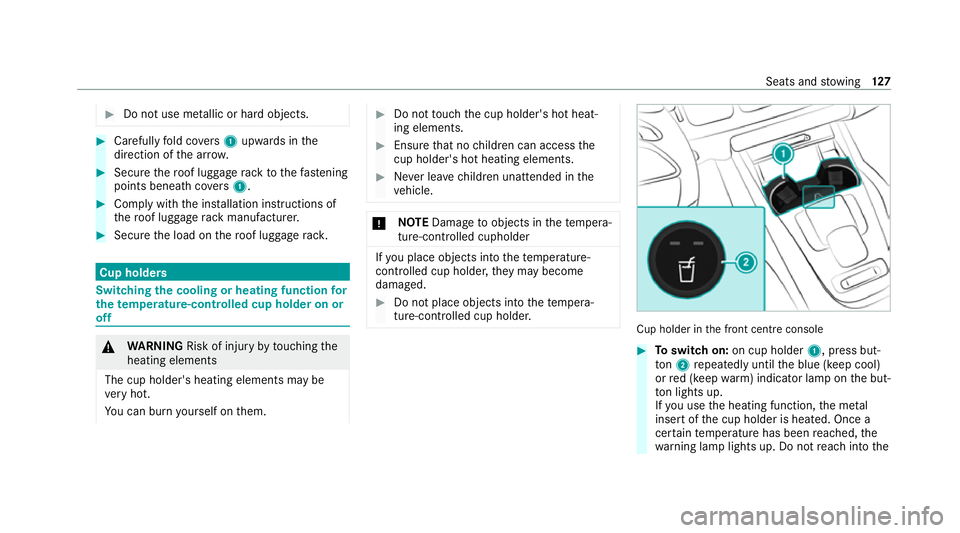
ture-contro lled cup holder. Cup holder in
the front cent reconsole #
Toswitch on: on cup holder 1, press but‐
to n2 repeatedly until the blue (keep cool)
or red (keep warm) indicator lamp on the but‐
to n lights up.
If yo u use the heating function, the me tal
inse rtof the cup holder is heated. Once a
cer tain temp erature has been reached, the
wa rning lamp lights up. Do not reach into the Seats and
stowing 127
Page 133 of 525
Wire
lesscharging of the mobile phone and
connection with theex terior aerial Note
s on wirelessly charging the mobile
phone &
WARNING Risk of injury duetoobjects
being stowed incor rectly
If objects in theve hicle interior are stowed
incor rectly, they can slide or be thrown
around and hit vehicle occupants. In addi‐
tion, cup holders, open stowage spaces and
mobile phone recep tacles cannot al ways
re tain all objects within.
There is a risk of injur y,particularly in the
ev ent of sudden braking or a sudden change
in direction. #
Alw aysstow objects so that they can‐
not be throw n around in su chsitua‐
tions. #
Alw ays make sure that objects do not
pr otru de from stowage spaces, luggage
nets or stowage nets. #
Close the loc kable stow age spaces
before starting a journe y. #
Alw aysstow and secure heavy, hard,
poin ted, sharp-edged, fragile or bulky
objects in the boot/load compartment. Obser
vethe no tes on loading theve hicle. &
WARNING Risk offire from placing
objects in the mobile phone stowage
compartment
Placing other objects in the mobile phone
stow age compartment could con stitute a fire
hazard. #
Apart from a mobile phone, do not
place any other objects in the mobile
phone stowage compartment, espe‐
cially those made of me tal. *
NO
TEDama getoobjects caused by
placing them in the mobile phone stow‐
age compartment If objects are placed in
the mobile phone
stow age compartment, they may be dam‐
aged byelectromagnetic fields. #
Do not place credit cards, data storage
devices, ski passes or other objects
sensitive toelectromagnetic fields in
th e mobile phone stowage compart‐
ment. *
NO
TEDama getothe mobile phone
stow age compartment caused byliquids If liquids enter
the mobile phone stowage
compartment, the compartment may be
damaged. #
Ensure that no liquids enter the mobile
phone stowage compartment. Alw
ays obser vethe no tesfo r persons with elec‐
tronic medical aids (/ page 34).13 0
Seats and stowing
Page 135 of 525
Fi
tting/ removing the floormats &
WARNING Risk of accident due to
objects in the driver's foot we ll
Objects in the driver's foot we ll may impede
pedal tr avel or block a depressed pedal.
This jeopardises the operating and road
saf ety of theve hicle. #
Stow all objects in theve hicle securely
so that they cannot getinto the driver's
fo ot we ll. #
Alw aysfit th efloor mats securely and
as prescribed in order toensure that
th ere is alw ays suf ficient room forthe
pedals. #
Do not use loose floor mats and do not
place floor mats on top of one ano ther. Fi
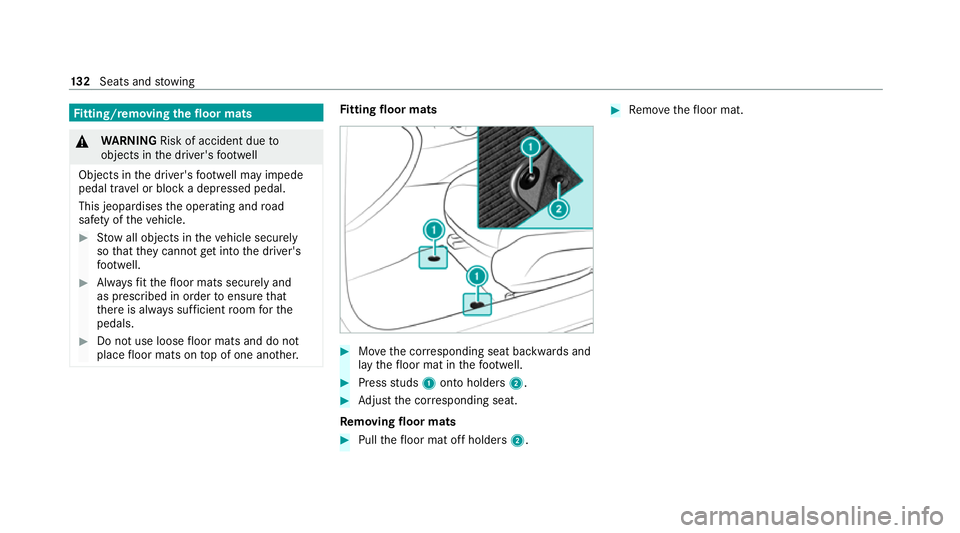
tting floor mats #
Movethe cor responding seat backwards and
lay thefloor mat in thefo ot we ll. #
Press studs 1onto holders 2. #
Adjust the cor responding seat.
Re moving floormats #
Pull thefloor mat off holders 2. #
Remo vethefloor mat. 13 2
Seats and stowing
Page 137 of 525
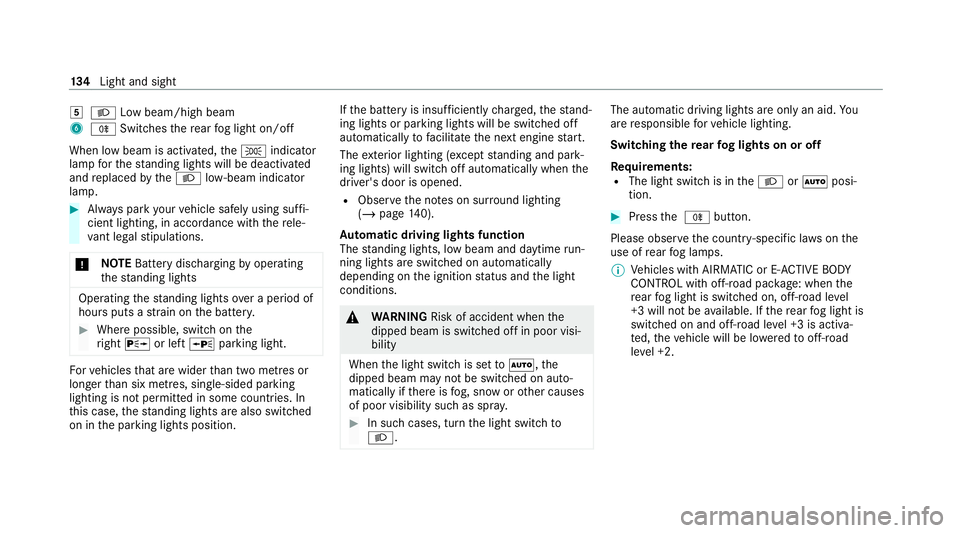
004B
0058 Low beam/high beam
6 005E Switches there ar fog light on/off
When low beam is activated, the0060 indicator
lamp forth est anding lights will be deactivated
and replaced bythe0058 low- beam indicator
lamp. #
Alw ays park your vehicle safely using suf fi‐
cient lighting, in acco rdance with there le‐
va nt le galst ipulations.
* NO
TEBattery discharging byoperating
th est anding lights Operating
thest anding lights over a period of
hours puts a stra in on the batter y. #
Where possible, switch on the
ri ght 0064 or left 0063parking light. Fo
rve hicles that are wider than two metres or
lon gerth an six metres, sin gle-sided parking
lighting is not permitted in some count ries. In
th is case, thest anding lights are also swit ched
on in the parking lights position. If
th e battery is insuf ficiently charge d, thest and‐
ing lights or parking lights will be swit ched off
automatically tofacilitate the next engine start.
The exterior lighting (e xcept standing and park‐
ing lights) will swit choff automatically when the
driver's door is opened.
R Obser vethe no tes on sur round lighting
(/ page 140).
Au tomatic driving lights function
The standing lights, low beam and daytime run‐
ning lights are switched on au tomatically
depending on the ignition status and the light
conditions. &
WARNING Risk of accident when the
dipped beam is switched off in poor visi‐
bility
When the light switch is set to0058 ,the
dipped beam may not be switched on auto‐
matically if there is fog, snow or other causes
of poor visibility such as spr ay. #
In such cases, turn the light switch to
0058 . The automatic driving lights are only an aid.
Yo u
are responsible forve hicle lighting.
Switching there ar fog lights on or off
Re quirements:
R The light switch is in the0058 or0058 posi‐
tion. #
Press the 005E button.
Please obser vethe count ry-specific la wsonthe
use of rear fog lamps.
% Vehicles with AIRMATIC or E- ACTIVE BODY
CO NTROL with off-road pac kage : when the
re ar fog light is switched on, off-road le vel
+3 will not be available. If there ar fog light is
switched on and off-road le vel +3 is activa‐
te d, theve hicle will be lo weredto off-road
le ve l +2. 134
Light and sight
Page 138 of 525
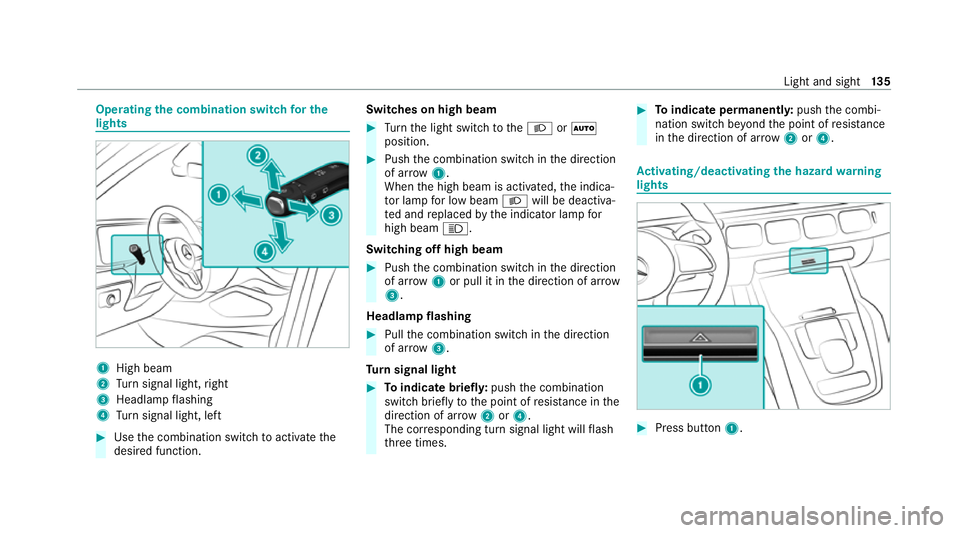
Operating
the combination switch for the
lights 1
High beam
2 Turn signal light, right
3 Headlamp flashing
4 Turn signal light, left #
Use the combination switch toactivate the
desired function. Switches on high beam #
Turn the light switch tothe0058 or0058
position. #
Push the combination switch in the direction
of ar row1.
When the high beam is activated, the indica‐
to r lamp for low beam 0058will be deactiva‐
te d and replaced bythe indicator lamp for
high beam 0057.
Switching off high beam #
Push the combination switch in the direction
of ar row1or pull it in the direction of ar row
3 .
Headlamp flashing #
Pull the combination switch in the direction
of ar row3.
Tu rn signal light #
Toindicate briefl y:push the combination
switch briefly tothe point of resis tance in the
direction of ar row2or4.
The cor responding turn signal light will flash
th re e times. #
Toindicate permanentl y:push the combi‐
nation switch be yond the point of resis tance
in the direction of ar row2or4. Ac
tivating/deactivating the hazard warning
lights #
Press button 1. Light and sight
13 5
Page 139 of 525
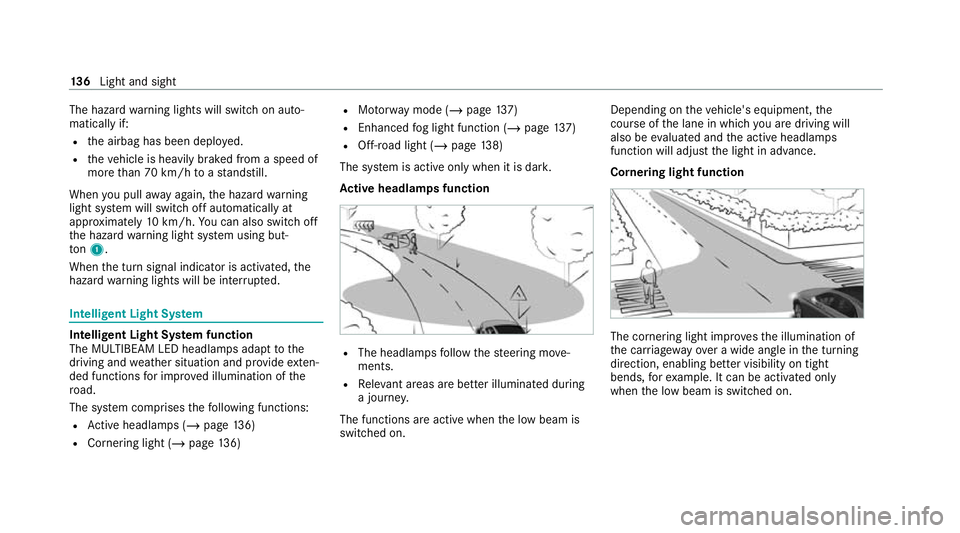
The hazard
warning lights will switch on auto‐
matically if:
R the airbag has been deplo yed.
R theve hicle is heavily braked from a speed of
more than 70 km/h toast andstill.
When you pull away again, the hazard warning
light sy stem will switch off automatically at
appr oximately 10km/h. You can also swit choff
th e hazard warning light sy stem using but‐
to n1.
When the turn signal indicator is activated, the
hazard warning lights will be inter rupte d. Intelligent Light Sy
stem Intelligent Light Sy
stem function
The MULTIBEAM LED headlamps adapt tothe
driving and weather situation and pr ovide exten‐
ded functions for impr oved illumination of the
ro ad.
The sy stem comprises thefo llowing functions:
R Active headla mps (/ page136)
R Cornering light (/ page136) R
Motorw ay mode (/ page137)
R Enhanced fog light function (/ page137)
R Off-road light (/ page138)
The sy stem is active only when it is dar k.
Ac tive headlamps function R
The headlamps follow thesteering mo ve‐
ments.
R Releva nt areas are better illumina ted during
a journe y.
The functions are active when the low beam is
switched on. Depending on
theve hicle's equipment, the
cou rse of the lane in which you are driving will
also be evaluated and the active headlamps
function will adjust the light in advance.
Cornering light function The cornering light impr
ovesth e illumination of
th e car riag ewa yove r a wide angle in the turning
direction, enabling better visibility on tight
bends, forex ample. It can be activated only
when the low beam is switched on. 13 6
Light and sight
Page 141 of 525
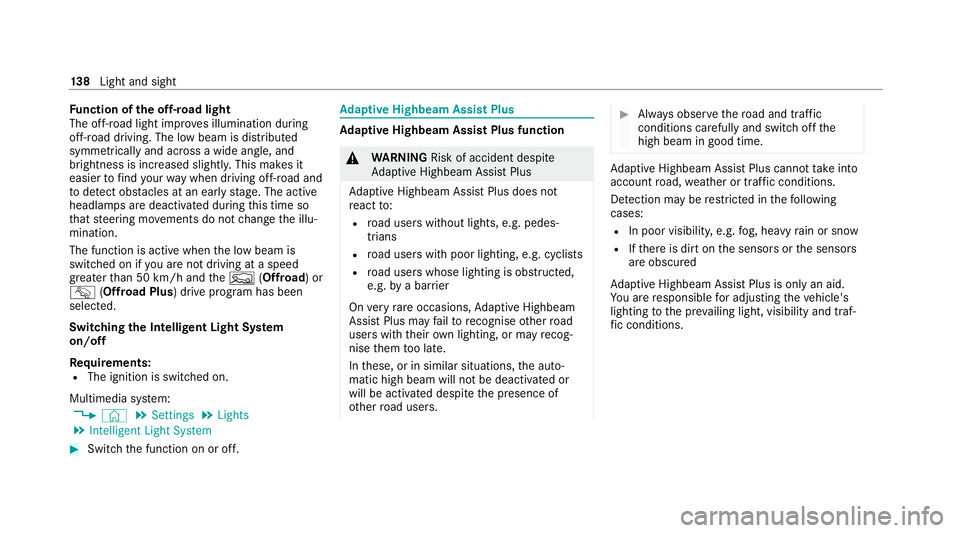
Fu
nction of the off-road light
The off-ro ad light impr oves illumination during
off-road driving. The low beam is distributed
symmetrically and across a wide angle, and
brightness is increased slightl y.This makes it
easier tofind your wa y when driving off-ro ad and
to detect obs tacles at an earl yst age. The active
headlamps are deactivated during this time so
th at steering mo vements do not change the illu‐
mination.
The function is active when the low beam is
switched on if you are not driving at a speed
greater than 50 km/h and theF (Offroad) or
G (Offroad Plus) drive program has been
selected.
Switching the Intelligent Light Sy stem
on/off
Re quirements:
R The ignition is switched on.
Multimedia sy stem:
4 © 5
Settings 5
Lights
5 Intelligent Light System #
Switch the function on or off. Ad
aptive Highbeam Assist Plus Ad
aptive Highbeam Assist Plus function &
WARNING Risk of accident despite
Ad aptive Highbeam Assist Plus
Ad aptive Highbeam Assist Plus does not
re act to:
R road users without lights, e.g. pedes‐
trians
R road users with poor lighting, e.g. cyclists
R road users whose lighting is obstructed,
e.g. bya bar rier
On very rare occasions, Adaptive Highbeam
Assist Plus may failto recognise other road
users with their own lighting, or may recog‐
nise them too late.
In these, or in similar situations, the auto‐
matic high beam will not be deactivated or
will be activated despite the presence of
ot her road users. #
Alw ays obser vethero ad and traf fic
conditions carefully and switch off the
high beam in good time. Ad
aptive Highbeam Assist Plus cannot take into
account road, weather or traf fic conditions.
De tection may be restricted in thefo llowing
cases:
R In poor visibilit y,e.g. fog, heavy rain or snow
R Ifth ere is dirt on the sensors or the sensors
are obscured
Ad aptive Highbeam Assist Plus is on lyan aid.
Yo u are responsible for adju sting theve hicle's
lighting tothe pr evailing light, visibility and traf‐
fi c conditions. 13 8
Light and sight
Page 146 of 525
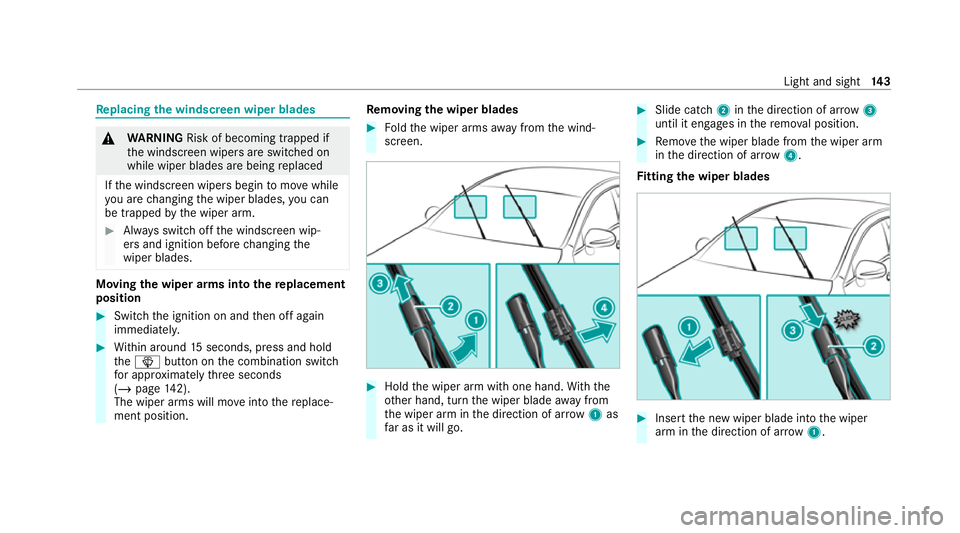
Re
placing the windsc reen wiper blades &
WARNING Risk of becoming trapped if
th e windscreen wipers are switched on
while wiper blades are being replaced
If th e windscreen wipers begin tomo vewhile
yo u are changing the wiper blades, you can
be trapped bythe wiper arm. #
Alw ays switch off the windscreen wip‐
ers and ignition before changing the
wiper blades. Moving
the wiper arms into there placement
position #
Switch the ignition on and then off again
immediatel y. #
Within around 15seconds, press and hold
th e00D4 button on the combination switch
fo r appro ximately thre e seconds
(/ page 142).
The wiper arms will mo veinto there place‐
ment position. Re
moving the wiper blades #
Foldthe wiper arms away from the wind‐
screen. #
Hold the wiper arm with one hand. With the
ot her hand, turn the wiper blade away from
th e wiper arm in the direction of ar row 1 as
fa r as it will go. #
Slide catch 2inthe direction of ar row 3
until it engages in there mo val position. #
Remo vethe wiper blade from the wiper arm
in the direction of ar row4.
Fi tting the wiper blades #
Inse rtthe new wiper blade into the wiper
arm in the direction of ar row1. Light and sight
14 3