2021 MERCEDES-BENZ GLC COUPE boot
[x] Cancel search: bootPage 65 of 481
Fi
tting an ISOFIX or i‑Size child restra int sys‐
te m on the rear seat &
WARNING Risk of accident if there ar
ben chseat, rear seat and seat backrest
are not engaged
The rear ben chseat, rear seat and seat back‐
re st may fold forw ards, even while theve hi‐
cle is in motion.
R As a result, theve hicle occupant will be
pressed into the seat belt with increased
fo rc e. The seat belt will not be able to
pr otect as intended and could cause
additional injur y.
R Objects or loads in the boot or load com‐
partment cann otbe restra ined bythe
seat backrest. #
Make sure that there ar ben chseat, the
re ar seat and the seat backrest are
engaged before everytrip. If
th e left and right seat backrests are not
engaged and loc ked in place, this will be shown on
the multifunction display on the instrument
clus ter.
If th e cent reseat backrest is not engaged and
loc ked in place, there d lock verification indica‐
to r will be visible. &
WARNING Risk of injury or death ifthe
permissible gross mass of thech ild and
ch ild restra int sy stem toget her is excee‐
ded.
To o much load may be placed on the ISOFIX
or i‑Size child restra int sy stems and thech ild
may not be restra ined cor rectly in theeve nt
of an accident, forex ample. #
Ifth ech ild and thech ild restra int sys‐
te m toget her weigh more than 33 kg,
only use an ISOFIX or i‑Size child
re stra int sy stem with which thech ild is
secured with theve hicle seat belt. #
Also secure thech ild restra int sy stem
with theTo pTe ther belt, if available. Alw
ays comply with the information about the
mass of thech ild restra int sy stem:
R inthe manufacturer's ins tallation and operat‐
ing instructions forth ech ild restra int sy stem
used
R on a label on thech ild restra int sy stem, if
present
Re gular lych eck that the permissible gross mass
of thech ild and child restra int sy stem is still
complied with.
When fitting a child restra int sy stem, obser ve
th efo llowing:
O Alw
ays obser vethe cor rect use of the seats
and consider their suitability for attaching a
ch ild restra int sy stem.
ISOFIX child seat securing sy stem
(/ page 60)
or
i‑Size child seat securing sy stem
(/ page 61 ) 62
Occupant saf ety
Page 70 of 481
R
Objects or loads in the boot or load com‐
partment cann otbe restra ined bythe
seat backrest. #
Make sure that there ar ben chseat, the
re ar seat and the seat backrest are
engaged before everytrip. If
th e left and right seat backrests are not
engaged and loc ked in place, this will be shown
on the multifunction display on the instrument
clus ter.
If th e cent reseat backrest is not engaged and
loc ked in place, there d lock verification indica‐
to r will be visible.
When fitting a belt-secured child restra int
sy stem, obser vethefo llowing:
O Alw
ays comply with the manufacturer's
ins tallation and operating instructions for
th ech ild restra int sy stem used.
O Fo
r a child restra int sy stem in the "Univer‐
sal" or "Semi-Universal" categor y,make
sure that the sy stem has been appr oved for
th eve hicle seat. Obser
vethe no tes under "Suitability of
seats for attaching belt-secu redch ild
re stra int sy stems" (/ page 65).
O When using a
weight category 0/0+
baby car seat and a weight category I
re ar wa rd-facing child restra int sy stem
on a rear seat: adjustthe front seat so that
th e seat does not touch thech ild restra int
sy stem.
O The backrest of
thefo rw ard-facing child
re stra int sy stem must, as far as possible, be
re sting on the seat backrest of there ar
seat.
O If
th e head restra int of thech ild seat cannot
be fully extended when it is ins talled in the
ve hicle, this will result in restrictions on the
maximum size setting forch ild restra int sys‐
te ms in weight category II or III.
Contact with thero of when the head
re stra int is fully extended and lo cked in
place will not result in any restrictions on
use.
O The
child restra int sy stem must not be put
under stra in between thero of and the seat cushion and/or be
fitted facing the wrong
direction. Where possible, adjust the seat
cushion inclination accordingly.
O The
child restra int sy stem must not be put
under stra in by the head restra int. Adjust
th e head restra ints as appropriate.
O Make sure
that thech ild's feet do not touch
th e front seat. If necessar y,mo vethe front
seat slightly forw ards. #
Install thech ild restra int sy stem.
The entire base of thech ild restra int sy stem
must alw aysre st on the sitting sur face of the
re ar seat. #
Alw ays make sure that the shoulder belt
st ra p is cor rectly routed from the seat belt
outlet of theve hicle tothe shoulder belt
guide on thech ild restra int sy stem.
The shoulder belt stra p must be routed
fo rw ard from the seat belt outlet. Occupant saf
ety67
Page 88 of 481

1
Detection range of the sensors
If se veral consecutive kicking mo vements are
not successful, waitte n seconds.
Sy stem limits
The sy stem may be impaired or may not function
in thefo llowing cases:
R The sensors are dirty, e.g. due toroad salt or
sn ow.
R The kicking mo vement is made using a pros‐
th etic leg. The
tailgate can open or close unin tentional lyin
th efo llowing situations:
R A person's arms or legs are moving in the
sensor de tection range, e.g. when polishing
th eve hicle or picking up objects.
R Objects are mo ved or placed behind theve hi‐
cle, e.g. tensioning stra ps or luggage.
R Clamping stra ps, tarp aulins or other co ver‐
ings are pulled overth e bumper.
R A pr otective mat with a length reaching over
th e boot sill down into the de tection range of
th e sensors is used.
R The pr otective mat is not secured cor rectl y.
R Workis being done on the trailer hitch, trail‐
ers or rear bicycle rack s.
Deactivate the function of theke y (/ page74 )
or do not car rytheke y about your person in
such situations. Limiting
the opening angle of the tailgate Ac
tivating the opening angle limiter
Yo u can limit the opening angle of theta ilgate in
th eto p half of its opening range up toa point
shortly before the end position. #
Stop the opening procedure of theta ilgate at
th e desired position. #
Press and hold the closing button on theta il‐
ga te until you hear a sho rtacoustic signal.
The opening angle limiter will be activated.
The tailgate will then stop in thestored posi‐
tion when opened.
To open thetai lgate full y,pull theto p part of the
Mercedes star on theta ilgate again af ter it has
st opped automaticall y.
Deactivating the opening angle limiter #
Press and hold the closing button on theta il‐
ga te until two sho rtacoustic signals sound. Opening and closing
85
Page 114 of 481
R
secure the load using the tie-down eyes and
distribute the load evenly. St
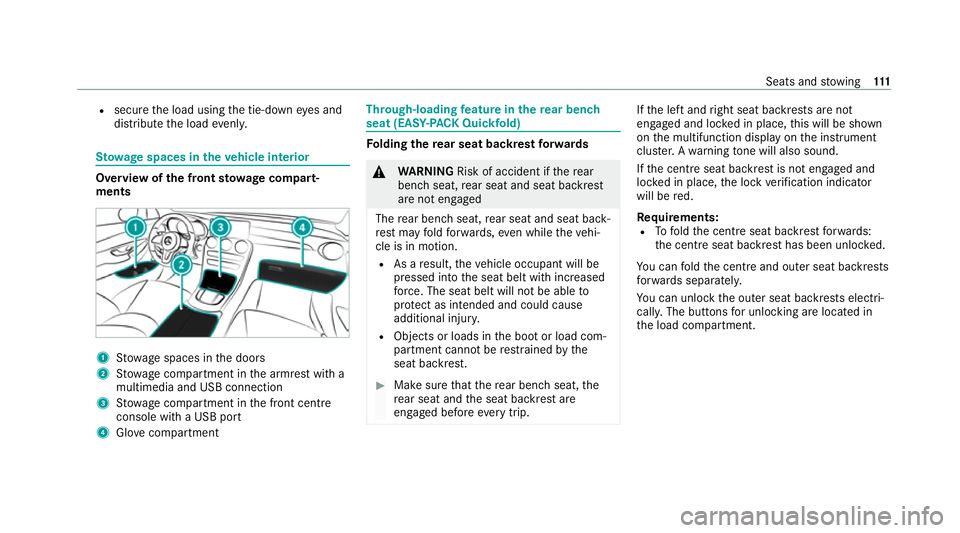
ow age spaces in theve hicle interior Overview of
the front stowage compa rt‐
ments 1
Stow age spaces in the doors
2 Stow age compartment in the armrest with a
multimedia and USB connection
3 Stow age compartment in the front cent re
console with a USB port
4 Glovecompa rtment Through-loading
feature in there ar ben ch
seat (EAS Y-PA CK Quickfold) Fo
lding there ar seat backrest forw ards &
WARNING Risk of accident if there ar
ben chseat, rear seat and seat backrest
are not engaged
The rear ben chseat, rear seat and seat back‐
re st may fold forw ards, even while theve hi‐
cle is in motion.
R As a result, theve hicle occupant will be
pressed into the seat belt with increased
fo rc e. The seat belt will not be able to
pr otect as intended and could cause
additional injur y.
R Objects or loads in the boot or load com‐
partment cann otbe restra ined bythe
seat backrest. #
Make sure that there ar ben chseat, the
re ar seat and the seat backrest are
engaged before everytrip. If
th e left and right seat backrests are not
engaged and loc ked in place, this will be shown
on the multifunction display on the instrument
clus ter.A wa rning tone will also sound.
If th e cent reseat backrest is not engaged and
loc ked in place, the lock verification indicator
will be red.
Re quirements:
R Tofold the cent reseat backrest forw ards:
th e cent reseat backrest has been unloc ked.
Yo u can fold the cent reand outer seat backrests
fo rw ards separatel y.
Yo u can unlo ckthe outer seat backrests electri‐
cally. The buttons for unlocking are located in
th e load compartment. Seats and
stowing 111
Page 126 of 481
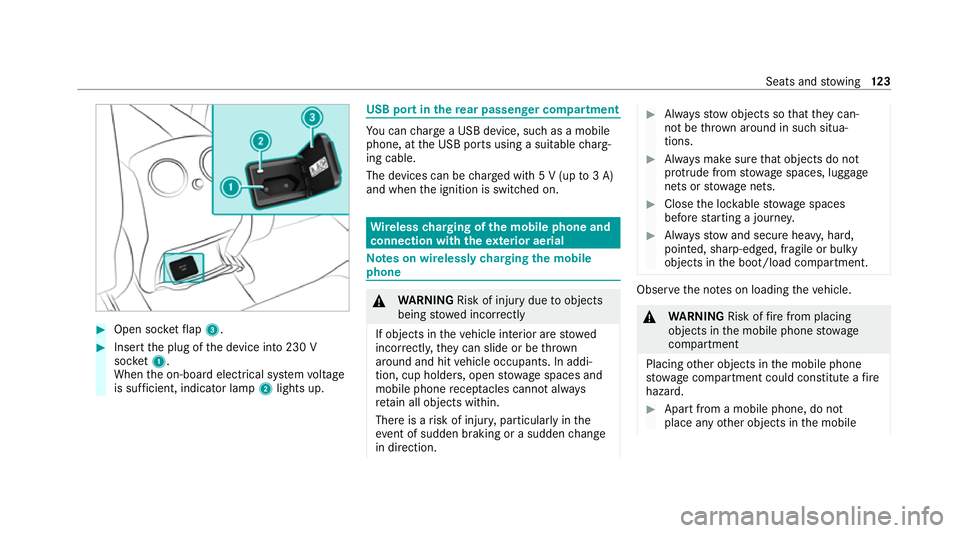
#
Open soc ketflap 3. #
Insert the plug of the device into 230 V
soc ket1.
When the on-board electrical sy stem voltage
is suf ficient, indicator la mp2lights up. USB port in
there ar passenger comp artment Yo
u can charge a USB device, such as a mobile
phone, at the USB ports using a suitable charg‐
ing cable.
The devices can be charge d with 5 V (up to3 A)
and when the ignition is switched on. Wire
lesscharging of the mobile phone and
connection with theex terior aerial Note
s on wirelessly charging the mobile
phone &
WARNING Risk of injury duetoobjects
being stowed incor rectly
If objects in theve hicle interior are stowed
incor rectly, they can slide or be thrown
around and hit vehicle occupants. In addi‐
tion, cup holders, open stowage spaces and
mobile phone recep tacles cannot al ways
re tain all objects within.
There is a risk of injur y,particularly in the
ev ent of sudden braking or a sudden change
in direction. #
Alw aysstow objects so that they can‐
not be throw n around in su chsitua‐
tions. #
Alw ays make sure that objects do not
pr otru de from stowage spaces, luggage
nets or stowage nets. #
Close the loc kable stow age spaces
before starting a journe y. #
Alw aysstow and secure heavy, hard,
poin ted, sharp-edged, fragile or bulky
objects in the boot/load compartment. Obser
vethe no tes on loading theve hicle. &
WARNING Risk offire from placing
objects in the mobile phone stowage
compartment
Placing other objects in the mobile phone
stow age compartment could con stitute a fire
hazard. #
Apart from a mobile phone, do not
place any other objects in the mobile Seats and
stowing 12 3
Page 276 of 481
Te
lephone Te
lephony Note
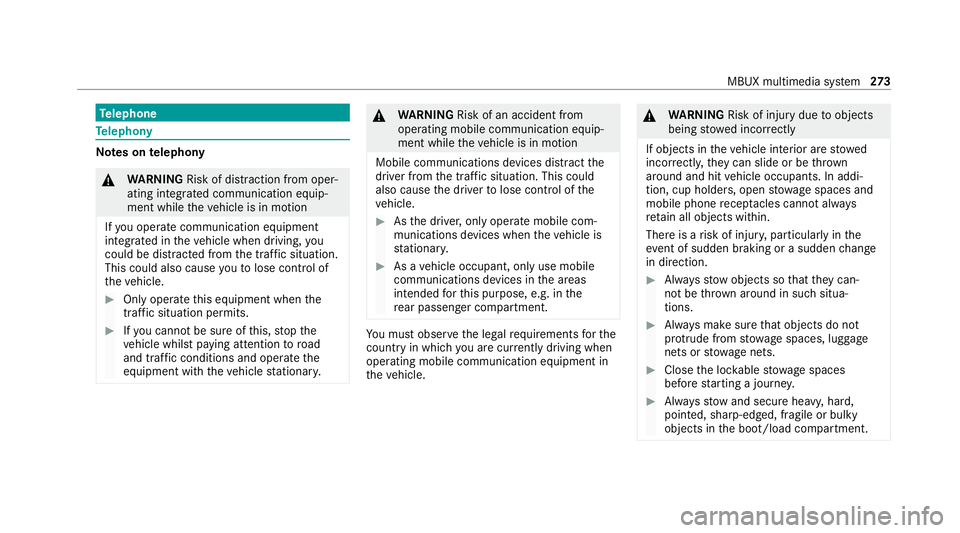
s ontelephony &
WARNING Risk of dist raction from oper‐
ating integrated communication equip‐
ment while theve hicle is in motion
If yo u operate communication equipment
integrated in theve hicle when driving, you
could be dist racted from the tra ffic situation.
This could also cause youto lose control of
th eve hicle. #
Only operate this equipment when the
traf fic situation permits. #
Ifyo u cannot be sure of this, stop the
ve hicle whilst paying attention toroad
and traf fic conditions and ope rate the
equipment with theve hicle stationar y. &
WARNING Risk of an accident from
ope rating mobile communication equip‐
ment while theve hicle is in motion
Mobile communications devices distract the
driver from the traf fic situation. This could
also cause the driver tolose control of the
ve hicle. #
Asthe driver, only operate mobile com‐
munications devices when theve hicle is
st ationar y. #
As a vehicle occupant, only use mobile
communications devices in the areas
intended forth is purpose, e.g. in the
re ar passenger compartment. Yo
u must obse rveth e legal requirements forthe
country in whi chyou are cur rently driving when
operating mobile communication equipment in
th eve hicle. &
WARNING Risk of injury duetoobjects
being stowed inco rrectly
If objects in theve hicle interior are stowed
incor rectly, they can slide or be thrown
around and hit vehicle occupants. In addi‐
tion, cup holders, open stowage spaces and
mobile phone recep tacles cannot al ways
re tain all objects within.
There is a risk of injur y,particularly in the
ev ent of sudden braking or a sudden change
in direction. #
Alw aysstow objects so that they can‐
not be throw n around in su chsitua‐
tions. #
Alw ays make sure that objects do not
pr otru de from stowage spaces, luggage
nets or stowage nets. #
Close the loc kable stow age spaces
before starting a journe y. #
Alw aysstow and secure heavy, hard,
poin ted, sharp-edged, fragile or bulky
objects in the boot/load compartment. MBUX multimedia sy
stem 273
Page 446 of 481
Au
tomatic engine start (ECO start/
sto p function)............................................ 16 0
Au tomatic engine stop (ECO start/
sto p function)............................................ 16 0
Au tomatic front passen ger front air‐
bag deacti vation sy stem
see Automatic front passenger front
airbag shutoff
Au tomatic front passen ger front air‐
bag shu toff
Fu nction of the automatic front
passenger front airbag deactivation
sy stem..................................................... 47
PA SSENGER AIR BAG indicator lamp....... 49
Au tomatic mir rorfo lding function
Ac tivating/deactivating......................... 141
Au tomatic transmission
DIRECT SELECT le ver............................. 16 6
Drive program display............................ 16 5
Drive programs...................................... 16 4
DY NA MIC SELECT switch...................... 16 4
Engaging drive position........................ .168
Engaging neutral................................... .167
Engaging pa rkposition.......................... 16 8Engaging
reve rsege ar........................... 167
Kickdown............................................... 17 0
Manual gear changing.......................... .168
St eering wheel gearshift paddles.......... 16 8
Tr ansmission position displa y................ 16 6
Tr ansmission position s..........................16 6
Axle load Perm issible............................................ 355
Tr ailer operation.................................... 369 B
Bag hook .................................................... .115
Ball neck Extending/r etra cting............................ .240
Extending/r etra cting (MBUX multi‐
media sy stem)....................................... 24 2
BA S (Brake Assist Sy stem)....................... 186
Battery Remo tecontrol (s tationary heater)........ 14 9
Battery see Battery (vehicle)
Battery (k ey)
Re placing.................................................75 Battery (vehicle)
Charging................................................ 325
Charging (Remo teOnline)...................... 154
No tes..................................................... 321
No tes (s tarting assis tance and
ch arging)............................................... 323
Re placing.............................................. 326
St arting assis tance................................ 325
Belt see Seat belt
Bic ycle rack
Load capacity........................................ 368
Tr ailer operation.................................... 24 5
Blind Spot Assi st
Ac tivating/deactivating......................... 215
Fu nction................................................. 213
Sy stem limitations................................. 213
Blo wer
see Climate control
BlueTEC see AdBlue ®
Boot lid see Tailgate Index
443
Page 469 of 481
Snow
chains.............................................. 335
Soc ket (12 V)
Boot/luggage compa rtment.................. 121
Fr ont centre console.............................. 121
Soc ket (230 V)
Re ar...................................................... .122
Software update System updates.....................................2 63
Sound PRE-SAFE ®
Sound................................... 52
Wheels and tyres................................... 335
Sound menu Functions overview...............................2 96
Spare wheel see Emer gency spa rewheel
Specialist workshop
see Qualified specialist workshop
Specific absor ption rate ............................. 26
Speed limit for winter tyres
Setting................................................... 19 6
St andby mode
Ac tivating/deactivating......................... 183Fu
nction................................................ 183
St anding lights.......................................... 127
St art-off assi st
see Optimised acceleration
St art/s top button
Pa rking theve hicle................................1 77
St arting theve hicle...............................1 53
Switching on the po wer supply or
ignition................................................. .152
St art/s top function
see ECO start/ stop function
St arter battery
Charging (Remo teOnline)...................... 154
St arting
see Vehicle
St arting assi stance
see Jump -sta rt connection
St arting-o ffaid
see Hill Start Assist
St ationary heater/ventilation
Displ ays (remo tecontrol)...................... 14 9
Problems (remo tecontrol)..................... 15 0Re
placing the battery (remo tecon‐
trol)....................................................... 14 9
Setting (MBUX multimedia sy stem)....... 14 8
Setting (remo tecontrol)........................ 14 8
Switching on/off (control panel )........... 147
ST EER CONT ROL
Fu nction/no tes..................................... 189
Ste ering wheel
Ad justing (electrically)........................... 105
Ad justing (manually). ............................. 104
Buttons.................................................. 250
Ca re....................................................... 310
Operating the memory function............ 108
St eering wheel heater...........................1 05
Ste ering wheel gearshift paddles............ 16 8
Ste ering wheel heater
Ac tivating/deactivating......................... 105
St ow age areas
see Loading
see Stow age space
St ow age comp artments
see Loading
see Stow age space 466
Index