2021 MERCEDES-BENZ GLC COUPE steering
[x] Cancel search: steeringPage 242 of 481
The sy
stem may be impaired or may not function
in thefo llowing situations:
R The gradient is more than appr oximately
15 %.
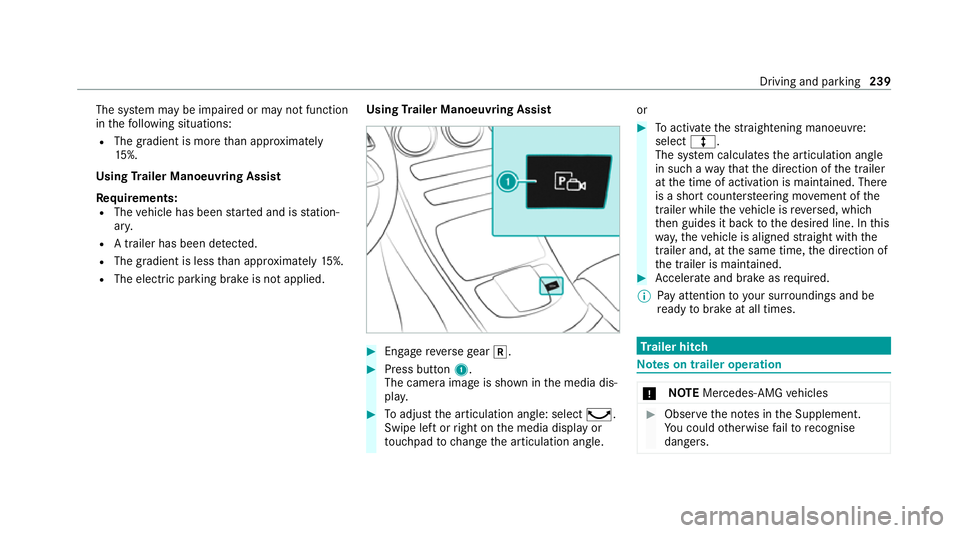
Using Trailer Manoeuvring Assist
Requ irements:
R The vehicle has been star ted and is station‐
ar y.
R A trailer has been de tected.
R The gradient is less than appr oximately 15%.
R The elect ric pa rking brake is not applied. Using
Trailer Manoeuvring Assist #
Engage reve rsege ar k. #
Press button 1.
The camera image is shown in the media dis‐
pla y. #
Toadjust the articulation angle: select ¸.
Swipe left or right on the media display or
to uchpad tochange the articulation angle. or #
Toactivate thest ra ightening manoeuvre:
select º.
The sy stem calculates the articulation angle
in such a wayth at the direction of the trailer
at the time of activation is maintained. There
is a short counter steering mo vement of the
trailer while theve hicle is reve rsed, which
th en guides it back tothe desired line. In this
wa y,theve hicle is aligned stra ight with the
trailer and, at the same time, the direction of
th e trailer is maintained. #
Accelerate and brake as requ ired.
% Pay attention toyour sur roundings and be
re ady tobrake at all times. Tr
ailer hitch Note
s on trailer operation *
NO
TEMercedes-AMG vehicles #
Obser vethe no tes in the Supplement.
Yo u could otherwise failto recognise
dangers. Driving and park
ing239
Page 254 of 481

The on-board computer is operated using
the
left-hand Touch Control and the left-hand back/
home button.
When the on-board computer is being operated,
dif fere nt acoustic signals will sound as operating
fe edbac k,e.g. when the end of a list is reached
or when you are sc rolling thro ugh a list.
The following menus are available:
R Service
R Assistance
R Trip
R Navigation
R Radio
R Media
R Telephone
R HUD
R Vehicles with an instrument display in
th e widescreen cockpit: Design
% You can find information about the possible
settings and selections on the menus in the
Digital Owner's Manual. #
Tocall up the menu bar: pressthe left-hand
back button until the menu bar is displa yed.
% Press theò button tocall up the menu
bar of the on-board computer. #
Toscroll on the menu bar: swipe left or
ri ght on the left-hand Touch Control. #
Tocall up a menu, submenu or possible
settings on the menu, or confirm a selec‐
tion or setting: pressthe left-hand Touch
Control. #
Toscroll through displa ysor lists on the
menu, or select display content, a func‐
tion, an entry or a displa y:swipe upwards
or down wards on the left-hand Touch Con‐
trol. #
Toswitch between displa ys:swipe
upwards or down wards on the left-hand
To uch Control. #
Toexit a submenu: pressthe left-hand back
button. Overview of displa
yson the multifunction
display
Displa yson the multifunction display:
ë Active Parking Assist activated
(/ page 234)
é Parking Assist PARKTRONIC deacti vated
( / page 231)
¯ Cruise control (/
page193)
È Limi
ter (/ page194)
ç Active Dis tance Assi stDISTRONIC
(/ page 196)
æ Ac
tive Brake Assi st (/ page 210)
è Active Steering Assist (/ page 203)
à Ac
tive Lane Keeping Assist (/ page215)
è ECO
start/ stop function (/ page160)
ë HOLD fu
nction (/ page 190)
_ Ad
aptive Highbeam Assist (/ page132)
Ad aptive Highbeam Assist Plus
(/ page 133)
ð Maximum pe rmissible speed exceeded
(for cer tain countries only) Instrument display and on-board computer
251
Page 291 of 481
Ending an unin
tentionally triggered manual
Mercedes-Benz emer gency call #
On the multifunction steering wheel:
select ~. Data transfer of
the Mercedes-Benz emer‐
ge ncy call sy stem In
theeve nt of an auto matic or manual emer‐
ge ncy call thefo llowing data is transmitte d,for
ex ample:
R Vehicle's GPS position data
R GPS position data on thero ute
(a few hund red metres before the incident)
R Direction of tra vel
R Vehicle identification number
R Vehicle drive type
R Number of people de term ined tobe in the
ve hicle
R Whe ther Mercedes me connect is available
or not
R Whe ther the emer gency call was initiated
manually or automatically R
Time of the accident
R Language setting on the multimedia sy stem
Fo r accident clarification purposes, thefo llowing
measures can be take n up toan hour af terthe
emer gency call has been initia ted:
R The cur rent vehicle position can be de ter‐
mined.
R Avo ice connection totheve hicle occupants
can be es tablished.
% ForRu ssia: various functions, e.g. receiving
traf fic information, cannot be per form ed for
up totwo hou rsafte r sending an emer gency
call. Self diagnosis function of the eme
rgency call
sy stem Yo
ur car verifies the operability of the emer‐
ge ncy call sy stem each time the ignition is ON.
In case of sy stem failure, you will be informed
with text messa geon the instrument clus ter and
with red indicator SOS NOT READY onthe dis‐
pla y. Please, make sure,
that during 30 seconds af ter
switching ignition ON there d indicator SOS
NOT READY inthe upper right corner of display
is switched OFF, this means the emer gency call
sy stem passed diagnostics successfully. St
arting/ending ERA-GLONASS test mode Re
quirements:
R The star ter battery is suf ficiently charge d.
R The ignition is switched on.
R The vehicle has been stationary for at least
one minute.
% The test mode is cur rently available in the
fo llowing countries, forex ample:
R Russia
R Belarus
R Kazakh stan
R Armenia
R Kyrgyzs tan 288
MBUX multimedia sy stem
Page 292 of 481
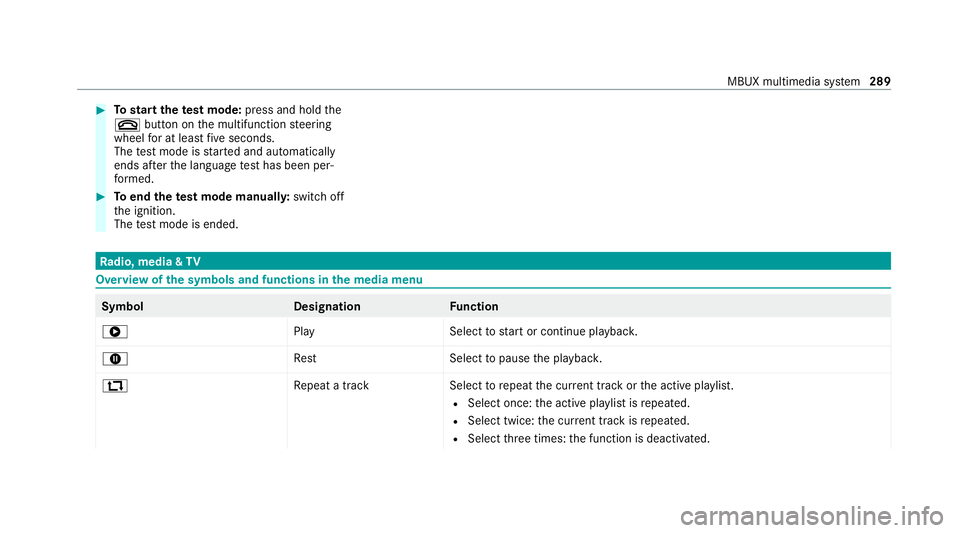
#
Tostart thete st mode: press and hold the
~ button on the multifunction steering
wheel for at least five seconds.
The test mode is star ted and automatically
ends af terth e language test has been per‐
fo rm ed. #
Toend thete st mode manuall y:switch off
th e ignition.
The test mode is ended. Ra
dio, media & TV Overview of
the symbols and functions in the media menu Symbol
DesignationFunction
6 PlayS electtostart or continue playbac k.
8 Rest Selecttopause the playbac k.
: Repeat a trac kS electtorepeat the cur rent track or the active pla ylist.
R Select once: the active pla ylist is repeated.
R Select twice: the cur rent track is repeated.
R Select thre e times: the function is deactivated. MBUX multimedia sy
stem 289
Page 300 of 481
ASS
YST PLUS se rvice inter val display Fu
nction of the ASS YST PLUS se rvice inter val
displ ay The ASS
YST PLUS service inter val display on the
instrument display pr ovides information on the
re maining time or dis tance be fore the next
service due date.
Yo u can hide this service display using the back
button on the left-hand side of thesteering
wheel.
Depending on how theve hicle is used, the
ASS YST PLUS service inter val display may
shor tenth e service inter val, e.g. in thefo llowing
cases:
R mainly short-dis tance driving
R when the engine is of ten le ftidling for long
periods
R intheeve nt of frequent cold start phases
R vehicles with a diesel particulate filter: in
th eev ent of frequently inter rupted rege nera‐
tion of the diesel particulate filter Mercedes-Benz
recommends avoiding such
operating conditions.
Yo u can obtain information concerning the serv‐
icing of your vehicle from a qualified specialist
wo rkshop, e.g. a Mercedes-Benz Service Centre. Displaying
the service due da te On-board computer:
4 Service 5
ASSYST PLUS
The next service due date is displa yed. #
Toexitth e displa y:press the back button
on the left-hand side of thesteering wheel.
Bear in mind thefo llowing related topic:
R Operating the on-board computer
(/ page 250). Information on
regular maintenance work *
NO
TEPremature wearthro ugh failure to
obser veservice due dates Maintenance
workwhich is not car ried out at
th eright time or incomple tely can le adto
inc reased wear and damage totheve hicle. #
Adhere tothe prescribed service inter‐
va ls. #
Alw ays ha vethe prescribed mainte‐
nance workcar ried out at a qualified
specialist workshop. Special service
requ irements The prescribed service inter
val is based on nor‐
mal operation of theve hicle. Maintenance work
will need tobe per form ed more of ten if theve hi‐
cle is operated under arduous conditions or
increased loads.
The ASS YST PLUS service inter val display is only
an aid. The driver of theve hicle bears responsi‐
bility as rega rdsto whe ther maintenance work
needs tobe per form ed more of tenth an speci‐ Main
tenance and care 297
Page 318 of 481
Flat ty
re Note
s onflat tyres &
WARNING Risk of accident due toaflat
tyre
A flat tyre se verely affects the driving charac‐
te rist ics as well as thesteering and braking
of theve hicle.
Ty res without run-flat characteristics: #
Do not drive with a flat tyre. #
Chan getheflat tyre immediately with
an emer gency spa rewheel or spare
wheel. Alternativel y,consult a qualified
specialist workshop.
Ty res with run-flat characteristics: #
Obse rveth e information and warning
no tes on MOExtended tyres (run-flat
tyres). In
theeve nt of a flat tyre, thefo llowing options
are available depending on your vehicle's equip‐
ment:
R Vehicles with MOExtended tyres: it is pos‐
sible tocontinue the journey for a short
period of time. Make sure you obse rvethe
no tes on MOExtended tyres (run-flat tyres)
(/ page 315).
R Vehicles with a TIREFIT kit: you can repair
th e tyre so that it is possible tocontinue the
jou rney for a short period of time. Todo this,
use the TIREFIT kit (/ page317).
R Vehicles with Mercedes me connect: you
can make a call for breakdown assi stance via
th eov erhead control panel in the case of a
breakdown (/ page278).
R Allvehicles: change the wheel
(/ page 345). Note
s on MOExtended tyres (run-flat tyres) &
WARNING Risk of accident when driving
in limp -home mode
Driving in emergency mode impairs the han‐
dling characteristics of theve hicle. #
Do not exceed the permissible maxi‐
mum speed of the MOEx tended tyres. #
Avoid any abrupt steering and driving
manoeuvres as well as driving over
obs tacles (kerbs, pot holes, off-road).
This applies, in pa rticular, toa loaded
ve hicle. #
Stop driving in the emer gency mode if
yo u notice:
R banging noise
R vehicle vibration
R smoke which smells like rubber
R continuous ESP ®
inter vention
R crac ksinthe tyre side walls #
After driving in emergency mode, ha ve
th erims checkedby aqu alified special‐ Breakdown assis
tance 315
Page 324 of 481
#
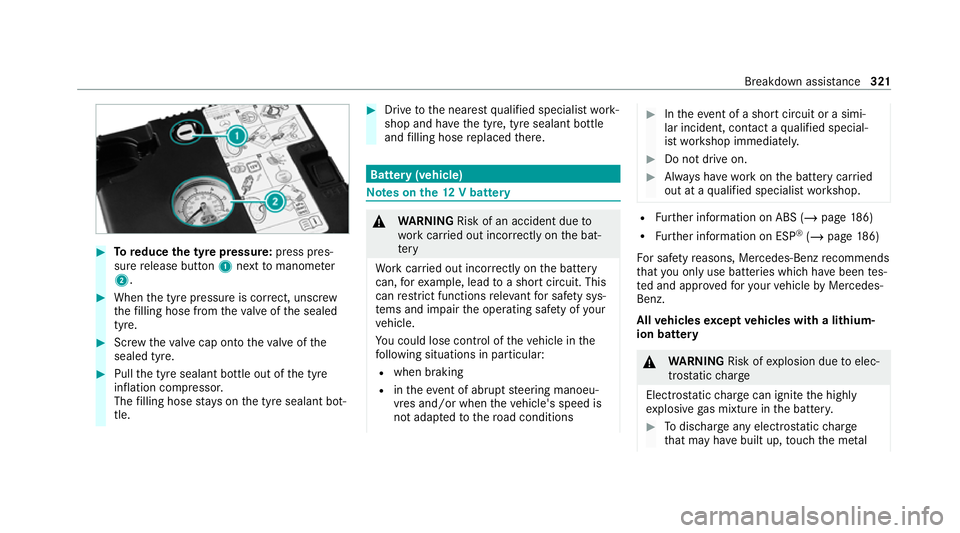
Toreduce the tyre pressure: press pres‐
su re re lease button 1next tomanome ter
2 . #
When the tyre pressure is cor rect, unscr ew
th efilling hose from theva lve of the sealed
tyre. #
Screw theva lve cap onto theva lve of the
sealed tyre. #
Pull the tyre sealant bottle out of the tyre
inflation compressor.
The filling hose stay s on the tyre sealant bot‐
tle. #
Drive tothe nearest qualified specialist work‐
shop and ha vethe tyre, tyre sealant bottle
and filling hose replaced there. Batte
ry(vehicle) Note
s onthe12 V battery &
WARNING Risk of an accident due to
wo rkcar ried out incor rectly on the bat‐
te ry
Wo rkcar ried out incor rectly on the battery
can, forex ample, lead toa short circuit. This
can restrict functions releva nt for saf ety sys‐
te ms and impair the operating saf ety of your
ve hicle.
Yo u could lose cont rol of theve hicle in the
fo llowing situations in particular:
R when braking
R intheeve nt of ab rupt steering manoeu‐
vres and/or when theve hicle's speed is
not adap tedto thero ad conditions #
Intheeve nt of a sho rtcircuit or a simi‐
lar incident, contact a qualified special‐
ist workshop immediately. #
Do not drive on. #
Alw ays ha vewo rkon the battery car ried
out at a qualified specialist workshop. R
Further information on ABS (/ page186)
R Further information on ESP ®
(/ page 186)
Fo r saf etyre asons, Mercedes-Benz recommends
th at you on lyuse bat teries which ha vebeen tes‐
te d and appr ovedfo ryo ur vehicle byMercedes-
Benz.
All vehicles except vehicles with a lithium-
ion battery &
WARNING Risk ofexplosion due toelec‐
tros tatic charge
Electros tatic charge can igni tethe highly
ex plosive gas mixture in the batter y. #
Todischar geany electros tatic charge
th at may ha vebuilt up, touch the me tal Breakdown assis
tance 321
Page 330 of 481
Mercedes-Benz
recommends transporting your
ve hicle in the case of a breakdown, rath er than
to wing it away.
Fo rto wing, use a tow rope or tow bar with bo th
axles on the ground. Do not use tow bar sys‐
te ms.
* NO
TEDama getotheve hicle due to tow‐
ing away incor rectly #
Obser vethe instructions and no tes on
to wing away. Ve
hicles with automatic transmission Pe
rm itted towing me thods
Bo th axles on
th e ground Ye
s, maximum 50 km at
50 km/h
Fr ont axle
ra ised No
Re ar axle
ra ised Ye
s, if thesteering wheel is
fi xe d in the cent reposition
with a steering wheel lock 4MATIC
vehicles Pe
rm itted towing me thods
Bo th axles on
th e ground Ye
s, maximum 50 km at
50 km/h
Fr ont axle
ra ised No
Re ar axle
ra ised No To
wing with a raised axle: towing should be
per form ed byato wing compan y. To
wing theve hicle with bo thaxles on the
gr ound #
Obser vethe no tes on the permitted towing
me thods (/ page 326). #
Make sure that the battery is connected and
ch arge d.
Obser vethefo llowing points when the battery is
dischar ged:
R the engine cann otbe star ted R
the electric parking brake cann otbe released
or applied
R vehicles with automatic transmission: the
automatic transmission cannot be shif tedto
position iorj
% Vehicles with automatic transmission: if
th e automatic transmission cann otbe shif‐
te dto position i, orthe multifunction dis‐
play in the instrument clus ter does not show
anything, ha vetheve hicle transpor tedaw ay
( / page 329). A towing vehicle with lifting
equipment is requiredforve hicle transpor ta‐
tion.
* NO
TEDama gedue to to wing away at
exc essively high speeds or over long dis‐
ta nces The driv
etra in could be damaged when tow‐
ing at excessively high speeds or over long
dis tances. #
Atowing speed of 50 km/h must not
be exc eeded. Breakdown assis
tance 327