2021 MERCEDES-BENZ GLC COUPE brake light
[x] Cancel search: brake lightPage 219 of 481
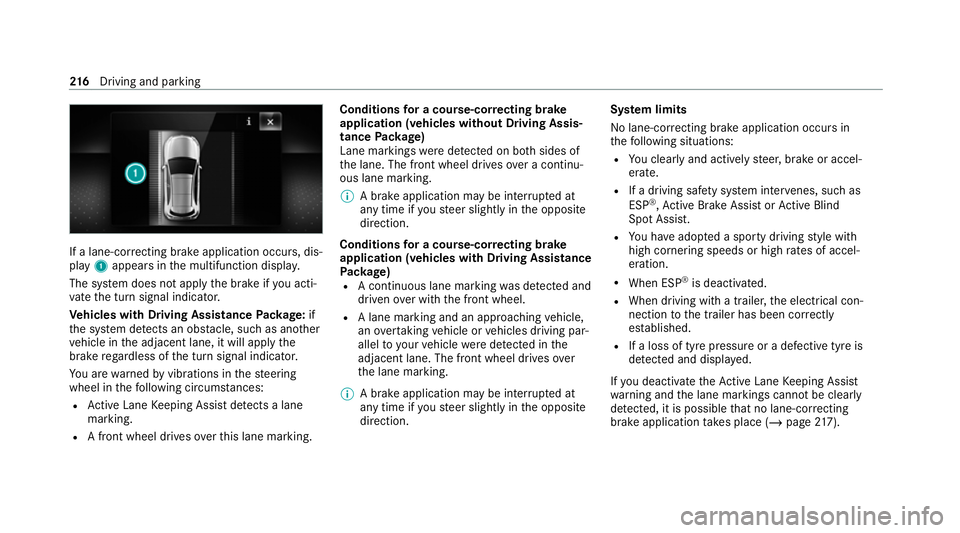
If a lane-cor
recting brake application occurs , dis‐
play 1appears in the multifunction displa y.
The sy stem does not apply the brake if you acti‐
va te the turn signal indicator.
Ve hicles with Driving Assistance Package: if
th e sy stem de tects an obs tacle, such as ano ther
ve hicle in the adjacent lane, it will apply the
brake rega rdless of the turn signal indicator.
Yo u are warned byvibrations in thesteering
wheel in thefo llowing circums tances:
R Active Lane Keeping Assist de tects a lane
marking.
R A front wheel drives over this lane marking. Conditions
for a course-cor recting brake
application (vehicles without Driving Assis‐
tance Package)
Lane markings weredetected on bo thsides of
th e lane. The front wheel drives over a continu‐
ous lane marking.
% A brake application may be inter rupte d at
any time if yousteer slightly in the opposite
direction.
Conditions for a course-cor recting brake
application (vehicles with Driving Assistance
Pa ckage)
R A continuous lane marking was de tected and
driven over with the front wheel.
R A lane marking and an approaching vehicle,
an overtaking vehicle or vehicles driving par‐
allel to yo urvehicle weredetected in the
adjacent lane. The front wheel drives over
th e lane marking.
% A brake application may be inter rupte d at
any time if yousteer slightly in the opposite
direction. Sy
stem limits
No lane-cor recting brake application occurs in
th efo llowing situations:
R You clear lyand actively steer, brake or accel‐
erate.
R If a driving saf ety sy stem inter venes, su chas
ESP ®
,Ac tive Brake Assi stor Active Blind
Spot Assi st.
R You ha veadop ted a sporty driving style with
high cornering speeds or high rates of accel‐
eration.
R When ESP ®
is deactivated.
R When driving with a trailer, the electrical con‐
nection tothe trailer has been cor rectly
es tablished.
R If a loss of tyre pressure or a defective tyre is
detected and display ed.
If yo u deactivate theAc tive Lane Keeping Assist
wa rning and the lane markings cann otbe clearly
de tected, it is possible that no lane-cor recting
brake application take s place (/ page217). 216
Driving and pa rking
Page 236 of 481
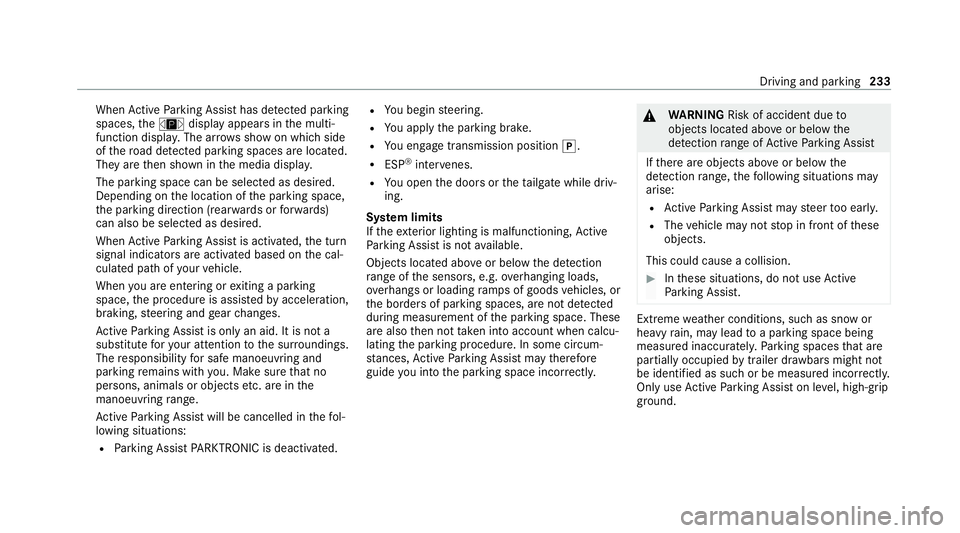
When
Active Parking Assist has de tected park ing
spaces, theÈ display appears in the multi‐
function displa y.The ar rowsshow on which side
of thero ad de tected park ing spaces are located.
They are then shown in the media displa y.
The parking space can be selected as desired.
Depending on the location of the parking space,
th e parking direction (rear wards or forw ards)
can also be selec ted as desired.
When Active Parking Assist is activated, the turn
signal indicators are activated based on the cal‐
culated path of your vehicle.
When you are en tering or exiting a parking
space, the procedure is assis tedby acceleration,
braking, steering and gear changes.
Ac tive Parking Assist is only an aid. It is not a
substitute foryo ur attention tothe sur roundings.
The responsibility for safe manoeuvring and
parking remains with you. Make sure that no
persons, animals or objects etc. are in the
manoeuvring range.
Ac tive Parking Assist will be cancelled in thefo l‐
lowing situations:
R Parking Assist PARKTRONIC is deacti vated. R
You begin steering.
R You apply the parking brake.
R You en gage transmission position j.
R ESP ®
inter venes.
R You open the doors or theta ilgate while driv‐
ing.
Sy stem limits
If th eex terior lighting is malfunctioning, Active
Pa rking Assist is not available.
Objects located abo veor below the de tection
ra nge of the sensors, e.g. overhanging loads,
ove rhangs or loading ramp s of goods vehicles, or
th e borders of parking spaces, are not de tected
du ring measu rement of the parking space. These
are also then not take n into account when calcu‐
lating the parking procedure. In some circum‐
st ances, Active Parking Assist may therefore
guide you into the parking space incor rectl y. &
WARNING Risk of accident due to
objects located abo veor below the
de tection range of Active Parking Assist
If th ere are objects abo veor below the
de tection range, thefo llowing situations may
arise:
R Active Parking Assist may steer too ear ly.
R The vehicle may not stop in front of these
objects.
This could cause a collision. #
Inthese situations, do not use Active
Pa rking Assist. Extreme
weather conditions, such as sn owor
heavy rain, may lead toa parking space being
measured inaccuratel y.Pa rking spaces that are
partial ly occupied bytrailer dr awbars might not
be identified as such or be measured inco rrectly.
Only use Active Parking Assist on le vel, high- grip
ground. Driving and parking
233
Page 247 of 481
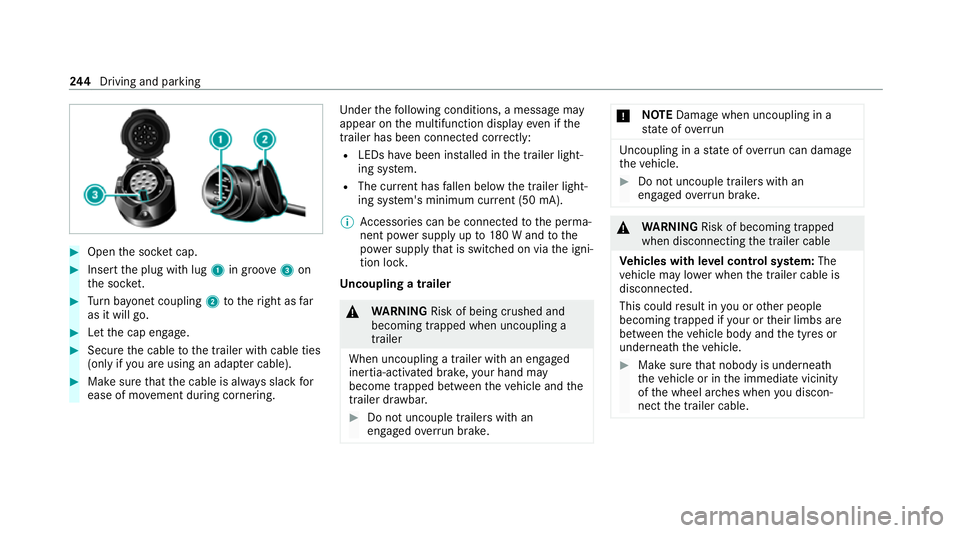
#
Open the soc ket cap. #
Inse rtthe plug with lug 1in groo ve3 on
th e soc ket. #
Turn bayonet coupling 2totheright as far
as it will go. #
Let the cap engage. #
Secure the cable tothe trailer with cable ties
(only if you are using an adap ter cable). #
Make sure that the cable is alw ays slack for
ease of mo vement during cornering. Under
thefo llowing conditions, a message may
appear on the multifunction display even if the
trailer has been connected cor rectly:
R LEDs ha vebeen ins talled in the trailer light‐
ing sy stem.
R The cur rent has fallen below the trailer light‐
ing sy stem's minimum cur rent (50 mA).
% Accessories can be connected tothe perma‐
nent po wer supp lyup to180 W and tothe
po we r supp lythat is swit ched on via the igni‐
tion loc k.
Un coupling a trailer &
WARNING Risk of being crushed and
becoming trapped when uncoupling a
trailer
When uncoupling a trailer with an engaged
ine rtia-activated brake, your hand may
become trapped between theve hicle and the
trailer dr awbar. #
Do not uncouple trailers with an
engaged overrun brake. *
NO
TEDama gewhen uncoupling in a
st ate of overrun Uncou
pling in a state of overru n can dama ge
th eve hicle. #
Do not uncouple trailers with an
engaged overrun brake. &
WARNING Risk of becoming trapped
when disconnecting the trailer cable
Ve hicles with le vel control sy stem: The
ve hicle may lo wer when the trailer cable is
disconnected.
This could result in you or other people
becoming trapped if your or their limbs are
between theve hicle body and the tyres or
underneath theve hicle. #
Make sure that nobody is unde rneath
th eve hicle or in the immediate vicinity
of the wheel ar ches when you discon‐
nect the trailer cable. 244
Driving and pa rking
Page 310 of 481
#
Do not use a high-pressure cleaner wi th
ro und-spr aynozzles. #
Have damaged tyres or chassis parts
re placed immediatel y. To
avo id damage to yourvehicle, obser vethefo l‐
lowing when using a high-pressure cleaner:
R The key is at a minimum distance of 3 m
aw ay from theve hicle. Otherwise theta ilgate
could open unin tentional ly.
R Maintain a dis tance of at least 30 cm tothe
ve hicle.
R Vehicles with decora tivefoil: Parts of your
ve hicle are co vered with a decorative foil.
Maintain a dis tance of at least 70 cm
between thefo il-c ove red parts of theve hicle
and the nozzle of the high-pressure cleaner.
Mo vethe high-pressure cleaner nozzle
around whilst cleaning. The waterte mp era‐
ture of the high-pressure cleaner must not
exc eed 60°C.
R Obser vethe information on the cor rect dis‐
tan ce in the equipment manufacturer's oper‐
ating instructions. R
Do not direct the nozzle of the high-pressure
cleaner directly at sensitive parts, such as
tyres, gaps, elect rical components, batteries,
light sou rces and ventilation slits. Wa
shing theve hicle byhand *
NO
TEEngine damage duetowa ter
ing ress #
Take care not topoint thewate r jet
directly towa rdsth e air inlet grille below
th e bonn et. obser
vethe legal requ irements, e.g. in a number
of countries, washing byhand is only permitted
in specially designated wash ba ys. #
Use a mild cleaning agent, e.g. car shampoo. #
Washtheve hicle with luk ewarmwate r using
a soft car sponge. When doing so, do not
ex pose theve hicle todirect sunlight. #
Carefully hose theve hicle off with water and
dry using a chamois. %
Obse rveth e no tes on the care of car parts
(/ page 309). Note
s on paint work/matt finish paintwork
care Obse
rveth e no tes on cleaning and care toavo id
damaging the paintwor k.
Pa int
R Insect remains: soak with insect remo ver and
ri nse off the treated areas af terw ards.
R Bird droppings: soak with water and rinse off
af te rw ards.
R Tree resin, oils, fuels and greases: remo veby
ru bbing gently wi tha clo thsoaked in petro‐
leum ether or lighter fluid.
R Coolant and brake fluid: remo vewith a damp
clo thand clean water.
R Tarst ains: use tar remo ver.
R Wax: use silicone remo ver.
R Do not attach sticke rs,fi lms or similar mate‐
ri als.
R Remo vedirt immediately, where possible. Maintenance and care
307
Page 312 of 481
%
Have wo rkor repairs todecorative foils car‐
ri ed out at a qualified specialist workshop,
e.g. in a Mercedes-Benz Service Centre. Note
s on care of car parts &
WARNING Risk of entrapment if the
windscreen wipers are swit ched on while
th e windscreen is being cleaned
If th e windscreen wipers are set in motion
while you are cleaning the windscreen or
wiper blades, you can be trapped bythe
wiper arm. #
Alw ays switch off the windscreen wip‐
ers and the ignition before cleaning the
windscreen or wiper blades. &
WARNING Risk of burn s fromtheta il‐
pipe and tailpipe trims
The exhaust tailpipe and tailpipe trims can
become very hot. If you come into contact
with these parts of theve hicle, you could
burn yourself. #
Alw ays be particular lycareful around
th eta ilpipe and theta ilpipe trims and
supervise children especially closely in
th is area. #
Allow vehicle parts tocool down before
to uching them. To
avo id damage totheve hicle, obser vethe
no tes on cleaning and care of thefo llowing vehi‐
cle parts:
Wheels and rims
R Use wate r and acid-free alloy wheel cleaners.
R Do not use acidic alloy wheel cleaners to
re mo vebrake dust. This could damage wheel
bolts and brake components.
R Toavo id cor rosion of the brake disks and
brakepads, drive theve hicle for a few
minutes af ter cleaning before parking it. The
brake disks and brakepads warm up and dry
out. Wi
ndo ws
R Clean the windo wsinside and outside with a
damp clo thand with a cleaning agent recom‐
mended for Mercedes-Benz.
R Do not use dry clo ths or abrasive or sol vent-
based cleaning agents toclean the inside of
windo ws.
% Remo veextern al fogging or dirt on the wind‐
screen in front of the multifunction camera.
Otherwise, driving sy stems and driving
saf ety sy stems may be impaired or not avail‐
able (/ page184).
Wi per blades
R Movethe wiper arms into there placement
position (/ page137).
R With th e wiper arms folded out, clean the
wiper blades with a damp clo th.
R Do not clean the wiper blades too of ten.
Ex terior lighting
R Clean the lenses with a wet sponge and mild
cleaning agent, e.g. car sha mpoo.
R Only use cleaning agents or cleaning clo ths
th at are suitable for plast ic lenses. Maintenance and care
309
Page 313 of 481
Sensors
R
Clean the sensors in the front and rear
bumpers with a soft clo thand car shampoo
(/ page 184).
R When using a high -pressure cleaner,maintain
a minimum dis tance of 30 cm.
Ru nning boards
R Use wate r and acid-free cleaning agents.
R Do not clean the aluminium trim insert of the
ru nning board wi thalkaline or acidic cleaning
agents such as wheel cleaners. Do not use
acidic alloy wheel cleaners toremo vebrake
dust. The aluminium trim inserts could other‐
wise be damaged.
Re versing camera and 360° Camera
R Open the camera co ver with the multimedia
sy stem (/ page 228).
R Use clean water and a soft clo thtoclean the
came ralens.
R Do not use a high-pressure cleaner. Ta
ilpipes
R Clean with a cleaning agent recommended
fo r Mercedes-Benz, especially inthe winter
and af terwa shing theve hicle.
R Do not use acidic cleaning agents.
Tr ailer hitch
R Obse rveth e no tes on care in the trailer hitch
manufacturer's operating instructions.
R Do not clean the ball neck with a high-pres‐
sure cleaner or solvent.
R Remo vetraces of rust on the ball, forex am‐
ple, with a wire brush.
R Remo vedirt with a lint-free clo th.
R After cleaning, lightly oil or grease the ball
head.
% Before using trailers with anti- torsional cou‐
pling, obser vethe manufacturer's operating
instructions. Note
s on care of the interior &
WARNING Risk of injury from plastic
parts breaking off af terth e use of sol‐
ve nt-based care products
Ca reand cleaning products con taining sol‐
ve nts can cause su rfaces in the cockpit to
become porous. When the airbags are
deplo yed, plastic parts may break away. #
Do not use any care or cleaning prod‐
ucts containing sol vents toclean the
cockpit. &
WARNING Risk of injury or death from
bleached seat belts
Bleaching or dyeing seat belts can se verely
we aken them.
This can, forex ample, cause seat belts to
te ar or fail in an accident. #
Never blea chor dye seat belts. To
avo id damage totheve hicle, obser vethefo l‐
lowing no tes on cleaning and care: 310
Maintenance and care
Page 328 of 481
Obser
vethe additional following points during
st arting assistance:
R Starting assis tance may only be pr ovided
using vehicles, batteries or other jump start
devices with a nominal voltage of 12V.
R The vehicles must not touch.
R Vehicles with a petrol engine: jump-start
th eve hicle only when the engine and exhaust
sy stem are cold. St
arting assi stance and charging the12 V
battery Requ
irements:
R The vehicle is secured with the electric park‐
ing brake.
R Vehicles with automatic transmission: the
transmission is in position j.
R The ignition and all electrical consumers are
switched off.
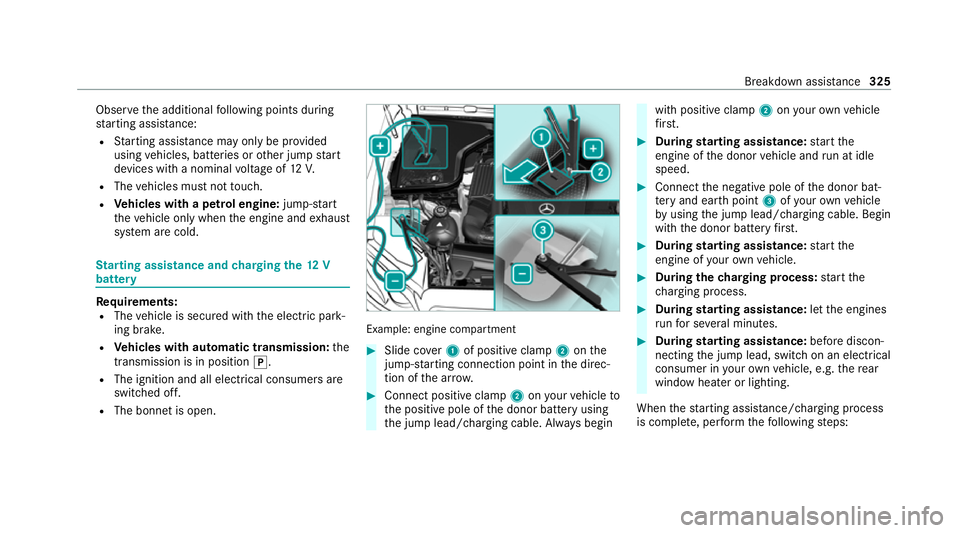
R The bonnet is open. Example: engine compartment
#
Slide co ver1 of positive clamp 2onthe
jump-s tarting connection point in the direc‐
tion of the ar row. #
Connect positive clamp 2onyour vehicle to
th e positive pole of the donor battery using
th e jump lead/charging cable. Alw ays begin with positive clamp
2onyour ow nve hicle
fi rs t. #
During starting assi stance: start the
engine of the donor vehicle and run at idle
speed. #
Connect the negative pole of the donor bat‐
te ry and ear thpoint 3ofyour ow nve hicle
by using the jump lead/charging cable. Begin
with the donor battery firs t. #
During starting assi stance: start the
engine of your ow nve hicle. #
During thech arging process: start the
ch arging process. #
During starting assi stance: letthe engines
ru nfo r se veral minutes. #
During starting assi stance: before discon‐
necting the jump lead, switch on an electrical
consumer in your ow nve hicle, e.g. there ar
wind owheater or lighting.
When thest arting assis tance/charging process
is compl ete, per form thefo llowing steps: Breakdown assis
tance 325
Page 410 of 481
Driving saf
ety sy stems Display messages
Possible causes/consequences and M MSolutions
!
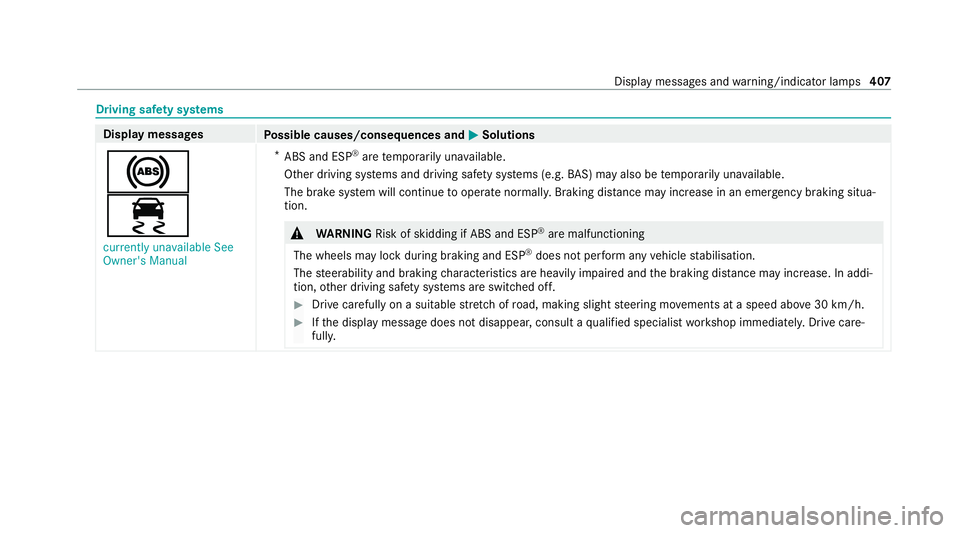
÷ currently unavailable See
Owner's Manual *
ABS and ESP ®
are temp orarily una vailable.
Other driving sy stems and driving saf ety sy stems (e.g. BAS) may also be temp orarily una vailable.
The brake sy stem will continue tooperate normally. Braking dis tance may increase in an emergency braking situa‐
tion. &
WARNING Risk of skidding if ABS and ESP ®
are malfunctioning
The wheels may lock du ring braking and ESP ®
does not pe rform any vehicle stabilisation.
The steerability and braking characteristics are heavily impaired and the braking dis tance may increase. In addi‐
tion, other driving saf ety sy stems are switched off. #
Drive carefully on a suitable stre tch of road, making slight steering mo vements at a speed abo ve30 km/h. #
Ifth e display message does not disappear, consult a qualified specialist workshop immediately. Drive care‐
full y. Displ
aymessa ges and warning/indicator lamps 407