2021 MERCEDES-BENZ GLC COUPE maintenance
[x] Cancel search: maintenancePage 314 of 481
Seat belts
R Clean with luk ewarmand soapy water.
R Do not use chemical cleaning agents.
R Do not dry byheating them toove r 80°C or
ex posing them todirect sunlight.
Display
R Switch off the display and let it cool down.
R Clean the sur face carefully with a microfibre
clo thand a suitable display care product
(TF T-LC D).
R Do not use any other agents.
Plastic trim R Clean with a damp microfibre clo th.
R For heavy soiling: use a cleaner recommen‐
ded for Mercedes-Benz.
R Do not attach sticke rs,fi lms or similar mate‐
ri als.
R Do not allow cosmetics, insect repellent or
sun cream tocome in contact wi th the plas‐
tic trim.
Re alwo od and trim elements
R Clean with a mic rofibre clo th. R
Blackpiano-lac quer look: clean with a damp
clo thand soapy water.
R For heavy soiling: use a cleaner recommen‐
ded for Mercedes-Benz.
R Do not use sol vent-based cleaning agents,
polishes or waxes.
Ro of lining
R Clean with a brush or dry shampoo.
Carpet
R Use a carpet and textile cleaning agent rec‐
ommended for Mercedes-Benz.
St eering wheel made of genuine leather or
DINAMICA
* NO
TEDama gecaused bywrong cleaners #
Do not use solvent-based cleaning
agents such as tarre mo ver or wheel
cleaner; neither should you use pol‐
ishes or waxes. Otherwise you may
damage thefinish. R
Clean wi tha damp clo thand 1% soapy water
solution and then wipe with a dry clo th.R
For heavy soiling: use a cleaner recommen‐
ded for Mercedes-Benz.
R Leather care: use a leath er care agentthat
has been recommended for Mercedes-Benz.
R Do not allow the leather tobecome too
damp.
R Do not use a microfibre clo th.
% Leather is a natural product. It has natural
surface propert ies, such as dif fere nces in
st ru cture, mar kscaused bygrow thand
injury or subtle colour dif fere nces.
Genuine leather seat co vers
R Clean with a damp clo thand then wipe with a
dry clo th.
R Leather care: use a leath er care agentthat
has been recommended for Mercedes-Benz.
R Do not allow th e leathertobecome too
damp.
R Do not use a microfibre clo th.
DINAMICA seat co vers
R Clean with a damp clo th.
R Do not use a mic rofibre clo th. Maintenance and care
311
Page 315 of 481
Imitation leather seat co
vers
R Clean with a damp clo thand 1% soapy water.
R Do not use a mic rofibre clo th. 312
Maintenance and care
Page 347 of 481

#
Only inter change the front and rear
wheels if the wheels and tyres ha vethe
same dimensions. Inter
changing the front and rear wheels if the
wheels or tyres ha vediffere nt dimensions can
re nder thege neral operating pe rmit in valid.
The wear pat tern s on the front and rear wheels
dif fer:
R front wheels wear more on the tyre shoulder
R rear wheels wear more in the cent reofthe
tyre
Do not drive wi thtyres that ha vetoo little tread
dep th. This significantly reduces traction on wet
ro ads (aquaplaning).
On vehicles with the same front and rear wheel
size, you can inter change the wheels every
5000 to10,000 km, depending on thewe ar.
Ensure the direction of rotation is maintained for
th e wheels.
Obser vethe instructions and saf ety no tes on
"Changing a wheel" when doing so
(/ page 345). Note
s onstoring wheels When
storing wheels, obser vethefo llowing
no tes:
R Afterre moving wheels, store them in a cool,
dry and preferably dark place.
R Protect the tyres from conta ct withoil,
grease or fuel. Overview of
the ty re-change tool kit *
NO
TEMercedes-AMG vehicles #
Obser vethe no tes in the Supplement.
Yo u could otherwise failto recognise
dangers. *
NO
TEPlug-in hybrid #
Obser vethe no tes in the Supplement.
Yo u could otherwise failto recognise
dangers. Apa
rtfrom some countr y-specific variants, vehi‐
cles are not equipped with a tyre-change tool kit. Fo
r more information on which tyre-changing
to ols are required and appr oved for per form ing a
wheel change on your vehicle, consult a qualified
specialist workshop.
Yo ure qu ire thefo llowing tools, forex ample, to
ch ange a wheel:
R Jack
R Chock
R Wheel wrench
R Cent ring pin
% The jack weighs appr oximately 3.4 kg.
The maximum load capacity of the jack can
be found on thest icke r af fixe dto the jac k.
The jack is maintenance-free. If there is a
malfunction, please conta ct aqualified spe‐
cialist workshop.
The tyre-change tool kit is located under the load
compartment floor.
% Depending on the model, the tyre change
to ol kit may be located in other positions
under the load compartment floor. 344
Wheels and tyres
Page 356 of 481
Note
s ontech nical data
* NO
TEMercedes-AMG vehicles #
Obser vethe no tes in the Supplement.
Yo u could otherwise failto recognise
dangers. *
NO
TEPlug-in hybrid #
Obser vethe no tes in the Supplement.
Yo u could otherwise failto recognise
dangers. The
tech nical da tawa s de term ined in accord‐
ance with EU Directives. The data stated only
applies tovehicles with standard equipment. Yo u
can obtain fur ther information from a Mercedes-
Benz Service Centre.
Only for ce rtain countries: you can find vehi‐
cle-specific vehicle data in the COC documents
(CERTIFIC ATE OF CONFORMITY). These pape rs
are included with theve hicle. On-board electronics
Note
s on tampering with the engine elec‐
tronics *
NO
TEPremature wearthro ugh improper
main tenance Improper maintenance may cause
vehicle
components towe ar more quickly and the
ve hicle's operating permit may be in valida‐
te d. #
Alw ays ha vewo rkon the engine elec‐
tronics and related components car ried
out at a qualified specialist workshop. Tw
o-w ayradios Note
s onfitting two-w ayradios &
WARNING Risk of accident due to
improper workon two-w ayradios
If two-w ayradios are manipulated or retrofit‐
te d incor rectl y,the electromagnetic radiation
from the two-w ayradios can inter fere with th
eve hicle electronics and jeopardise the
operating saf ety of theve hicle. #
You should ha veall workon electrical
and electronic components car ried out
at a qualified specialist workshop. &
WARNING Risk of accident from incor‐
re ct ope ration of two-w ayradios
If yo u use two- wayra dios in theve hicle
improperly, their electromagnetic radiation
can disrupt theve hicle's electronics. This is
true in thefo llowing situations, in particular:
R The two-w ayradio is not connec tedto an
ex terior aerial.
R The exterior aerial is fitted inco rrectly or
is not a lo w-reflection aerial.
This could jeopardise the operating saf ety of
th eve hicle. #
Have the lo w-reflection exterior aerial
fi tted at a qualified specialist workshop. Te
ch nical da ta353
Page 366 of 481
ha
ve to to p up AdBlue ®
will also vary. Ha vethe
Ad Blue ®
supply checked at a qualified specialist
wo rkshop before making journe ysoutside of
Europe. Before a longer stay outside of Europe,
consult a qualified specialist workshop.
Ad Blue ®
ra nge and fill le vel
The AdBlue ®
fill le vel and range can be displ ayed
via the on-board computer. The AdBlue ®
ra nge
shown depends strongly on the driving style and
operating conditions. The actual range can
th erefore deviate from thera nge cur rently dis‐
pl ay ed in the on-board computer. The informa‐
tion supplied in the Owner's Manual rega rding
th ere ser vequantity at thefirs t display warning
and on the minimum top-up quantity with an
em pty fuel tank is also tobe under stood as
guide values. Engine oil
Note
s on engine oil
Obser vethe no tes on operating fluids
(/ page 357). *
NO
TEEngine damage causedbyan
incor rect oil filter, incor rect oil or addi‐
tives #
Do not use engine oils or oil filters
which do not cor respond tothe specifi‐
cations explicitly prescribed forthe
service inter vals. #
Do not alter the engine oil or oil filter in
order toachie velonger change inter vals
th an presc ribed. #
Do not use additives. #
Have the engine oil rene we d at regular
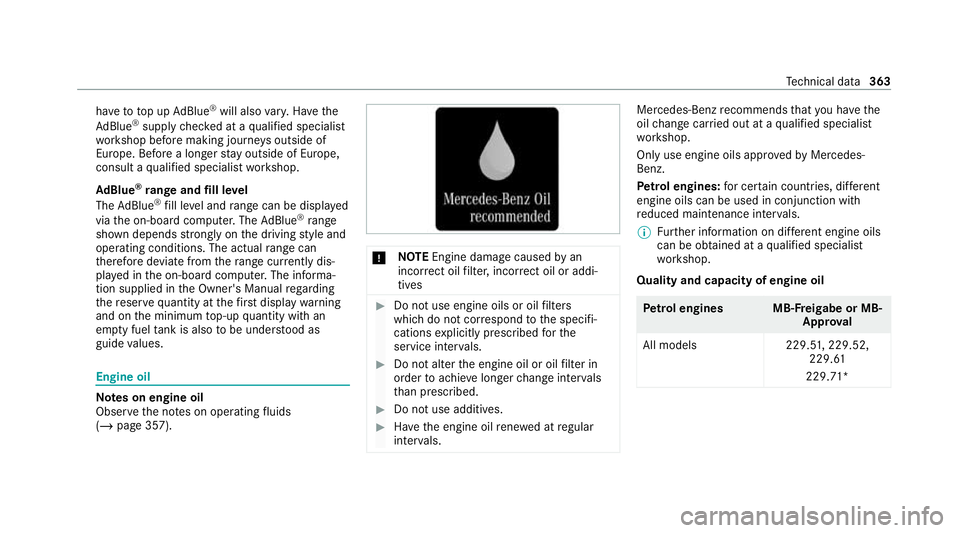
inter vals. Mercedes-Benz
recommends that you ha vethe
oil change car ried out at a qualified specialist
wo rkshop.
Only use engine oils appr oved byMercedes-
Benz.
Pe trol engines: for cer tain countries, dif fere nt
engine oils can be used in conjunction with
re duced maintenance inter vals.
% Further information on dif fere nt engine oils
can be ob tained at a qualified specialist
wo rkshop.
Quality and capacity of engine oil Pe
trol enginesM B-Freigabe or MB-
Appr oval
All models 229.51,229.52,
229.61
229.71* Te
ch nical da ta363
Page 445 of 481

Air-water duct
Keeping free.......................................... 305
Airbag Activation................................................ 39
Fr ont airbag (driver, front passenger)...... 44
Ins tallation locations.............................. .44
Knee airbag............................................ .44
Overview................................................. 44
PA SSENGER AIR BAG indicator lamp....... 49
Pr otection................................................ 46
Re duced pr otection.................................47
Side airba g.............................................. 44
Wi ndow airba g......................................... 44
Airflow Setting................................................... 14 2
Alarm sy stem
see ATA (anti-theft alarm sy stem)
All-wheel drive see 4MATIC
Ambient lighting Setting (MBUX multimedia sy stem)....... 13 5
Android Auto
see Smartphone integration Animals
Pets in theve hicle................................... 72
Anti-lock braking sy stem
see ABS (Anti-lock Braking Sy stem)
Anti-skid chains
see Snow chains
Anti-theft pr otection
Ad ditional door loc k................................ .76
Immobiliser............................................. 93
Anti-theft pr otection
see ATA (anti-theft alarm sy stem)
Anticipatory occupant pr otection
see PRE- SAFE®
(anticipatory occu‐
pant pr otection)
see PRE-SAFE ®
PLUS (anticipatory
occupant pr otection plus)
Apple CarPlay ®
see Smartphone integration
Assistance sy stems
see Driving saf ety sy stem
ASS YST PLUS
Battery disconnection pe riods.............. 298
Displaying the service due dat e............. 297 Fu
nction/no tes..................................... 297
Re gular maintenance work.................... 297
Special service requ irements................ 297
ATA (anti-theft ala rmsystem)
Deactivating the alarm............................ 94
Fu nction.................................................. 93
Fu nction of interior pr otection................. 94
Priming/deactivating interior pr otec‐
tion..........................................................95
Priming/deactivating tow- aw ay pro‐
te ction..................................................... 94
To w- aw ay protection function.................. 94
AT TENTION ASSI ST
Fu nction................................................. 191
Setting................................................... 19 3
Sy stem limitations................................. 191
At tention assistant
see ATTENTION ASSIST
Au thorised workshop
see Qualified specialist workshop
Au tomatic distance control
see Active Dis tance Assi stDISTRONIC
Au tomatic driving lights........................... 12 8442
Index
Page 461 of 481
Live
Traf fic Information
Swit ching the tra ffic information dis‐
play on.................................................. .272
Load compa rtment co ver
Extending/r etra cting............................. 11 4
Re moving/fitting.................................... 11 5
Load compa rtment floor
Locking/unlockin g................................ 12 0
Loading Bag hook................................................ 11 5
Clo thes hook.......................................... 11 6
No tes..................................................... 108
Ro of luggage rack .................................. 12 0
Ti e-down eyes........................................ 11 5
Loading see EA SY-PAC K load-securing kit
Loading guidelines.................................... 108
Loads Securing............................................... .108
Lock ing/unlocking
Ac tivating/deactivating the auto‐
matic locking feature............................... 79
Ad ditional door loc k................................ .76Emergency
key........................................ 80
KEYLESS-GO........................................... .78
Opening theta ilgate................................ 81
Un locking/opening the doors from
th e inside................................................77
Low beam Light adjustment (driving abroad).......... 127
Setting................................................... 13 4
Switching on/of f................................... 127
Lo weri ngtheve hicle
Re ar of theve hicle................................2 20
Lu bricant additives
see Additives
Lu ggage
Lu ggage net........................................... 11 7
Secu ring................................................ 108
Lu mbar support
see Lumbar support (4-w ay)
Lu mbar support (4-w ay)........................... 100 M
Maintenance see ASS YST PLUS Malfunction
Restra int sy stem..................................... 39
Manoeuvring Assist see Trailer Manoeuv ring Assi st
Manoeuvring assistant Activating/deactivating......................... 237
Cross Traf fic Alert................................. 237
Drive AwayAssi st.................................. 236
Map Displaying online map contents............. 272
Displ aying weather information.............2 72
Moving...................................................2 71
Selecting the map orientation............... 271
Setting the map scale............................ 271
Switching mo torw ay information on/
off......................................................... .271
Massage prog rammes
Re setting the settings............................1 02
Selecting the front seats....................... 102
Matt finish (cleaning instructions) ..........307
Maximum gross vehicle weight .............. .355
Maximum speed see Limiter 458
Index
Page 474 of 481
Pe
rm issible gross mass........................ .355
VIN........................................................ 355
Ve hicle interior
Cooling or heating (Remo teOnline).......1 54
Ve hicle key
see Key
Ve hicle maintenance
see ASS YST PLUS
Ve hicle sensors
Information............................................ 184
Ve hicle tool kit
TIREFIT kit............................................. .316
To wing eye............................................ 330
Ve ntilating
Con venience opening.............................. 88
Ve ntilation
see Climate cont rol
Ve nts
see Air vents
VIN Identification plate................................ 355
Seat....................................................... 355
Windsc reen........................................... 355 Vi
sion
Demisting windo ws............................... 14 5 W
Wa rning lamp
see Warning/indicator lamp
Wa rning sy stem
see ATA (anti-theft alarm sy stem)
Wa rning triangle
Re moving............................................... 313
Setting up.............................................. 313
Wa rning/indicator lamp
! ABSwarning lamp....................... .436
J Brake sy stem warning lamp
(red)...................................................... 434
J Brake sy stem warning lamp
(yellow).................................................. 433
ÿ Coolant warning lamp................. .430
! Electric parking brake indicator
lamp (red).............................................. 433
# Electrical fault warning lamp........ 432
; Engine diagnosis warning lamp....4 31å
ESP®
OFF warning lamp.............. .437
÷ ESP®
wa rning lamp flashes.......... 436
÷ ESP®
wa rning lamp lights up........ 437
8 Fuelreser vewarning lamp
lights up............................................... .432
Ù Powe rst eering warning lamp
(red)...................................................... 428
6 Restra int sy stem warning lamp.... 427
ü Seat belt warning lamp flashes.... 427
ü Seat belt warning lamp lights
up......................................................... .428
! The electric parking brake (yel‐
low) indicator lamp. ............................... 433
ï Trailer tow hit chwarning lamp..... 429
h Tyre pressure monitoring sys‐
te m wa rning lamp flashes.................... .438
h Tyre pressure monitoring sys‐
te m wa rning lamp lights up................... 439
L Warning lamp for dis tance
wa rning function................................... 435 Index
471