Page 362 of 497
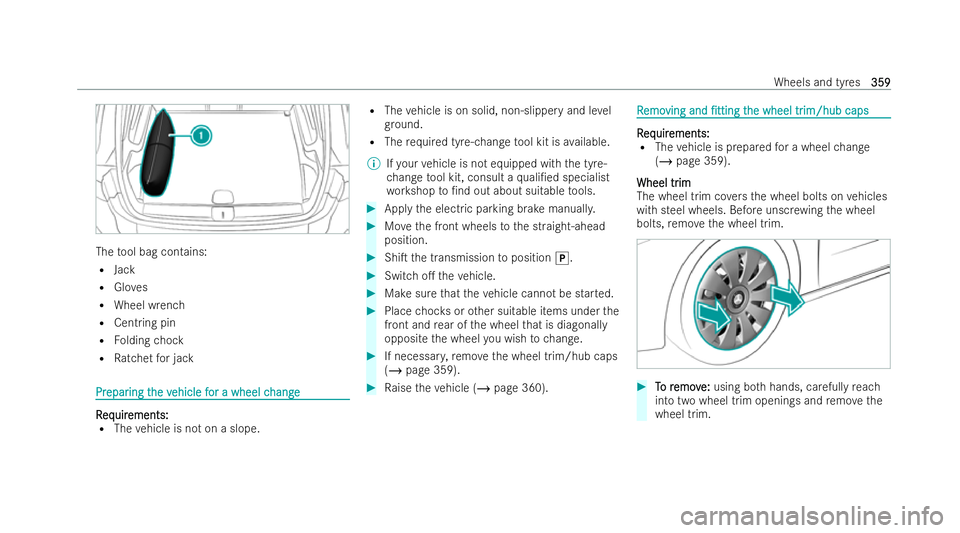
The
tool bag contains:
R Jack
R Gloves
R Wheel wrench
R Centring pin
R Folding chock
R Ratchet for jack Pr
Pr
epar
epar ing t
ing the v
he vehicle f
ehicle f or a wheel c
or a wheel c hange
hange R
R
eq
eq uir
uir ements:
ements:
R The vehicle is not on a slope. R
The vehicle is on solid, non-slippery and le vel
gr ound.
R The requ ired tyre-change tool kit is available.
% Ifyo ur vehicle is not equipped with the tyre-
ch ange tool kit, consult a quali�/ed specialist
wo rkshop to�/nd out about sui table tools. #
Apply the electric parking brake manuall y. #
Movethe front wheels tothe straight-ahead
position. #
Shi�T the transmission toposition j. #
Switch o�. theve hicle. #
Make sure that theve hicle cann otbe star ted. #
Place choc ks orother suitable items under the
front and rear of the wheel that is diagonal ly
opposite the wheel you wish tochange. #
If necessar y,remo vethe wheel trim/hub caps
(/ page 359). #
Raise theve hicle (/ page 360). R
R
emo
emo ving and
ving and �/tting
�/ttingt
the wheel tr
he wheel tr im/hub caps
im/hub caps R
R
eq
eq uir
uir ements:
ements:
R The vehicle is prepared for a wheel change
(/ page 359).
Wheel tr
Wheel tr im
im
The wheel trim co vers the wheel bolts on vehicles
with steel wheels. Before unscr ewing the wheel
bolts, remo vethe wheel trim. #
T
To r
o r emov
emov e:
e:using bo thhands, carefully reach
into two wheel trim openings and remo vethe
wheel trim. Wheels and tyres
359
359
Page 363 of 497
Plas
Plastic hub cap
tic hub cap #
T
To r
o r emov
emov e:
e:turn the centre co ver of the hub
cap anti-clockwise and remo vethe hub cap. #
T To o �/t:
�/t: make sure that the centre co ver of the
hub cap is turned anti-clockwise. #
Position the hub cap and turn the centre co ver
clockwise until the hub cap engages ph ysically
and audibl y. R
R
aising t
aising t he v
he vehicle when c
ehicle when c hanging a wheel
hanging a wheelR
R
eq
eq uir
uir ements:
ements:
R There are no persons in theve hicle.
R The vehicle has been prepared for a wheel
ch ange (/ page 359).
R The wheel trims and hub caps ha vebeen
re mo ved (/ page 359).
Impor tant no tes on using the jack:
R Use only a vehicle-speci�/c jack that has been
appr ovedby Mercedes-Benz toraise theve hi-
cle.
R The jack is only designed forra ising and hold-
ing theve hicle for a short time while a wheel is being
changed and not for maintenance
wo rkunder theve hicle.
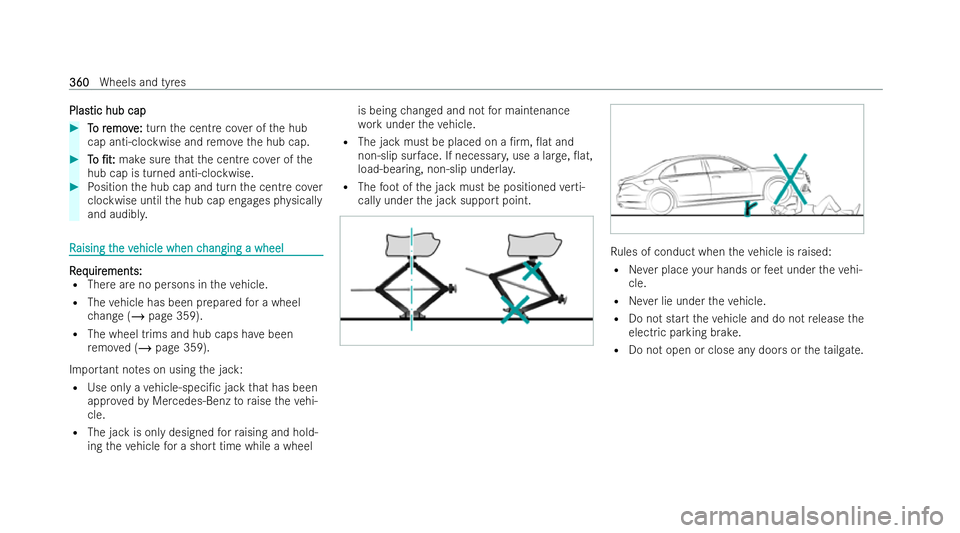
R The jack must be placed on a �/rm, �0at and
non-slip sur face. If necessar y,use a lar ge, �0at,
load-bearing, non-slip underla y.
R The foot ofthe jack must be positioned verti-
cally under the jack support point. Ru
les of conduct when theve hicle is raised:
R Never place your hands or feet under theve hi-
cle.
R Never lie under theve hicle.
R Do not start theve hicle and do not release the
electric parking brake.
R Do not open or close any doors or theta ilgate. 360 360
Wheels and tyres
Page 364 of 497
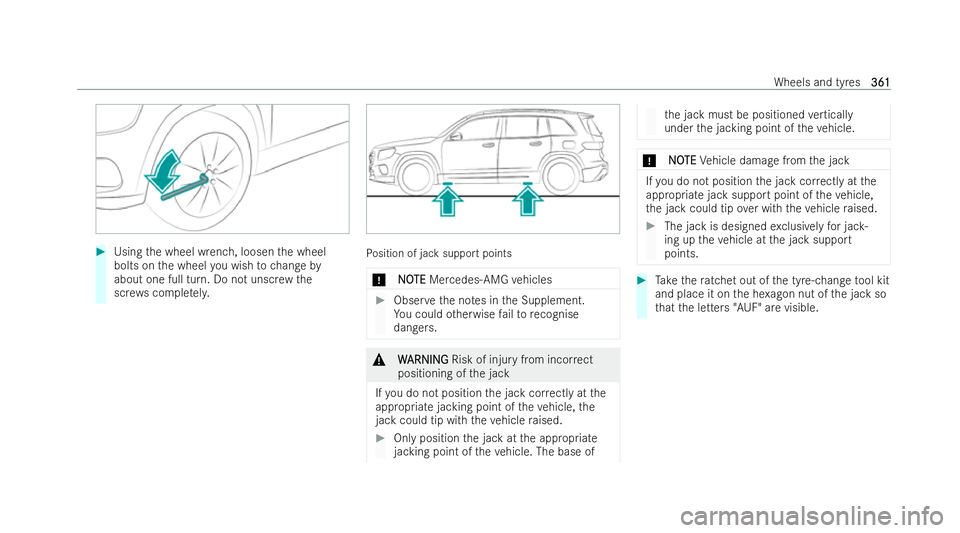
#
Using the wheel wrench, loosen the wheel
bolts on the wheel you wish tochange by
about one full turn. Do not unscr ewthe
scr ews comple tely. Po
sition of jack support points
* N
NOOTE
TE Mercedes-AMG vehicles #
Obser vethe no tes in the Supplement.
Yo u could otherwise failto recognise
dangers. &
W
WARNING
ARNING Risk of injury from incor rect
positioning of the jack
If yo u do not position the jack cor rectly at the
appropriate jacking point of theve hicle, the
jack could tip wi th theve hicle raised. #
Only position the jack at the appropriate
jacking point of theve hicle. The base of th
e jack must be positioned vertically
under the jacking point of theve hicle. *
N
NOOTE
TE Vehicle damage from the jack If
yo u do not position the jack cor rectly at the
appropriate jack support point of theve hicle,
th e jack could tip over with theve hicle raised. #
The jack is designed exclusively for jac k-
ing up theve hicle at the jack support
points. #
Take thera tchet out of the tyre-change tool kit
and place it on the he xagon nut of the jack so
th at the letters "AUF" are visible. Wheels and tyres
361
361
Page 365 of 497
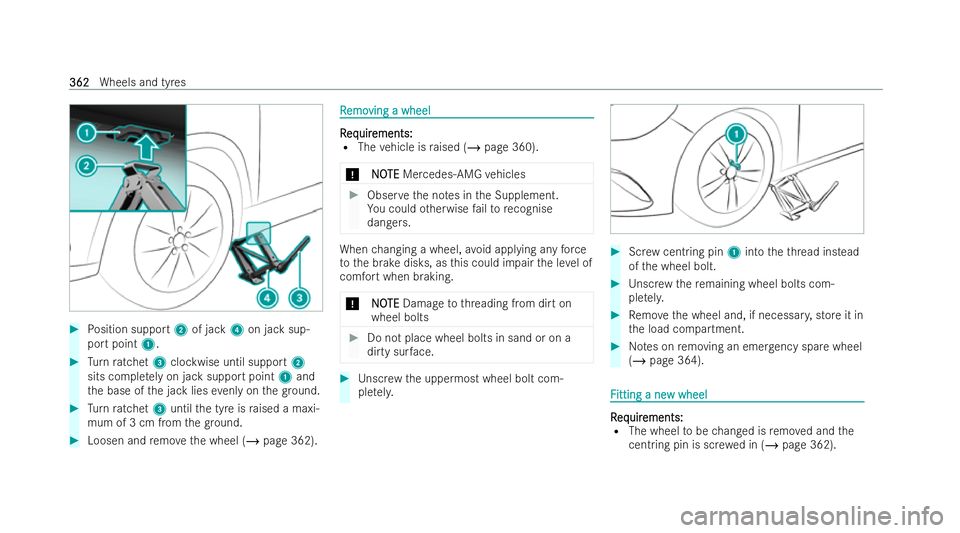
#
Position support 2of jack 4on jack sup-
port point 1. #
Turn ratchet 3clockwise until support 2
sits comple tely on jack support point 1and
th e base of the jack lies evenly on thegr ound. #
Turn ratchet 3until the tyre is raised a maxi-
mum of 3 cm from thegr ound. #
Loosen and remo vethe wheel (/ page 362). R
R
emo
emo ving a wheel
ving a wheel R R
eq eq uir
uir ements:
ements:
R The vehicle is raised (/ page 360).
* NO
NOTE
TEMercedes-AMG vehicles #
Obser vethe no tes in the Supplement.
Yo u could otherwise failto recognise
dangers. When
changing a wheel, avoid applying any force
to the brake disks, as this could impair the le vel of
comfort when braking.
* N
NOOTE
TE Damage tothre ading from dirt on
wheel bolts #
Do not place wheel bolts in sand or on a
dirty sur face. #
Unscr ewthe uppermost wheel bolt com-
ple tely. #
Screw cent ring pin 1into theth re ad ins tead
of the wheel bolt. #
Unscr ewthere maining wheel bolts com-
ple tely. #
Remo vethe wheel and, if necessar y,store it in
th e load compartment. #
Notes on removing an emer gency spa rewheel
(/ page 364). F F
itting a ne
itting a ne w wheel
w wheel R
R
eq
eq uir
uir ements:
ements:
R The wheel tobe changed is remo ved and the
cent ring pin is sc rewe d in (/ page 362). 362
362
Wheels and tyres
Page 466 of 497
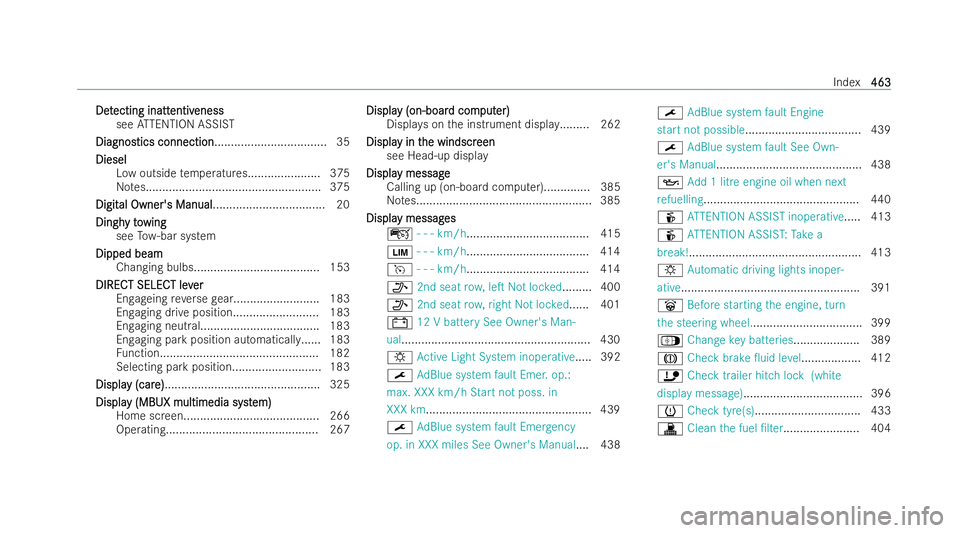
Det
Det
ecting inatt
ecting inatt entiv
entiveness
eness
see ATTENTION ASSIST
Diagnos
Diagnostics connection tics connection.................................. 35
Diesel
Diesel
Low outside temp eratures...................... 375
No tes..................................................... 375
Digit
Digit al Owner's Manual
al Owner's Manual.................................. 20
Dingh
Dingh yto
y to wing
wing
see Tow- bar system
Dipped beam
Dipped beam
Changing bulbs...................................... 153
DIRECT SELECT lev
DIRECT SELECT lev er
er
Engageing reve rsege ar.......................... 183
Engaging drive position.......................... 183
Engaging neutral.................................... 183
Engaging park position automaticall y...... 183
Fu nction................................................ 182
Selecting park position........................... 183
Displa
Displa y (car
y (care)
e)............................................... 325
Displa
Displa y (MBUX multimedia syst
y (MBUX multimedia syst em)
em)
Home sc reen......................................... 266
Operating.............................................. 267 Displa
Displa y (on-boar
y (on-boar d com
d com put
puter)
er)
Displa yson the inst rument displa y......... 262
Displa
Displa y in t
y in t he windscr
he windscr een
een
see Head-up display
Displa
Displa y message
y message
Calling up (on-board computer).............. 385
No tes..................................................... 385
Displa
Displa y messag
y messag es es
ç - - - km/h.................................... .415
È - - - km/h..................................... 414
h - - - km/h..................................... 414
_ 2nd seat row, le�T Not loc ked......... 400
_ 2nd seat row, right Not loc ked...... 401
# 12 V battery See Owner's Man-
ual......................................................... 430
: Active Light System inoperative..... 392
¯ AdBlue system fault Emer. op.:
max. XXX km/h Start not poss. in
XXX km.................................................. 439
¯ AdBlue system fault Emer gency
op. in XXX miles See Owner's Manual.... 438 ¯
AdBlue system fault Engine
start not possible................................... 439
¯ AdBlue system fault See Own-
er's Manual............................................ 438
5 Add 1 litre engine oil when next
re fuelling ............................................... 440
é ATTENTION ASSIST inoperati ve..... 413
é ATTENTION ASSIS T:Take a
break!.................................................... 413
: Automatic driving lights inoper-
ative...................................................... 391
û Before starting the engine, turn
th e steering wheel.................................. 399
Á Change key batteries .................... 389
J Check brake �0uid le vel.................. 412
ï Check trailer hitch lock (white
display message) .................................... 396
h Check tyre(s) ................................ 433
! Clean the fuel �/lter....................... 404 Index
463 463