2021 LINCOLN CORSAIR spare tire
[x] Cancel search: spare tirePage 405 of 638
Second Stage: Checking Tire Pressure
WARNING: If the tire does not inflate
to the recommended tire pressure within
15 minutes, stop and call roadside
assistance. WARNING:
The power plug may get
hot after use and should be handled
carefully when unplugging.
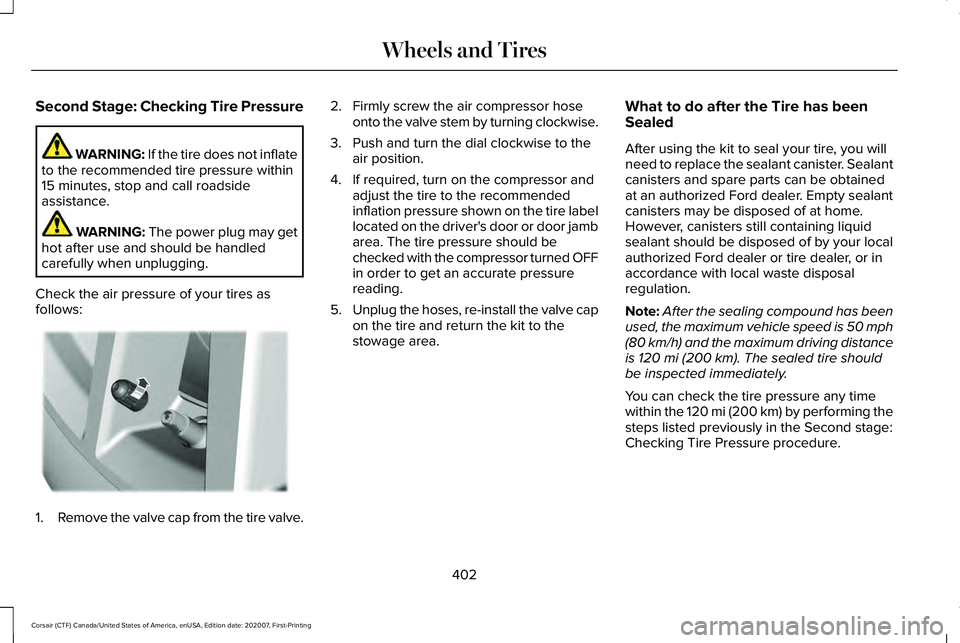
Check the air pressure of your tires as
follows: 1.
Remove the valve cap from the tire valve. 2. Firmly screw the air compressor hose
onto the valve stem by turning clockwise.
3. Push and turn the dial clockwise to the air position.
4. If required, turn on the compressor and adjust the tire to the recommended
inflation pressure shown on the tire label
located on the driver's door or door jamb
area. The tire pressure should be
checked with the compressor turned OFF
in order to get an accurate pressure
reading.
5. Unplug the hoses, re-install the valve cap
on the tire and return the kit to the
stowage area. What to do after the Tire has been
Sealed
After using the kit to seal your tire, you will
need to replace the sealant canister. Sealant
canisters and spare parts can be obtained
at an authorized Ford dealer. Empty sealant
canisters may be disposed of at home.
However, canisters still containing liquid
sealant should be disposed of by your local
authorized Ford dealer or tire dealer, or in
accordance with local waste disposal
regulation.
Note:
After the sealing compound has been
used, the maximum vehicle speed is 50 mph
(80 km/h) and the maximum driving distance
is
120 mi (200 km). The sealed tire should
be inspected immediately.
You can check the tire pressure any time
within the
120 mi (200 km) by performing the
steps listed previously in the Second stage:
Checking Tire Pressure procedure.
402
Corsair (CTF) Canada/United States of America, enUSA, Edition date: 202007, First-Printing Wheels and TiresE175983
Page 408 of 638
These Tire Quality Grades are
determined by standards that the United
States Department of Transportation has
set.
Tire Quality Grades apply to new
pneumatic passenger car tires. They do
not apply to deep tread, winter-type
snow tires, space-saver or temporary
use spare tires, light truck or LT type
tires, tires with nominal rim diameters of
10 to 12 inches or limited production tires
as defined in Title 49 Code of Federal
Regulations Part 575.104 (c)(2).
U.S. Department of Transportation Tire
quality grades: The U.S. Department of
Transportation requires us to give you
the following information about tire
grades exactly as the government has
written it.
Treadwear
The treadwear grade is a comparative
rating based on the wear rate of the tire
when tested under controlled conditions
on a specified government test course.
For example, a tire graded 150 would
wear 1½ times as well on the
government course as a tire graded 100.
The relative performance of tires
depends upon the actual conditions of
their use, however, and may depart
significantly from the norm due to
variations in driving habits, service
practices, and differences in road
characteristics and climate.
Traction AA A B C
WARNING: The traction grade
assigned to this tire is based on
straight-ahead braking traction tests,
and does not include acceleration,
cornering, hydroplaning or peak
traction characteristics. The traction grades, from highest to
lowest are AA, A, B, and C. The grades
represent the tire
’s ability to stop on wet
pavement as measured under controlled
conditions on specified government test
surfaces of asphalt and concrete. A tire
marked C may have poor traction
performance.
Temperature A B C WARNING:
The temperature
grade for this tire is established for a
tire that is properly inflated and not
overloaded. Excessive speed,
underinflation, or excessive loading,
either separately or in combination,
can cause heat buildup and possible
tire failure.
The temperature grades are A (the
highest), B and C, representing the tire ’s
resistance to the generation of heat and
its ability to dissipate heat when tested
under controlled conditions on a
specified indoor laboratory test wheel.
Sustained high temperature can cause
405
Corsair (CTF) Canada/United States of America, enUSA, Edition date: 202007, First-Printing Wheels and Tires
Page 414 of 638

T type tires have some additional
information beyond those of P type tires;
these differences are described below: A. T: Indicates a type of tire, designated
by the Tire and Rim Association, that is
intended for temporary service on cars,
sport utility vehicles, minivans and light
trucks.
B.
145: Indicates the nominal width of
the tire in millimeters from sidewall edge
to sidewall edge. In general, the larger
the number, the wider the tire.
C.
80: Indicates the aspect ratio which
gives the tire's ratio of height to width.
Numbers of 70 or lower indicate a short
sidewall.
D.
D: Indicates a diagonal type tire.
R:
Indicates a radial type tire.
E.
16: Indicates the wheel or rim
diameter in inches. If you change your
wheel size, you will have to purchase
new tires to match the new wheel
diameter. Location of the Tire Label
You will find a Tire Label containing tire
inflation pressure by tire size and other
important information located on the
B-Pillar or the edge of the driver door.
Inflating Your Tires
Safe operation of your vehicle requires
that your tires are properly inflated.
Remember that a tire can lose up to half
of its air pressure without appearing flat.
Every day before you drive, check your
tires. If one looks lower than the others,
use a tire gauge to check pressure of all
tires and adjust if required.
At least once a month and before long
trips, inspect each tire and check the tire
pressure with a tire gauge (including
spare, if equipped). Inflate all tires to the
inflation pressure recommended by us.
411
Corsair (CTF) Canada/United States of America, enUSA, Edition date: 202007, First-Printing Wheels and TiresA
BCDE
E142545
Page 416 of 638
To check the pressure in your tire(s):
1. Make sure the tires are cool,
meaning they are not hot from
driving even a mile.
Note: If you are checking tire pressure
when the tire is hot, (for example, driven
more than 1 mi (1.6 km), never bleed or
reduce air pressure. The tires are hot
from driving and it is normal for
pressures to increase above
recommended cold pressures. A hot tire
at or below recommended cold inflation
pressure could be significantly
under-inflated.
Note: If you have to drive a distance to
get air for your tire(s), check and record
the tire pressure first and add the
appropriate air pressure when you get
to the pump. It is normal for tires to heat
up and the air pressure inside to go up
as you drive.
2. Remove the cap from the valve on
one tire, then firmly press the tire
gauge onto the valve and measure
the pressure. 3. Add enough air to reach the
recommended air pressure.
Note: If you overfill the tire, release air
by pressing on the metal stem in the
center of the valve. Then recheck the
pressure with your tire gauge.
4. Replace the valve cap.
5. Repeat this procedure for each tire,
including the spare.
Note: Some spare tires operate at a
higher inflation pressure than the other
tires. For T type mini-spare tires, see the
Dissimilar spare wheel and tire
assembly information for a description.
Store and maintain at
60 psi (4.15 bar).
For full-size and dissimilar spare tires,
see the Dissimilar spare wheel and tire
assembly information for a description.
Store and maintain at the higher of the
front and rear inflation pressure as
shown on the Tire Label. 6.
Visually inspect the tires to make
sure there are no nails or other
objects embedded that could poke
a hole in the tire and cause an air
leak.
7. Check the sidewalls to make sure there are no gouges, cuts or bulges.
Inspecting Your Tires and Wheel Valve
Stems
Periodically inspect the tire treads for
uneven or excessive wear and remove
objects such as stones, nails or glass
that may be wedged in the tread
grooves. Check the tire and valve stems
for holes, cracks, or cuts that may permit
air leakage and repair or replace the tire
and replace the valve stem. Inspect the
tire sidewalls for cracking, cuts, bruises
and other signs of damage or excessive
wear. If internal damage to the tire is
suspected, have the tire demounted and
inspected in case it needs to be repaired
or replaced. For your safety, tires that
are damaged or show signs of excessive
wear should not be used because they
are more likely to blow out or fail.
413
Corsair (CTF) Canada/United States of America, enUSA, Edition date: 202007, First-Printing Wheels and Tires
Page 417 of 638
Improper or inadequate vehicle
maintenance can cause tires to wear
abnormally. Inspect all your tires,
including the spare, frequently, and
replace them if one or more of the
following conditions exist:
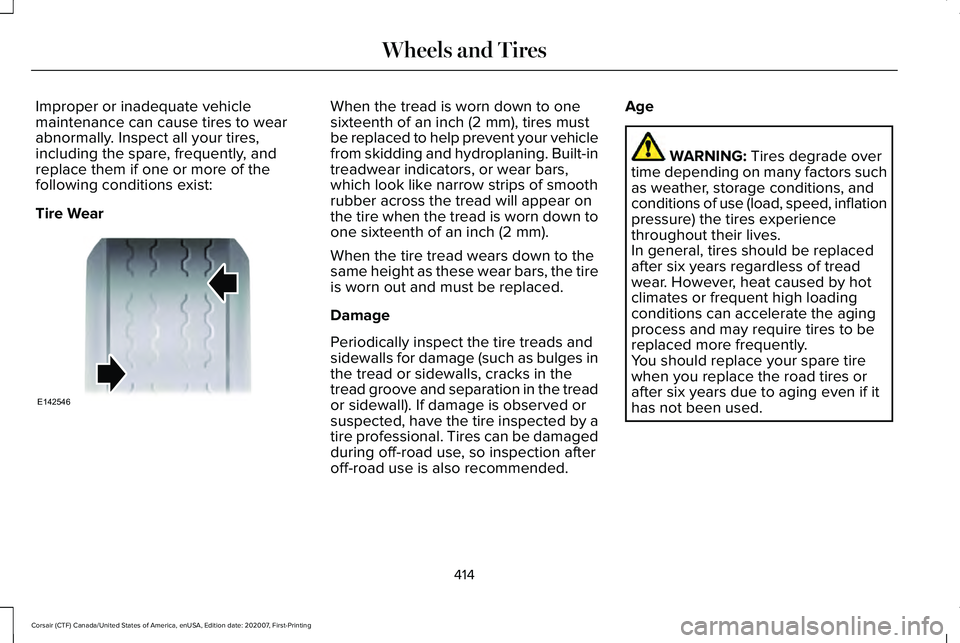
Tire Wear When the tread is worn down to one
sixteenth of an inch (2 mm), tires must
be replaced to help prevent your vehicle
from skidding and hydroplaning. Built-in
treadwear indicators, or wear bars,
which look like narrow strips of smooth
rubber across the tread will appear on
the tire when the tread is worn down to
one sixteenth of an inch (2 mm).
When the tire tread wears down to the
same height as these wear bars, the tire
is worn out and must be replaced.
Damage
Periodically inspect the tire treads and
sidewalls for damage (such as bulges in
the tread or sidewalls, cracks in the
tread groove and separation in the tread
or sidewall). If damage is observed or
suspected, have the tire inspected by a
tire professional. Tires can be damaged
during off-road use, so inspection after
off-road use is also recommended.
Age WARNING: Tires degrade over
time depending on many factors such
as weather, storage conditions, and
conditions of use (load, speed, inflation
pressure) the tires experience
throughout their lives.
In general, tires should be replaced
after six years regardless of tread
wear. However, heat caused by hot
climates or frequent high loading
conditions can accelerate the aging
process and may require tires to be
replaced more frequently.
You should replace your spare tire
when you replace the road tires or
after six years due to aging even if it
has not been used.
414
Corsair (CTF) Canada/United States of America, enUSA, Edition date: 202007, First-Printing Wheels and TiresE142546
Page 420 of 638
Highway Hazards
No matter how carefully you drive, there
is always the possibility that you may
eventually have a flat tire on the
highway. Drive slowly to the closest safe
area out of traffic. This may further
damage the flat tire, but your safety is
more important.
If you feel a sudden vibration or ride
disturbance while driving, or you suspect
your tire or vehicle has been damaged,
immediately reduce your speed. Drive
with caution until you can safely pull off
the road. Stop and inspect the tires for
damage. If a tire is under-inflated or
damaged, deflate it, remove wheel and
replace it with your spare tire and wheel.
If you cannot detect a cause, have the
vehicle towed to the nearest repair
facility or tire dealer to have the vehicle
inspected.
Tire and Wheel Alignment
A bad jolt from hitting a curb or pothole
can cause the front end of your vehicle
to become misaligned or cause damage
to your tires. If your vehicle seems to
pull to one side when you are driving,
the wheels may be out of alignment.
Have an authorized dealer check the
wheel alignment periodically.
Wheel misalignment in the front or the
rear can cause uneven and rapid
treadwear of your tires and should be
corrected by an authorized dealer.
Front-wheel drive vehicles and those
with an independent rear suspension (if
equipped) may require alignment of all
four wheels.
The tires should also be balanced
periodically. An unbalanced tire and
wheel assembly may result in irregular
tire wear.Tire Rotation
Note:
If your tires show uneven wear,
ask an authorized dealer to check for
and correct any wheel misalignment,
tire imbalance or mechanical problem
involved before tire rotation.
Note: Your vehicle may be equipped
with a dissimilar spare wheel and tire
assembly. A dissimilar spare wheel and
tire assembly is defined as a spare
wheel and tire assembly that is different
in brand, size or appearance from the
road tires and wheels. If you have a
dissimilar spare wheel and tire
assembly, it is intended for temporary
use only and should not be used in a
tire rotation.
Note: After having your tires rotated,
inflation pressure must be checked and
adjusted to the vehicle requirements.
417
Corsair (CTF) Canada/United States of America, enUSA, Edition date: 202007, First-Printing Wheels and Tires
Page 422 of 638

•
Not all S-class snow chains or cables
meet these restrictions. Chains of this
size restriction will include a tensioning
device.
• The snow chains or cables must be
mounted in pairs on the front axle.
• Do not use chains or cables on
225/55R19, and 245/45R20 tires.
• Install cables securely, verifying that the
cables do not touch any wiring, brake
lines or fuel lines.
• When driving with tire cables do not
exceed 29.8 mph (48 km/h) or the
maximum speed recommended by the
chain manufacturer, whichever is less.
• Drive cautiously. If you hear the cables
rub or bang against the vehicle, stop and
retighten them. If this does not work,
remove the cables to prevent vehicle
damage.
• Remove the cables when they are no
longer needed. Do not use cables on dry
roads.
If you have any questions regarding snow
chains or cables, please contact your
authorized dealer. TIRE PRESSURE MONITORING
SYSTEM WARNING:
The tire pressure
monitoring system is not a substitute for
manually checking tire pressures. You
should periodically check tire pressures
using a pressure gauge. Failure to correctly
maintain tire pressures could increase the
risk of tire failure, loss of control, vehicle
rollover and personal injury.
Note: You should only use tire sealants in
roadside emergencies as they may cause
damage to the tire pressure monitoring
system sensor.
Note: If the tire pressure monitoring system
sensor becomes damaged, it may not
function. Each tire, including the spare (if
provided), should be checked
monthly when cold and inflated to
the inflation pressure recommended by the
vehicle manufacturer on the vehicle placard
or tire inflation pressure label. (If your vehicle
has tires of a different size than the size
indicated on the vehicle placard or tire
inflation pressure label, you should
determine the proper tire inflation pressure
for those tires).
As an added safety feature, your vehicle has
been equipped with a Tire Pressure
Monitoring System (TPMS) that illuminates a
low tire pressure telltale when one or more
of your tires is significantly under-inflated.
Accordingly, when the low tire pressure
telltale illuminates, you should stop and
check your tires as soon as possible, and
inflate them to the proper pressure. Driving
on a significantly under-inflated tire causes
the tire to overheat and can lead to tire
failure. Under-inflation also reduces fuel
efficiency and tire tread life, and may affect
the vehicle ’s handling and stopping ability.
419
Corsair (CTF) Canada/United States of America, enUSA, Edition date: 202007, First-Printing Wheels and Tires
Page 424 of 638
Check the tire pressure periodically (at least
monthly) using an accurate tire gauge. See
When Inflating Your Tires in this chapter.
Understanding Your Tire Pressure
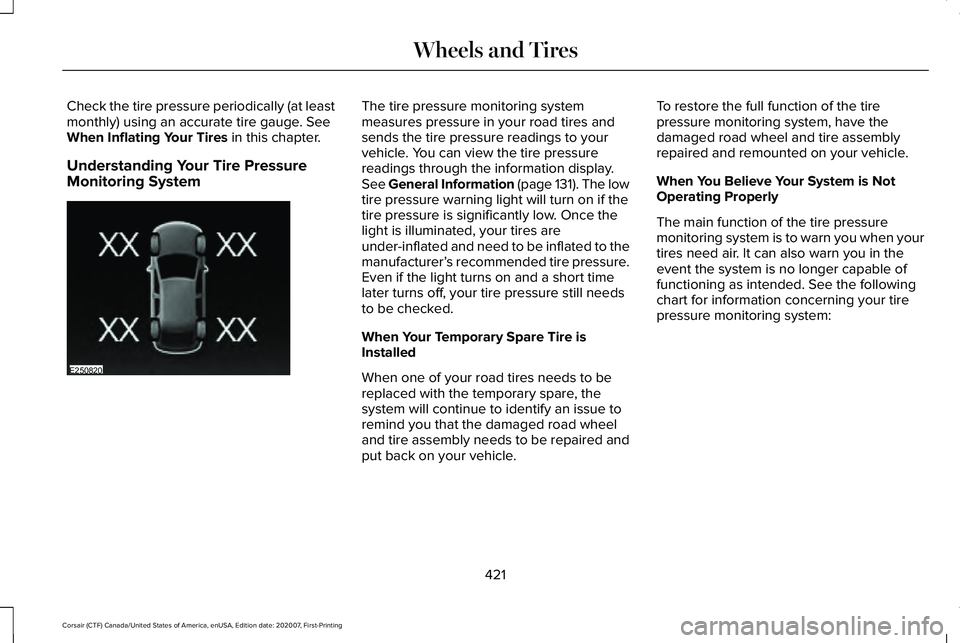
Monitoring System The tire pressure monitoring system
measures pressure in your road tires and
sends the tire pressure readings to your
vehicle. You can view the tire pressure
readings through the information display.
See General Information (page 131). The low
tire pressure warning light will turn on if the
tire pressure is significantly low. Once the
light is illuminated, your tires are
under-inflated and need to be inflated to the
manufacturer’
s recommended tire pressure.
Even if the light turns on and a short time
later turns off, your tire pressure still needs
to be checked.
When Your Temporary Spare Tire is
Installed
When one of your road tires needs to be
replaced with the temporary spare, the
system will continue to identify an issue to
remind you that the damaged road wheel
and tire assembly needs to be repaired and
put back on your vehicle. To restore the full function of the tire
pressure monitoring system, have the
damaged road wheel and tire assembly
repaired and remounted on your vehicle.
When You Believe Your System is Not
Operating Properly
The main function of the tire pressure
monitoring system is to warn you when your
tires need air. It can also warn you in the
event the system is no longer capable of
functioning as intended. See the following
chart for information concerning your tire
pressure monitoring system:
421
Corsair (CTF) Canada/United States of America, enUSA, Edition date: 202007, First-Printing Wheels and TiresE250820