2021 LEXUS LS500 display
[x] Cancel search: displayPage 355 of 520

3555-6. Using the other interior features
5
Interior features
■The power outlet can be used when
●12 V
The engine switch is in ACCESSORY or
IGNITION ON mode.
●120 VAC
The engine switch is in IGNITION ON
mode.
NOTICE
■To avoid damaging the power outlet
Close the power outlet lid when the
power outlet is not in use.
Foreign objects or liquids that enter the
power outlet may cause a short circuit.
■To prevent the fuse from being blown
●12 V
Do not use an accessory that uses more
than 12 V 10 A.
●120 VAC
Do not use a 120 VAC appliance that
requires more than 100 W. If a 120 VAC
appliance that consumes more than 100
W is used, the protection circuit will cut
the power supply.
■To prevent incorrect operation of the
vehicle
When turning the engine switch off,
make sure to disc onnect accessories
designed for charging , such as portable
chargers, power banks, etc. from the
power outlets.
If such an accessory is left connected, the
following may occur:
●The doors cannot be locked using the
smart access system with push-button
start or wireless remote control.
●The opening screen will be displayed
on the multi-information display.
●The interior lights, instrument panel
lights, etc. will illuminate.
■To prevent the battery from being dis-
charged
Do not use the power outlet longer than
necessary when the engine is not run-
ning.
■Appliances that may not operate
properly (120 VAC)
The following 120 VAC appliances may
not operate properly even if their power
consumption is under 100 W.
●Appliances with high initial peak watt-
age
●Measuring devices that process pre-
cise data
●Other appliances that require an
extremely stable power supply
Page 357 of 520

3575-6. Using the other interior features
5
Interior features
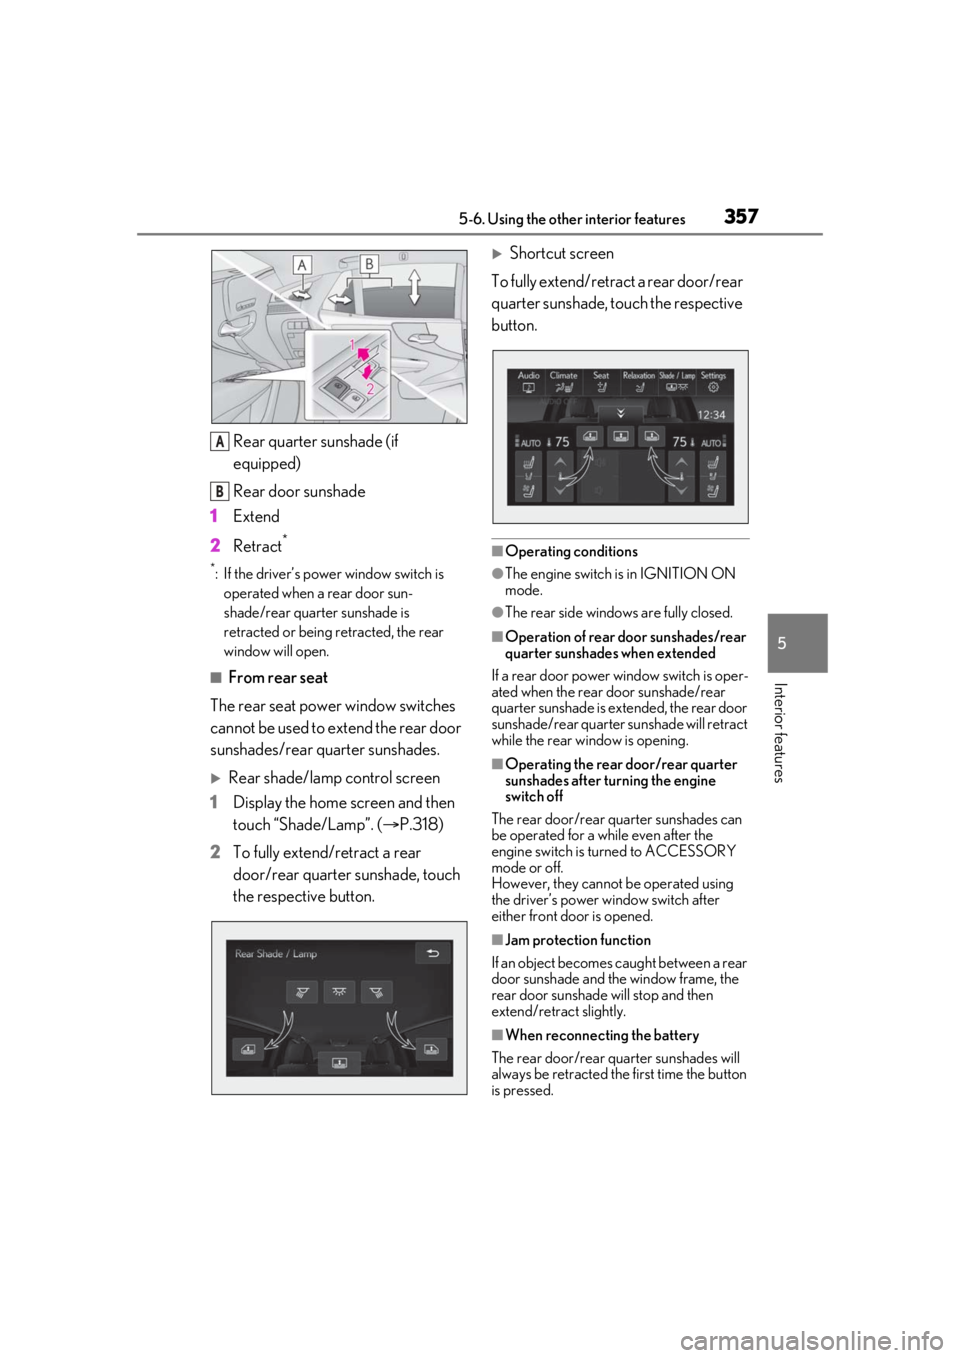
Rear quarter sunshade (if
equipped)
Rear door sunshade
1 Extend
2 Retract
*
*: If the driver’s power window switch is
operated when a rear door sun-
shade/rear quarter sunshade is
retracted or being retracted, the rear
window will open.
■From rear seat
The rear seat power window switches
cannot be used to extend the rear door
sunshades/rear quarter sunshades.
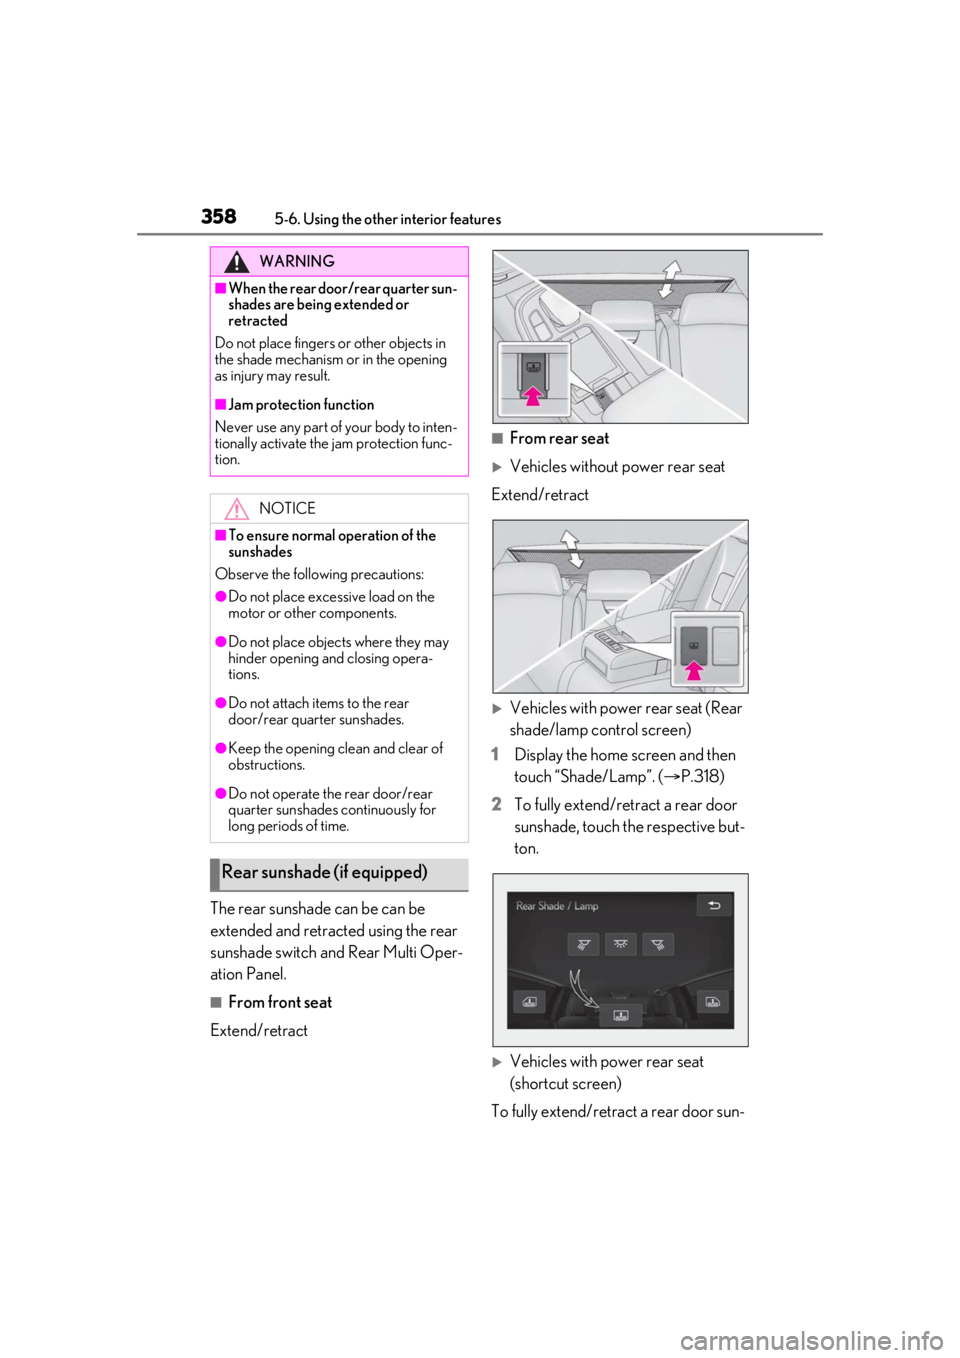
Rear shade/lamp control screen
1 Display the home screen and then
touch “Shade/Lamp”. ( P.318)
2 To fully extend/retract a rear
door/rear quarter sunshade, touch
the respective button.
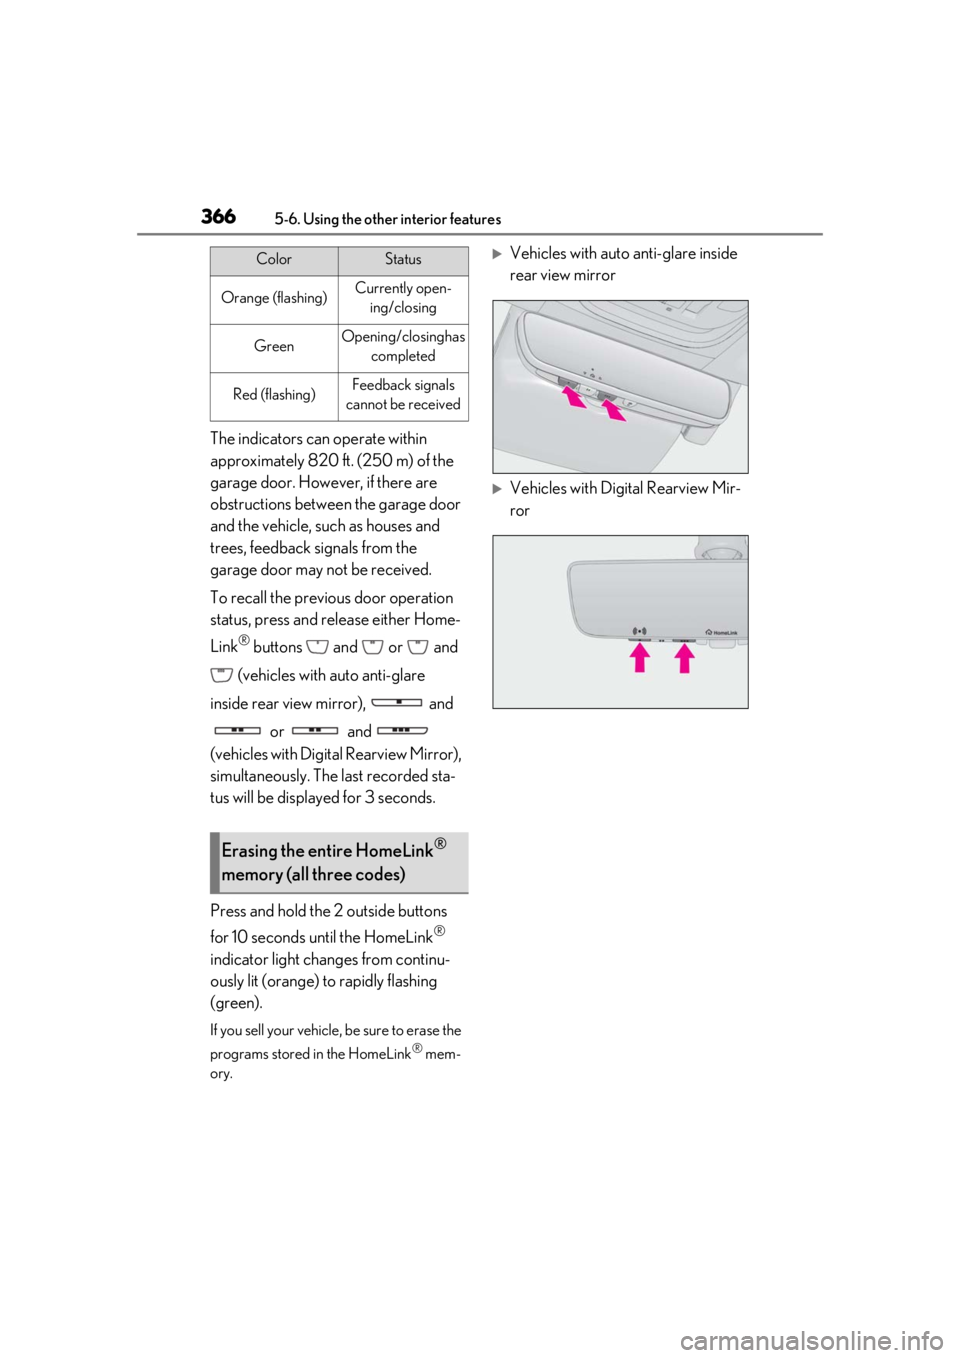
Shortcut screen
To fully extend/retract a rear door/rear
quarter sunshade, touch the respective
button.
■Operating conditions
●The engine switch is in IGNITION ON
mode.
●The rear side window s are fully closed.
■Operation of rear door sunshades/rear
quarter sunshades when extended
If a rear door power window switch is oper-
ated when the rear door sunshade/rear
quarter sunshade is extended, the rear door
sunshade/rear quarter sunshade will retract
while the rear window is opening.
■Operating the rear door/rear quarter
sunshades after turning the engine
switch off
The rear door/rear quarter sunshades can
be operated for a while even after the
engine switch is turned to ACCESSORY
mode or off.
However, they cannot be operated using
the driver’s power window switch after
either front door is opened.
■Jam protection function
If an object becomes caught between a rear
door sunshade and the window frame, the
rear door sunshade will stop and then
extend/retract slightly.
■When reconnecting the battery
The rear door/rear quarter sunshades will
always be retracted the first time the button
is pressed.
A
B
Page 358 of 520

3585-6. Using the other interior features
The rear sunshade can be can be
extended and retracted using the rear
sunshade switch and Rear Multi Oper-
ation Panel.
■From front seat
Extend/retract
■From rear seat
Vehicles without power rear seat
Extend/retract
Vehicles with power rear seat (Rear
shade/lamp control screen)
1 Display the home screen and then
touch “Shade/Lamp”. ( P.318)
2 To fully extend/retract a rear door
sunshade, touch the respective but-
ton.
Vehicles with power rear seat
(shortcut screen)
To fully extend/retract a rear door sun-
WARNING
■When the rear door/rear quarter sun-
shades are being extended or
retracted
Do not place fingers or other objects in
the shade mechanism or in the opening
as injury may result.
■Jam protection function
Never use any part of your body to inten-
tionally activate the jam protection func-
tion.
NOTICE
■To ensure normal operation of the
sunshades
Observe the following precautions:
●Do not place excessive load on the
motor or other components.
●Do not place objects where they may
hinder opening and closing opera-
tions.
●Do not attach items to the rear
door/rear quarter sunshades.
●Keep the opening clean and clear of
obstructions.
●Do not operate the rear door/rear
quarter sunshades continuously for
long periods of time.
Rear sunshade (if equipped)
Page 366 of 520

3665-6. Using the other interior features
The indicators can operate within
approximately 820 ft. (250 m) of the
garage door. However, if there are
obstructions between the garage door
and the vehicle, such as houses and
trees, feedback signals from the
garage door may not be received.
To recall the previous door operation
status, press and release either Home-
Link
® buttons and or and
(vehicles with auto anti-glare
inside rear view mirror), and or and
(vehicles with Digital Rearview Mirror),
simultaneously. The last recorded sta-
tus will be displayed for 3 seconds.
Press and hold the 2 outside buttons
for 10 seconds until the HomeLink
®
indicator light changes from continu-
ously lit (orange) to rapidly flashing
(green).
If you sell your vehicle, be sure to erase the
programs stored in the HomeLink
® mem-
ory.
Vehicles with auto anti-glare inside
rear view mirror
Vehicles with Digital Rearview Mir-
ror
ColorStatus
Orange (flashing)Currently open- ing/closing
GreenOpening/closing has completed
Red (flashing)Feedback signals
cannot be received
Erasing the entire HomeLink®
memory (all three codes)
Page 375 of 520

3756-2. Maintenance
6
Maintenance and care
3Press or to select “Scheduled
Maintenance” and then press .
4 Press or to select “Yes” and
then press .
A message will be displayed on the
multi-information disp lay when the reset
procedure has been completed.
You can perform some maintenance
procedures by yourself.
Please be aware that do-it-yourself
maintenance may affect warranty cov-
erage.
The use of Lexus repair manuals is recom-
mended.
For details about warra nty coverage, refer
to the separate “Owner’s Guide”, “War-
ranty and Service Guide”, “Owner’s Man-
ual Supplement” or “Warranty Booklet”.
Do-it-yourself maintenance
General maintenance
Listed below are the general main-
tenance items that should be per-
formed at the intervals specified in
the “Warranty and Service Guide”
or “Owner’s Manual Supplement”.
It is recommended that any prob-
lem you notice should be brought to
the attention of your Lexus dealer
or qualified service shop for advice.
WARNING
■If the engine is running
Turn the engine off and ensure that there
is adequate ventilati on before perform-
ing maintenance checks.
Engine compartment
ItemsCheck points
Brake fluid
Is the brake fluid at the
correct level?
( P.389)
Engine/inter-
cooler coolant
Is the engine/inter-
cooler coolant at the
correct level?
( P.388)
Engine oil
Is the engine oil at the
correct level?
( P.386)
Exhaust system
There should not be
any fumes or strange
sounds.
Page 387 of 520

3876-3. Do-it-yourself maintenance
6
Maintenance and care
P.458
Oil quantity (Low Full)
1.6 qt. (1.5 L, 1.3 Imp. qt.)
Item
Clean funnel
■Adding engine oil
If the oil level is below or near the low
level mark, add engine oil of the same
type as that already in the engine.
2WD models
AWD models
1 Remove the oil filler cap by turning
it counterclockwise.
2 Add engine oil slowly, checking the
dipstick.
3 Install the oil filler cap by turning it
clockwise.
■Engine oil consumption
A certain amount of engine oil will be con-
sumed while driving. In the following situa- tions, oil consumption may increase, and
engine oil may need
to be refilled in
between oil maintenance intervals.
●When the engine is new, for example
directly after purchasing the vehicle or
after replacing the engine
●If low quality oil or oil of an inappropriate
viscosity is used
●When driving at high engine speeds or
with a heavy load, or when driving while
accelerating or dece lerating frequently
●When leaving the engine idling for a long
time, or when driving frequently through
heavy traffic
■After changing the engine oil
The engine oil maintenance data should be
reset. Perform the following procedures:
1 Press or of the meter control
switch to select .
2 Press or to select “Vehicle Set-
tings” and then press .
3 Press or to select “Oil Mainte-
nance” and then press .
4 Press or to select “Yes” and
then press .
A message will be displayed on the
multi-information disp lay when the reset
procedure has been completed.
WARNING
■Used engine oil
●Used engine oil contains potentially
harmful contaminants which may
cause skin disorders such as inflamma-
tion and skin cancer, so care should be
taken to avoid prolonged and
repeated contact. To remove used
engine oil from your skin, wash thor-
oughly with soap and water.
Page 390 of 520

3906-3. Do-it-yourself maintenance
a dangerous loss of braking efficiency. Use
only newly opened brake fluid.
If any washer does not work or the
warning message appears on the
multi-information display, the washer
tank may be empty. Add washer fluid.
WARNING
■When filling the reservoir
Take care as brake fluid can harm your
hands and eyes and damage painted sur-
faces.
If fluid gets on your hands or in your eyes,
flush the affected area with clean water
immediately.
If you still experience discomfort, see a
doctor.
NOTICE
■If the fluid level is low or high
It is normal for the brake fluid level to go
down slightly as the brake pads wear out
or when the fluid level in the accumulator
is high.
If the reservoir need s frequent refilling,
there may be a serious problem.
Adding the washer fluid
WARNING
■When adding washer fluid
Do not add washer fluid when the engine
is hot or running as washer fluid contains
alcohol and may catch fire if spilled on
the engine, etc.
NOTICE
■Do not use any fluid other than
washer fluid
Do not use soapy water or engine anti-
freeze instead of washer fluid.
Doing so may cause streaking on the
vehicle’s painted surfaces, as well as
damaging the pump leading to problems
of the washer fluid not spraying.
■Diluting washer fluid
Dilute washer fluid with water as neces-
sary.
Refer to the freezing temperatures listed
on the label of the washer fluid bottle.
Page 395 of 520

3956-3. Do-it-yourself maintenance
6
Maintenance and care
Lexus recommends that tire rotation is car-
ried out at the same interval as tire inspec-
tion.
Do not fail to initialize the tire pressure
warning system after tire rotation.
Vehicles with front and rear tires of
differing sizes
Tires cannot be rotated.
For XXX/XXRXX size tires
When run-flat tires are installed, the
vehicle can be driven for a maximum of
50 miles (80 km) at a speed below 50
mph (80 km/h) after any tire goes flat.
(However, the vehicle speed may not
increase to near 50 mph [80 km/h]
depending on weather or driving con-
ditions.)
Make sure to replace th e flat tire before the
vehicle has been driven for near 50 miles
(80 km). Also, do not use a repaired tire.
For XXX/XXRFXX size tires
When run-flat tires are installed, the
vehicle can be driven for a maximum of
100 miles (160 km) at a speed below
50 mph (80 km/h) after any tire goes
flat. (However, the vehicle speed may
not increase to near 50 mph [80
km/h] depending on weather or driv-
ing conditions.)
Make sure to replace th e flat tire before the
vehicle has been driven for near 100 miles
(160 km). Also, do not use a repaired tire.
A run-flat tire has a or
mark on the side wall.
■Run-flat tires
●The run-flat tires are for only this vehicle.
Do not use the tires on other vehicles.
●Do not mix run-flat tires and normal tires.
●If non-genuine Lexus wheels are used, it
may be impossible to sufficiently demon-
strate the performance of run-flat tires.
Your vehicle is equipped with a tire
pressure warning system that uses tire
pressure warning valves and transmit-
ters to detect low ti re inflation pressure
before serious problems arise.
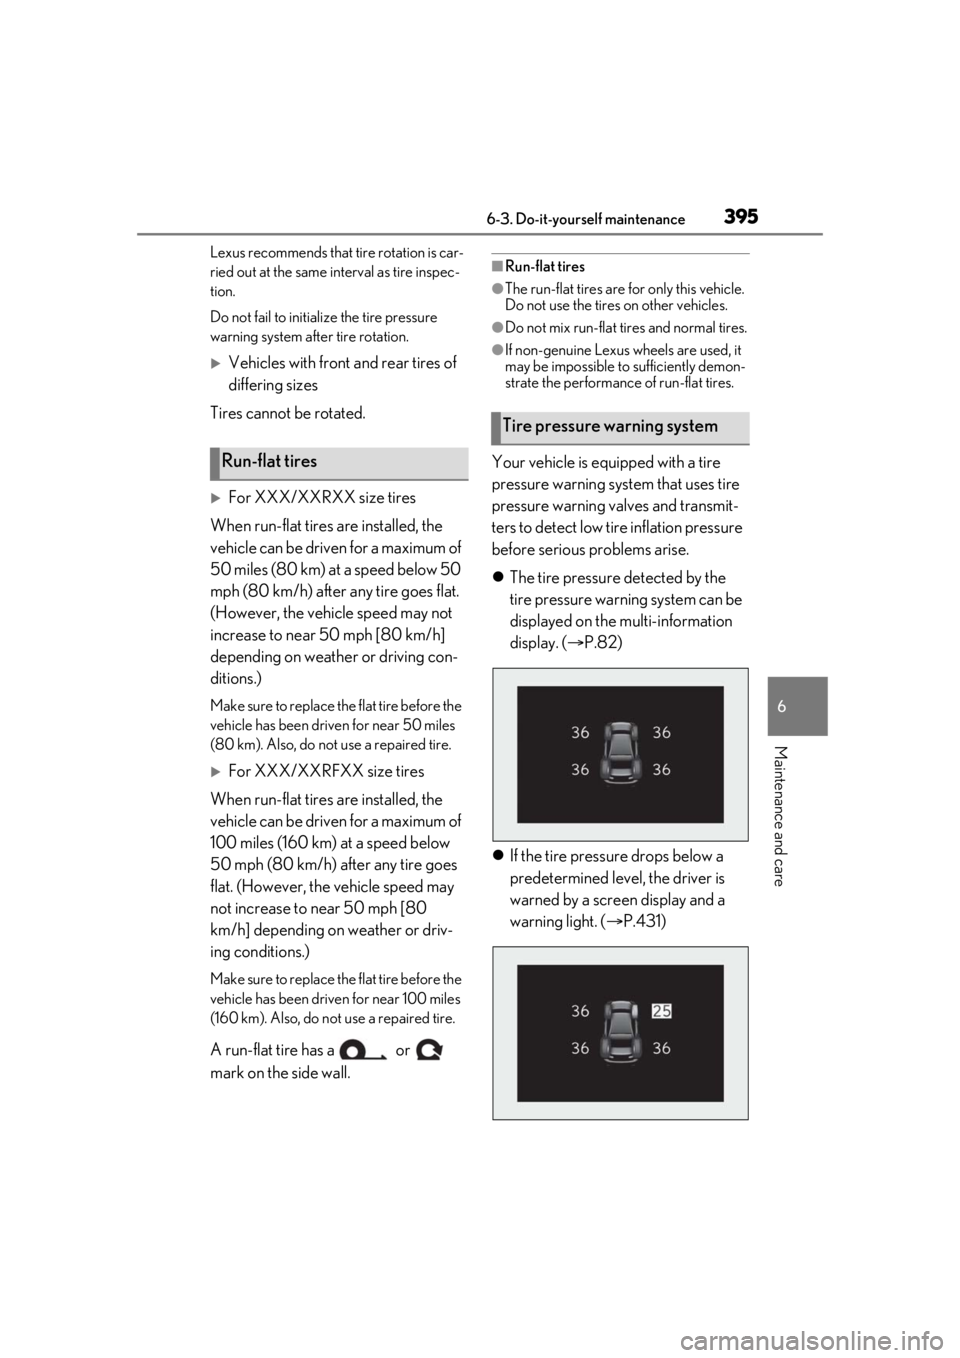
The tire pressure detected by the
tire pressure warning system can be
displayed on the multi-information
display. ( P.82)
If the tire pressure drops below a
predetermined level, the driver is
warned by a screen display and a
warning light. ( P.431)Run-flat tires
Tire pressure warning system