2021 Lexus LC500C wheel
[x] Cancel search: wheelPage 262 of 410

2606-1. Maintenance and care
WARNING
●When the upper part of the windshield
where the raindrop sensor is located is
touched by hand
●When a wet rag or similar is held close
to the raindrop sensor
●If something bumps against the wind-
shield
●If you directly touch the raindrop sen-
sor body or if something bumps into
the raindrop sensor
■Precautions regarding the exhaust
pipes and rear bumper diffusers
As exhaust gases cause the exhaust
pipes and rear bumper diffusers to
become quite hot, do not touch the
exhaust pipes and rear bumper diffusers
while the engine is running or immedi-
ately after the engine is turned off.
When washing the vehicle, be careful not
to touch the exhaust pipes and rear
bumper diffusers until they have cooled
sufficiently, as touching hot exhaust pipes
and rear bumper diffusers can cause
burns.
■Precaution regarding the rear
bumper with Blind Spot Monitor (if
equipped)
If the paint of the rear bumper is chipped
or scratched, the system may malfunc-
tion. If this occurs, consult your Lexus
dealer.
NOTICE
■To prevent paint deterioration and
corrosion on the body and compo-
nents (aluminum wheels etc.)
●Wash the vehicle immediately in the
following cases:
• After driving near the sea coast
• After driving on salted roads
• If coal tar, pollen or tree sap is present on the paint surface
• If dead insects, insect droppings or bird droppings are present on the
paint surface
• After driving in an area contaminated
with soot, oily smoke, mine dust, iron
powder or chemical substances
• If the vehicle becomes heavily soiled with dust or mud
• If liquids such as benzene and gasoline are spilled on the paint surface
●If the paint is chipped or scratched,
have it repaired immediately.
●To prevent the wheels from corroding,
remove any dirt and store in a place
with low humidity when storing the
wheels.
■To prevent damage or deterioration
of the soft top roof
●Immediately remove any snow that has
accumulated on the soft top roof or
luggage cover.
●If bird droppings etc. are present on
the soft top roof, immediately remove
it.
●When parking the vehicle, avoid direct
sunlight as much as possible.
●If parking the vehicle in a poorly venti-
lated area or a closed area, such as a
garage, ensure that there is adequate
ventilation.
●Do not use wax.
Page 270 of 410

2686-2. Maintenance
Seats• Do the seat controls operate properly?
Steering wheel
• Does the steering wheel rotate
smoothly?
• Does the steering wheel have the cor-
rect amount of free
play?
•There should not be any strange sounds
coming from the
steering wheel.
Vehicle exterior
ItemsCheck points
Doors/trunk• Do the doors/trunk operate smoothly?
Engine hood
•Does the engine hood lock system
work properly?
Fluid leaks
•There should not be any signs of fluid
leakage after the
vehicle has been
parked.
ItemsCheck points
Tires
• Is the tire inflation pressure correct?
• The tires should not be damaged or
excessively worn.
• Have the tires been rotated according to
the maintenance
schedule?
• The wheel nuts should not be loose.
Windshield wip-
ers
• The wiper blades should not show any
signs of cracking,
splitting, wear, con-
tamination or defor-
mation.
• The wiper blades should clear the
windshield without
streaking or skip-
ping.
ItemsCheck points
Page 284 of 410

2826-3. Do-it-yourself maintenance
Summer tires are high-speed perfor-
mance tires best suited to highway driv-
ing under dry conditions. Since summer
tires do not have the same traction per-
formance as snow tires, summer tires are
inadequate for driving on snow-covered
or icy roads. For driving on snow-cov-
ered roads or icy roads, the use of snow
tires is recommended. When installing
snow tires, be sure to replace all four
tires.
●All season tires
All season tires are designed to provide
better traction in snow and to be ade-
quate for driving in most winter condi-
tions as well as for use year-round. All
season tires, however, do not have ade-
quate traction performance compared
with snow tires in heavy or loose snow.
Also, all season tires fall short in accelera-
tion and handling performance com-
pared with summer tires in highway
driving.
●Snow tires
For driving on snow-covered roads or icy
roads, we recommend using snow tires. If
you need snow tires, select tires of the
same size, construction and load capacity
as the originally installed tires. Since your
vehicle has radial tires as original equip-
ment, make sure your snow tires also
have radial construction. Do not install
studded tires without first checking local
regulations for possible restrictions.
Snow tires should be installed on all
wheels. ( P.223)
■If the tread on snow tires wears down
below 0.16 in. (4 mm)
The effectiveness of the tires as snow tires is
lost.
WARNING
■When inspecting or replacing tires
Observe the following precautions to
prevent accidents.
Failure to do so may cause damage to
parts of the drivetrain as well as danger-
ous handling characteristics, which may
lead to an accident resulting in death or
serious injury.
●Do not mix tires of different makes,
models or tread patterns.
Also, do not mix tires of remarkably
different treadwear.
●Do not use tire sizes other than those
recommended by Lexus.
●Do not mix differently constructed
tires (radial, bias-belted or bias-ply
tires).
●Do not mix summer, all season and
snow tires.
●Do not use tires that have been used
on another vehicle.
Do not use tires if you do not know
how they were used previously.
NOTICE
■Driving on rough roads
Take particular care when driving on
roads with loose surfaces or potholes.
These conditions may cause losses in tire
inflation pressure, reducing the cushion-
ing ability of the tires. In addition, driving
on rough roads may cause damage to
the tires themselves, as well as the vehi-
cle’s wheels and body.
■Low profile tires (21-inch tires)
Low profile tires may cause greater dam-
age than usual to the tire wheel when
sustaining impact from the road surface.
Therefore, pay attention to the following:
●Be sure to use proper tire inflation
pressure. If tires are under-inflated,
they may be damaged more severely.
●Avoid potholes, uneven pavement,
curbs and other road hazards. Failure
to do so may lead to severe tire and
wheel damage.
■If tire inflation pressure of each tire
becomes low while driving
Do not continue driving, or your tires
and/or wheels may be ruined.
Page 285 of 410

2836-3. Do-it-yourself maintenance
6
Maintenance and care
Tires cannot be rotated.
When run-flat tires are installed, the
vehicle can be driven for a maximum of
100 miles (160 km) at a speed below
50 mph (80 km/h) after any tire goes
flat. (However, the vehicle speed may
not increase to near 50 mph [80
km/h] depending on weather or driv-
ing conditions.)
A run-flat tire has a mark on
the sidewall.
Make sure to replace the flat tire before
the vehicle has been driven for near 100
miles (160 km). Also, do not use a repaired
tire.
■Run-flat tires
●The run-flat tires are for only this vehicle.
Do not use the tires on other vehicles.
●Do not mix run-flat tires and normal tires.
●If non-genuine Lexus wheels are used, it
may be impossible to sufficiently demon-
strate the performanc e of run-flat tires.
Your vehicle is equipped with a tire
pressure warning system that uses tire
pressure warning valves and transmit-
ters to detect low tire inflation pressure
before serious problems arise.
If the tire pressure drops below a
predetermined level, the driver is
warned by a screen display and a
warning light. ( P.319)
The tire pressure detected by the
tire pressure warning system can be
displayed on the multi-information
display. ( P.79)
The illustration used is intended as an
example, and may differ from the image
that is actually displayed on the multi-infor-
mation display.
■Routine tire inflation pressure checks
The tire pressure warning system does not
replace routine tire inflation pressure
checks. Make sure to check tire inflation
pressure as part of your routine of daily
vehicle checks.
■Situations in which the tire pressure
warning system may not operate prop-
erly
●In the following cases, the tire pressure
warning system may not operate prop-
erly.
• If non-genuine Lexus wheels are used.
• A tire has been replaced with a tire that is not an OE (Original Equipment) tire.
• A tire has been replaced with a tire that is not of the specified size.
• Tire chains etc. are equipped.
• An auxiliary-supported run-flat tire is equipped.
• If a window tint that affects the radio wave signals is installed.
• If there is a lot of snow or ice on the vehi- cle, particularly around the wheels or
wheel housings.
• If the tire inflation pressure is extremely higher than the specified level.
• If wheel without tire pressure warning valves and transmitters are used.
Tire rotation
Run-flat tires
Tire pressure warning system
Page 287 of 410

2856-3. Do-it-yourself maintenance
6
Maintenance and care
For vehicles sold in Canada
When replacing tires or wheels, tire
pressure warning valves and transmit-
ters must also be installed.
When new tire pressure warning
valves and transmitters are installed,
new ID codes must be registered in the
tire pressure warning computer and
the tire pressure warning system must
be initialized. ( P.287)
■When replacing the tires and wheels
If the ID code of the tire pressure warning
valve and transmitter is not registered, the
tire pressure warning system will not work
properly. After driving for about 20 min-
utes, the tire pressure warning light blinks
for 1 minute and stays on to indicate a sys-
tem malfunction.
Installing tire pressure warning
valves and transmittersNOTICE
■Repairing or replac ing tires, wheels,
tire pressure warning valves, trans-
mitters and tire valve caps
●When removing or fitting the wheels,
tires or the tire pressure warning
valves and transmitters, contact your
Lexus dealer as the tire pressure warn-
ing valves and transmitters may be
damaged if not handled correctly.
●Make sure to install the tire valve caps.
If the tire valve caps are not installed,
water could enter the tire pressure
warning valves and the tire pressure
warning valves could be bound.
●When replacing tire valve caps, do not
use tire valve caps other than those
specified. The cap may become stuck.
Page 290 of 410

2886-3. Do-it-yourself maintenance
4Press or of the meter con-
trol switches and select “TPWS
SET”, then press “OK”.
5 Press or of the meter con-
trol switches and select “Change
wheel set”. Then press and hold
“OK” until the tire pressure warn-
ing light starts blinking.
The change wheel set mode is activated
and registration is started.
A message is displaye d on the multi-infor-
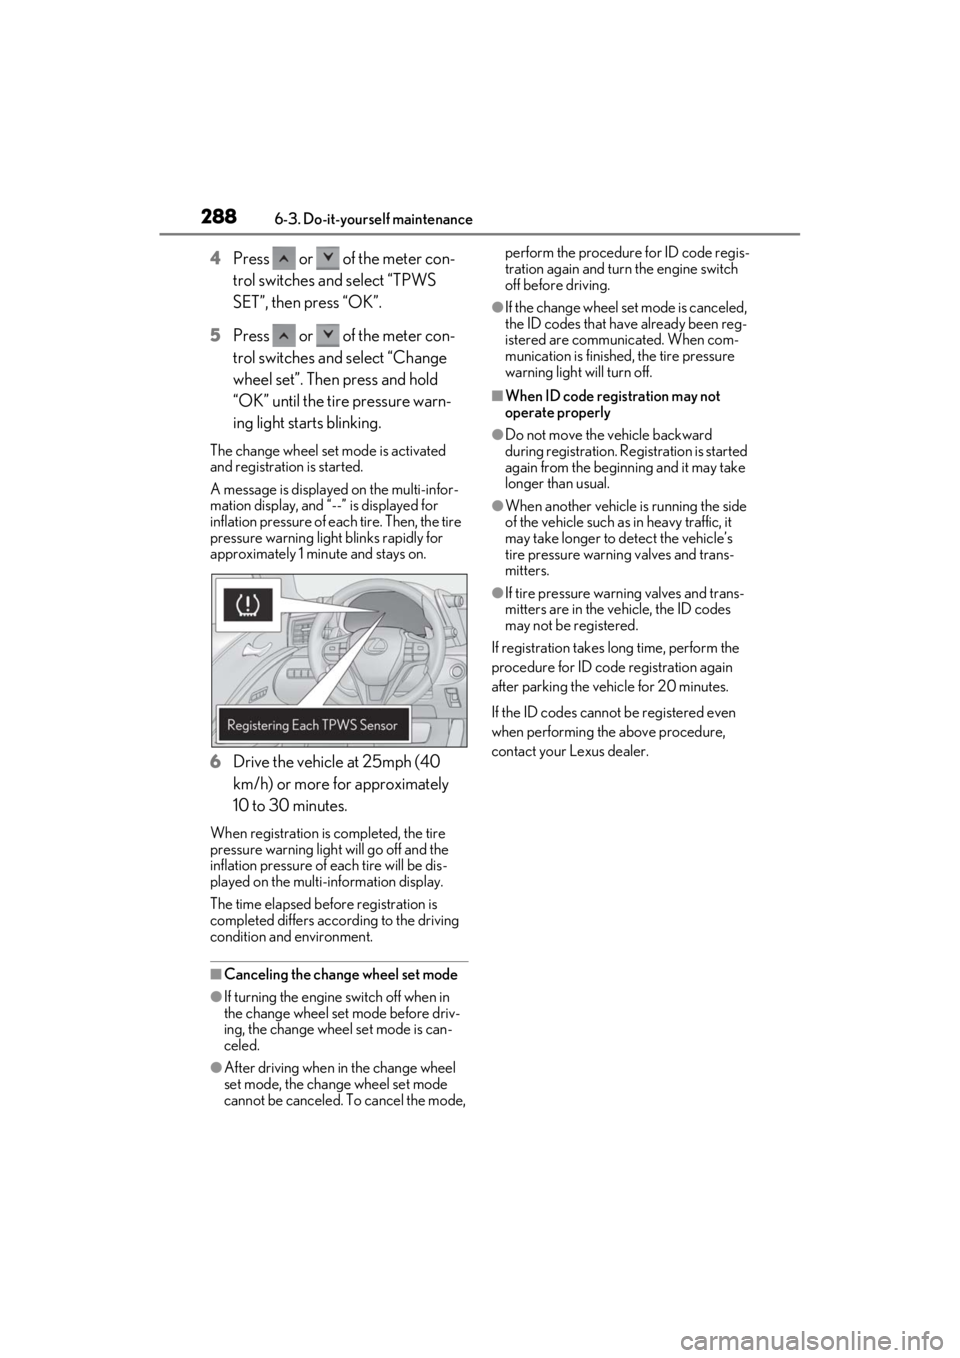
mation display, and “--” is displayed for
inflation pressure of e ach tire. Then, the tire
pressure warning light blinks rapidly for
approximately 1 minute and stays on.
6 Drive the vehicle at 25mph (40
km/h) or more for approximately
10 to 30 minutes.
When registration is completed, the tire
pressure warning light will go off and the
inflation pressure of e ach tire will be dis-
played on the multi-information display.
The time elapsed before registration is
completed differs according to the driving
condition and environment.
■Canceling the change wheel set mode
●If turning the engine switch off when in
the change wheel set mode before driv-
ing, the change wheel set mode is can-
celed.
●After driving when in the change wheel
set mode, the change wheel set mode
cannot be canceled. To cancel the mode, perform the procedure for ID code regis-
tration again and turn the engine switch
off before driving.
●If the change wheel set mode is canceled,
the ID codes that have already been reg-
istered are communicated. When com-
munication is finished, the tire pressure
warning light will turn off.
■When ID code registration may not
operate properly
●Do not move the vehicle backward
during registration. Re
gistration is started
again from the beginning and it may take
longer than usual.
●When another vehicle is running the side
of the vehicle such as in heavy traffic, it
may take longer to detect the vehicle’s
tire pressure warnin g valves and trans-
mitters.
●If tire pressure warning valves and trans-
mitters are in the vehicle, the ID codes
may not be registered.
If registration takes long time, perform the
procedure for ID code registration again
after parking the vehicle for 20 minutes.
If the ID codes cannot be registered even
when performing the above procedure,
contact your Lexus dealer.
Page 291 of 410

2896-3. Do-it-yourself maintenance
6
Maintenance and care
Stop the vehicle in a safe place on a hard, flat surface.
Set the parking brake.
Shift the shift position to P.
Stop the engine.
■Tools
As your vehicle is eq uipped with run-flat
tires, the following tools for replacing a tire
are not included with your vehicle. They can
be purchased at your Lexus dealer.
●Wheel nut wrench
●Jack
●Jack handle
Screwdriver
Wheel nut wrench
*
Jack*
Jack handle*
Towing eyelet
Replacing the tire
When raising your vehicle with a
jack, position the jack correctly.
Improper placement may damage
your vehicle or cause injury.
If necessary tire replacement
seems difficult to perform, contact
your Lexus dealer.
Before jacking up the vehicle
Location of the tools
A
B
C
D
E
Page 292 of 410

2906-3. Do-it-yourself maintenance
*: They can be purchased at your Lexus dealer.
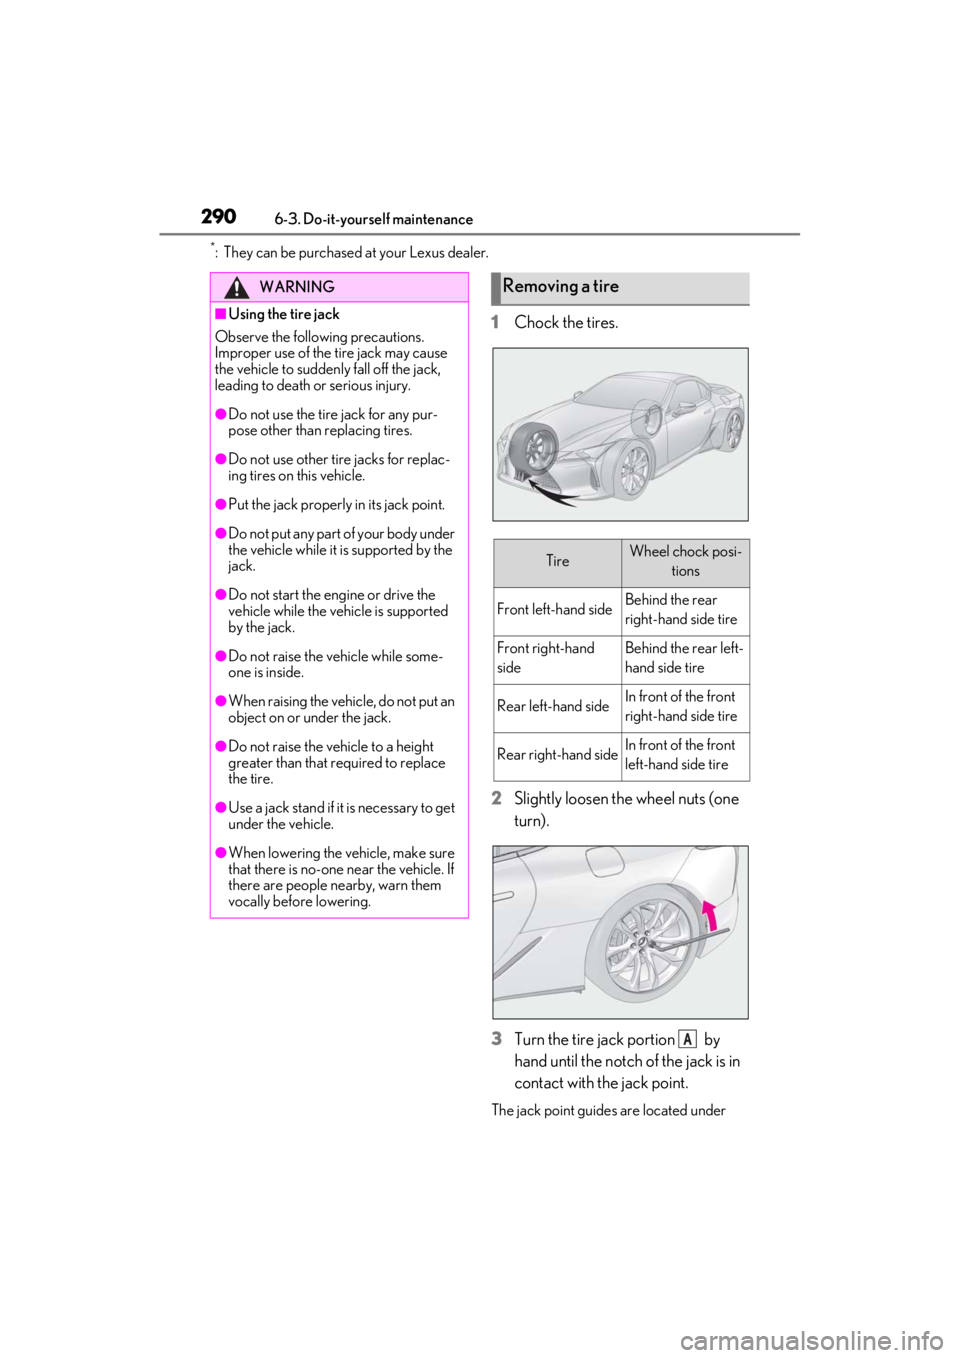
1Chock the tires.
2
Slightly loosen the wheel nuts (one
turn).
3
Turn the tire jack portion by
hand until the notch of the jack is in
contact with the jack point.
The jack point guides are located under
WARNING
■Using the tire jack
Observe the following precautions.
Improper use of the tire jack may cause
the vehicle to suddenly fall off the jack,
leading to death or serious injury.
●Do not use the tire jack for any pur-
pose other than replacing tires.
●Do not use other tire jacks for replac-
ing tires on this vehicle.
●Put the jack properly in its jack point.
●Do not put any part of your body under
the vehicle while it is supported by the
jack.
●Do not start the engine or drive the
vehicle while the vehicle is supported
by the jack.
●Do not raise the vehicle while some-
one is inside.
●When raising the vehicle, do not put an
object on or under the jack.
●Do not raise the vehicle to a height
greater than that required to replace
the tire.
●Use a jack stand if it is necessary to get
under the vehicle.
●When lowering the vehicle, make sure
that there is no-one near the vehicle. If
there are people nearby, warn them
vocally before lowering.
Removing a tire
TireWheel chock posi-
tions
Front left-hand sideBehind the rear
right-hand side tire
Front right-hand
sideBehind the rear left-
hand side tire
Rear left-hand sideIn front of the front
right-hand side tire
Rear right-hand sideIn front of the front
left-hand side tire
A