2021 LEXUS ES350 high
[x] Cancel search: highPage 3 of 464
3TABLE OF CONTENTS
1
2
3
4
5
6
7
8
9
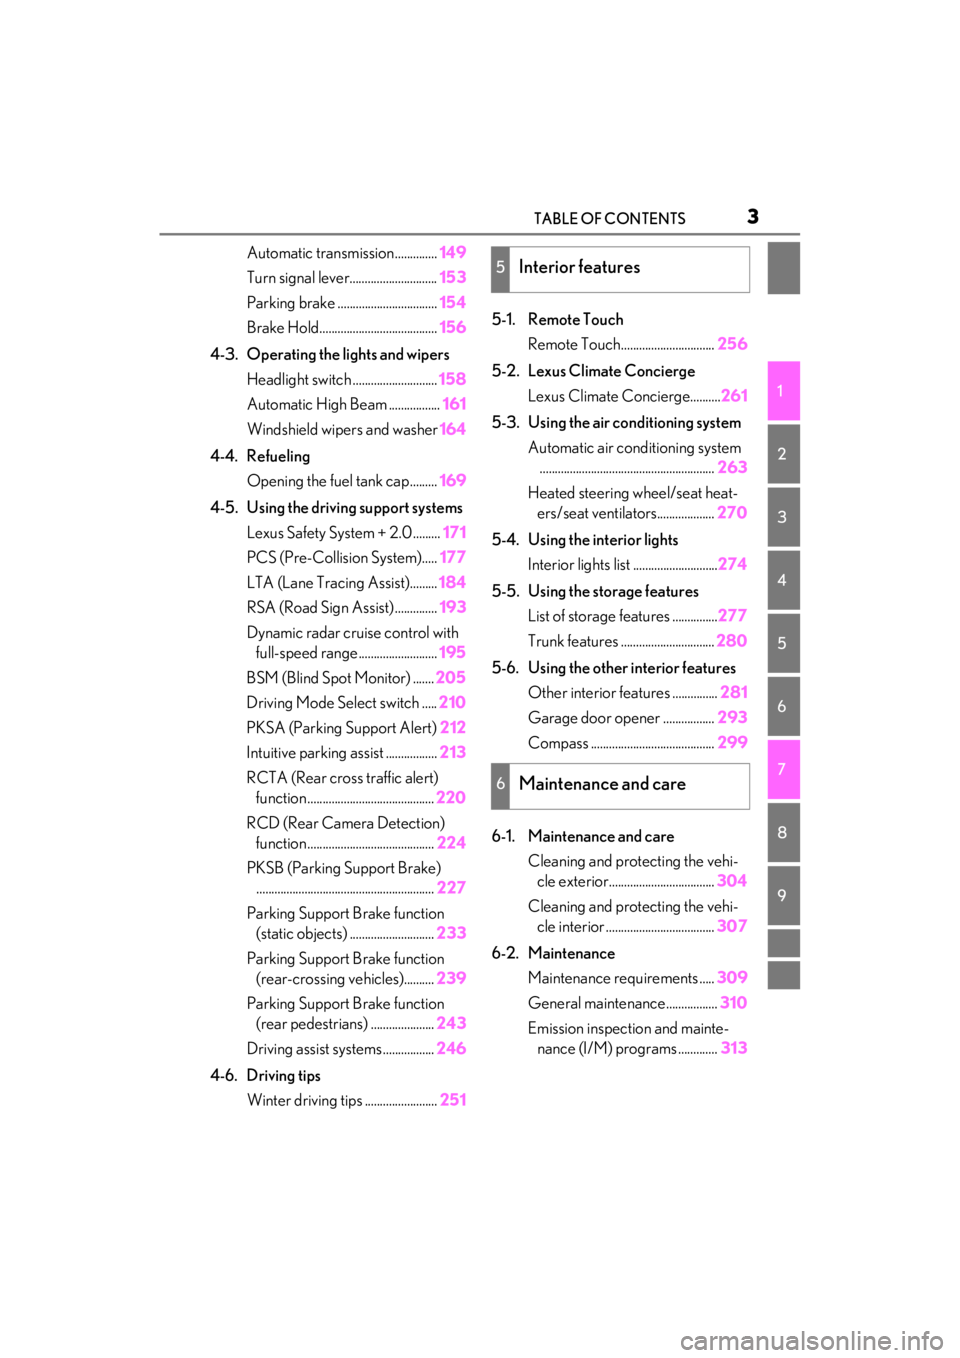
Automatic transmission..............149
Turn signal lever............................. 153
Parking brake ................................. 154
Brake Hold....................................... 156
4-3. Operating the lights and wipers Headlight switch ............................ 158
Automatic High Beam ................. 161
Windshield wipers and washer 164
4-4. Refueling Opening the fuel tank cap......... 169
4-5. Using the driving support systems Lexus Safety System + 2.0 ......... 171
PCS (Pre-Collision System)..... 177
LTA (Lane Tracing Assist)......... 184
RSA (Road Sign Assist) .............. 193
Dynamic radar crui se control with
full-speed range.......................... 195
BSM (Blind Spot Monitor) ....... 205
Driving Mode Select switch ..... 210
PKSA (Parking Support Alert) 212
Intuitive parking assist ................. 213
RCTA (Rear cross traffic alert) function .......................................... 220
RCD (Rear Camera Detection) function .......................................... 224
PKSB (Parking Support Brake) ........................................................... 227
Parking Support Brake function (static objects) ............................ 233
Parking Support Brake function (rear-crossing vehicles).......... 239
Parking Support Brake function (rear pedestrians) ..................... 243
Driving assist systems ................. 246
4-6. Driving tips Winter driving tips ........................ 2515-1. Remote Touch
Remote Touch............................... 256
5-2. Lexus Climate Concierge Lexus Climate Concierge.......... 261
5-3. Using the air conditioning system Automatic air conditioning system.......................................................... 263
Heated steering wheel/seat heat- ers/seat ventilators................... 270
5-4. Using the interior lights Interior lights list ............................ 274
5-5. Using the storage features List of storage features ............... 277
Trunk features ............................... 280
5-6. Using the other interior features Other interior features ............... 281
Garage door opener ................. 293
Compass ......................................... 299
6-1. Maintenance and care Cleaning and protecting the vehi-cle exterior................................... 304
Cleaning and protecting the vehi- cle interior .................................... 307
6-2. Maintenance Maintenance re quirements .....309
General maintenance ...
.............. 310
Emission inspection and mainte- nance (I/M) programs ............. 313
5Interior features
6Maintenance and care
Page 15 of 464

15Pictorial index
Parking brake switch ............................................................................................. P.154
Applying/releasing ........................................................................................................... P.154
Precautions against winter season ............................................................................ P.252
Warning buzzer/message............................................................................................ P.372
Turn signal lever ......................................................................................................P.153
Headlight switch......................................................................................................P.158
Headlights/parking lights/tail lights/daytime running lights ........................... P.158
Automatic High Beam ....................................................................................................... P.161
Windshield wiper and washer switch ................................................................ P.164
Usage.......................................................................................................................................P.164
Adding washer fluid ......................................................................................................... P.3 25
Warning messages .......................................................................................................... P.372
Emergency flasher switch .................................................................................. P.352
Hood lock release lever ........................................................................................ P.316
Tilt and telescopic steering control swit ch/tilt and telescopic steering lock
release lever .............................................................................................................. P.11 9
Adjustment ..................................................................................................................... ........ P.119
Driving position memory
*1............................................................................................... P.114
Air conditioning system .......................................................................................P.263
Usage.......................................................................................................................... ........... P.263
Rear window defogger................................................................................................... P.264
Audio system
*2
Trunk opener main switch ....................................................................................P.105
*1: If equipped
*2: Refer to “NAVIGATION AND MULTIMEDIA SYSTEM OWNER’S MANUAL”.
E
F
G
H
I
J
K
L
M
Page 22 of 464

221-1. For safe use
1-1.For safe use
Use only floor mats designed specifi-
cally for vehicles of the same model
and model year as your vehicle. Fix
them securely in place onto the carpet.
1Insert the retaining hooks (clips)
into the floor mat eyelets.
2 Turn the upper knob of each retain-
ing hook (clip) to secure the floor
mats in place.
Always align the marks .
The shape of the reta ining hooks (clips)
may differ from that shown in the illustra-
tion.
Before driving
Observe the following before start-
ing off in the vehicle to ensure
safety of driving.
Installing floor mats
A
WARNING
Observe the following precautions.
Failure to do so may cause the driver’s
floor mat to slip, poss ibly interfering with
the pedals while driv ing. An unexpect-
edly high speed may result or it may
become difficult to stop the vehicle. This
could lead to an accident, resulting in
death or serious injury.
■When installing the driver’s floor mat
●Do not use floor mats designed for
other models or different model year
vehicles, even if they are Lexus Genu-
ine floor mats.
●Only use floor mats designed for the
driver’s seat.
●Always install the floor mat securely
using the retaining hooks (clips) pro-
vided.
●Do not use two or more floor mats on
top of each other.
●Do not place the floor mat bottom-
side up or upside-down.
■Before driving
●Check that the floor mat is securely
fixed in the correct place with all the
provided retaining hooks (clips). Be
especially careful to perform this
check after cleaning the floor.
●With the engine stopped and the shift
lever in P, fully depress each pedal to
the floor to make sure it does not inter-
fere with the floor mat.
Page 30 of 464

301-1. For safe use
Driver’s seat belt buckle switch
Airbag sensor assembly
“AIR BAG ON” and “AIR BAG OFF” indicator lights
Front passenger’s seat belt buckle switch
Front impact sensors
Your vehicle is equipped with ADVA NCED AIRBAGS designed based on the
US motor vehicle safety standards (FMVSS208). The airbag sensor assembly
(ECU) controls airbag deployment based on information obtained from the sen-
sors etc. shown in the system compon ents diagram above. This information
includes crash severity and occupant info rmation. As the airbags deploy, a chemi-
cal reaction in the inflators quickly fills the airbags with non-toxic gas to help
restrain the motion of the occupants.
■If the SRS airbags deploy (inflate)
●Slight abrasions, burns, bruising etc., may
be sustained from SRS airbags, due to the
extremely high speed deployment (infla-
tion) by hot gases.
●A loud noise and white powder will be
emitted.
●Parts of the airbag module (steering
wheel hub, airbag cover and inflator) as
well as the front seat s, parts of the front
and rear pillars, and r oof side rails may be
hot for several minutes. The airbag itself
may also be hot.
●The windshield may crack.
●All of the doors will be unlocked.
( P.96)
●The brakes and stop lights will be con-
trolled automatically. ( P.246)
●The interior lights will turn on automati-
cally. ( P.275)
●The emergency flashers will turn on auto-
matically. ( P.352)
●Fuel supply to the engine will be stopped.
( P.360)
●For Lexus Enform Safety Connect sub-
scribers, if any of the following situations
occur, the system is designed to send an
emergency call to the response center,
notifying them of the vehicle’s location
(without needing to push the “SOS” but- ton) and an agent will attempt to speak
with the occupants to ascertain the level
of emergency and assistance required. If
the occupants are unable to communi-
cate, the agent automatically treats the
call as an emergency and helps to dis-
patch the necessary emergency services.
(
P.55)
• An SRS airbag is deployed.
• A seat belt pretensioner is activated.
• The vehicle is involved in a severe rear- end collision.
■SRS airbag deployment conditions (SRS
front airbags)
●The SRS front airbags will deploy in the
event of an impact that exceeds the set
threshold level (the level of force corre-
sponding to an approximately 12 - 18
mph [20 - 30 km/h] frontal collision with
a fixed wall that does not move or
deform).
However, this threshold velocity will be
considerably higher in the following situ-
ations:
• If the vehicle strikes an object, such as a parked vehicle or sign pole, which can
move or deform on impact
• If the vehicle is involved in an underride collision, such as a collision in which the
front of the vehicle “underrides”, or goes
under, the bed of a truck
●Depending on the type of collision, it is
possible that only the seat belt preten-
N
O
P
Q
R
Page 33 of 464
331-1. For safe use
1
For safety and security
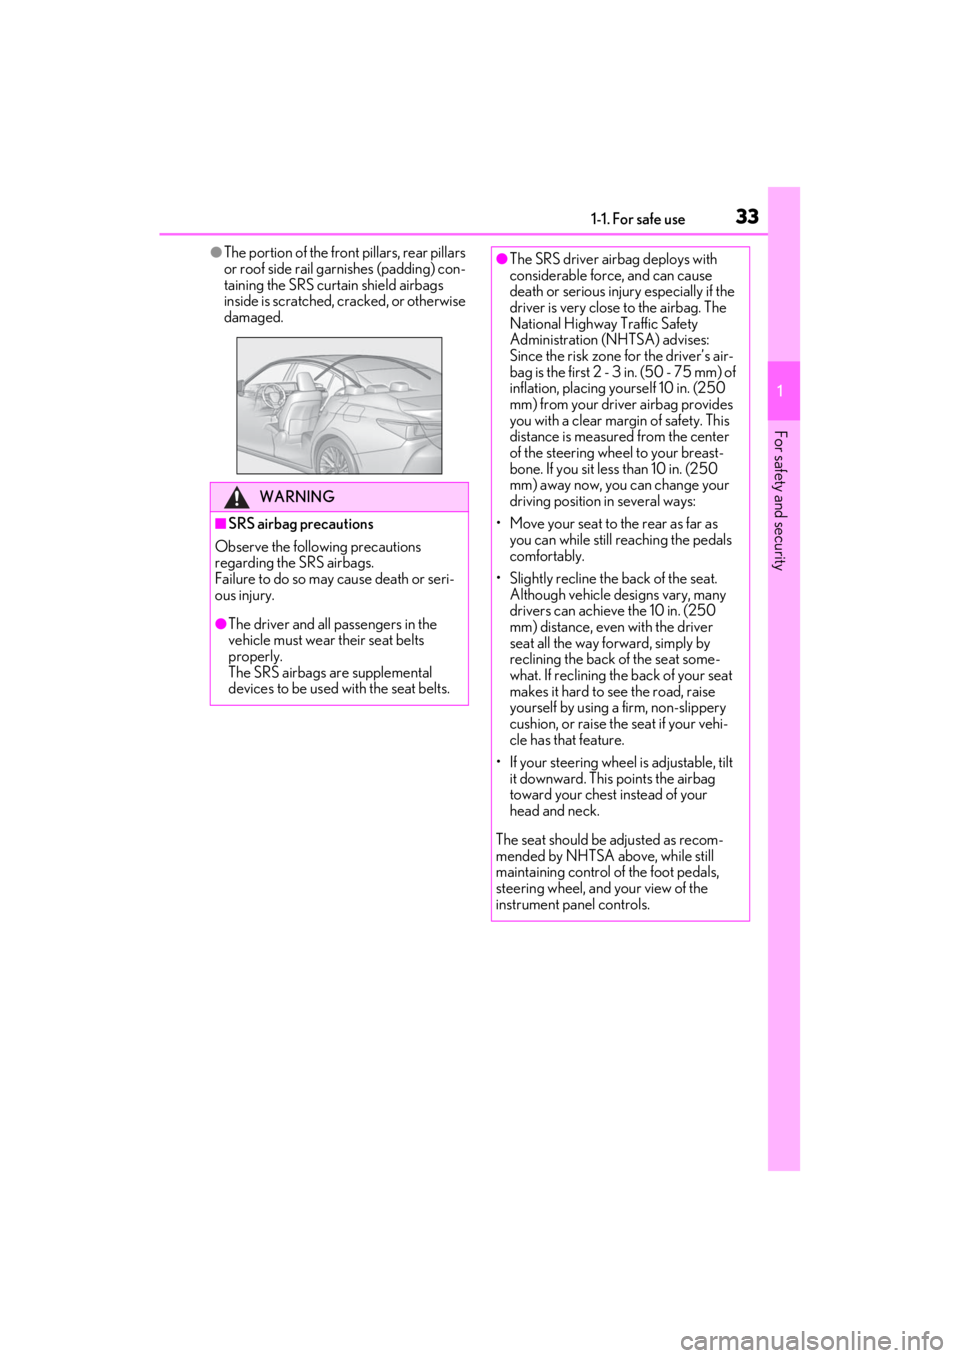
●The portion of the front pillars, rear pillars
or roof side rail garnishes (padding) con-
taining the SRS curtain shield airbags
inside is scratched, cracked, or otherwise
damaged.
WARNING
■SRS airbag precautions
Observe the following precautions
regarding the SRS airbags.
Failure to do so may cause death or seri-
ous injury.
●The driver and all passengers in the
vehicle must wear their seat belts
properly.
The SRS airbags are supplemental
devices to be used with the seat belts.
●The SRS driver airbag deploys with
considerable force, and can cause
death or serious injury especially if the
driver is very close to the airbag. The
National Highway Traffic Safety
Administration (NHTSA) advises:
Since the risk zone for the driver’s air-
bag is the first 2 - 3 in. (50 - 75 mm) of
inflation, placing yourself 10 in. (250
mm) from your driver airbag provides
you with a clear margin of safety. This
distance is measured from the center
of the steering wheel to your breast-
bone. If you sit less than 10 in. (250
mm) away now, you can change your
driving position in several ways:
• Move your seat to the rear as far as you can while still reaching the pedals
comfortably.
• Slightly recline the back of the seat. Although vehicle designs vary, many
drivers can achieve the 10 in. (250
mm) distance, even with the driver
seat all the way forward, simply by
reclining the back of the seat some-
what. If reclining the back of your seat
makes it hard to see the road, raise
yourself by using a firm, non-slippery
cushion, or raise the seat if your vehi-
cle has that feature.
• If your steering wheel is adjustable, tilt it downward. This points the airbag
toward your chest instead of your
head and neck.
The seat should be adjusted as recom-
mended by NHTSA above, while still
maintaining control of the foot pedals,
steering wheel, and your view of the
instrument panel controls.
Page 49 of 464
491-2. Child safety
1
For safety and security
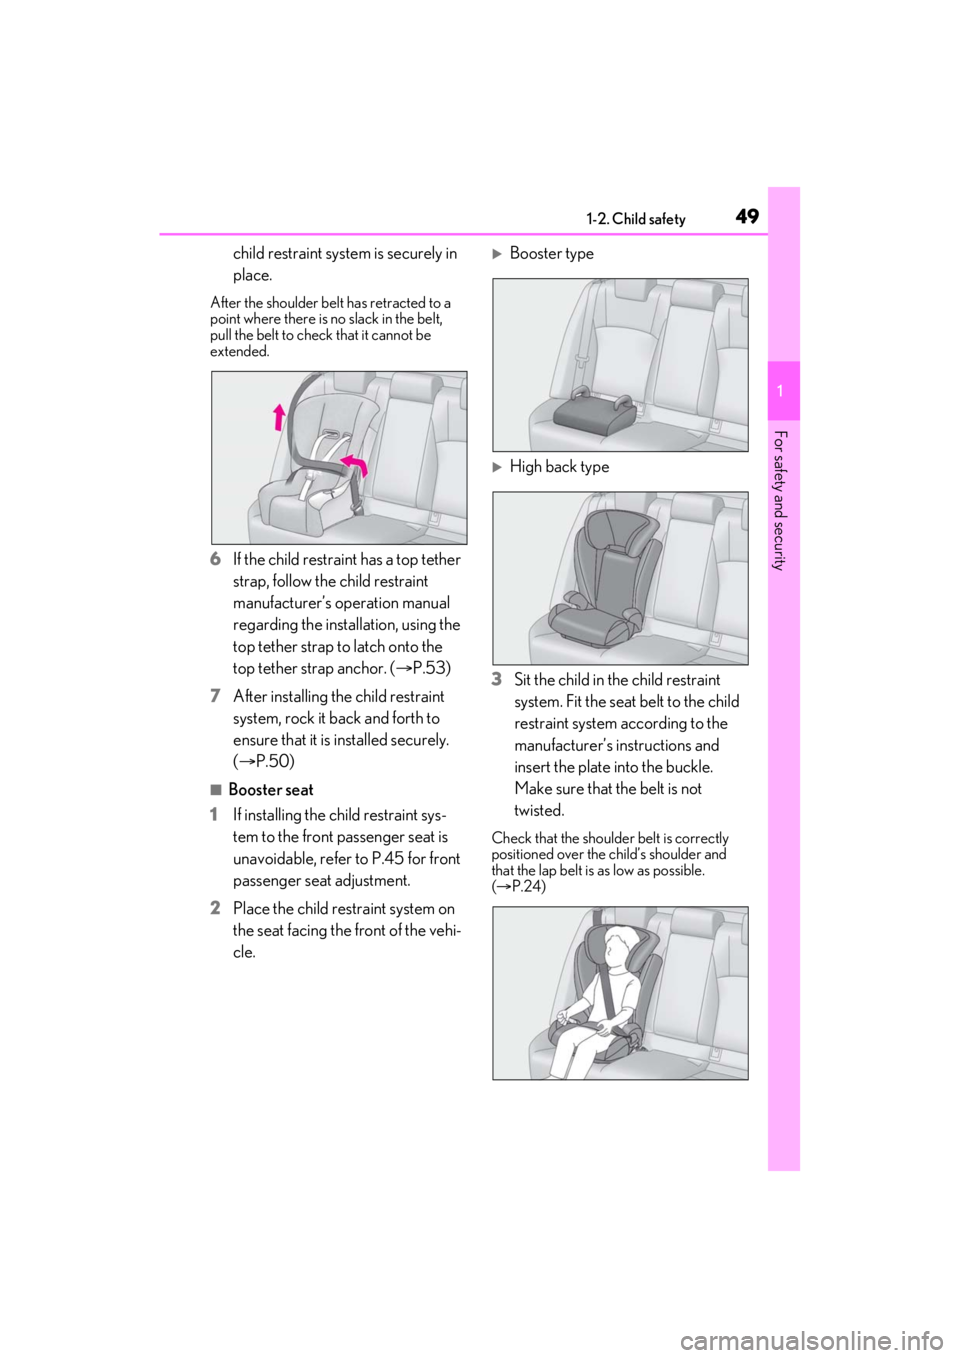
child restraint system is securely in
place.
After the shoulder belt has retracted to a
point where there is no slack in the belt,
pull the belt to check that it cannot be
extended.
6If the child restraint has a top tether
strap, follow the child restraint
manufacturer’s operation manual
regarding the installation, using the
top tether strap to latch onto the
top tether strap anchor. ( P.53)
7 After installing the child restraint
system, rock it back and forth to
ensure that it is installed securely.
(P.50)
■Booster seat
1 If installing the child restraint sys-
tem to the front passenger seat is
unavoidable, refer to P.45 for front
passenger seat adjustment.
2 Place the child restraint system on
the seat facing the front of the vehi-
cle.
Booster type
High back type
3 Sit the child in the child restraint
system. Fit the seat belt to the child
restraint system according to the
manufacturer’s in structions and
insert the plate into the buckle.
Make sure that the belt is not
twisted.
Check that the shoulder belt is correctly
positioned over the child’s shoulder and
that the lap belt is as low as possible.
( P.24)
Page 67 of 464
672-1. Instrument cluster
2
Vehicle status information and indicators
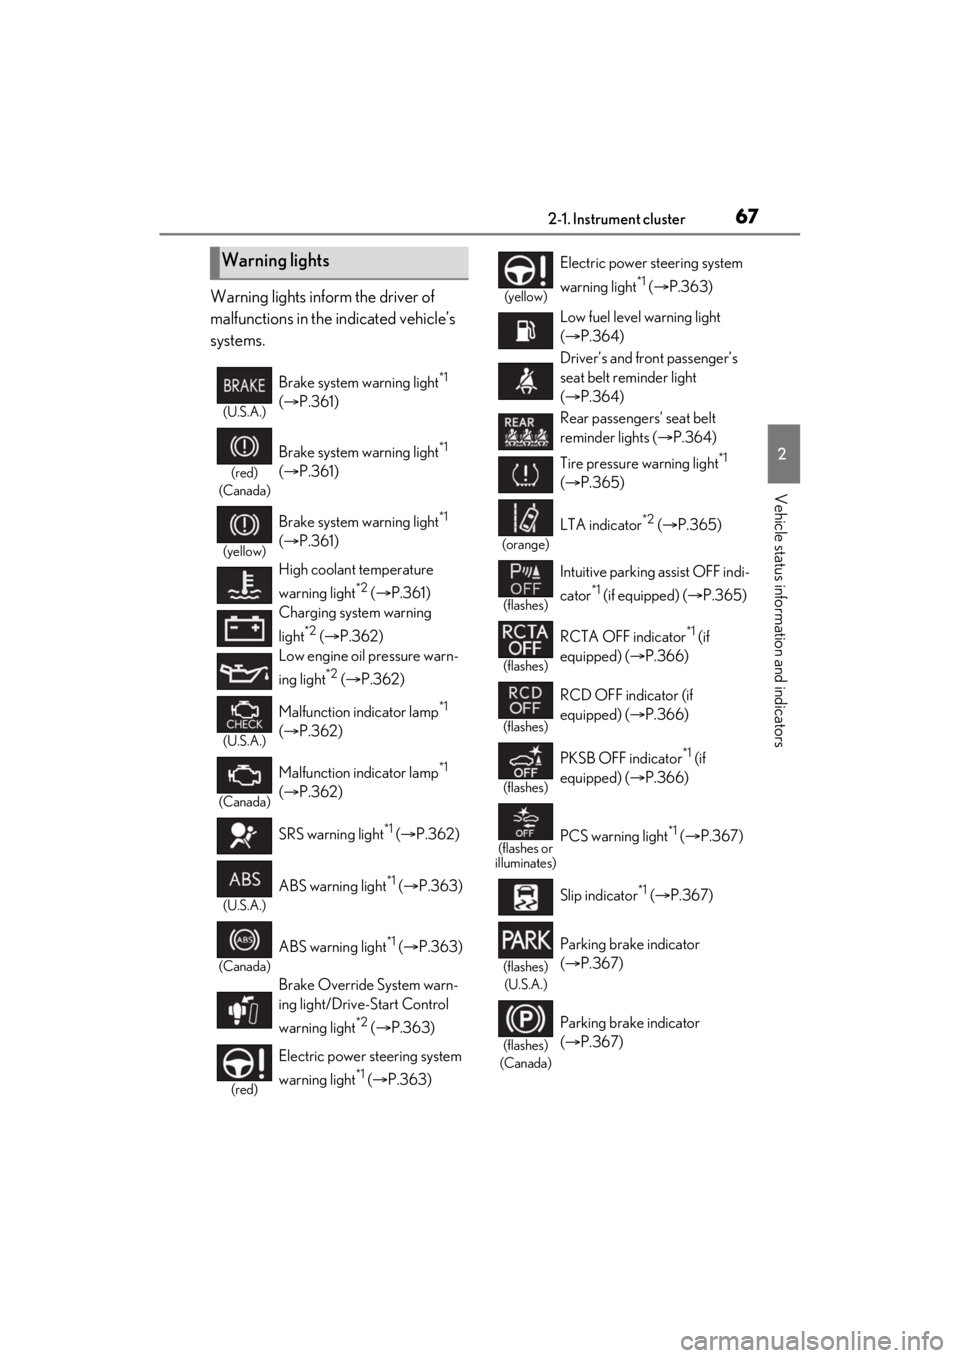
Warning lights inform the driver of
malfunctions in the indicated vehicle’s
systems.
Warning lights
(U.S.A.)
Brake system warning light*1
( P.361)
(red)
(Canada)
Brake system warning light*1
( P.361)
(yellow)
Brake system warning light*1
( P.361)
High coolant temperature
warning light
*2 ( P.361)
Charging system warning
light
*2 ( P.362)
Low engine oil pressure warn-
ing light
*2 ( P.362)
(U.S.A.)
Malfunction indicator lamp*1
( P.362)
(Canada)
Malfunction indicator lamp*1
( P.362)
SRS warning light
*1 ( P.362)
(U.S.A.)
ABS warning light*1 ( P.363)
(Canada)
ABS warning light*1 ( P.363)
Brake Override System warn-
ing light/Drive-Start Control
warning light
*2 ( P.363)
(red)
Electric power st eering system
warning light
*1 ( P.363)
(yellow)
Electric power steering system
warning light
*1 ( P.363)
Low fuel level warning light
( P.364)
Driver’s and front passenger’s
seat belt re minder light
( P.364)
Rear passengers’ seat belt
reminder lights ( P.364)
Tire pressure warning light
*1
( P.365)
(orange)
LTA indicator*2 ( P.365)
(flashes)
Intuitive parking assist OFF indi-
cator
*1 (if equipped) ( P.365)
(flashes)
RCTA OFF indicator*1 (if
equipped) ( P.366)
(flashes)
RCD OFF indicator (if
equipped) (P.366)
(flashes)
PKSB OFF indicator*1 (if
equipped) ( P.366)
(flashes or
illuminates)PCS warning light*1 ( P.367)
Slip indicator
*1 ( P.367)
(flashes)
(U.S.A.)
Parking brake indicator
( P.367)
(flashes)
(Canada)
Parking brake indicator
( P.367)
Page 68 of 464

682-1. Instrument cluster
*1: These lights come on when the engine switch is turned to IGNITION ON
mode to indicate that a system check is
being performed. They will go off after
the engine is on, or after a few seconds.
There may be a malfunction in a system
if the lights do not come on, or go off.
Have the vehicle inspected by your
Lexus dealer.
*2: This light illuminates on the multi-infor- mation display.
The indicators inform the driver of the
operating state of the vehicle’s various
systems.
(flashes)
Brake hold operated indica-
tor
*1 ( P.368)
Master warning light
*1
( P.368)
WARNING
■If a safety system warning light does
not come on
Should a safety system light such as the
ABS and SRS warning light not come on
when you start the engine, this could
mean that these systems are not avail-
able to help protect you in an accident,
which could result in death or serious
injury. Have the ve hicle inspected by
your Lexus dealer immediately if this
occurs.
Indicators
Turn signal indicator ( P.153)
(U.S.A.)
Headlight indicator ( P.158)
(Canada)
Tail light indicator ( P.158)
Headlight high beam indicator
( P.160)
Automatic High Beam indicator
( P.161)
PCS warning light
*1, 2 ( P.177)
Cruise control indicator
( P.195)
Dynamic radar cruise control
indicator ( P.195)
Cruise control “SET” indicator
( P.195)
(white)
LTA indicator ( P.189)
(green)
LTA indicator (P.189)
(orange)
(flashes)LTA indicator ( P.189)
BSM outside rear view mirror
indicators
*1, 3 (if equipped)
( P.205, 220)
BSM indicator (if equipped)
( P.205)
Intuitive parking assist OFF indi-
cator
*1, 2 (if equipped)
( P.214)
RCTA OFF indicator
*1, 2 (if
equipped) ( P.220)
RCD OFF indicator
*2 (if
equipped) ( P.224)
PKSB OFF indicator
*1, 2 (if
equipped) ( P.228)
(flashes)
Slip indicator*1 ( P.247)
VSC OFF indicator
*1, 2
( P.247)