Page 222 of 631
Features of your vehicle
1324
• When driving downhill or uphill.
• When only part of the vehicle infront is visible on a crossroad or
curved road.
• When there is a traffic light, reflect- ing sign, flashing sign or mirror.
• When the road conditions are bad such as being wet or covered with
snow.
• When the front vehicle’s head- lamps are off but the fog lamps on.
• When a vehicle suddenly appears from a curve.
• When the vehicle is tilted from a flat tire or being towed.
• When the LKA (Lane Keeping Assist) warning light illuminates.✽NOTICE
• Do not place any accessories,stickers or tint the windshield.
• Have on the windshield glass replaced from an authorized deal-
e r.
• Do not remove or damage related parts of the High Beam Assist sys-
tem.
• Be careful that water doesn’t get into the High Beam Assist unit.
• Do not place objects on the dash- board that reflect light such as
mirrors, white paper, etc. The sys-
tem may not function properly if
sunlight is reflected.
• At times, the Smart High Beam system may not operate due to sys-
tem limitations. Always check the
road conditions for your safety.
When the system does not operate
normally, manually change
between the high beam and low
beam.
• While other beeps such as the seat belt warning sound are in opera-
tion and override the LKA alarm-
ing system, LKA beeps may not
occur.
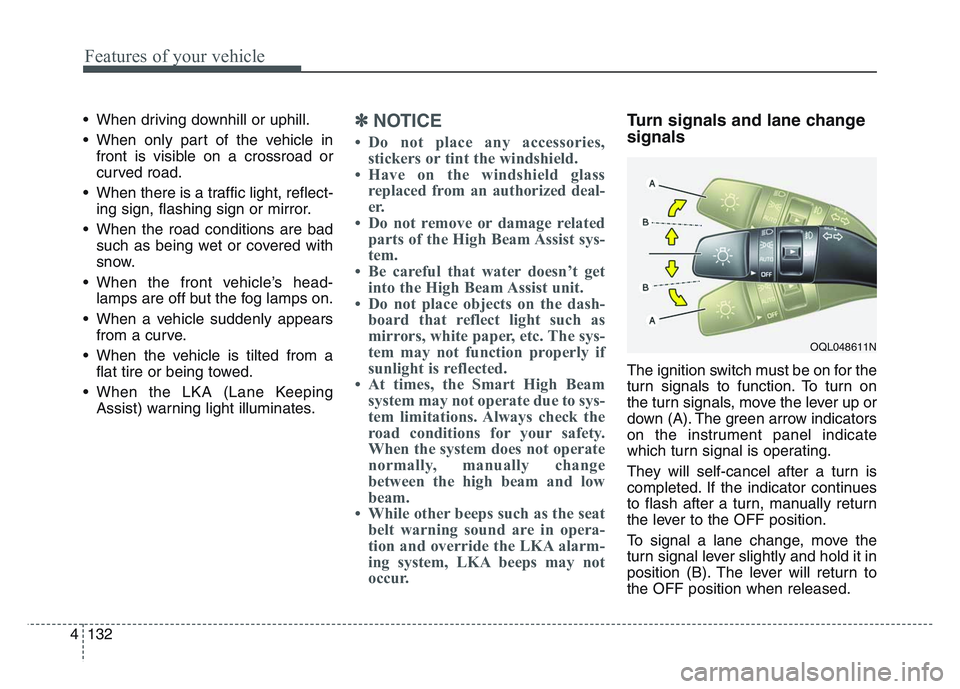
Turn signals and lane change
signals
The ignition switch must be on for the
turn signals to function. To turn on
the turn signals, move the lever up or
down (A). The green arrow indicators
on the instrument panel indicate
which turn signal is operating.
They will self-cancel after a turn is
completed. If the indicator continues
to flash after a turn, manually return
the lever to the OFF position.
To signal a lane change, move the
turn signal lever slightly and hold it in
position (B). The lever will return to
the OFF position when released.
OQL048611N
Page 233 of 631
4 143
Features of your vehicle
If you want to defrost and defog the
front windshield, refer to “Windshield
defrosting and defogging” in this sec-
tion.
Rear window defroster
The defroster heats the window to
remove frost, fog and thin ice from
the rear window, while the engine is
running.
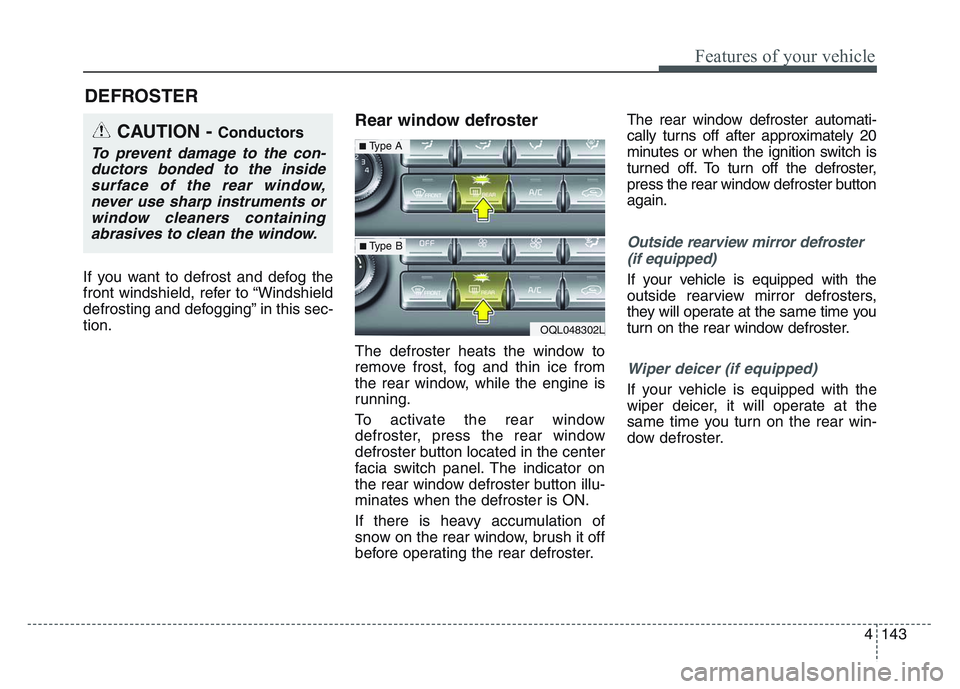
To activate the rear window
defroster, press the rear window
defroster button located in the center
facia switch panel. The indicator on
the rear window defroster button illu-
minates when the defroster is ON.
If there is heavy accumulation of
snow on the rear window, brush it off
before operating the rear defroster.The rear window defroster automati-
cally turns off after approximately 20
minutes or when the ignition switch is
turned off. To turn off the defroster,
press the rear window defroster button
again.
Outside rearview mirror defroster
(if equipped)
If your vehicle is equipped with the
outside rearview mirror defrosters,
they will operate at the same time you
turn on the rear window defroster.
Wiper deicer (if equipped)
If your vehicle is equipped with the
wiper deicer, it will operate at the
same time you turn on the rear win-
dow defroster.
DEFROSTER
CAUTION - Conductors
To prevent damage to the con-ductors bonded to the insidesurface of the rear window,never use sharp instruments orwindow cleaners containingabrasives to clean the window.
OQL048302L
■Type A
■ Type B
Page 236 of 631
Features of your vehicle
1464
Mode selection
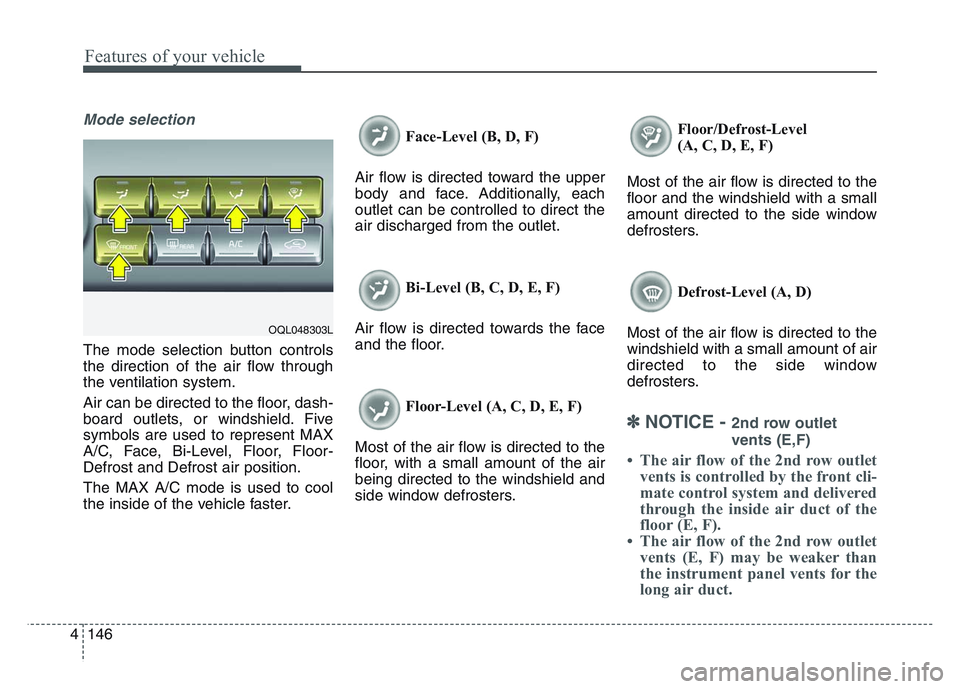
The mode selection button controls
the direction of the air flow through
the ventilation system.
Air can be directed to the floor, dash-
board outlets, or windshield. Five
symbols are used to represent MAX
A/C, Face, Bi-Level, Floor, Floor-
Defrost and Defrost air position.
The MAX A/C mode is used to cool
the inside of the vehicle faster.Face-Level (B, D, F)
Air flow is directed toward the upper
body and face. Additionally, each
outlet can be controlled to direct the
air discharged from the outlet.
Bi-Level (B, C, D, E, F)
Air flow is directed towards the face
and the floor.
Floor-Level (A, C, D, E, F)
Most of the air flow is directed to the
floor, with a small amount of the air
being directed to the windshield and
side window defrosters. Floor/Defrost-Level
(A, C, D, E, F)
Most of the air flow is directed to the
floor and the windshield with a small
amount directed to the side window
defrosters.
Defrost-Level (A, D)
Most of the air flow is directed to the
windshield with a small amount of air
directed to the side window
defrosters.
✽NOTICE - 2nd row outlet
vents (E,F)
• The air flow of the 2nd row outlet vents is controlled by the front cli-
mate control system and delivered
through the inside air duct of the
floor (E, F).
• The air flow of the 2nd row outlet vents (E, F) may be weaker than
the instrument panel vents for the
long air duct.
OQL048303L
Page 237 of 631
4 147
Features of your vehicle
MAX A/C selection
The MAX A/C mode is used to cool
the inside of the vehicle faster.
Air flow is directed toward the upper
body and face.
In this mode, the air conditioning and
the recirculated air position will be
selected automatically.Instrument panel vents
The outlet vents can be opened or
closed separately using the thumb-
wheel.
Also, you can adjust the direction of
air flow these vents using the vent
control lever as shown.
Temperature control
The temperature control knob allows
you to control the temperature of the
air flowing from the ventilation system.
To change the air temperature in the
passenger compartment, turn the
knob to the right position for warm and
hot air or left position for cooler air.
OQL048305LOQL048307L
OQL048306L
Page 247 of 631
4 157
Features of your vehicle
✽NOTICE
Never place anything over the sensor
located on the instrument panel to
ensure better control of the heating
and cooling system.
Manual heating and air condi-
tioning
The heating and cooling system can
be controlled manually by pressing
buttons or turning knob(s) other than
the AUTO button. In this case, the
system works sequentially according
to the order of buttons or knob(s)
selected.
1. Start the engine.
2. Set the mode to the desired posi-tion.
For improving the effectiveness of
heating and cooling;- Heating:
- Cooling:
3. Set the temperature control to the desired position.
4. Set the air intake control to the outside (fresh) air position.
5. Set the fan speed control to the desired speed.
6. If air conditioning is desired, turn the air conditioning system on.
Press the AUTO button in order to
convert to full automatic control of
the system.
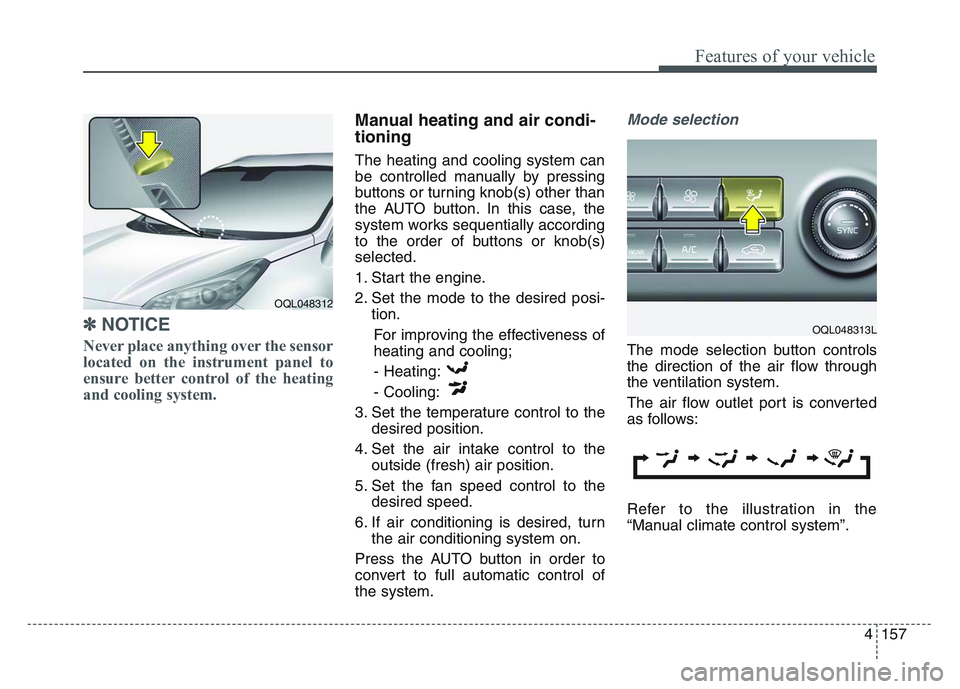
Mode selection
The mode selection button controls
the direction of the air flow through
the ventilation system.
The air flow outlet port is converted
as follows:
Refer to the illustration in the
“Manual climate control system”.
OQL048312
OQL048313L
Page 248 of 631
Features of your vehicle
1584
Face-Level
Air flow is directed toward the upper
body and face. Additionally, each
outlet can be controlled to direct the
air discharged from the outlet.
Bi-Level
Air flow is directed towards the face
and the floor.
Floor-Level
Most of the air flow is directed to the
floor, with a small amount of the air
being directed to the windshield and
side window defrosters.
Floor/Defrost-Level
Most of the air flow is directed to the
floor and the windshield with a small
amount directed to the side window
defrosters. Defrost-Level
Most of the air flow is directed to the
windshield with a small amount of air
directed to the side window defrosters.
Instrument panel vents
The outlet vents can be opened or
closed separately using the thumb-
wheel.
Also, you can adjust the direction of
air flow from these vents using the
vent control lever as shown.
OQL048343L
■Type A
■ Type B
OQL048306L
Page 378 of 631
Driving your vehicle
925
LKA operation
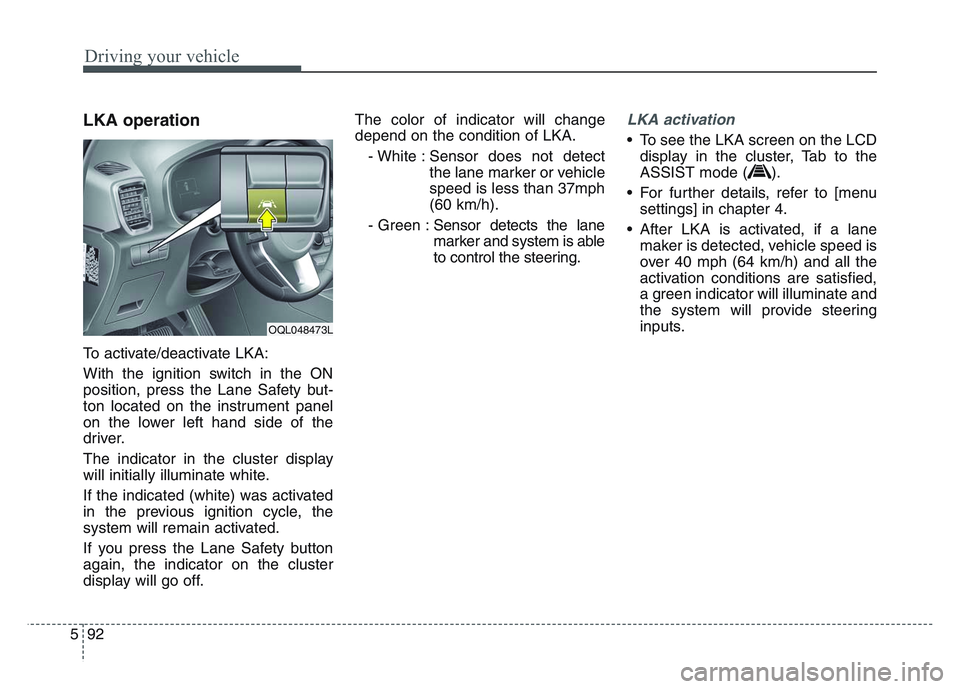
To activate/deactivate LKA:
With the ignition switch in the ON
position, press the Lane Safety but-
ton located on the instrument panel
on the lower left hand side of the
driver.
The indicator in the cluster display
will initially illuminate white.
If the indicated (white) was activated
in the previous ignition cycle, the
system will remain activated.
If you press the Lane Safety button
again, the indicator on the cluster
display will go off.The color of indicator will change
depend on the condition of LKA.
- White : Sensor does not detect the lane marker or vehicle
speed is less than 37mph
(60 km/h).
- Green : Sensor detects the lane
marker and system is able
to control the steering.
LKA activation
• To see the LKA screen on the LCD
display in the cluster, Tab to the
ASSIST mode ( ).
• For further details, refer to [menu settings] in chapter 4.
• After LKA is activated, if a lane maker is detected, vehicle speed is
over 40 mph (64 km/h) and all the
activation conditions are satisfied,
a green indicator will illuminate and
the system will provide steering
inputs.
OQL048473L
Page 450 of 631
Driving your vehicle
1645
Turn signals when towing a trailer
When you tow a trailer, your vehicle
has to have a different turn signal
flasher and extra wiring. The green
arrows on your instrument panel will
flash whenever you signal a turn or
lane change. Properly connected,
the trailer lights will also flash to alert
other drivers you’re about to turn,
change lanes, or stop.
When towing a trailer, the green
arrows on your instrument panel will
flash for turns even if the bulbs on
the trailer are burned out. Thus, you
may think drivers behind you are
seeing your signals when, in fact,
they are not. It’s important to check
occasionally to be sure the trailer
bulbs are still working. You must also
check the lights every time you dis-
connect and then reconnect the
wires.
Do not connect a trailer lighting sys-
tem directly to your vehicle’s lighting
system. Use only an approved trailer
wiring harness.
An authorized Kia dealer can assist
you in installing the wiring harness.
Driving on grades
Reduce speed and shift to a lower
gear before you start down a long or
steep downgrade. If you don’t shift
down, you might have to use your
brakes so much that they would get
hot and no longer operate efficiently.
On a long uphill grade, shift down
and reduce your speed to around 45
mph (70 km/h) to reduce the possibil-
ity of engine and transmission over-
heating.
If your trailer weighs more than the
maximum trailer weight without trail-
er brakes and you have an automat-
ic transmission, you should drive in D
(Drive) when towing a trailer.
Operating your vehicle in D (Drive)
when towing a trailer will minimize
heat build up and extend the life of
your transmission.CAUTION
Always use an approved trailerwiring harness. Failure to usean approved trailer wiring har-ness could result in damage tothe vehicle electrical system.