Page 70 of 316
2-32
Scheduling a charging
1 On the Charge Management screen, press Charging Settings.
2 Check Scheduled Charging and then press .
3 Select and then change the settings.
\037
\036\035
a a You can set the off-peak electricity time.
b b You can charge the battery for the Next Departure, primarily using the off-peak
electricity time.
c c You can charge the battery only at the off-peak electricity time.
4 Press OK.
0000
A
Scheduled charging is performed only when the charging connector is connected to the
vehicle.
0000
A
Scheduled charging is synchronized with the preset departure time and its charging time
may differ depending on the environment.
Page 73 of 316
2-35
Energy flows screen
\037\036
\035
\034
a a Returns to the previous step.
b b Can see the driving status of the vehicle.
c c Can see the energy flows among the engine, motor, and battery.
d d The list of menu items appears.
000EDisplay Off: Turns off the screen. To switch the screen back on, press the screen or
briefly press the power knob.
000EUser’s Manual on Web (QR Code): Displays the QR code that provides access to the
online user manual for the system.
000ESplit Screen: Can turn on or off the split screen mode.
[In case of starting the vehicle
Energy flows
Description
Starting with the motor power
Page 109 of 316
5-5
0000
A
Vehicle location may not be displayed correctly if:
000DThe vehicle is driving on a Y-shaped or winding road with narrow angles.
000DThe vehicle is driving closely to another road.
000DThe vehicle is driving on a road where there are many tall buildings in the vicinity.
000DThe vehicle is driving on a new road or a road under construction.
000DThe vehicle is transported by a ferry or heavy-duty transport vehicle.
000DThe vehicle is driving in a rugged mountain area or on a steep curve road.
000DThe vehicle is entering a public road after making a turn through the turntable in an
underground parking lot or multi-story parking lot.
000DThe vehicle stops and starts repeatedly or moves slowly in front of an intersection.
000DThe system reboots after the vehicle battery has been recharged or replaced.
000DThe vehicle is driving on a slippery road due to heavy snow, etc.
000DThe tires have been replaced recently or spare tires (or studless tires) are used.
000DImproper-sized tires are used or the pressure of each tire is different.
000DThe replaced tire is worn out or the studless tires have been used for over two seasons.
000DA roof carrier is installed on the vehicle.
000DOn a highway. continued driving causes the system to perform map matching or apply
the updated GPS data.
0000
A
Navigation service may not be provided correctly under the following conditions:
000DWhen the vehicle drives on a straight road continuously, the system may guide you to
drive straight. It is not a malfunction.
000DGuidance may not be followed immediately after the vehicle makes a turn at an
intersection or drives through an intersection.
000DThe system may guide you to make a U-turn in a prohibited area.
000DThe system may guide you to a traffic-blocked road (e.g. no-entry road or road under
construction).
000DThe system may guide you to a road away from the destination when there is no road
to the destination or there are only narrow roads on the way.
000DGuidance may not be proper when the vehicle is off the route.
000DGuidance may not match the actual distance on an overpass or underpass due to the
difference of the start point.
000DWhen you are driving at high speeds, route recalculations may take longer.
0000
A
Because the navigation system is used for information purposes only, Kia does not
assume responsibility of the accuracy of the information.
0000
A
When the traffic information is not received, the status icon appears at the top of the map
screen.
000DHD Radio: The system is using the HD radio data. If no traffic information is available,
the status icon (
) will be displayed instead.
Page 111 of 316
5-7
i i Displays the lanes in different colors.
\225Orange: Recommended lane
\225White: Available lane
\225Gray: Unavailable lane
j j Displays quick menu items that can be used during guidance.
k k Can pause or cancel the route guidance. > See "
Stopping the route guidance."
l l Displays the remaining distance to the destination and the estimated time of arrival. \
For
more details, press the information item.
m m Displays or hides the detailed guidance.
n n Displays the system information on the map. (It can display up to two i\
tems.)
\225 Traffic information (with an icon if there is no HD data reception)
\225Bluetooth connection status
o o Check the range you can drive with the current amount of battery (EV only).
0000
A
To see only the map with no destination, press the map area on the Home screen or on
the All menu screen, press Map. Or press the [ MAP] button on the control panel.
0000
A
The screen may differ depending on the vehicle model and specifications.
\335Warning
Be sure to check the road conditions while driving, because the camera information may get
changed occasionally after a map update to the latest version. Relying s\
olely on the driving
assist system may cause violation of traffic rules and regulations, resulting in an accident.
Page 285 of 316
9-91
Updating the software and map
1 Connect a USB device to the computer and run Navigation Updater for
downloading the update files.
2 Follow the instructions on the screen to download the update files.
3 Remove the USB device from the computer and then connect it to the
USB port in your vehicle.
4 Start the vehicle to turn on the system.
0000
A
You can perform update without starting the vehicle by simply locating the start
switch to "ON".
\334\334Caution
\225Perform update with the start switch "ON" when the battery is sufficiently charged
by driving the vehicle. When the battery is discharged while updating, the system
may get damaged with the update stopped.
-Note that the battery may be discharged easily in winter.
-The battery may also be discharged easily when the vehicle is not used for a long
time. Caution is required.
\225
When you start the vehicle while updating with the start switch "ON", po\
wer supply
to the system may be cut off.
5 On the All Menus screen, press Setup >
General >
SW Info/Update.
0000
A
After the system is turned on, press Yes when a pop-up window appears whether
to proceed with update. In this case, the screen changes to allow you to select the
update method.
[ Updating immediately
You can finish the update quickly.
1 On the SW Info/Update screen, press Update.
2 Press
Update Now.
3 Press OK.
The update is performed immediately after the system reboots.
Page 287 of 316
9-93
0000
A
Make sure that a USB device with update files is connected to the system before turning
off the vehicle.
0000
A
When you set the update time to "0", the update notification window appears and then
the update starts.
000DTo close the notification window and proceed with the update, press
Yes.
000DTo cancel the update, press No.
0000
A
Once the update has started, you cannot cancel it. After the update, the\
system
automatically turns off.
0000
A
When you start the vehicle, the update complete notification appears to show the update
result. After update is completed, the SW Info/Update screen displays the updated
version.
0000
A
When you turn on the system while updating, you can see its progress.
0000
A
Scheduled update is canceled when:
000DLow battery is detected when turning off the vehicle.
000DThe storage device with the update files is disconnected.
000DThe vehicle is started before the update scheduled time.
000DThe system has been turned off for more than 3 minutes with the vehicle turned off.
Page 293 of 316
10-5
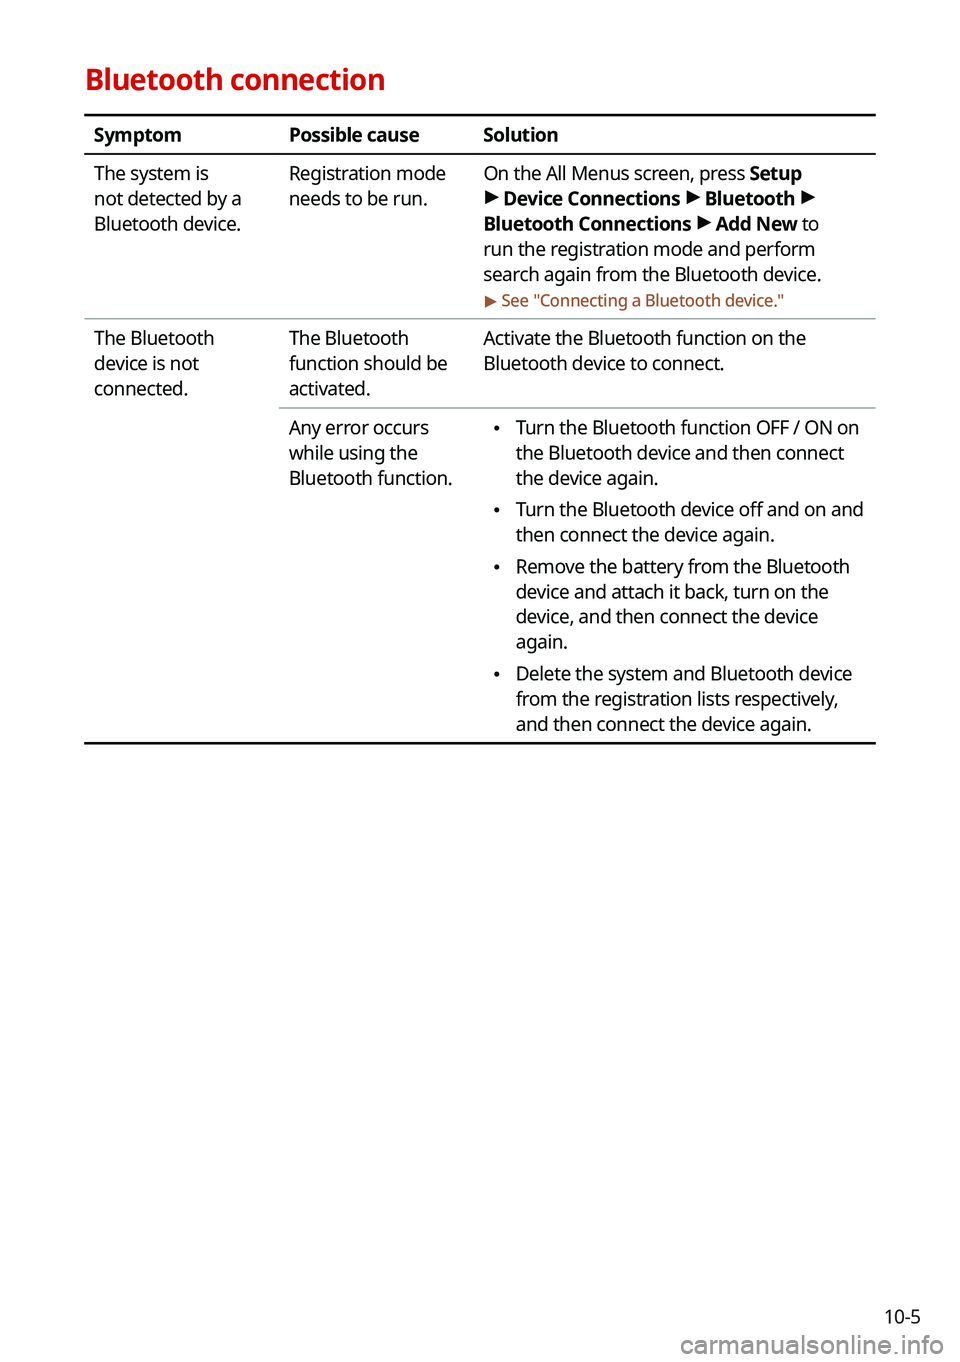
Bluetooth connection
SymptomPossible causeSolution
The system is
not detected by a
Bluetooth device. Registration mode
needs to be run.
On the All Menus screen, press Setup
>
Device Connections >
Bluetooth >
Bluetooth Connections >
Add New to
run the registration mode and perform
search again from the Bluetooth device.
> See " Connecting a Bluetooth device."
The Bluetooth
device is not
connected. The Bluetooth
function should be
activated.Activate the Bluetooth function on the
Bluetooth device to connect.
Any error occurs
while using the
Bluetooth function.
\225 Turn the Bluetooth function OFF / ON on
the Bluetooth device and then connect
the device again.
\225Turn the Bluetooth device off and on and
then connect the device again.
\225Remove the battery from the Bluetooth
device and attach it back, turn on the
device, and then connect the device
again.
\225Delete the system and Bluetooth device
from the registration lists respectively,
and then connect the device again.
Page 294 of 316
10-6
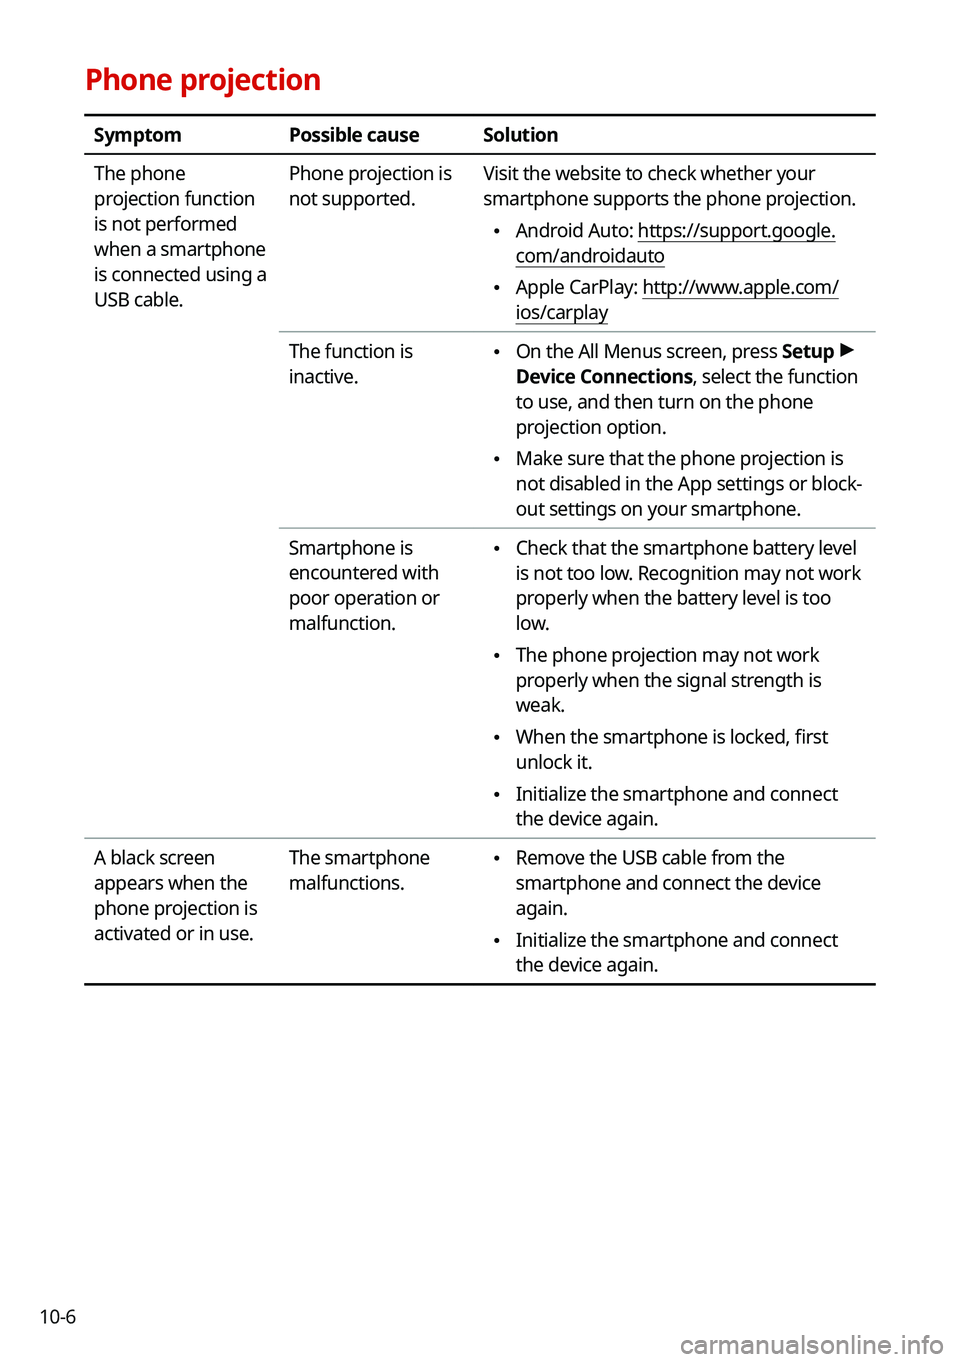
Phone projection
SymptomPossible causeSolution
The phone
projection function
is not performed
when a smartphone
is connected using a
USB cable. Phone projection is
not supported.
Visit the website to check whether your
smartphone supports the phone projection.
\225
Android Auto: https://support.google.
com/androidauto
\225Apple CarPlay: http://www.apple.com/
ios/carplay
The function is
inactive.
\225 On the All Menus screen, press Setup >
Device Connections, select the function
to use, and then turn on the phone
projection option.
\225 Make sure that the phone projection is
not disabled in the App settings or block-
out settings on your smartphone.
Smartphone is
encountered with
poor operation or
malfunction.
\225 Check that the smartphone battery level
is not too low. Recognition may not work
properly when the battery level is too
low.
\225The phone projection may not work
properly when the signal strength is
weak.
\225When the smartphone is locked, first
unlock it.
\225Initialize the smartphone and connect
the device again.
A black screen
appears when the
phone projection is
activated or in use. The smartphone
malfunctions.
\225
Remove the USB cable from the
smartphone and connect the device
again.
\225Initialize the smartphone and connect
the device again.