Page 15 of 482
1-2
E EX
XT
TE
ER
RI
IO
OR
R
O
OV
VE
ER
RV
VI
IE
EW
W
Your vehicle at a glance
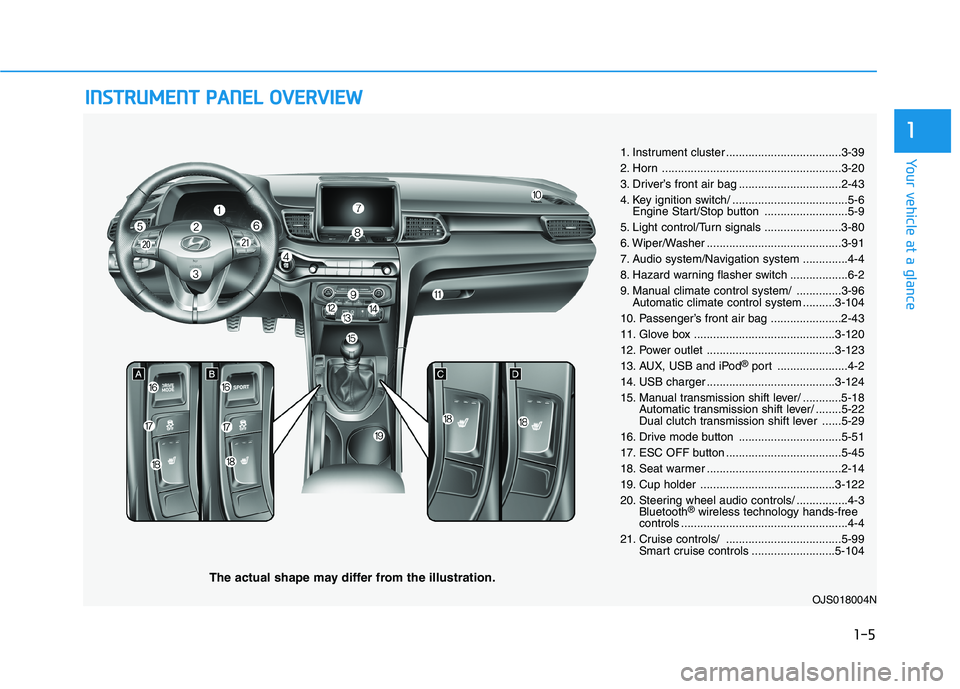
1. Hood ......................................................3-33
2. Headlamp ....................................3-80, 7-68
3. Daytime running light (DRL) ..................3-87
4. Turn signal lamp ....................................7-685. Tires and wheels ..................................7-37
6. Side view mirror ....................................3-22
7. Wide sunroof ........................................3-29
8. Wiper blade ..........................................7-31
9. Windows ................................................3-25
OJS018001N
■ ■
Front view
The actual shape may differ from the illustration.
Page 16 of 482
1-3
Your vehicle at a glance
1
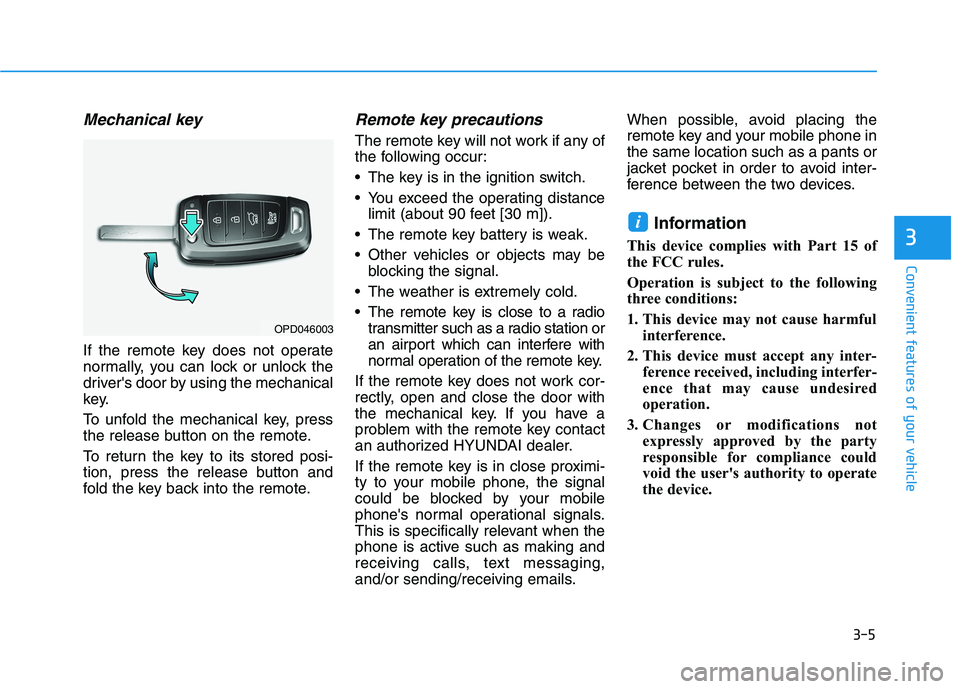
1. Door ......................................................3-13
2. Fuel filler door ......................................3-36
3. Rear combination lamp ........................7-73
4. Back-up lamp ........................................7-73
5. Turn signal lamp ....................................7-736. Liftgate ..................................................3-34
7. High mounted stop lamp ......................7-76
8. Defroster..............................................3-114
9. Rear view monitor ................................3-95
10. Antenna ................................................4-2
OJS018002N
■
■
Rear view
The actual shape may differ from the illustration.
Page 18 of 482

I IN
NS
ST
TR
RU
UM
ME
EN
NT
T
P
PA
AN
NE
EL
L
O
OV
VE
ER
RV
VI
IE
EW
W
The actual shape may differ from the illustration.
1-5
Your vehicle at a glance
1
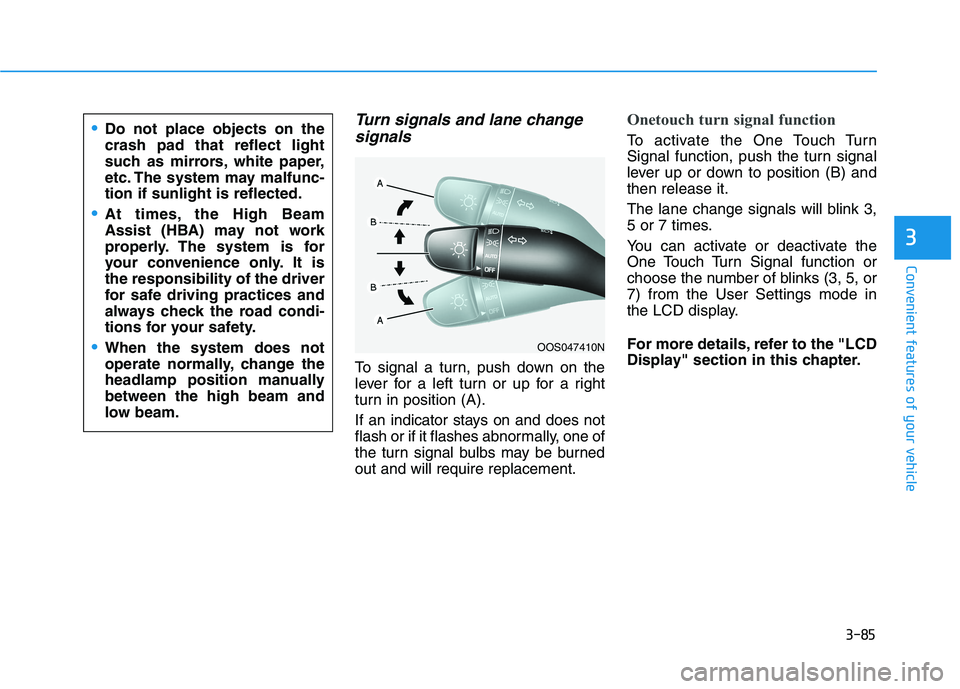
1. Instrument cluster ....................................3-39
2. Horn ........................................................3-20
3. Driver’s front air bag ................................2-43
4. Key ignition switch/ ....................................5-6
Engine Start/Stop button ..........................5-9
5. Light control/Turn signals ........................3-80
6. Wiper/Washer ..........................................3-91
7. Audio system/Navigation system ..............4-4
8. Hazard warning flasher switch ..................6-2
9. Manual climate control system/ ..............3-96
Automatic climate control system ..........3-104
10. Passenger’s front air bag ......................2-43
11. Glove box ............................................3-120
12. Power outlet ........................................3-123
13. AUX, USB and iPod
®port ......................4-2
14. USB charger ........................................3-124
15. Manual transmission shift lever/ ............5-18
Automatic transmission shift lever/ ........5-22
Dual clutch transmission shift lever ......5-29
16. Drive mode button ................................5-51
17. ESC OFF button ....................................5-45
18. Seat warmer ..........................................2-14
19. Cup holder ..........................................3-122
20. Steering wheel audio controls/ ................4-3
Bluetooth
®wireless technology hands-free
controls ....................................................4-4
21. Cruise controls/ ....................................5-99
Smart cruise controls ..........................5-104
OJS018004N
Page 87 of 482

3-5
Convenient features of your vehicle
Mechanical key
If the remote key does not operate
normally, you can lock or unlock the
driver's door by using the mechanical
key.
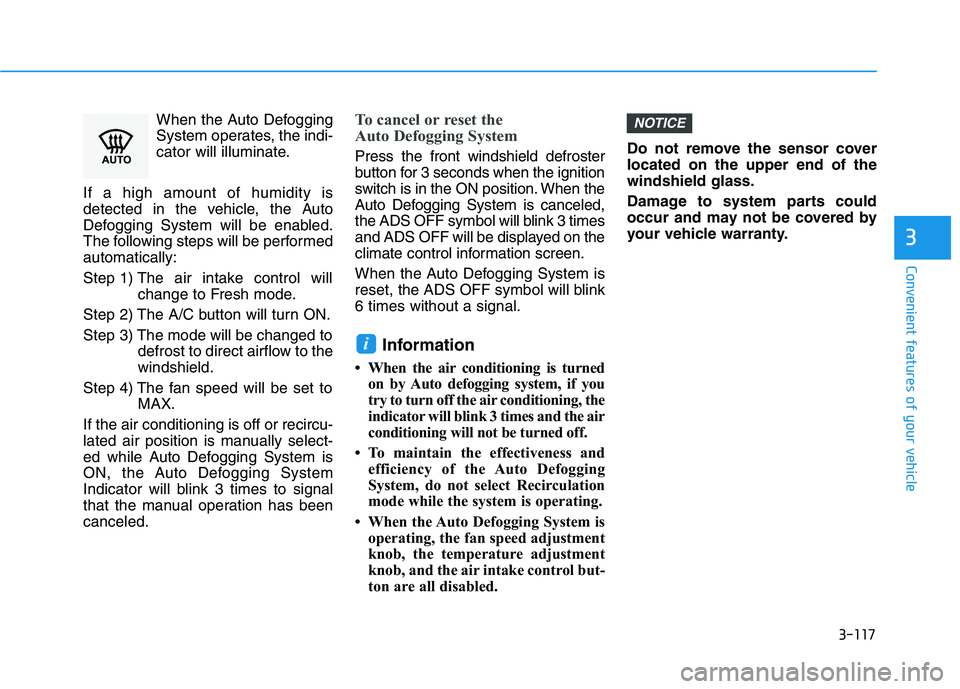
To unfold the mechanical key, press
the release button on the remote.
To return the key to its stored posi-
tion, press the release button and
fold the key back into the remote.
Remote key precautions
The remote key will not work if any of
the following occur:
The key is in the ignition switch.
You exceed the operating distance
limit (about 90 feet [30 m]).
The remote key battery is weak.
Other vehicles or objects may be
blocking the signal.
The weather is extremely cold.
The remote key is close to a radio
transmitter such as a radio station or
an airport which can interfere with
normal operation of the remote key.
If the remote key does not work cor-
rectly, open and close the door with
the mechanical key. If you have a
problem with the remote key contact
an authorized HYUNDAI dealer.
If the remote key is in close proximi-
ty to your mobile phone, the signal
could be blocked by your mobile
phone's normal operational signals.
This is specifically relevant when the
phone is active such as making and
receiving calls, text messaging,
and/or sending/receiving emails.When possible, avoid placing the
remote key and your mobile phone in
the same location such as a pants or
jacket pocket in order to avoid inter-
ference between the two devices.
Information
This device complies with Part 15 of
the FCC rules.
Operation is subject to the following
three conditions:
1. This device may not cause harmful
interference.
2. This device must accept any inter-
ference received, including interfer-
ence that may cause undesired
operation.
3. Changes or modifications not
expressly approved by the party
responsible for compliance could
void the user's authority to operate
the device.
i
3
OPD046003
Page 135 of 482
3-53
Convenient features of your vehicle
3
Turn Signal Indicator
Light
This indicator light blinks:
When you operate the turn signal
indicator stalk.
If any of the following occur, there may
be a malfunction with the turn signal
system.
- The turn signal indicator light illumi-
nates but does not blink
- The turn signal indicator light blinks
rapidly
- The turn signal indicator light does
not illuminate at all
If any of these conditions occur, have
your vehicle inspected by an author-
ized HYUNDAI dealer.
High Beam Indicator
Light
This indicator light illuminates:
When the headlights are on and in
the high beam position
When the turn signal lever is pulled
into the Flash-to-Pass position.
Light ON Indicator
Light
This indicator light illuminates:
When the tail lights or headlights
are on.
Page 151 of 482
3-69
Convenient features of your vehicle
3
ItemsExplanation
One Touch Turn Signal
- Off: The one touch turn signal function will be deactivated.
- 3, 5, 7 Flashes: The turn signal indicator will blink 3, 5, or 7 times when the turn signal lever is
moved slightly.
For more details, refer to "Lighting" in this chapter.
Headlight DelayTo activate or deactivate the headlight delay function.
For more details, refer to "Lighting" in this chapter.
Welcome Light
- On: The welcome light function will be activated.
- Off: The welcome light function will be deactivated.
For more details, refer to "Welcome System" in this chapter
4. Lights
ItemsExplanation
Welcome Sound - Off : The welcome sound function will be deactivated.
- On : The welcome sound function will be activated.
5. Sound
Page 167 of 482

3-85
Convenient features of your vehicle
3
Turn signals and lane change
signals
To signal a turn, push down on the
lever for a left turn or up for a right
turn in position (A).
If an indicator stays on and does not
flash or if it flashes abnormally, one of
the turn signal bulbs may be burned
out and will require replacement.
Onetouch turn signal function
To activate the One Touch Turn
Signal function, push the turn signal
lever up or down to position (B) and
then release it.
The lane change signals will blink 3,
5 or 7 times.
You can activate or deactivate the
One Touch Turn Signal function or
choose the number of blinks (3, 5, or
7) from the User Settings mode in
the LCD display.
For more details, refer to the "LCD
Display" section in this chapter.
OOS047410N
Do not place objects on the
crash pad that reflect light
such as mirrors, white paper,
etc. The system may malfunc-
tion if sunlight is reflected.
At times, the High Beam
Assist (HBA) may not work
properly. The system is for
your convenience only. It is
the responsibility of the driver
for safe driving practices and
always check the road condi-
tions for your safety.
When the system does not
operate normally, change the
headlamp position manually
between the high beam and
low beam.
Page 199 of 482

3-117
Convenient features of your vehicle
3
When the Auto Defogging
System operates, the indi-
cator will illuminate.
If a high amount of humidity is
detected in the vehicle, the Auto
Defogging System will be enabled.
The following steps will be performed
automatically:
Step 1) The air intake control will
change to Fresh mode.
Step 2) The A/C button will turn ON.
Step 3) The mode will be changed to
defrost to direct airflow to the
windshield.
Step 4) The fan speed will be set to
MAX.
If the air conditioning is off or recircu-
lated air position is manually select-
ed while Auto Defogging System is
ON, the Auto Defogging System
Indicator will blink 3 times to signal
that the manual operation has been
canceled.To cancel or reset the
Auto Defogging System
Press the front windshield defroster
button for 3 seconds when the ignition
switch is in the ON position. When the
Auto Defogging System is canceled,
the ADS OFF symbol will blink 3 times
and ADS OFF will be displayed on the
climate control information screen.
When the Auto Defogging System is
reset, the ADS OFF symbol will blink
6 times without a signal.
Information
• When the air conditioning is turned
on by Auto defogging system, if you
try to turn off the air conditioning, the
indicator will blink 3 times and the air
conditioning will not be turned off.
• To maintain the effectiveness and
efficiency of the Auto Defogging
System, do not select Recirculation
mode while the system is operating.
• When the Auto Defogging System is
operating, the fan speed adjustment
knob, the temperature adjustment
knob, and the air intake control but-
ton are all disabled.Do not remove the sensor cover
located on the upper end of the
windshield glass.
Damage to system parts could
occur and may not be covered by
your vehicle warranty.
NOTICE
i