Page 113 of 546
3-22
Convenient features of your vehicle
Tilt Steering / Telescope Steering
When adjusting the steering wheel to
a comfortable position, adjust the
steering wheel so that it points
toward your chest, not toward your
face. Make sure you can see the
instrument panel warning lights and
gauges. After adjusting, push the
steering wheel both up and down to
be certain it is locked in position.
Always adjust the position of the
steering wheel before driving.
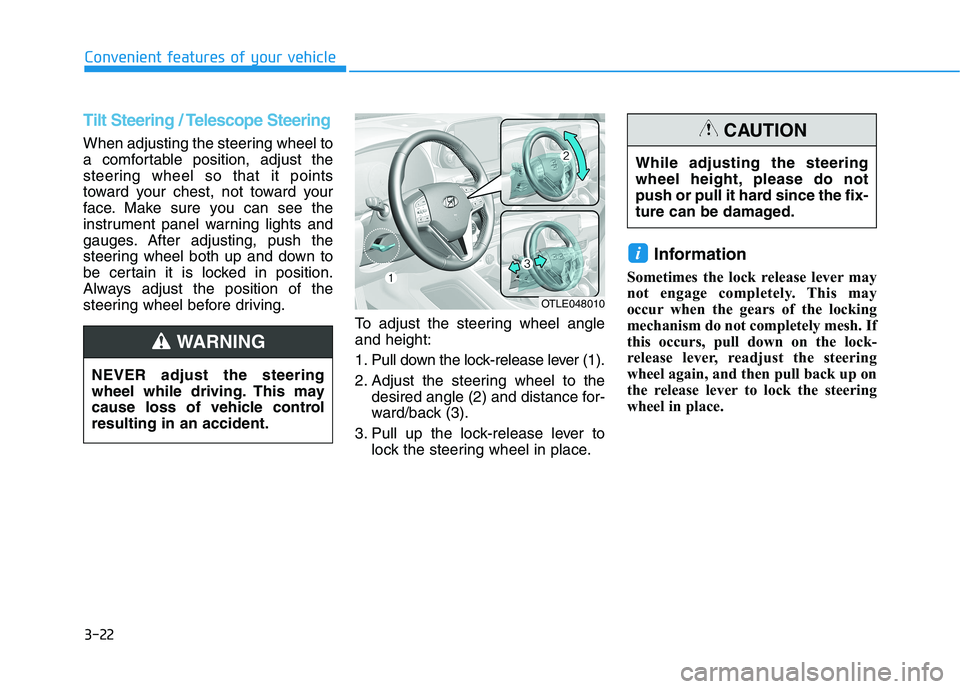
To adjust the steering wheel angle
and height:
1. Pull down the lock-release lever (1).
2. Adjust the steering wheel to the
desired angle (2) and distance for-
ward/back (3).
3. Pull up the lock-release lever to
lock the steering wheel in place.
Information
Sometimes the lock release lever may
not engage completely. This may
occur when the gears of the locking
mechanism do not completely mesh. If
this occurs, pull down on the lock-
release lever, readjust the steering
wheel again, and then pull back up on
the release lever to lock the steering
wheel in place.
i
OTLE048010
NEVER adjust the steering
wheel while driving. This may
cause loss of vehicle control
resulting in an accident.
WARNING
While adjusting the steering
wheel height, please do not
push or pull it hard since the fix-
ture can be damaged.
CAUTION
Page 114 of 546
3-23
Convenient features of your vehicle
3
Heated Steering Wheel
(if equipped)When the ignition switch is in the ON
position or when the engine is run-
ning, press the heated steering
wheel button to warm the steering
wheel. The indicator on the button
will illuminate.
To turn the heated steering wheel off,
press the button again. The indicator
on the button will turn off.
The heated steering wheel will auto-
matically turn off after approximately
30 minutes.
Do not install any cover or acces-
sory on the steering wheel. The
cover or accessory could cause
damage to the heated steering
wheel system.Horn
To sound the horn, press the area
indicated by the horn symbol on your
steering wheel (see illustration). The
horn will operate only when this area
is pressed.
Do not strike the horn severely to
operate it, or hit it with your fist.
Do not press on the horn with a
sharp-pointed object.
NOTICE
NOTICEOTL045012
OTLA045325
■Type A
OTLA045326
■Type B
Page 164 of 546
3-73
Convenient features of your vehicle
3
If the brake fluid level in the reser-
voir is low:
1. Drive carefully to the nearest safe
location and stop your vehicle.
2. With the engine stopped, check
the brake fluid level immediately
and add fluid as required (For
more details, refer to "Brake
Fluid" in chapter 7).After adding
brake fluid, check all brake com-
ponents for fluid leaks. If a brake
fluid leak is found, or if the warning
light remains on, or if the brakes
do not operate properly, do not
drive the vehicle. Have the vehicle
inspected by an authorized
HYUNDAI dealer.
Dual-diagonal braking system
Your vehicle is equipped with dual-
diagonal braking systems. This
means you still have braking on two
wheels even if one of the dual sys-
tems should fail.
With only one of the dual systems
working, more than normal pedal
travel and greater pedal pressure is
required to stop the vehicle.
Also, the vehicle will not stop in as
short a distance with only a portion
of the brake system working.
If the brakes fail while you are driv-
ing, shift to a lower gear for addition-
al engine braking and stop the vehi-
cle as soon as it is safe to do so.Parking Brake & Brake Fluid
Warning Light
Driving the vehicle with a warn-
ing light ON is dangerous. If the
Parking Brake & Brake Fluid
Warning Light illuminates with
the parking brake released, it
indicates that the brake fluid
level is low.
In this case, have your vehicle
inspected by an authorized
HYUNDAI dealer.WARNING
Page 170 of 546
3-79
Convenient features of your vehicle
3
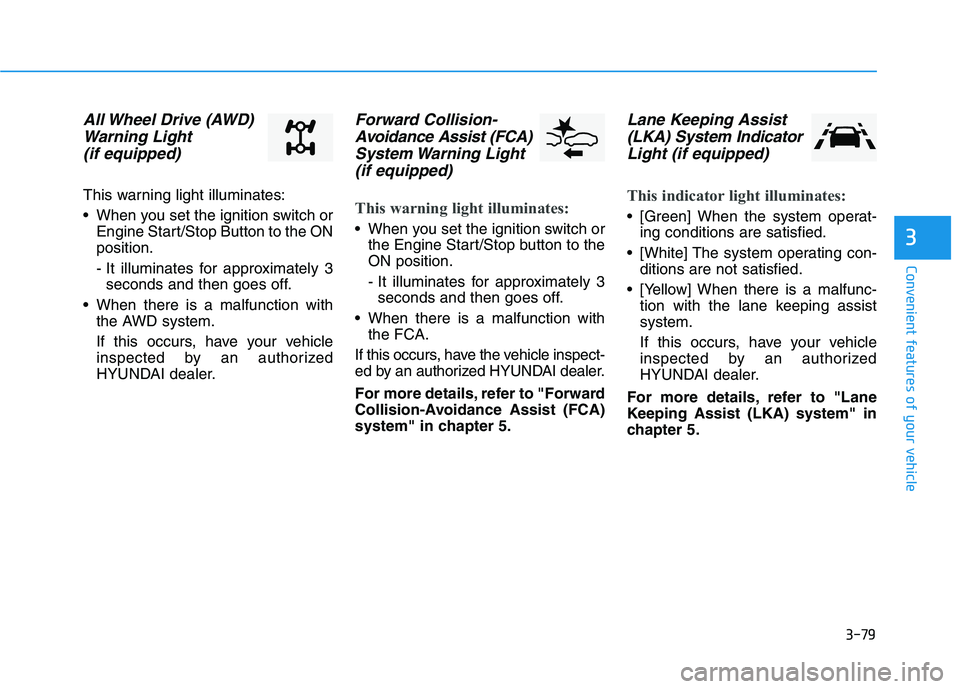
All Wheel Drive (AWD)
Warning Light
(if equipped)
This warning light illuminates:
When you set the ignition switch or
Engine Start/Stop Button to the ON
position.
- It illuminates for approximately 3
seconds and then goes off.
When there is a malfunction with
the AWD system.
If this occurs, have your vehicle
inspected by an authorized
HYUNDAI dealer.
Forward Collision-
Avoidance Assist (FCA)
System Warning Light
(if equipped)
This warning light illuminates:
When you set the ignition switch or
the Engine Start/Stop button to the
ON position.
- It illuminates for approximately 3
seconds and then goes off.
When there is a malfunction with
the FCA.
If this occurs, have the vehicle inspect-
ed by an authorized HYUNDAI dealer.
For more details, refer to "Forward
Collision-Avoidance Assist (FCA)
system" in chapter 5.
Lane Keeping Assist
(LKA) System Indicator
Light (if equipped)
This indicator light illuminates:
[Green] When the system operat-
ing conditions are satisfied.
[White] The system operating con-
ditions are not satisfied.
[Yellow] When there is a malfunc-
tion with the lane keeping assist
system.
If this occurs, have your vehicle
inspected by an authorized
HYUNDAI dealer.
For more details, refer to "Lane
Keeping Assist (LKA) system" in
chapter 5.
Page 175 of 546
3-84
Convenient features of your vehicle
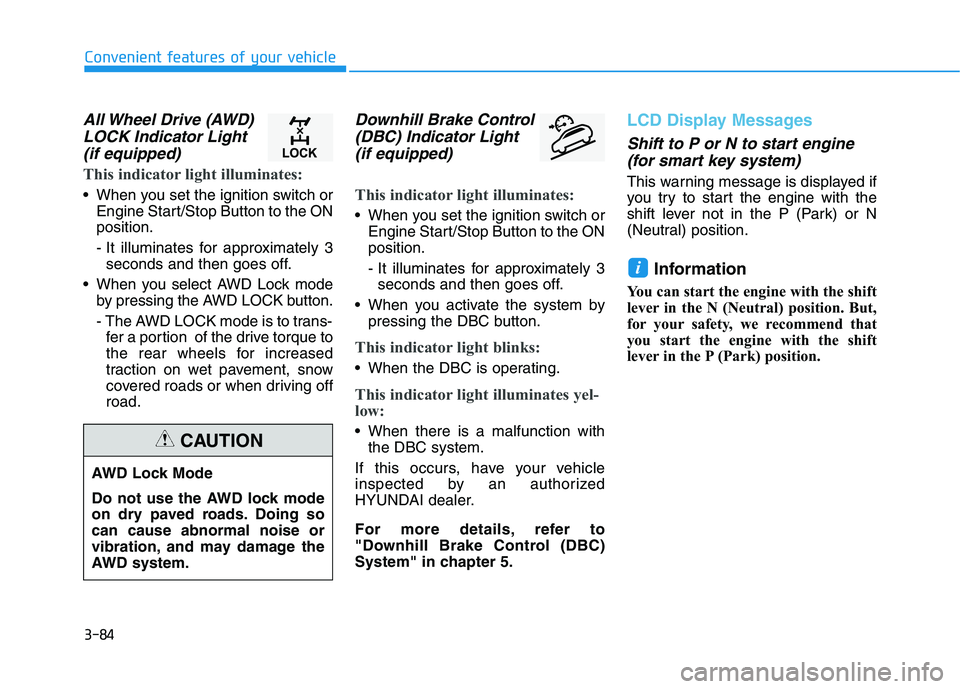
All Wheel Drive (AWD)
LOCK Indicator Light
(if equipped)
This indicator light illuminates:
When you set the ignition switch or
Engine Start/Stop Button to the ON
position.
- It illuminates for approximately 3
seconds and then goes off.
When you select AWD Lock mode
by pressing the AWD LOCK button.
- The AWD LOCK mode is to trans-
fer a portion of the drive torque to
the rear wheels for increased
traction on wet pavement, snow
covered roads or when driving off
road.
Downhill Brake Control
(DBC) Indicator Light
(if equipped)
This indicator light illuminates:
When you set the ignition switch or
Engine Start/Stop Button to the ON
position.
- It illuminates for approximately 3
seconds and then goes off.
When you activate the system by
pressing the DBC button.
This indicator light blinks:
When the DBC is operating.
This indicator light illuminates yel-
low:
When there is a malfunction with
the DBC system.
If this occurs, have your vehicle
inspected by an authorized
HYUNDAI dealer.
For more details, refer to
"Downhill Brake Control (DBC)
System" in chapter 5.
LCD Display Messages
Shift to P or N to start engine
(for smart key system)
This warning message is displayed if
you try to start the engine with the
shift lever not in the P (Park) or N
(Neutral) position.
Information
You can start the engine with the shift
lever in the N (Neutral) position. But,
for your safety, we recommend that
you start the engine with the shift
lever in the P (Park) position.
i
AWD Lock Mode
Do not use the AWD lock mode
on dry paved roads. Doing so
can cause abnormal noise or
vibration, and may damage the
AWD system.
CAUTION
Page 178 of 546
3-87
Convenient features of your vehicle
3
Wiper
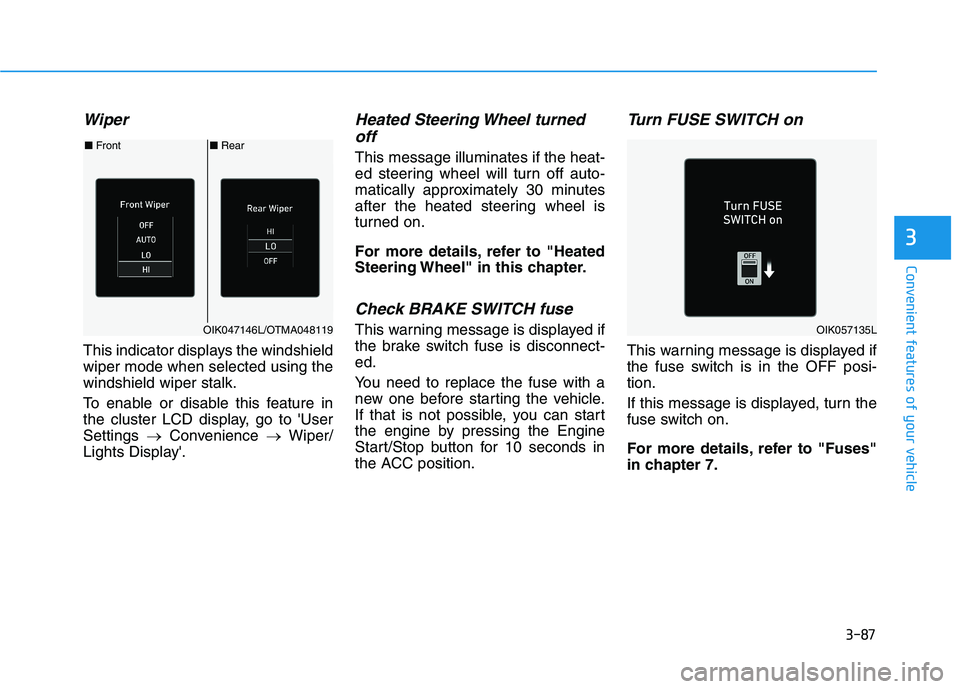
This indicator displays the windshield
wiper mode when selected using the
windshield wiper stalk.
To enable or disable this feature in
the cluster LCD display, go to 'User
Settings →Convenience →Wiper/
Lights Display'.
Heated Steering Wheel turned
off
This message illuminates if the heat-
ed steering wheel will turn off auto-
matically approximately 30 minutes
after the heated steering wheel is
turned on.
For more details, refer to "Heated
Steering Wheel" in this chapter.
Check BRAKE SWITCH fuse
This warning message is displayed if
the brake switch fuse is disconnect-
ed.
You need to replace the fuse with a
new one before starting the vehicle.
If that is not possible, you can start
the engine by pressing the Engine
Start/Stop button for 10 seconds in
the ACC position.
Turn FUSE SWITCH on
This warning message is displayed if
the fuse switch is in the OFF posi-
tion.
If this message is displayed, turn the
fuse switch on.
For more details, refer to "Fuses"
in chapter 7.
■Rear ■Front
OIK047146L/OTMA048119OIK057135L
Page 183 of 546
3-92
Convenient features of your vehicle
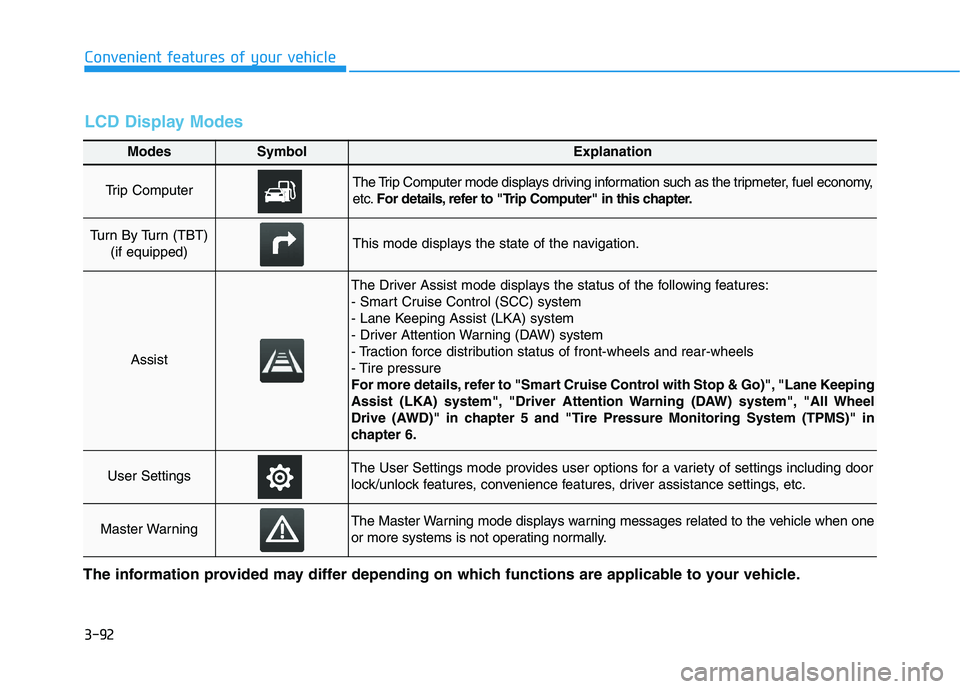
Modes SymbolExplanation
Trip Computer The Trip Computer mode displays driving information such as the tripmeter, fuel economy,
etc.For details, refer to "Trip Computer" in this chapter.
Turn By Turn (TBT)
(if equipped)This mode displays the state of the navigation.
Assist
The Driver Assist mode displays the status of the following features:
- Smart Cruise Control (SCC) system
- Lane Keeping Assist (LKA) system
- Driver Attention Warning (DAW) system
- Traction force distribution status of front-wheels and rear-wheels
- Tire pressure
For more details, refer to "Smart Cruise Control with Stop & Go)", "Lane Keeping
Assist (LKA) system", "Driver Attention Warning (DAW) system", "All Wheel
Drive (AWD)" in chapter 5 and "Tire Pressure Monitoring System (TPMS)" in
chapter 6.
User SettingsThe User Settings mode provides user options for a variety of settings including door
lock/unlock features, convenience features, driver assistance settings, etc.
Master WarningThe Master Warning mode displays warning messages related to the vehicle when one
or more systems is not operating normally.
The information provided may differ depending on which functions are applicable to your vehicle.
LCD Display Modes
Page 185 of 546
3-94
Convenient features of your vehicle
Tire Pressure
This mode displays information relat-
ed to Tire Pressure.
For more details, refer to "Tire
Pressure Monitoring System
(TPMS)" in chapter 6.
Driving force distribution (AWD)
This mode displays an image of the
torque distribution to each wheel
while driving. The display shows
when the real time all-wheel drive
system is active.
If the AWD lock button is selected,
this mode is not displayed.
For more details, refer to the "All
Wheel Drive" in the chapter 5.
Master warning mode
This warning light illuminates when
there is a malfunction in any of the
following systems:
- LED Headlamp
- Forward Collision Avoidance Assist
System
- Blind Spot Collision Warning
System
- Smart Cruise Control System
- Headlamp/Tail lamp Bulb
- High Beam Assist
- Tire Pressure Monitoring System
The information provided may dif-
fer depending on which functions
are applicable to your vehicle.
OTLE048605OTM048127L