Page 106 of 546
3-15
Convenient features of your vehicle
3
D DO
OO
OR
R
L
LO
OC
CK
KS
S
Operating Door Locks from
Outside the Vehicle
Mechanical key
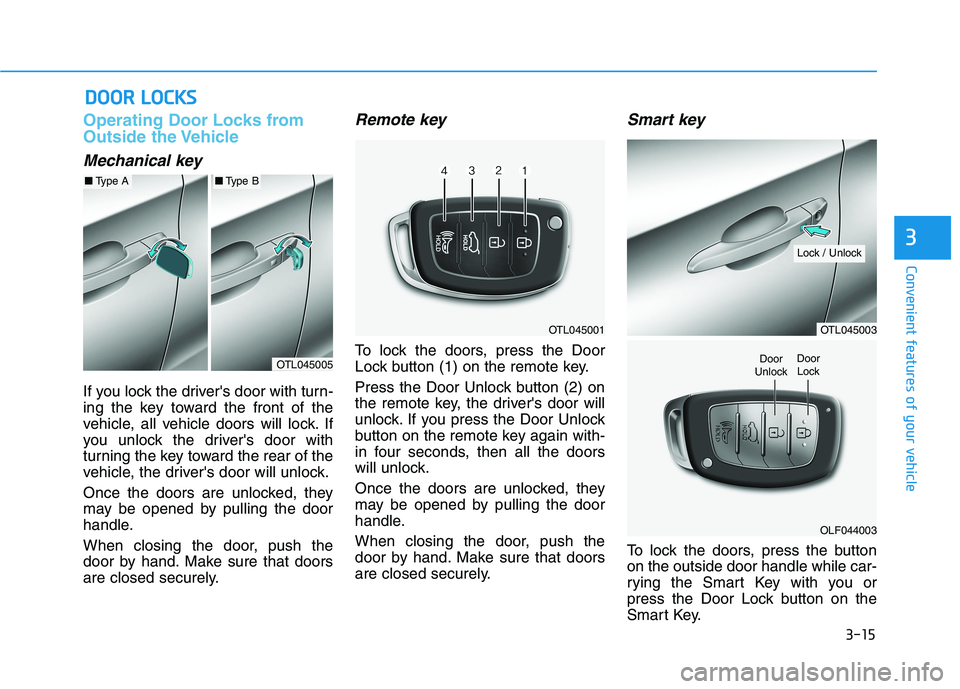
If you lock the driver's door with turn-
ing the key toward the front of the
vehicle, all vehicle doors will lock. If
you unlock the driver's door with
turning the key toward the rear of the
vehicle, the driver's door will unlock.
Once the doors are unlocked, they
may be opened by pulling the door
handle.
When closing the door, push the
door by hand. Make sure that doors
are closed securely.
Remote key
To lock the doors, press the Door
Lock button (1) on the remote key.
Press the Door Unlock button (2) on
the remote key, the driver's door will
unlock. If you press the Door Unlock
button on the remote key again with-
in four seconds, then all the doors
will unlock.
Once the doors are unlocked, they
may be opened by pulling the door
handle.
When closing the door, push the
door by hand. Make sure that doors
are closed securely.
Smart key
To lock the doors, press the button
on the outside door handle while car-
rying the Smart Key with you or
press the Door Lock button on the
Smart Key.
OTL045005
■Type A■Type B
OTL045001OTL045003
OLF044003
Door
UnlockDoor
Lock
Lock / Unlock
Page 113 of 546
3-22
Convenient features of your vehicle
Tilt Steering / Telescope Steering
When adjusting the steering wheel to
a comfortable position, adjust the
steering wheel so that it points
toward your chest, not toward your
face. Make sure you can see the
instrument panel warning lights and
gauges. After adjusting, push the
steering wheel both up and down to
be certain it is locked in position.
Always adjust the position of the
steering wheel before driving.
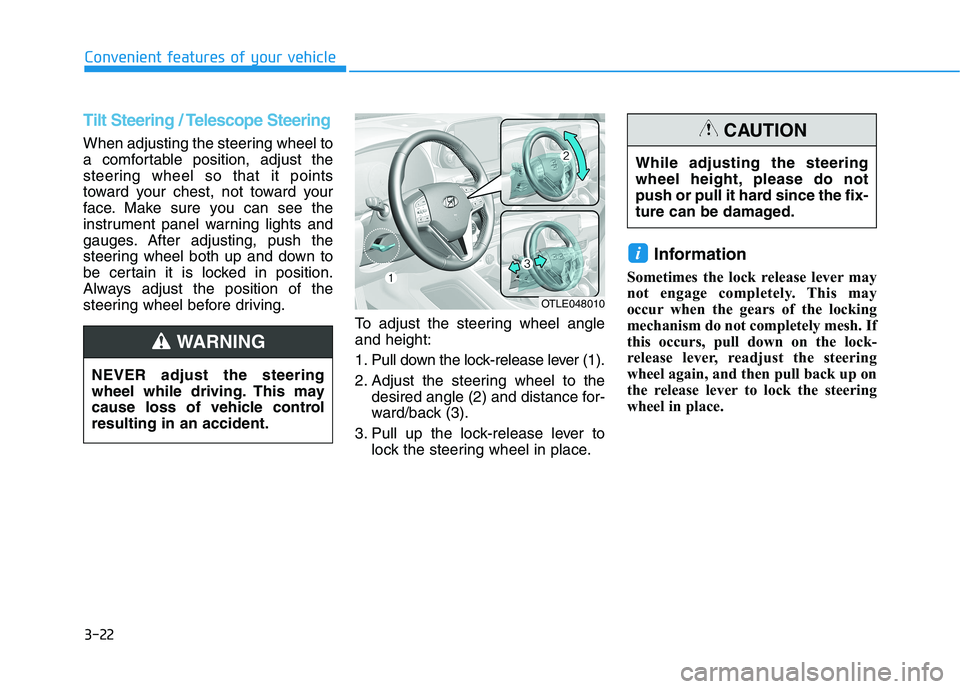
To adjust the steering wheel angle
and height:
1. Pull down the lock-release lever (1).
2. Adjust the steering wheel to the
desired angle (2) and distance for-
ward/back (3).
3. Pull up the lock-release lever to
lock the steering wheel in place.
Information
Sometimes the lock release lever may
not engage completely. This may
occur when the gears of the locking
mechanism do not completely mesh. If
this occurs, pull down on the lock-
release lever, readjust the steering
wheel again, and then pull back up on
the release lever to lock the steering
wheel in place.
i
OTLE048010
NEVER adjust the steering
wheel while driving. This may
cause loss of vehicle control
resulting in an accident.
WARNING
While adjusting the steering
wheel height, please do not
push or pull it hard since the fix-
ture can be damaged.
CAUTION
Page 115 of 546
3-24
Convenient features of your vehicle
M MI
IR
RR
RO
OR
RS
S
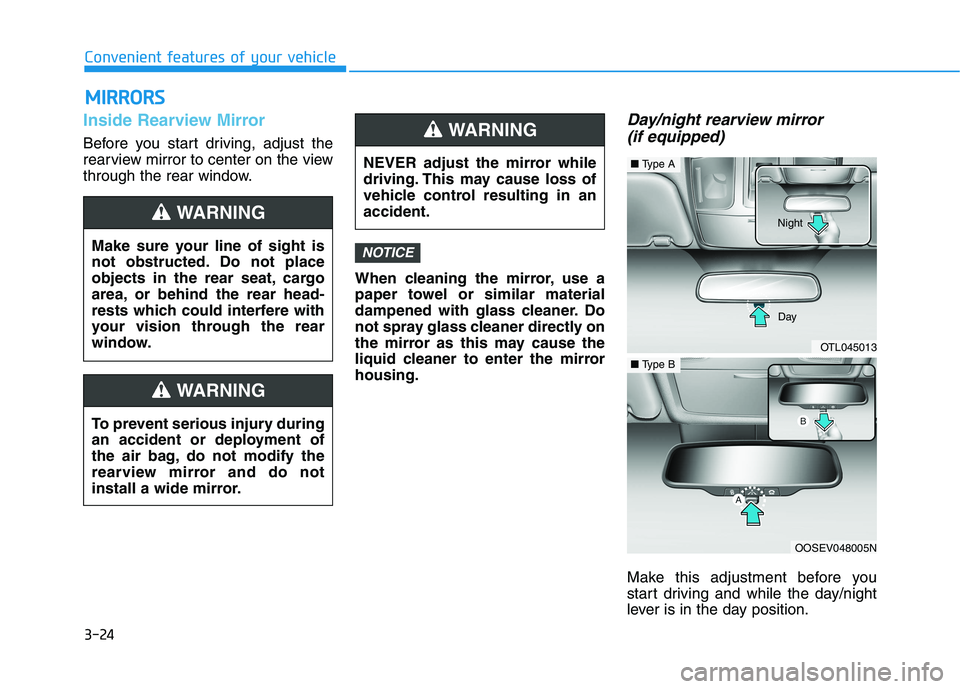
Inside Rearview Mirror
Before you start driving, adjust the
rearview mirror to center on the view
through the rear window.
When cleaning the mirror, use a
paper towel or similar material
dampened with glass cleaner. Do
not spray glass cleaner directly on
the mirror as this may cause the
liquid cleaner to enter the mirror
housing.
Day/night rearview mirror
(if equipped)
Make this adjustment before you
start driving and while the day/night
lever is in the day position.
NOTICEMake sure your line of sight is
not obstructed. Do not place
objects in the rear seat, cargo
area, or behind the rear head-
rests which could interfere with
your vision through the rear
window.
WARNING
NEVER adjust the mirror while
driving. This may cause loss of
vehicle control resulting in an
accident.
WARNING
To prevent serious injury during
an accident or deployment of
the air bag, do not modify the
rearview mirror and do not
install a wide mirror.
WARNING
OTL045013
■Type A
OOSEV048005N
■Type BDay Night
Page 116 of 546
3-25
Convenient features of your vehicle
3
Pull the day/night lever toward you to
reduce glare from the headlights of
the vehicles behind you during night
driving.
Remember that you lose some
rearview clarity in the night position.Blue Link®center (if equipped)
For details, refer to the Blue Link®
Owner's Guide, Navigation Manual
or Audio Manual.
Electrochromic mirror (ECM)
with homelink system
(if equipped)
To operate the electric rearview
mirror
Press the I button (1) to turn the
automatic- dimming function on. The
mirror indicator light will illuminate.
Press the O button (2) to turn the
automatic- dimming function off. The
mirror indicator light will turn off.
OHD046025N
OOSEV048040N
■Type A
OOSEV048039N
■Type B
Page 159 of 546
3-68
Convenient features of your vehicle
If the gauge pointer moves
beyond the normal range area
toward the "H" position, it indi-
cates overheating that may dam-
age the engine.
Do not continue driving with an
overheated engine. If your vehicle
overheats, refer to "If the Engine
Overheats" in chapter 6.
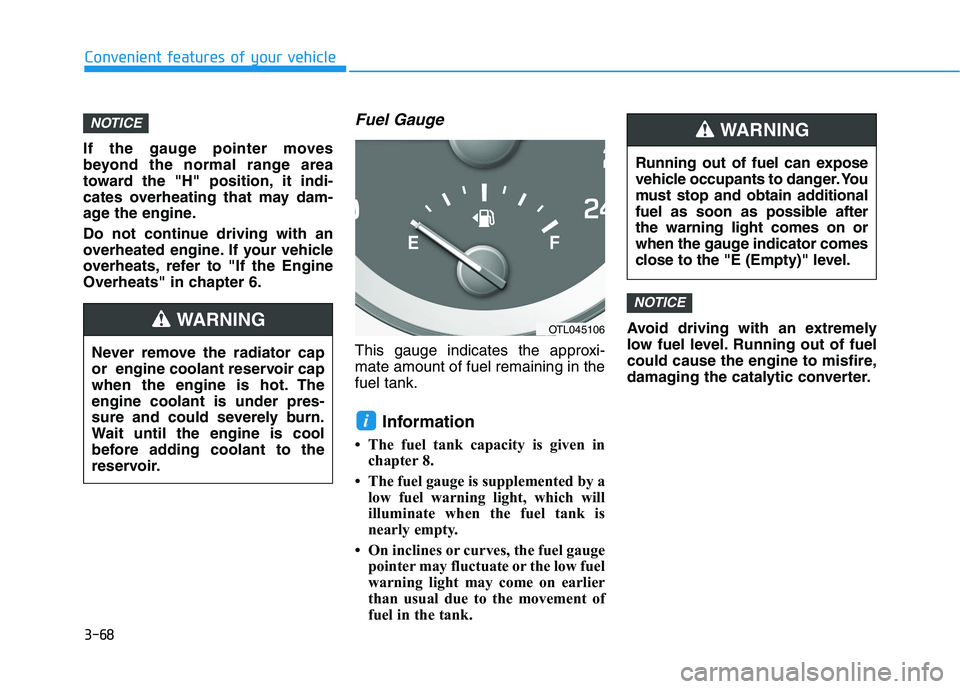
Fuel Gauge
This gauge indicates the approxi-
mate amount of fuel remaining in the
fuel tank.
Information
• The fuel tank capacity is given in
chapter 8.
• The fuel gauge is supplemented by a
low fuel warning light, which will
illuminate when the fuel tank is
nearly empty.
• On inclines or curves, the fuel gauge
pointer may fluctuate or the low fuel
warning light may come on earlier
than usual due to the movement of
fuel in the tank.Avoid driving with an extremely
low fuel level. Running out of fuel
could cause the engine to misfire,
damaging the catalytic converter.
NOTICE
i
NOTICE
Running out of fuel can expose
vehicle occupants to danger. You
must stop and obtain additional
fuel as soon as possible after
the warning light comes on or
when the gauge indicator comes
close to the "E (Empty)" level.
WARNING
Never remove the radiator cap
or engine coolant reservoir cap
when the engine is hot. The
engine coolant is under pres-
sure and could severely burn.
Wait until the engine is cool
before adding coolant to the
reservoir.
WARNINGOTL045106
Page 168 of 546
3-77
Convenient features of your vehicle
3
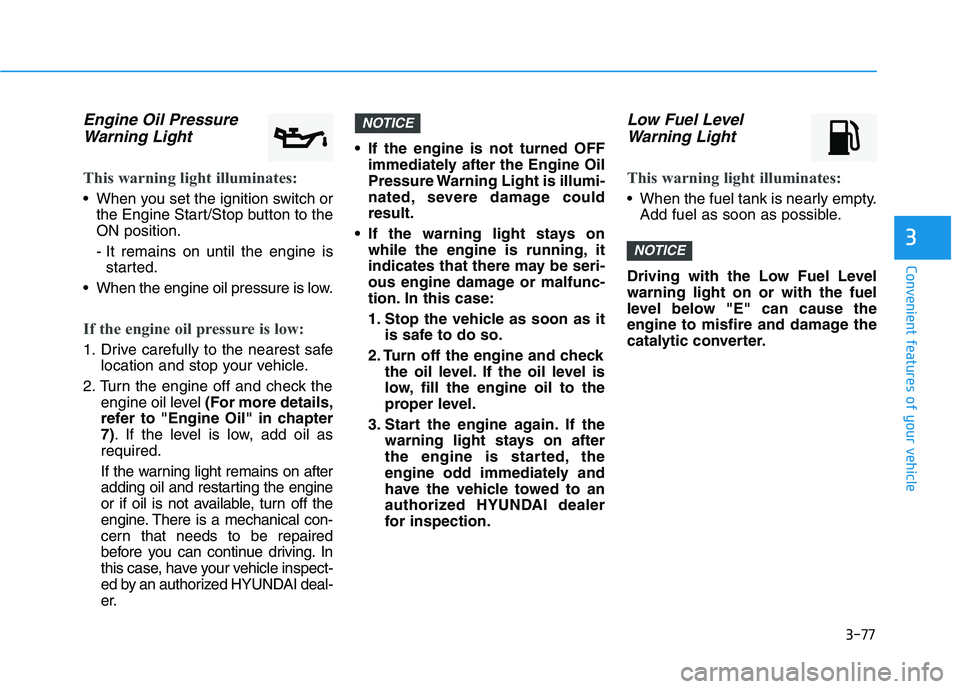
Engine Oil Pressure
Warning Light
This warning light illuminates:
When you set the ignition switch or
the Engine Start/Stop button to the
ON position.
- It remains on until the engine is
started.
When the engine oil pressure is low.
If the engine oil pressure is low:
1. Drive carefully to the nearest safe
location and stop your vehicle.
2. Turn the engine off and check the
engine oil level (For more details,
refer to "Engine Oil" in chapter
7). If the level is low, add oil as
required.
If the warning light remains on after
adding oil and restarting the engine
or if oil is not available, turn off the
engine. There is a mechanical con-
cern that needs to be repaired
before you can continue driving. In
this case, have your vehicle inspect-
ed by an authorized HYUNDAI deal-
er. If the engine is not turned OFF
immediately after the Engine Oil
Pressure Warning Light is illumi-
nated, severe damage could
result.
If the warning light stays on
while the engine is running, it
indicates that there may be seri-
ous engine damage or malfunc-
tion. In this case:
1. Stop the vehicle as soon as it
is safe to do so.
2. Turn off the engine and check
the oil level. If the oil level is
low, fill the engine oil to the
proper level.
3. Start the engine again. If the
warning light stays on after
the engine is started, the
engine odd immediately and
have the vehicle towed to an
authorized HYUNDAI dealer
for inspection.
Low Fuel Level
Warning Light
This warning light illuminates:
When the fuel tank is nearly empty.
Add fuel as soon as possible.
Driving with the Low Fuel Level
warning light on or with the fuel
level below "E" can cause the
engine to misfire and damage the
catalytic converter.
NOTICE
NOTICE
Page 200 of 546
3-109
Convenient features of your vehicle
3
Headlamp position ( )
The headlamp, parking lamp, license
plate lamp and instrument panel lamp
are turned ON.
Information
The ignition switch must be in the ON
position to turn on the headlamp.
High beam operation
To turn on the high beam headlamp,
push the lever away from you. The
lever will return to its original position.
The high beam indicator will light
when the headlamp high beams are
switched on.
To turn off the high beam headlamp,
pull the lever towards you. The low
beams will turn on.To flash the high beam headlamp,
pull the lever towards you, then
release the lever. The high beams
will remain ON as long as you hold
the lever towards you.
i
OTL045317C
OTL045255C
OTL045254C
Do not use high beam when there
are other vehicles approaching
you. Using high beam could
obstruct the other driver’s vision.
WARNING
Page 201 of 546
3-110
Convenient features of your vehicle
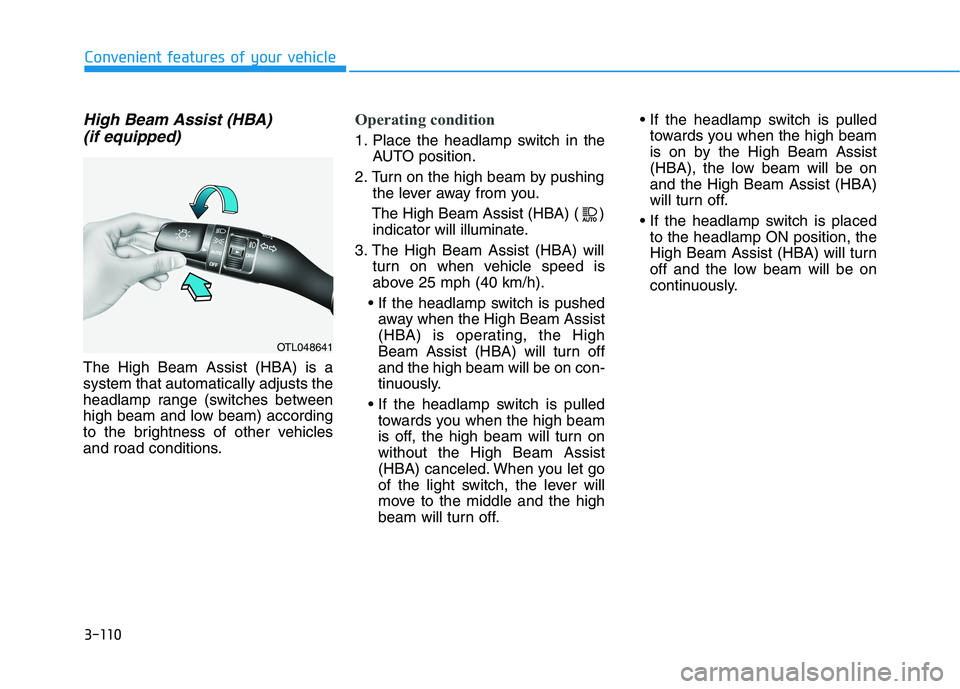
High Beam Assist (HBA)
(if equipped)
The High Beam Assist (HBA) is a
system that automatically adjusts the
headlamp range (switches between
high beam and low beam) according
to the brightness of other vehicles
and road conditions.
Operating condition
1. Place the headlamp switch in the
AUTO position.
2. Turn on the high beam by pushing
the lever away from you.
The High Beam Assist (HBA) ( )
indicator will illuminate.
3. The High Beam Assist (HBA) will
turn on when vehicle speed is
above 25 mph (40 km/h).
away when the High Beam Assist
(HBA) is operating, the High
Beam Assist (HBA) will turn off
and the high beam will be on con-
tinuously.
towards you when the high beam
is off, the high beam will turn on
without the High Beam Assist
(HBA) canceled. When you let go
of the light switch, the lever will
move to the middle and the high
beam will turn off.
towards you when the high beam
is on by the High Beam Assist
(HBA), the low beam will be on
and the High Beam Assist (HBA)
will turn off.
to the headlamp ON position, the
High Beam Assist (HBA) will turn
off and the low beam will be on
continuously.
OTL048641