2021 HYUNDAI SONATA LIMITED check engine light
[x] Cancel search: check engine lightPage 168 of 546
Convenient Features5-38
ThefT-AlArm SyS T em
This system helps to protect your vehicle
and valuables. The horn will sound and
the hazard warning lights will blink
continuously if any of the following
occur:
- A door is opened without using the
r
emote key or smart key.
- The trunk is opened without using the r
emote key or smart key.
- The engine hood is opened.
The alarm con
tinues for 30 seconds, then
the system resets. To turn off the alarm,
unlock the doors with the remote key or
smart key.
The Theft Alarm System automatically
sets 30 seconds after you lock the doors
and the trunk. For the system to activate,
you must lock the doors and the trunk
from outside the vehicle with the remote
key or smart key or by pressing the
button on the outside of the door handle
with the smart key in your possession.
The hazard warning lights will blink and
the chime will sound once to indicate the
system is armed.
Once the security system is set, opening
any door, the trunk, or the hood without
using the remote key or smart key will
cause the alarm to activate.
The Theft Alarm System will not set if the
hood, the trunk, or any door is not fully
closed. If the system will not set, check
the hood, the trunk, or the doors are fully
closed.
Do not attempt to alter this system or
add other devices to it. Information
• Do not lock the doors until all
passengers have left the vehicle. If the
remaining passenger leaves the vehicle
when the system is armed, the alarm
will be activated.
• If the vehicle is not disarmed with the
remote key or smart key, open the
doors by using the mechanical key
and place the ignition switch in the
ON position (for remote key) or start
the engine (for smart key) by directly
pressing the ignition switch with the
smart key.
• If the system is disarmed by unlocking
the vehicle, but neither a door or the
trunk is opened within 30 seconds, the
doors will relock and the system will
rearm automatically.
Page 194 of 546
Convenient Features5-64
exterior FeAtures
Hood
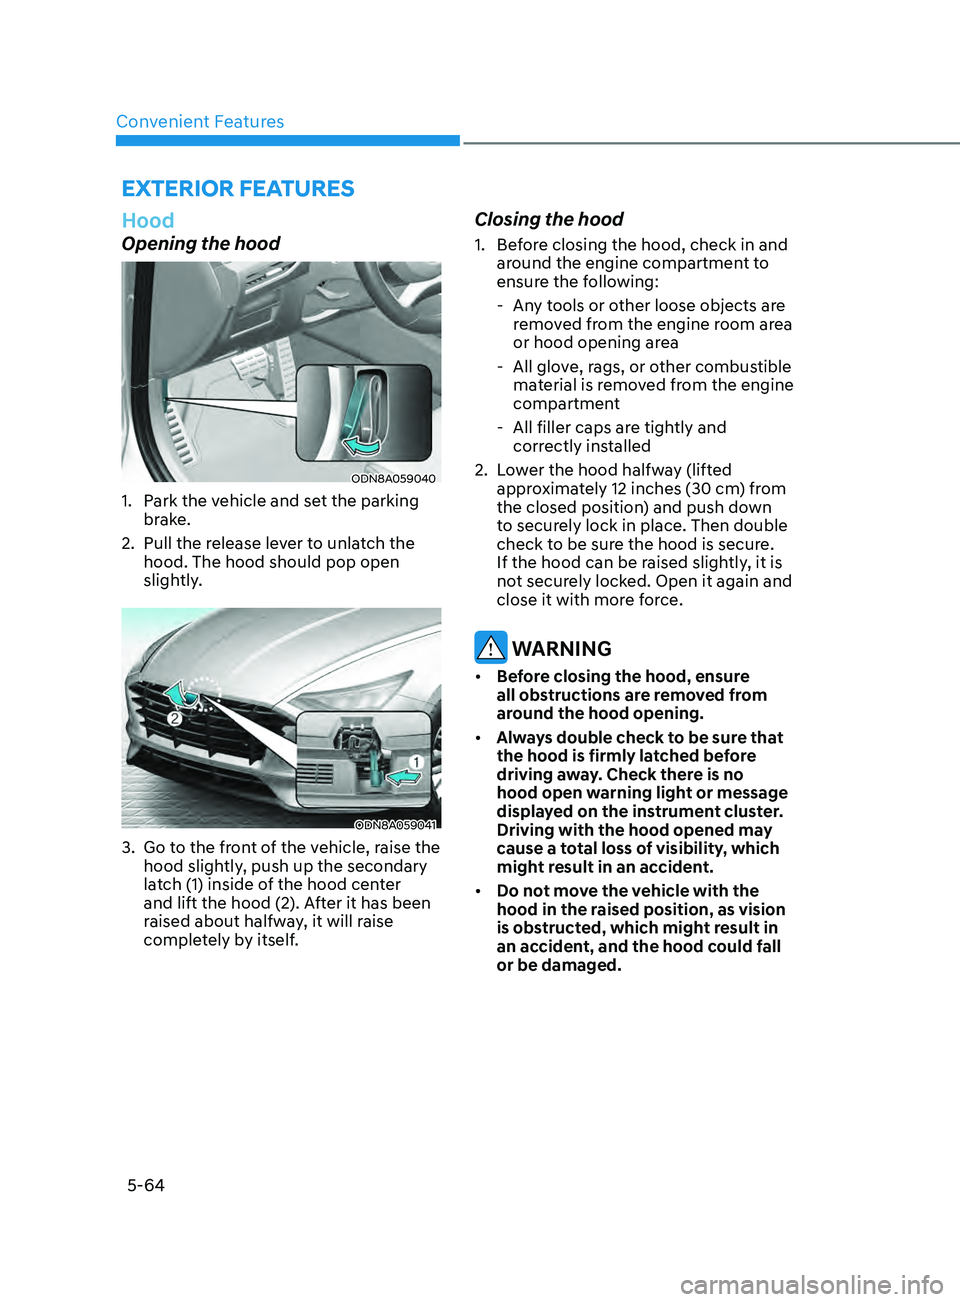
Opening the hood
ODN8A059040
1. Park the vehicle and set the parking brake.
2.
Pull the r
elease lever to unlatch the
hood. The hood should pop open
slightly.
ODN8A059041
3. Go to the front of the vehicle, raise the hood slightly, push up the secondary
latch (1) inside of the hood center
and lift the hood (2). After it has been
raised about halfway, it will raise
completely by itself.
Closing the hood
1. Before closing the hood, check in and around the engine compartment to
ensure the following:
- An
y tools or other loose objects are
removed from the engine room area
or hood opening area
- All glo
ve, rags, or other combustible
material is removed from the engine
compartment
- All filler caps ar
e tightly and
correctly installed
2.
L
ower the hood halfway (lifted
approximately 12 inches (30 cm) from
the closed position) and push down
to securely lock in place. Then double
check to be sure the hood is secure.
If the hood can be raised slightly, it is
not securely locked. Open it again and
close it with more force.
WARNING
• Before closing the hood, ensure
all obstructions are removed from
around the hood opening.
• Always double check to be sure that
the hood is firmly latched before
driving away. Check there is no
hood open warning light or message
displayed on the instrument cluster.
Driving with the hood opened may
cause a total loss of visibility, which
might result in an accident.
• Do not move the vehicle with the
hood in the raised position, as vision
is obstructed, which might result in
an accident, and the hood could fall
or be damaged.
Page 201 of 546
05
5-71
• Do not get back into a vehicle
once you have begun refueling.
You can generate a buildup of
static electricity by touching,
rubbing or sliding against any item
or fabric capable of producing
static electricity. Static electricity
discharge can ignite fuel vapors
causing a fire. If you must re-enter
the vehicle, you should once again
eliminate potentially dangerous
static electricity discharge by
touching a metal part of the vehicle,
away from the fuel filler neck, nozzle
or other gasoline source, with your
bare hand.
• When using an approved portable
fuel container, be sure to place the
container on the ground prior to
refueling. Static electricity discharge
from the container can ignite fuel
vapors causing a fire.
Once refueling has begun, contact
between your bare hand and the
vehicle should be maintained until
the filling is complete.
• Use only approved portable plastic
fuel containers designed to carry and
store gasoline.
• When refueling, always move the
shift button to the P (Park) position,
set the parking brake, and place
the ignition switch to the LOCK/
OFF position. Sparks produced by
electrical components related to the
engine can ignite fuel vapors causing
a fire.
• Do not use matches or a lighter and
do not smoke or leave a lit cigarette
in your vehicle while at a gas station,
especially during refueling.
• Do not over-fill or top-off your
vehicle tank, which can cause
gasoline spillage.• If a fire breaks out during refueling,
leave the vicinity of the vehicle, and
immediately contact the manager
of the gas station and then contact
the local fire department. Follow any
safety instructions they provide.
• If pressurized fuel sprays out, it can
cover your clothes or skin and thus
subject you to the risk of fire and
burns. Always remove the fuel cap
carefully and slowly. If the cap is
venting fuel or if you hear a hissing
sound, wait until the condition stops
before completely removing the cap.
• Always check that the fuel cap is
installed securely to prevent fuel
spillage in the event of an accident.
Information
Make sure to refuel your vehicle according
to the “Fuel Requirements” suggested in
the Introduction chapter.
NOTICE
• Do not spill fuel on the exterior
surfaces of the vehicle. Any type of
fuel spilled on painted surfaces may
damage the paint.
• If the fuel filler cap requires
replacement, use only a genuine
HYUNDAI cap or the equivalent
specified for your vehicle. An
incorrect fuel filler cap can result
in a serious malfunction of the fuel
system or emission control system.
Page 278 of 546
![HYUNDAI SONATA LIMITED 2021 Owners Manual Convenient Features
5-148
Wireless Cellular Phone
Charging System (if equipped)
ODN8059223
[A]: Indicator light, [B]: Charging pad
On certain models, the vehicle comes
equipped with a wireless cellu HYUNDAI SONATA LIMITED 2021 Owners Manual Convenient Features
5-148
Wireless Cellular Phone
Charging System (if equipped)
ODN8059223
[A]: Indicator light, [B]: Charging pad
On certain models, the vehicle comes
equipped with a wireless cellu](/manual-img/35/56193/w960_56193-277.png)
Convenient Features
5-148
Wireless Cellular Phone
Charging System (if equipped)
ODN8059223
[A]: Indicator light, [B]: Charging pad
On certain models, the vehicle comes
equipped with a wireless cellular phone
charger.
The system is available when all doors
are closed, and when the ignition switch
is ON.
To charge a cellular phone
The wireless cellular phone charging
system charges only the Qi-enabled
cellular phones. Read the label on the
cellular phone accessory cover or visit
your cellular phone manufacturer’s
website to check whether your cellular
phone supports the Qi technology.
The wireless charging process starts
when you put a Qi-enabled cellular
phone on the wireless charging unit.
1.
R
emove other items, including the
smart key, from the wireless charging
unit. If not, the wireless charging
process may be interrupted. Place
the cellular phone on the center of
the charging pad (
).
2.
The indica
tor light is orange when
the cellular phone is charging. The
indicator light turns green when
phone charging is complete.
3.
Y
ou can turn ON or OFF the wireless
charging function in the user settings
mode on the instrument cluster. For
further information, refer to the “LCD
Display Modes” in this chapter.
If your cellular phone is not charging:
-
Sligh
tly change the position of the
cellular phone on the charging pad.
-
Mak
e sure the indicator light is
orange.
The indicator light will blink orange for 10
seconds if there is a malfunction in the
wireless charging system.
In this case, temporarily stop the
charging process, and re-attempt to
charge your cellular phone again.
The system warns you with a message
on the LCD display if the cellular phone
is still on the wireless charging unit after
the engine is turned OFF and the front
door is opened.
Information
For some manufacturers’ cellular phones,
the system may not warn you even though
the cellular phone is left on the wireless
charging unit. This is due to the particular
characteristic of the cellular phone and
not a malfunction of the wireless charging.
NOTICE
• The wireless cellular phone charging system may not support certain
cellular phones, which are not
verified for the Qi specification (
).
•
When placing y
our cellular phone
on the charging mat, position the
phone in the middle of the mat for
optimal charging performance. If
your cellular phone is off to the side,
the charging rate may be less and in
some cases the cellular phone may
experience higher heat conduction.
•
In some cases, the wir
eless charging
may stop temporarily when the
Remote Key or Smart Key is used,
either when starting the vehicle or
locking/unlocking the doors, etc.
•
When char
ging certain cellular
phones, the charging indicator
may not change to green when the
cellular phone is fully charged.
Page 291 of 546
06
6 -7
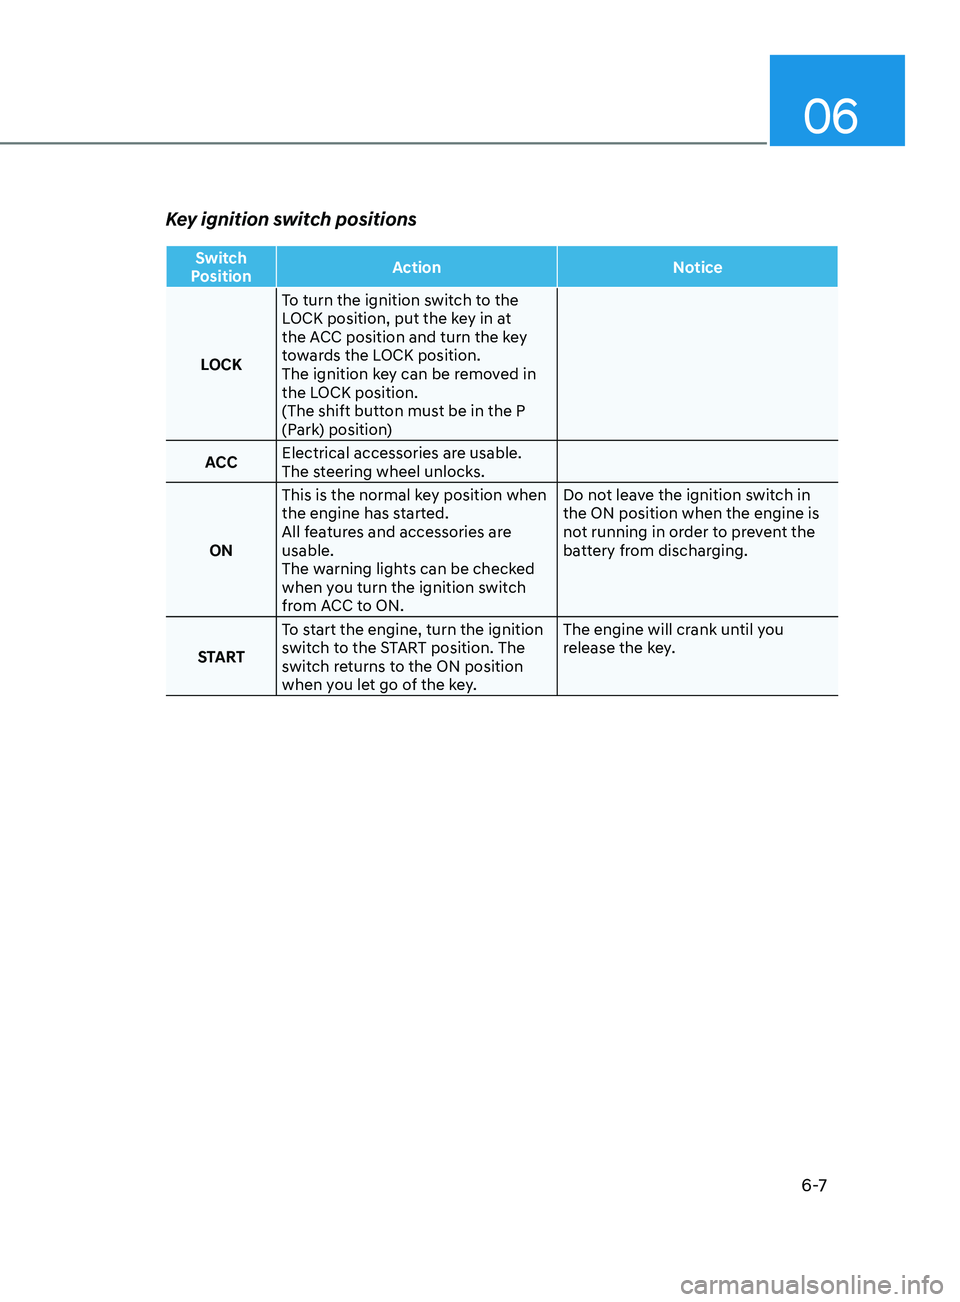
Key ignition switch positions
Switch
Position Action
Notice
LOCK To turn the ignition switch to the
LOCK position, put the key in at
the ACC position and turn the key
towards the LOCK position.
The ignition key can be removed in
the LOCK position.
(The shift button must be in the P
(Park) position)
ACC Electrical accessories are usable.
The steering wheel unlocks.
ON This is the normal key position when
the engine has started.
All features and accessories are
usable.
The warning lights can be checked
when you turn the ignition switch
from ACC to ON. Do not leave the ignition switch in
the ON position when the engine is
not running in order to prevent the
battery from discharging.
START To start the engine, turn the ignition
switch to the START position. The
switch returns to the ON position
when you let go of the key. The engine will crank until you
release the key.
Page 294 of 546
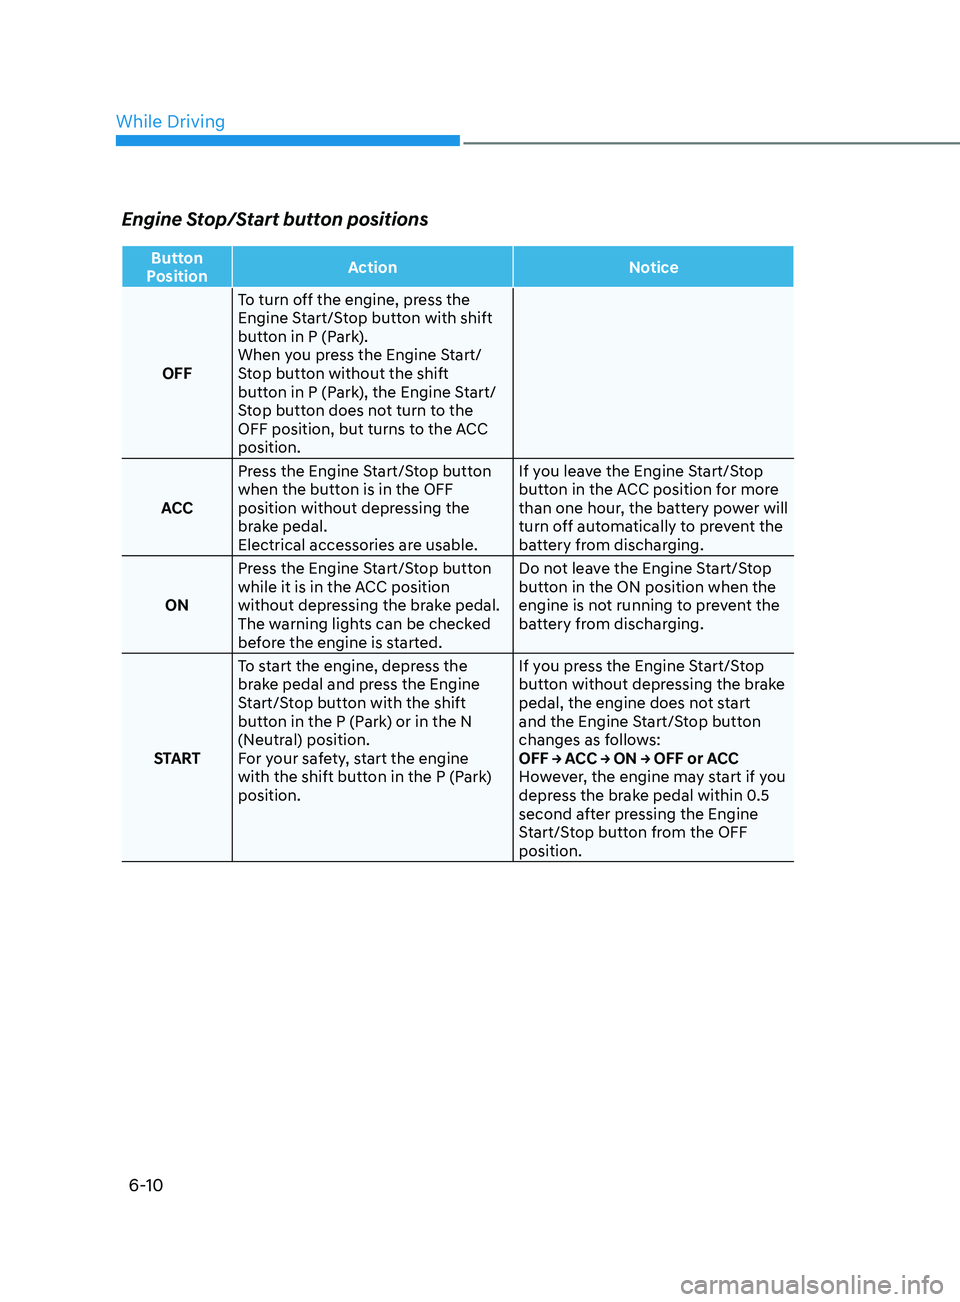
6-10
Engine Stop/Start button positions
Button
Position Action
Notice
OFF To turn off the engine, press the
Engine Start/Stop button with shift
button in P (Park).
When you press the Engine Start/
Stop button without the shift
button in P (Park), the Engine Start/
Stop button does not turn to the
OFF position, but turns to the ACC
position.
ACC Press the Engine Start/Stop button
when the button is in the OFF
position without depressing the
brake pedal.
Electrical accessories are usable. If you leave the Engine Start/Stop
button in the ACC position for more
than one hour, the battery power will
turn off automatically to prevent the
battery from discharging.
ON Press the Engine Start/Stop button
while it is in the ACC position
without depressing the brake pedal.
The warning lights can be checked
before the engine is started. Do not leave the Engine Start/Stop
button in the ON position when the
engine is not running to prevent the
battery from discharging.
START To start the engine, depress the
brake pedal and press the Engine
Start/Stop button with the shift
button in the P (Park) or in the N
(Neutral) position.
For your safety, start the engine
with the shift button in the P (Park)
position. If you press the Engine Start/Stop
button without depressing the brake
pedal, the engine does not start
and the Engine Start/Stop button
changes as follows:
OFF → ACC → ON → OFF or ACC
However, the engine may start if you
depress the brake pedal within 0.5
second after pressing the Engine
Start/Stop button from the OFF
position.
While Driving
Page 302 of 546
6-18
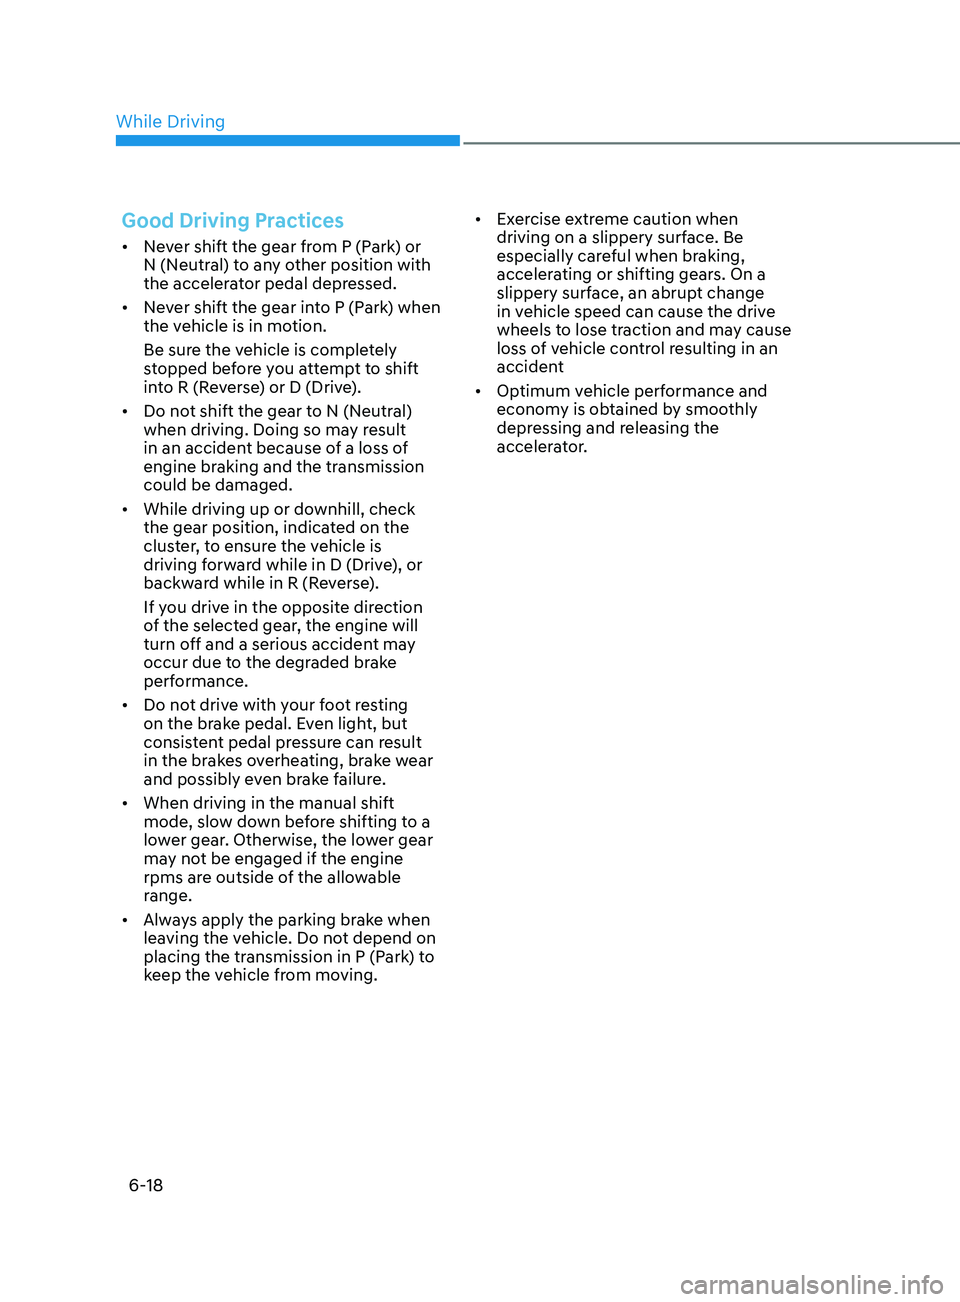
Good Driving Practices
• Never shift the gear from P (Park) or
N (Neutral) to any other position with
the accelerator pedal depressed.
• Never shift the gear into P (Park) when
the vehicle is in motion.
Be sure the vehicle is completely
stopped before you attempt to shift
into R (Reverse) or D (Drive).
• Do not shift the gear to N (Neutral)
when driving. Doing so may result
in an accident because of a loss of
engine braking and the transmission
could be damaged.
• While driving up or downhill, check
the gear position, indicated on the
cluster, to ensure the vehicle is
driving forward while in D (Drive), or
backward while in R (Reverse).
If y
ou drive in the opposite direction
of the selected gear, the engine will
turn off and a serious accident may
occur due to the degraded brake
performance.
• Do not drive with your foot resting
on the brake pedal. Even light, but
consistent pedal pressure can result
in the brakes overheating, brake wear
and possibly even brake failure.
• When driving in the manual shift
mode, slow down before shifting to a
lower gear. Otherwise, the lower gear
may not be engaged if the engine
rpms are outside of the allowable
range.
• Always apply the parking brake when
leaving the vehicle. Do not depend on
placing the transmission in P (Park) to
keep the vehicle from moving. •
Exercise extreme caution when
driving on a slippery surface. Be
especially careful when braking,
accelerating or shifting gears. On a
slippery surface, an abrupt change
in vehicle speed can cause the drive
wheels to lose traction and may cause
loss of vehicle control resulting in an
accident
• Optimum vehicle performance and
economy is obtained by smoothly
depressing and releasing the
accelerator.
While Driving
Page 308 of 546
6-24
Parking brake warning light
Check the parking brake
warning light by placing the
ignition switch to the ON
position (do not start the
engine).
This light will be illuminated when the
parking brake is applied with the ignition
switch in the START or ON position.
If the parking brake warning light
remains on after the parking brake
is released while engine is running,
there may be a malfunction in the
brake system. Immediate attention is
necessary.
If at all possible, cease driving the vehicle
immediately. If that is not possible,
use extreme caution while operating
the vehicle and only continue to drive
the vehicle until you can reach a safe
location.
Emergency braking
If there is a problem with the brake
pedal while driving, emergency braking
is possible by pulling up and holding
the EPB switch. Braking is possible only
while you are holding the EPB switch.
However, braking distance will be longer
than normal.
WARNING
Do not operate the parking brake while
the vehicle is moving except in an
emergency situation. It could damage
the brake system and lead to a severe
accident.
Information
During emergency braking, the parking
brake warning light will illuminate to
indicate that the system is operating.
NOTICE
If you continuously notice a noise or
burning smell when the EPB is used
for emergency braking, have system
checked by an authorized HYUNDAI
dealer.
When the EPB (Electronic Parking Brake)
does not release
If the EPB does not release normally,
contact an authorized HYUNDAI dealer
by loading the vehicle on a flatbed tow
truck and have the system checked.
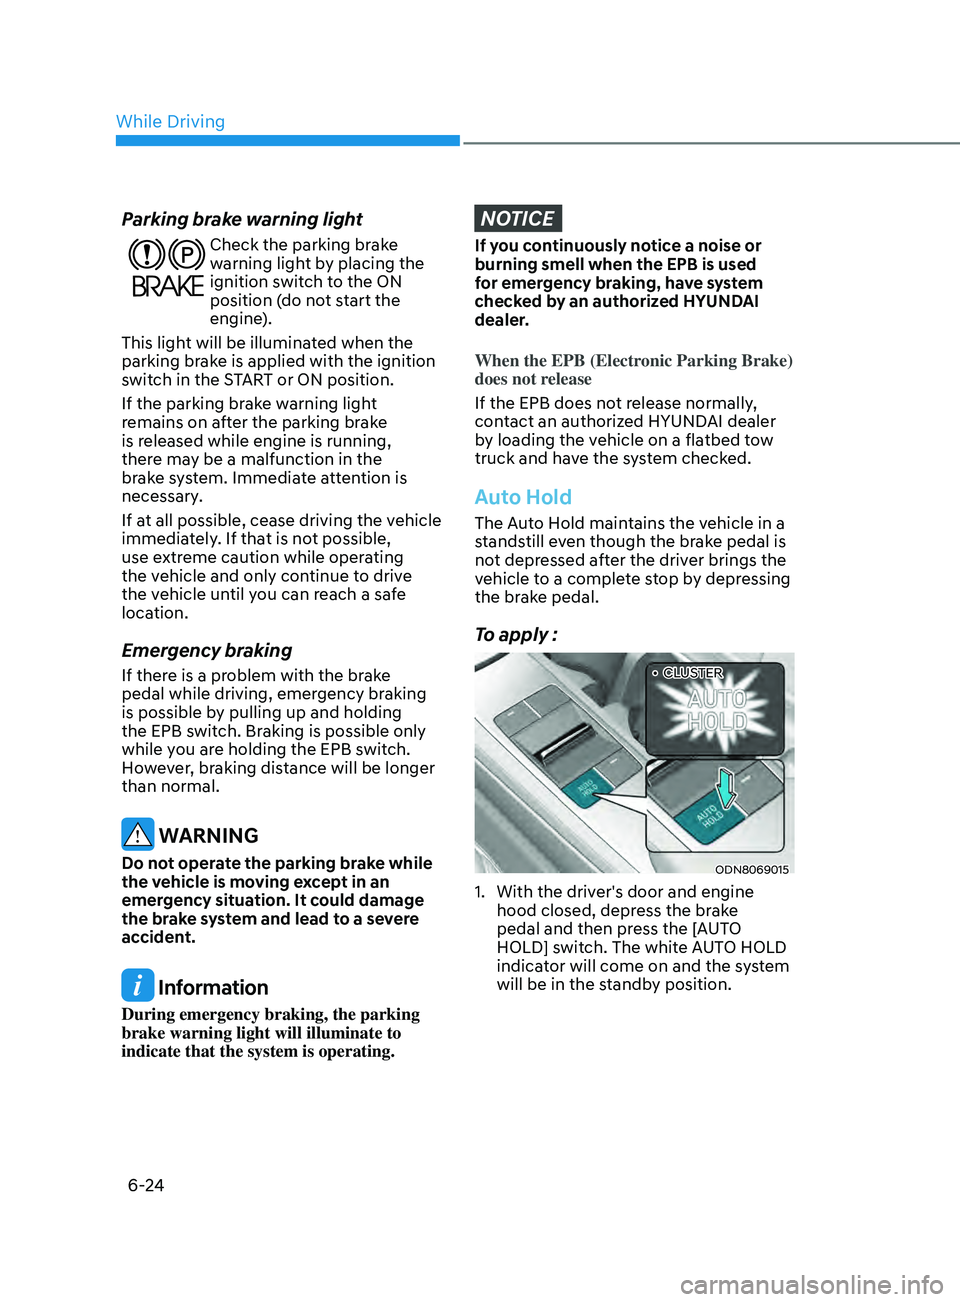
Auto Hold
The Auto Hold maintains the vehicle in a
standstill even though the brake pedal is
not depressed after the driver brings the
vehicle to a complete stop by depressing
the brake pedal.
To apply :
ODN8069015
1. With the driv er's door and engine
hood closed, depress the brake
pedal and then press the [AUTO
HOLD] switch. The white AUTO HOLD
indicator will come on and the system
will be in the standby position.
••CLUSTER
While Driving