2021 HYUNDAI SANTA FE garage
[x] Cancel search: garagePage 190 of 636
![HYUNDAI SANTA FE 2021 Owners Manual Convenient features
5-46
Day/night rearview mirror
(if equipped)
OTM050018[A]: Day, [B]: Night
Make this adjustment before you start
driving and while the day/night lever is in
the day position.
P HYUNDAI SANTA FE 2021 Owners Manual Convenient features
5-46
Day/night rearview mirror
(if equipped)
OTM050018[A]: Day, [B]: Night
Make this adjustment before you start
driving and while the day/night lever is in
the day position.
P](/manual-img/35/41163/w960_41163-189.png)
Convenient features
5-46
Day/night rearview mirror
(if equipped)
OTM050018[A]: Day, [B]: Night
Make this adjustment before you start
driving and while the day/night lever is in
the day position.
Pull the day/night lever towards you to
reduce glare from the headlamps of the
vehicles behind you during night driving.
Remember that you lose some rearview
clarity in the night position.
Electrochromic mirror (ECM) with
HomeLink® system (if equipped)
Your vehicle may be equipped with
a Gentex Automatic-Dimming Mirror
with an Integrated HomeLink® Wireless
Control System.
During nighttime driving, this feature
will automatically detect and reduce
rearview mirror glare. The HomeLink®
Universal Transceiver allows you to
activate your garage door(s), electric
gate, home lighting, etc.
OTMA050002
(1) HomeLink Channel 1
(2)
HomeLink Channel 2
(3
)
HomeLink Channel 3
(4
)
Garage Door Opener S
tatus Indicator:
Closing or Closed
(5)
HomeLink Oper
ation Indicator
(6)
Garage Door Opener S
tatus Indicator:
Opening or Opened
(7)
HomeLink U
ser Interface Indicator
Automatic-Dimming Night Vision Safety™
(NVS
®) Mirror (if equipped)
The NVS® Mirror automatically reduces
glare by monitoring light levels in the
front and the rear of the vehicle. Any
object that obstructs either light sensor
will degrade the automatic dimming
control feature.
For more information regarding NVS®
mirrors and other applications, please
refer to the Gentex website:
www.gentex.com
Your mirror will automatically dim
upon detecting glare from the vehicles
traveling behind you.
The mirror defaults to the ON position
each time the vehicle is started.
Page 191 of 636
05
5-47
Integrated HomeLink® Wireless Control
System
The HomeLink® Wireless Control System
provides a convenient way to replace
up to three hand held radio-frequency
transmitters used to activate compatible
devices such as gate operators, garage
door openers, entry door locks, security
systems, and home lighting.
NOTICE
HomeLink® operates while the ignition
switch is in the ACC or ON position
for safety reasons. It is to prevent
unintentional security problems from
happening when the vehicle is parked
outside the garage.
WARNING
Before programming HomeLink® to a
garage door opener or gate operator,
make sure people and objects are out
of the way of the device to prevent
potential harm or damage. Do not
use the HomeLink® with any garage
door opener that lacks the safety
stop and reverse features required
by U.S. federal safety standards (this
includes any garage door opener model
manufactured before April 1, 1982).
A garage door that cannot detect an
object - signaling the door to stop and
reverse - does not meet current U.S.
federal safety standards. Using a garage
door opener without these features
increases the risk of serious injury or
death.
For more information, contact
HomeLink® at www.homelink.com, or
call Home-Link customer support at
1-800-355-3515.
It is also recommended that a new
battery be replaced in the handheld
transmitter of the device being trained
to HomeLink® for quicker training and
accurate transmission of the radio
frequency. 1. Programming HomeLink
®
The following steps show how to
program HomeLink. If you have any
questions or are having difficulty
programming your HomeLink buttons,
refer to the HomeLink website or call the
HomeLink customer support toll-free
number. Do this before going back to the
dealer who sold you the car.
•
Visit the HomeLink website at: www.
homelink.com. Then at the top of the
page, choose your vehicle make. Then
watch the You Tube video, and/or
access additional website information.
• If you choose to access the website
via your cell phone, scan the QR code.
• Or call HomeLink customer support
at 1-800-355-3515 (Please have the
vehicle make/model and the opener
device make/model readily available.)
Page 192 of 636
Convenient features
5-48
1) Programming Preparation
OTMA050003
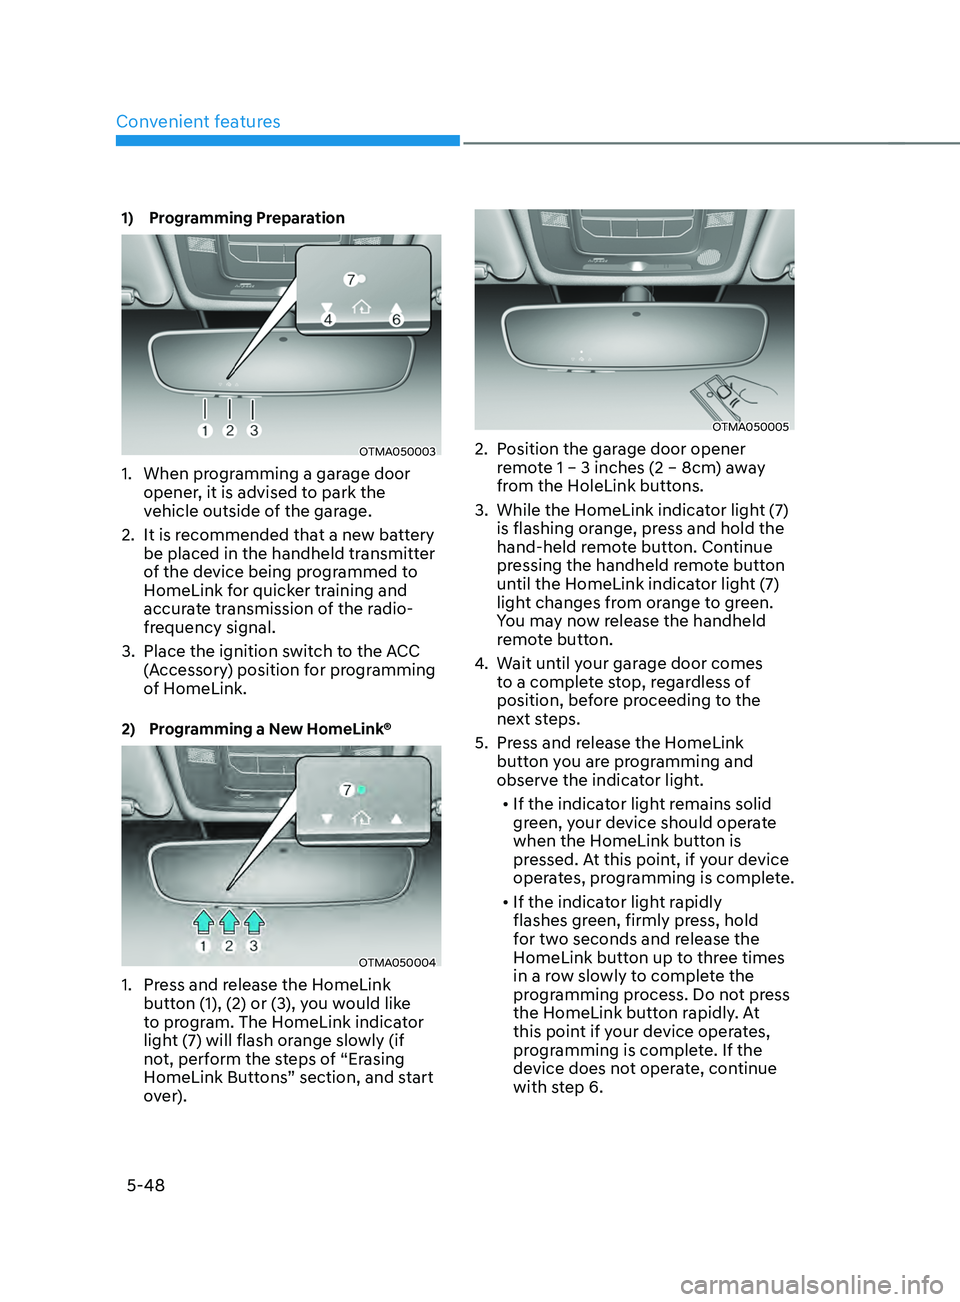
1. When programming a garage door
opener, it is advised to park the
vehicle outside of the garage.
2.
It is recommended tha
t a new battery
be placed in the handheld transmitter
of the device being programmed to
HomeLink for quicker training and
accurate transmission of the radio-
frequency signal.
3.
Place the ignition swit
ch to the ACC
(Accessory) position for programming
of HomeLink.
2) Programming a New HomeLink®
OTMA050004
1. Press and release the HomeLink
butt on (1), (2) or (3), you would like
to program. The HomeLink indicator
light (7) will flash orange slowly (if
not, perform the steps of “Erasing
HomeLink Buttons” section, and start
over).
OTMA050005
2. Position the garage door opener
r emote 1 – 3 inches (2 – 8cm) away
from the HoleLink buttons.
3.
While the HomeLink indica
tor light (7)
is flashing orange, press and hold the
hand-held remote button. Continue
pressing the handheld remote button
until the HomeLink indicator light (7)
light changes from orange to green.
You may now release the handheld
remote button.
4.
Wait un
til your garage door comes
to a complete stop, regardless of
position, before proceeding to the
next steps.
5.
Press and r
elease the HomeLink
button you are programming and
observe the indicator light.
• If the indicator light remains solid
green, your device should operate
when the HomeLink button is
pressed. At this point, if your device
operates, programming is complete.
• If the indicator light rapidly
flashes green, firmly press, hold
for two seconds and release the
HomeLink button up to three times
in a row slowly to complete the
programming process. Do not press
the HomeLink button rapidly. At
this point if your device operates,
programming is complete. If the
device does not operate, continue
with step 6.
Page 193 of 636
05
5-49
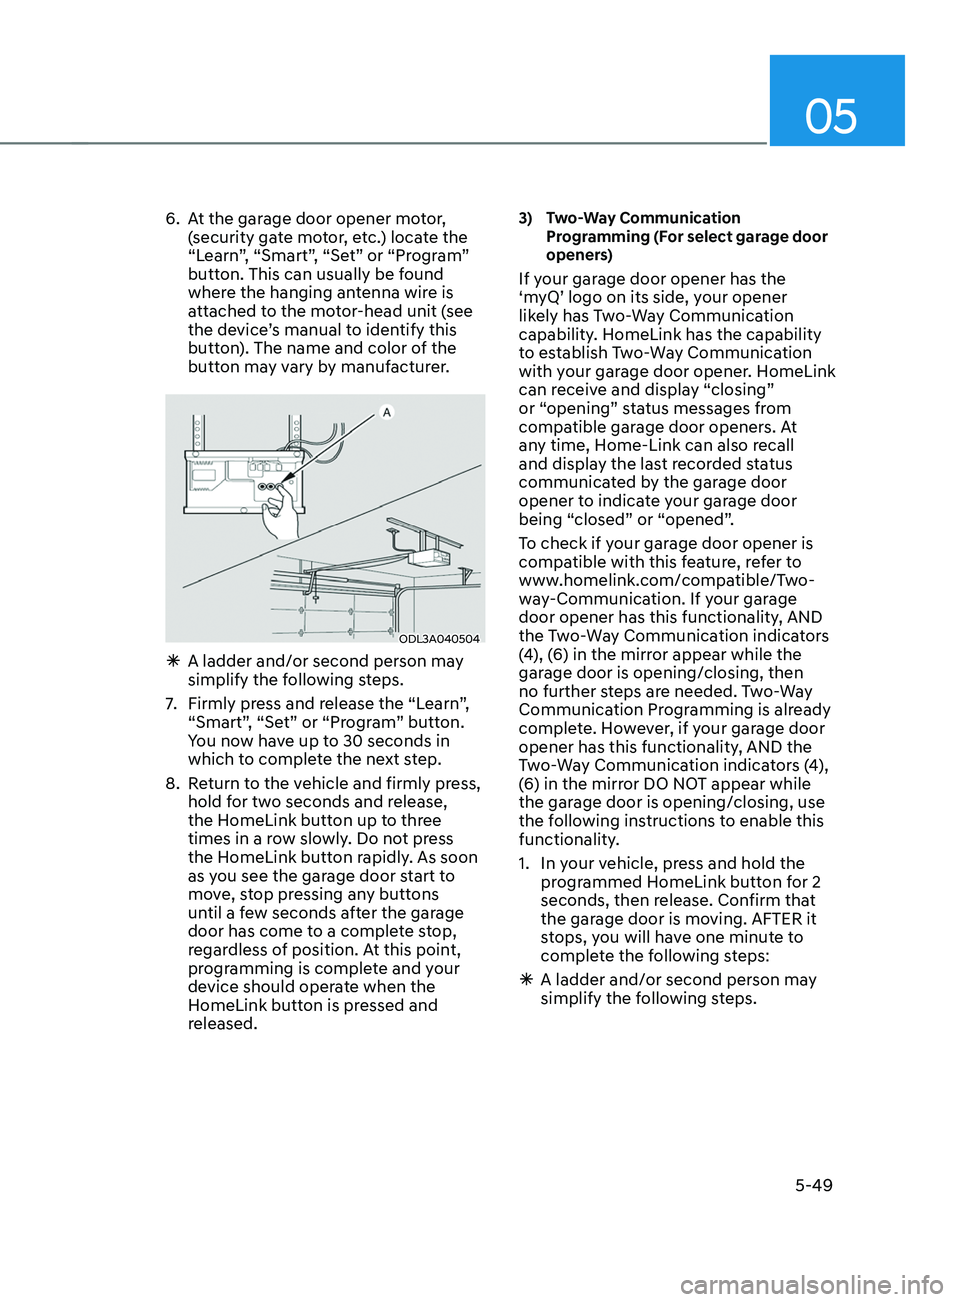
6. At the garage door opener motor,
(security gate motor, etc.) locate the
“Learn”, “Smart”, “Set” or “Program”
button. This can usually be found
where the hanging antenna wire is
attached to the motor-head unit (see
the device’s manual to identify this
button). The name and color of the
button may vary by manufacturer.
ODL3A040504
à A ladder and/or second person ma y
simplify the following steps.
7.
Firmly press and r
elease the “Learn”,
“Smart”, “Set” or “Program” button.
You now have up to 30 seconds in
which to complete the next step.
8.
Re
turn to the vehicle and firmly press,
hold for two seconds and release,
the HomeLink button up to three
times in a row slowly. Do not press
the HomeLink button rapidly. As soon
as you see the garage door start to
move, stop pressing any buttons
until a few seconds after the garage
door has come to a complete stop,
regardless of position. At this point,
programming is complete and your
device should operate when the
HomeLink button is pressed and
released.
3) Two-Way Communication
Pr
ogramming (For select garage door
openers)
If your garage door opener has the
‘myQ’ logo on its side, your opener
likely has Two-Way Communication
capability. HomeLink has the capability
to establish Two-Way Communication
with your garage door opener. HomeLink
can receive and display “closing”
or “opening” status messages from
compatible garage door openers. At
any time, Home-Link can also recall
and display the last recorded status
communicated by the garage door
opener to indicate your garage door
being “closed” or “opened”.
To check if your garage door opener is
compatible with this feature, refer to
www.homelink.com/compatible/Two-
way-Communication. If your garage
door opener has this functionality, AND
the Two-Way Communication indicators
(4), (6) in the mirror appear while the
garage door is opening/closing, then
no further steps are needed. Two-Way
Communication Programming is already
complete. However, if your garage door
opener has this functionality, AND the
Two-Way Communication indicators (4),
(6) in the mirror DO NOT appear while
the garage door is opening/closing, use
the following instructions to enable this
functionality.
1.
In your v
ehicle, press and hold the
programmed HomeLink button for 2
seconds, then release. Confirm that
the garage door is moving. AFTER it
stops, you will have one minute to
complete the following steps:
à A ladder and/or second person ma
y
simplify the following steps.
Page 194 of 636
Convenient features
5-50
2. On your garage door opener in your
garage, locate the “Learn” button
(usually near where the hanging
antenna wire is attached to the garage
door opener). If there is difficulty
locating this button, reference the
device’s owner’s manual.
3.
Press and r
elease the “Learn” button.
4.
A light on y
our garage door opener
may flash, and your Two-Way
Communication indicators (4), (6) in
your vehicle may flash, confirming
completion of the process.
5.
Re
turn to the vehicle and firmly
press and release the programmed
HomeLink button to activate
your garage door. The Two-Way
Communication indicators (4), (6)
flash in orange when the door is
moving. Do not make any additional
button presses until AFTER the garage
door has come to a complete stop.
6.
Your T
wo-Way Communication
programming is now complete.
Information
If your garage door opener has Two-
Way Communication functionality,
it is possible for HomeLink to stop
functioning the garage door shortly
after initial programming, IF the Two-
Way Communication Programming
wasn’t properly completed. This
usually happens after the first 10 times
a programmed HomeLink button is
pressed. If you experience this, completing
the “Programming a New HomeLink
Button” and “Two-Way Communication
Programming” will restore door
operation.
4) Canadian Pr ogramming
Canadian radio-frequency laws require
transmitter remote signals to “time-
out” (or quit) after a couple seconds of
transmission, which may not be long
enough for HomeLink to pick up the signal
during programming.
If you live in Canada or you are having
difficulties programming a gate operator
or garage door opener by using the
programming procedures, replace
“Programming a New HomeLink Button”
step 3 with the following:
While the HomeLink indicator light (7) is
flashing orange, press and release (“cycle”)
your device’s handheld remote every two
seconds until the HomeLink indicator light
(7) changes from orange to green. You may
now release the hand-held remote button.
Then proceed with “Programming a New
HomeLink Button” step 4.
Page 195 of 636
05
5-51
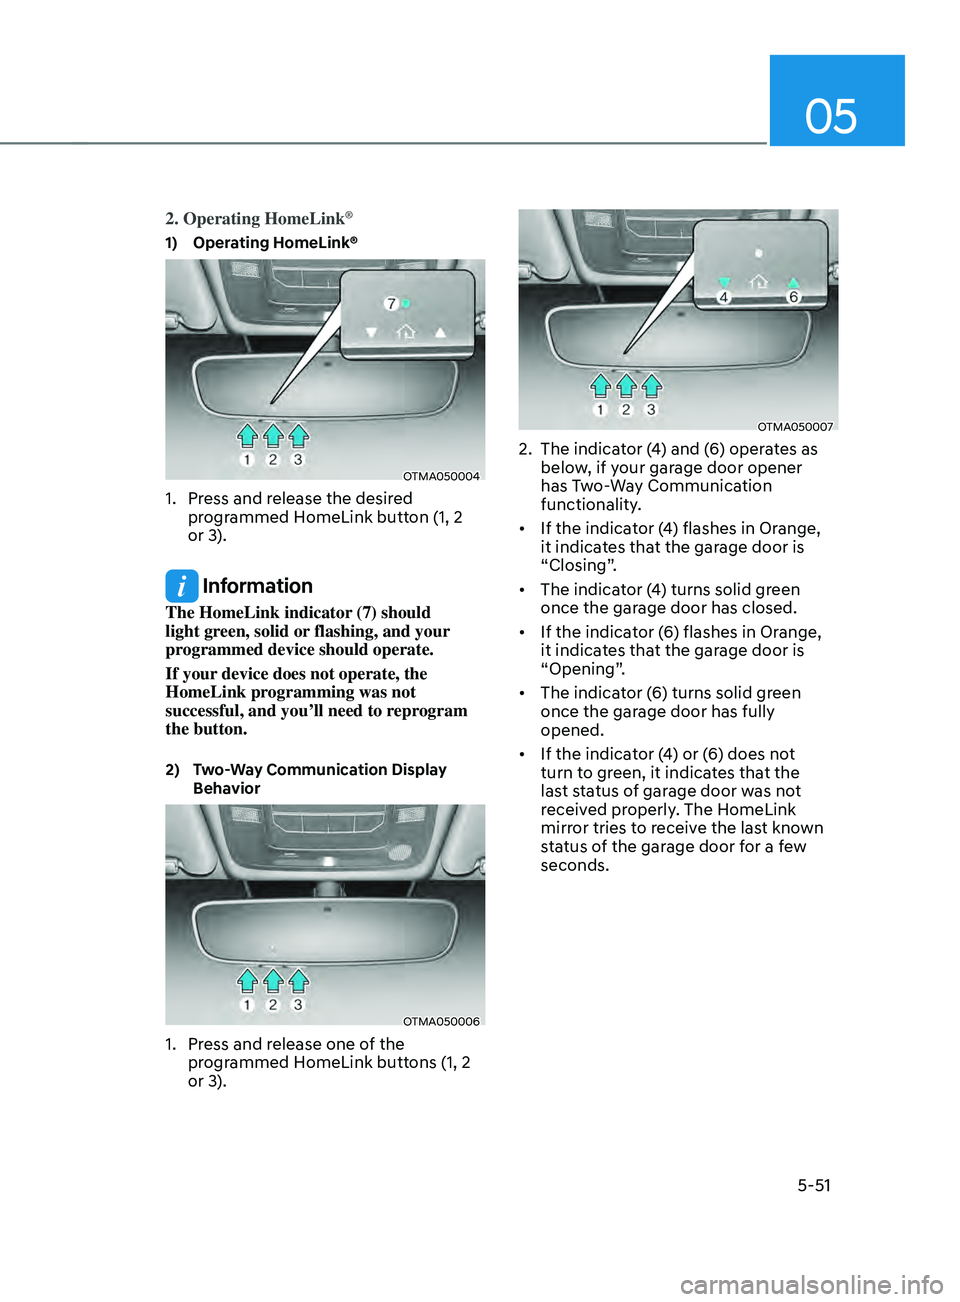
2. Operating HomeLink®
1) Operating HomeLink®
OTMA050004
1. Press and release the desired
programmed HomeLink button (1, 2
or 3).
Information
The HomeLink indicator (7) should
light green, solid or flashing, and your
programmed device should operate.
If your device does not operate, the
HomeLink programming was not
successful, and you’ll need to reprogram
the button.
2) Two-Way Communication Display
Beha
vior
OTMA050006
1. Press and release one of the
programmed HomeLink buttons (1, 2
or 3).
OTMA050007
2. The indicat or (4) and (6) operates as
below, if your garage door opener
has Two-Way Communication
functionality.
• If the indicator (4) flashes in Orange,
it indicates that the garage door is
“Closing”.
• The indicator (4) turns solid green
once the garage door has closed.
• If the indicator (6) flashes in Orange,
it indicates that the garage door is
“Opening”.
• The indicator (6) turns solid green
once the garage door has fully
opened.
• If the indicator (4) or (6) does not
turn to green, it indicates that the
last status of garage door was not
received properly. The HomeLink
mirror tries to receive the last known
status of the garage door for a few
seconds.
Page 196 of 636
Convenient features
5-52
3) Recalling Garage Door Status
HomeLink mirror with Two-Way
Communication provides a way to view
the last stored message from the garage
door opener. In order to recall the last
known status of the last activated device,
press the buttons “1 and 2” OR “2 and 3”
simultaneously.
• If the indicator (4) appears solid
Green, it indicates that the last
activated device was “closed”
properly.
• If the indicator (6) appears solid
Green, it indicates that the last
activated device was “open” properly.
3. Erasing HomeLink® Buttons
1) Erasing and Reprogramming a Single
H omeLink® Button:
1. Press and hold the desired HomeLink
butt on you want to re-program. DO
NOT release the button.
2.
The HomeLink indica
tor light (7) will
illuminate solid green. Release the
button as soon as the HomeLink
indicator light (7) begins to flash
orange, usually about 20 seconds.
3.
Proceed with the s
teps in the
“Programming a New HomeLink
Button” section.
Information
If you do not complete the re-
programming of a new device to the
button, it will revert to the previously
stored programming.
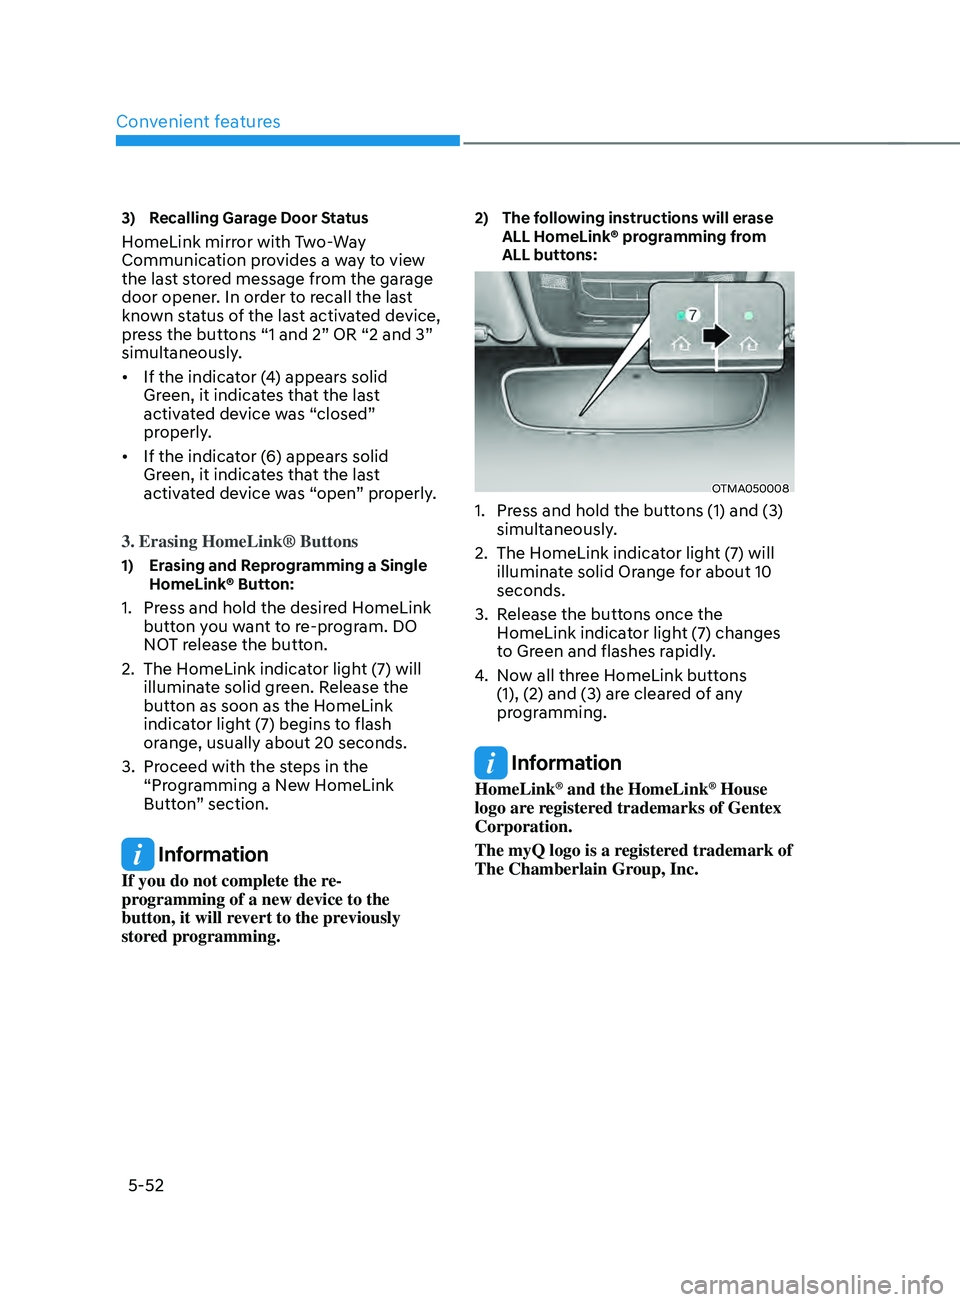
2) The following instructions will erase
ALL H
omeLink® programming from
ALL buttons:
OTMA050008
1. Press and hold the buttons (1) and (3)
simultaneously .
2.
The HomeLink indica
tor light (7) will
illuminate solid Orange for about 10
seconds.
3.
Release the butt
ons once the
HomeLink indicator light (7) changes
to Green and flashes rapidly.
4.
No
w all three HomeLink buttons
(1), (2) and (3) are cleared of any
programming.
Information
HomeLink® and the HomeLink® House
logo are registered trademarks of Gentex
Corporation.
The myQ logo is a registered trademark of
The Chamberlain Group, Inc.
Page 291 of 636
06
6-3
WARNING
Carbon monoxide (CO) gas is toxic. Breathing CO can cause unconsciousness and
death.
Engine exhaust contains carbon monoxide which cannot be seen or smelled.
Do not inhale engine exhaust.
If at any time you smell engine exhaust inside the vehicle, open the windows
immediately. Exposure to CO can cause unconsciousness and death by asphyxiation.
Be sure the exhaust system does not leak.
The exhaust system should be checked whenever the vehicle is raised to change the
oil or for any other purpose. If you hear a change in the sound of the exhaust or if you
drive over something that strikes the underneath side of the vehicle, we recommend
that the exhaust system be checked as soon as possible by an authorized HYUNDAI
dealer.
Do not run the engine in an enclosed area.
Letting the engine idle in your garage, even with the garage door open, is a hazardous
practice. Run the engine only long enough to start the engine and to move the vehicle
out of the garage.
Avoid idling the engine for prolonged periods with people inside the vehicle.
If it is necessary to idle the engine for a prolonged period with people inside the
vehicle, be sure to do so only in an open area with the air intake set at “Fresh” and fan
control set to high so fresh air is drawn into the interior.
Keep the air intakes clear.
To assure proper operation of the ventilation system, keep the ventilation air intakes
located in front of the windshield clear of snow, ice, leaves, or other obstructions.
If you must drive with the liftgate open:
Close all windows.
Open instrument panel air vents.
Set the air intake control at “Fresh”, the air flow control at “Floor” or “Face”, and the fan
control set to high.
WARNING
CALIFORNIA PROPOSITION 65 WARNING
Engine exhaust and a wide variety of automobile components including
components found in the interior furnishings in a vehicle, contain or emit harmful
chemicals known to the State of California to cause cancer and birth defects and
reproductive harm. In addition, certain fluids contained in vehicles and certain
products of components contain or emit chemicals known to the State of California
to cause cancer and birth defects or other reproductive harm.