2021 HYUNDAI SANTA FE light
[x] Cancel search: lightPage 194 of 636
Convenient features
5-50
2. On your garage door opener in your
garage, locate the “Learn” button
(usually near where the hanging
antenna wire is attached to the garage
door opener). If there is difficulty
locating this button, reference the
device’s owner’s manual.
3.
Press and r
elease the “Learn” button.
4.
A light on y
our garage door opener
may flash, and your Two-Way
Communication indicators (4), (6) in
your vehicle may flash, confirming
completion of the process.
5.
Re
turn to the vehicle and firmly
press and release the programmed
HomeLink button to activate
your garage door. The Two-Way
Communication indicators (4), (6)
flash in orange when the door is
moving. Do not make any additional
button presses until AFTER the garage
door has come to a complete stop.
6.
Your T
wo-Way Communication
programming is now complete.
Information
If your garage door opener has Two-
Way Communication functionality,
it is possible for HomeLink to stop
functioning the garage door shortly
after initial programming, IF the Two-
Way Communication Programming
wasn’t properly completed. This
usually happens after the first 10 times
a programmed HomeLink button is
pressed. If you experience this, completing
the “Programming a New HomeLink
Button” and “Two-Way Communication
Programming” will restore door
operation.
4) Canadian Pr ogramming
Canadian radio-frequency laws require
transmitter remote signals to “time-
out” (or quit) after a couple seconds of
transmission, which may not be long
enough for HomeLink to pick up the signal
during programming.
If you live in Canada or you are having
difficulties programming a gate operator
or garage door opener by using the
programming procedures, replace
“Programming a New HomeLink Button”
step 3 with the following:
While the HomeLink indicator light (7) is
flashing orange, press and release (“cycle”)
your device’s handheld remote every two
seconds until the HomeLink indicator light
(7) changes from orange to green. You may
now release the hand-held remote button.
Then proceed with “Programming a New
HomeLink Button” step 4.
Page 195 of 636
05
5-51
2. Operating HomeLink®
1) Operating HomeLink®
OTMA050004
1. Press and release the desired
programmed HomeLink button (1, 2
or 3).
Information
The HomeLink indicator (7) should
light green, solid or flashing, and your
programmed device should operate.
If your device does not operate, the
HomeLink programming was not
successful, and you’ll need to reprogram
the button.
2) Two-Way Communication Display
Beha
vior
OTMA050006
1. Press and release one of the
programmed HomeLink buttons (1, 2
or 3).
OTMA050007
2. The indicat or (4) and (6) operates as
below, if your garage door opener
has Two-Way Communication
functionality.
• If the indicator (4) flashes in Orange,
it indicates that the garage door is
“Closing”.
• The indicator (4) turns solid green
once the garage door has closed.
• If the indicator (6) flashes in Orange,
it indicates that the garage door is
“Opening”.
• The indicator (6) turns solid green
once the garage door has fully
opened.
• If the indicator (4) or (6) does not
turn to green, it indicates that the
last status of garage door was not
received properly. The HomeLink
mirror tries to receive the last known
status of the garage door for a few
seconds.
Page 196 of 636
Convenient features
5-52
3) Recalling Garage Door Status
HomeLink mirror with Two-Way
Communication provides a way to view
the last stored message from the garage
door opener. In order to recall the last
known status of the last activated device,
press the buttons “1 and 2” OR “2 and 3”
simultaneously.
• If the indicator (4) appears solid
Green, it indicates that the last
activated device was “closed”
properly.
• If the indicator (6) appears solid
Green, it indicates that the last
activated device was “open” properly.
3. Erasing HomeLink® Buttons
1) Erasing and Reprogramming a Single
H omeLink® Button:
1. Press and hold the desired HomeLink
butt on you want to re-program. DO
NOT release the button.
2.
The HomeLink indica
tor light (7) will
illuminate solid green. Release the
button as soon as the HomeLink
indicator light (7) begins to flash
orange, usually about 20 seconds.
3.
Proceed with the s
teps in the
“Programming a New HomeLink
Button” section.
Information
If you do not complete the re-
programming of a new device to the
button, it will revert to the previously
stored programming.
2) The following instructions will erase
ALL H
omeLink® programming from
ALL buttons:
OTMA050008
1. Press and hold the buttons (1) and (3)
simultaneously .
2.
The HomeLink indica
tor light (7) will
illuminate solid Orange for about 10
seconds.
3.
Release the butt
ons once the
HomeLink indicator light (7) changes
to Green and flashes rapidly.
4.
No
w all three HomeLink buttons
(1), (2) and (3) are cleared of any
programming.
Information
HomeLink® and the HomeLink® House
logo are registered trademarks of Gentex
Corporation.
The myQ logo is a registered trademark of
The Chamberlain Group, Inc.
Page 201 of 636
05
5-57
• If ‘Convenience → Welcome mirr or/
light → On door unlock’ is select ed in the User Se
ttings mode on the LCD
display, the outside mirror will fold or
unfold automatically as follows:
- The mirror will f
old or unfold when
the door is locked or unlocked by
the smart key.
- The mirror will f
old or unfold when
the door is locked or unlocked by
the button on the outside door
handle.
• If
‘Con
venience
→ W
elcome
mirror/ligh
t
→ On door unlock’ and ‘Conv
enience
→ W
elcome
mirr
or/light
→ On driv
er
appr
oach’
is select
ed
in the User Se
ttings mode on the LCD
display, the outside mirror will unfold
automatically when you approach the
vehicle (all doors closed and locked)
with a smart key in possession.
NOTICE
The electric type side view mirror
operates even though the ignition
switch is in the OFF position. However,
to prevent unnecessary battery
discharge, do not adjust the mirrors
longer than necessary while the engine
is not running.
NOTICE
Do not fold the electric type side view
mirror by hand. It could cause motor
failure.
Reverse parking aid (if equipped)
OTM050020
When the gear is shifted to the R
(Reverse) position, the side view mirror(s)
will rotate downwards to aid with driving
in reverse.
The position of the side view mirror
switch (1) determines whether or not the
mirrors will move:
Left/Right : When either the L (Left) or R (Right) switch is selected,
both side view mirrors will
move.
Neutral : When neither switch is selected, the outside rearview
mirrors will not move.
The side view mirrors will automatically
revert to their original positions if any of
the following occur:
• The Engine Start/Stop button is
pressed to either the OFF position or
the ACC position.
• The gear is shifted to any position
except R (Reverse).
• The side view mirror adjustment
button is not selected.
Page 207 of 636
05
5-63
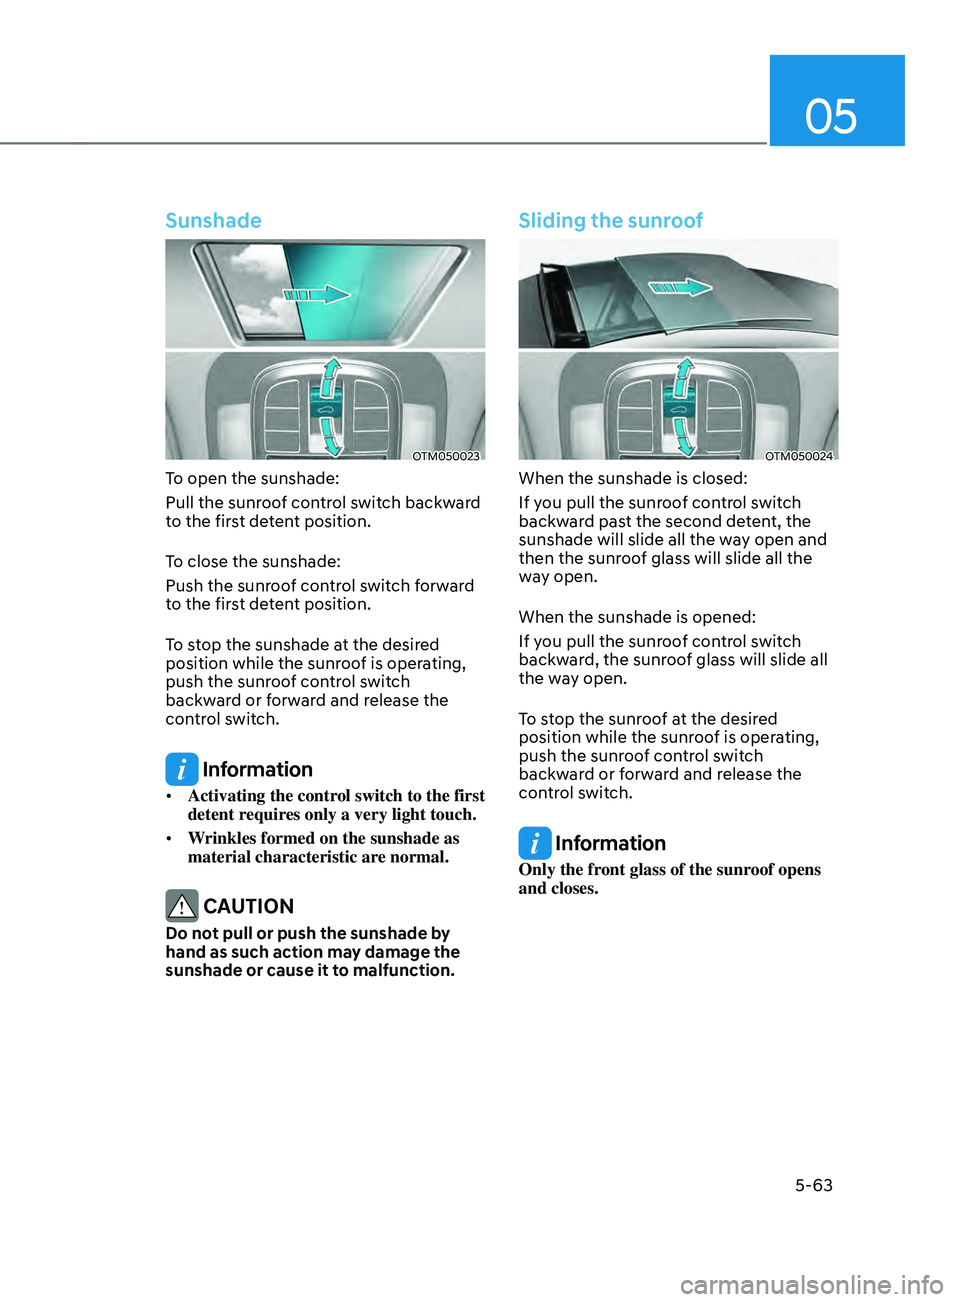
Sunshade
OTM050023
To open the sunshade:
Pull the sunroof control switch backward
to the first detent position.
To close the sunshade:
Push the sunroof control switch forward
to the first detent position.
To stop the sunshade at the desired
position while the sunroof is operating,
push the sunroof control switch
backward or forward and release the
control switch.
Information
• Activating the control switch to the first
detent requires only a very light touch.
• Wrinkles formed on the sunshade as
material characteristic are normal.
CAUTION
Do not pull or push the sunshade by
hand as such action may damage the
sunshade or cause it to malfunction.
Sliding the sunroof
OTM050024
When the sunshade is closed:
If you pull the sunroof control switch
backward past the second detent, the
sunshade will slide all the way open and
then the sunroof glass will slide all the
way open.
When the sunshade is opened:
If you pull the sunroof control switch
backward, the sunroof glass will slide all
the way open.
To stop the sunroof at the desired
position while the sunroof is operating,
push the sunroof control switch
backward or forward and release the
control switch.
Information
Only the front glass of the sunroof opens
and closes.
Page 209 of 636
05
5-65
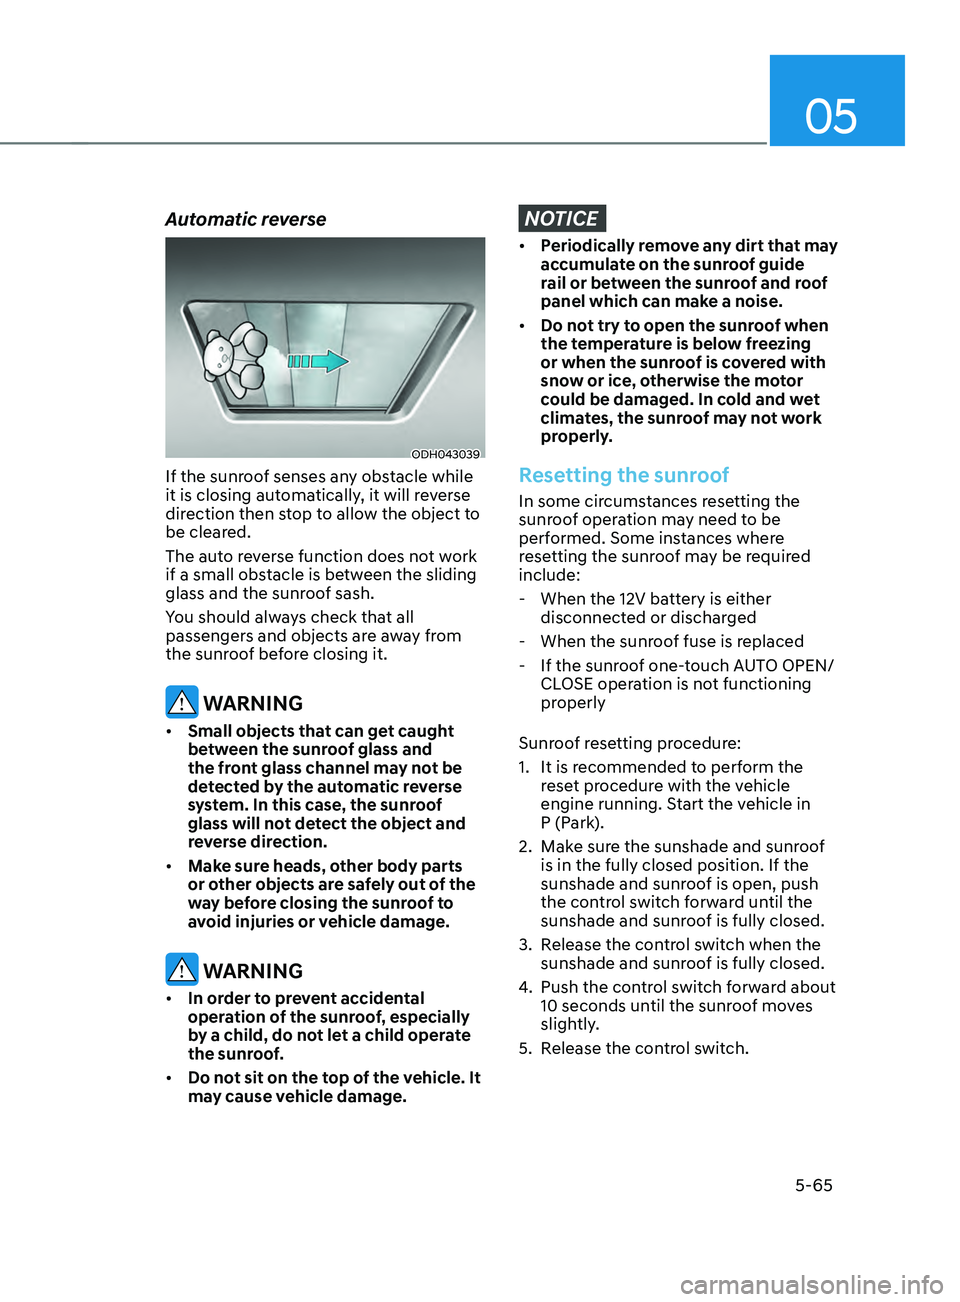
Automatic reverse
ODH043039
If the sunroof senses any obstacle while
it is closing automatically, it will reverse
direction then stop to allow the object to
be cleared.
The auto reverse function does not work
if a small obstacle is between the sliding
glass and the sunroof sash.
You should always check that all
passengers and objects are away from
the sunroof before closing it.
WARNING
• Small objects that can get caught
between the sunroof glass and
the front glass channel may not be
detected by the automatic reverse
system. In this case, the sunroof
glass will not detect the object and
reverse direction.
• Make sure heads, other body parts
or other objects are safely out of the
way before closing the sunroof to
avoid injuries or vehicle damage.
WARNING
• In order to prevent accidental
operation of the sunroof, especially
by a child, do not let a child operate
the sunroof.
• Do not sit on the top of the vehicle. It
may cause vehicle damage.
NOTICE
• Periodically remove any dirt that may
accumulate on the sunroof guide
rail or between the sunroof and roof
panel which can make a noise.
• Do not try to open the sunroof when
the temperature is below freezing
or when the sunroof is covered with
snow or ice, otherwise the motor
could be damaged. In cold and wet
climates, the sunroof may not work
properly.
Resetting the sunroof
In some circumstances resetting the
sunroof operation may need to be
performed. Some instances where
resetting the sunroof may be required
include:
- When the 12V batt
ery is either
disconnected or discharged
- When the sunroo
f fuse is replaced
- If the sunroo
f one-touch AUTO OPEN/
CLOSE operation is not functioning
properly
Sunroof resetting procedure:
1.
It is recommended t
o perform the
reset procedure with the vehicle
engine running. Start the vehicle in
P (Park).
2.
Make sur
e the sunshade and sunroof
is in the fully closed position. If the
sunshade and sunroof is open, push
the control switch forward until the
sunshade and sunroof is fully closed.
3.
Release the con
trol switch when the
sunshade and sunroof is fully closed.
4.
Push the contr
ol switch forward about
10 seconds until the sunroof moves
slightly.
5.
Release the con
trol switch.
Page 211 of 636
05
5-67
Hood
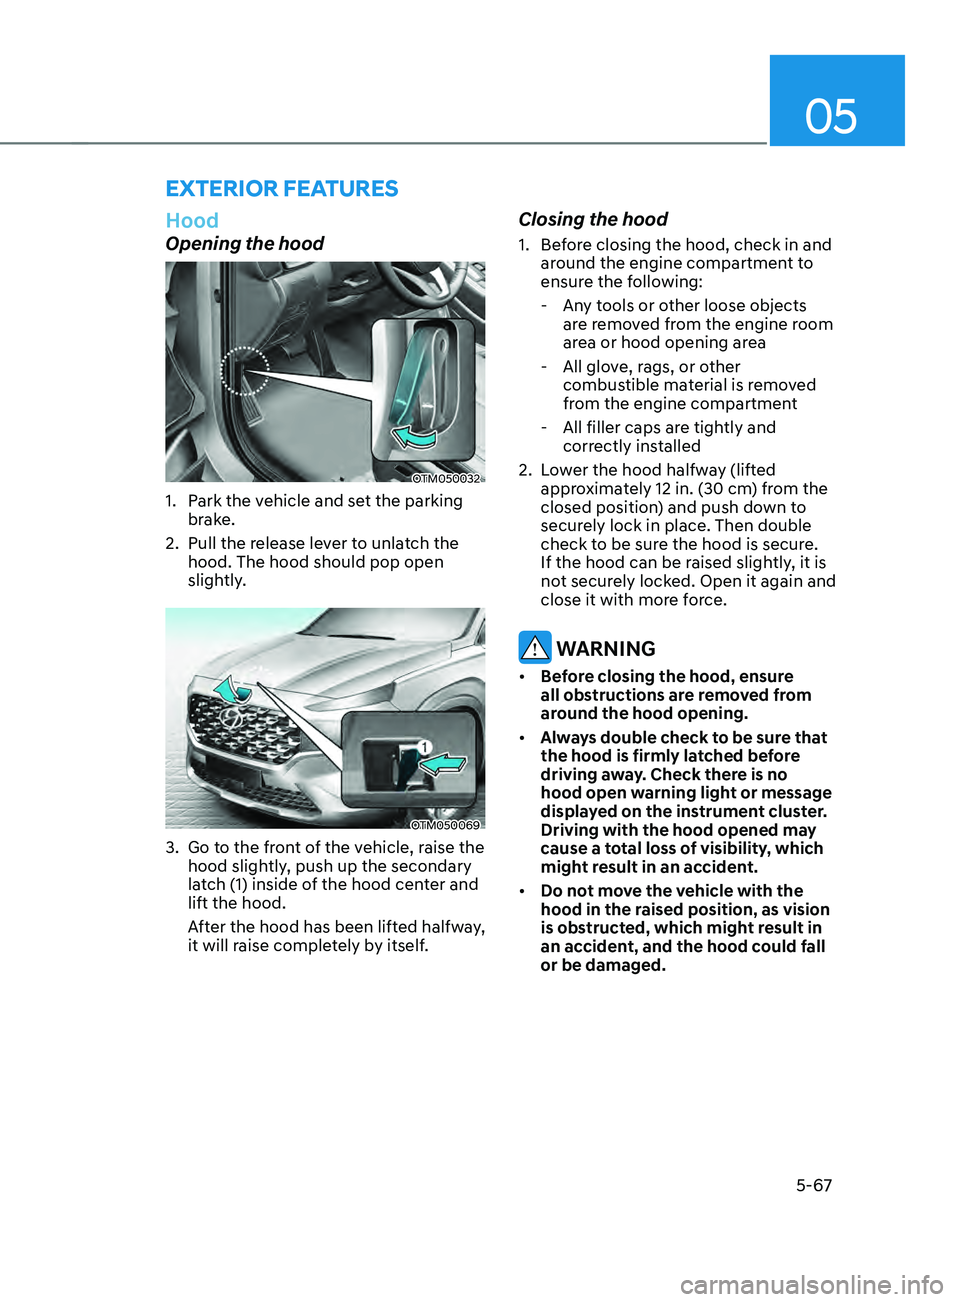
Opening the hood
OTM050032
1. Park the vehicle and set the parking
brake.
2.
Pull the release le
ver to unlatch the
hood. The hood should pop open
slightly.
OTM050069
3. Go to the front of the vehicle, raise the
hood sligh tly, push up the secondary
latch (1) inside of the hood center and
lift the hood.
After the hood has been lifted halfway,
it will raise completely by itself.
Closing the hood
1. Before closing the hood, check in and
ar ound the engine compartment to
ensure the following:
- Any t
ools or other loose objects
are removed from the engine room
area or hood opening area
- All glov
e, rags, or other
combustible material is removed
from the engine compartment
- All filler caps are tigh
tly and
correctly installed
2.
Lo
wer the hood halfway (lifted
approximately 12 in. (30 cm) from the
closed position) and push down to
securely lock in place. Then double
check to be sure the hood is secure.
If the hood can be raised slightly, it is
not securely locked. Open it again and
close it with more force.
WARNING
• Before closing the hood, ensure
all obstructions are removed from
around the hood opening.
• Always double check to be sure that
the hood is firmly latched before
driving away. Check there is no
hood open warning light or message
displayed on the instrument cluster.
Driving with the hood opened may
cause a total loss of visibility, which
might result in an accident.
• Do not move the vehicle with the
hood in the raised position, as vision
is obstructed, which might result in
an accident, and the hood could fall
or be damaged.
ExTERIOR FEATURES
Page 219 of 636
05
5-75
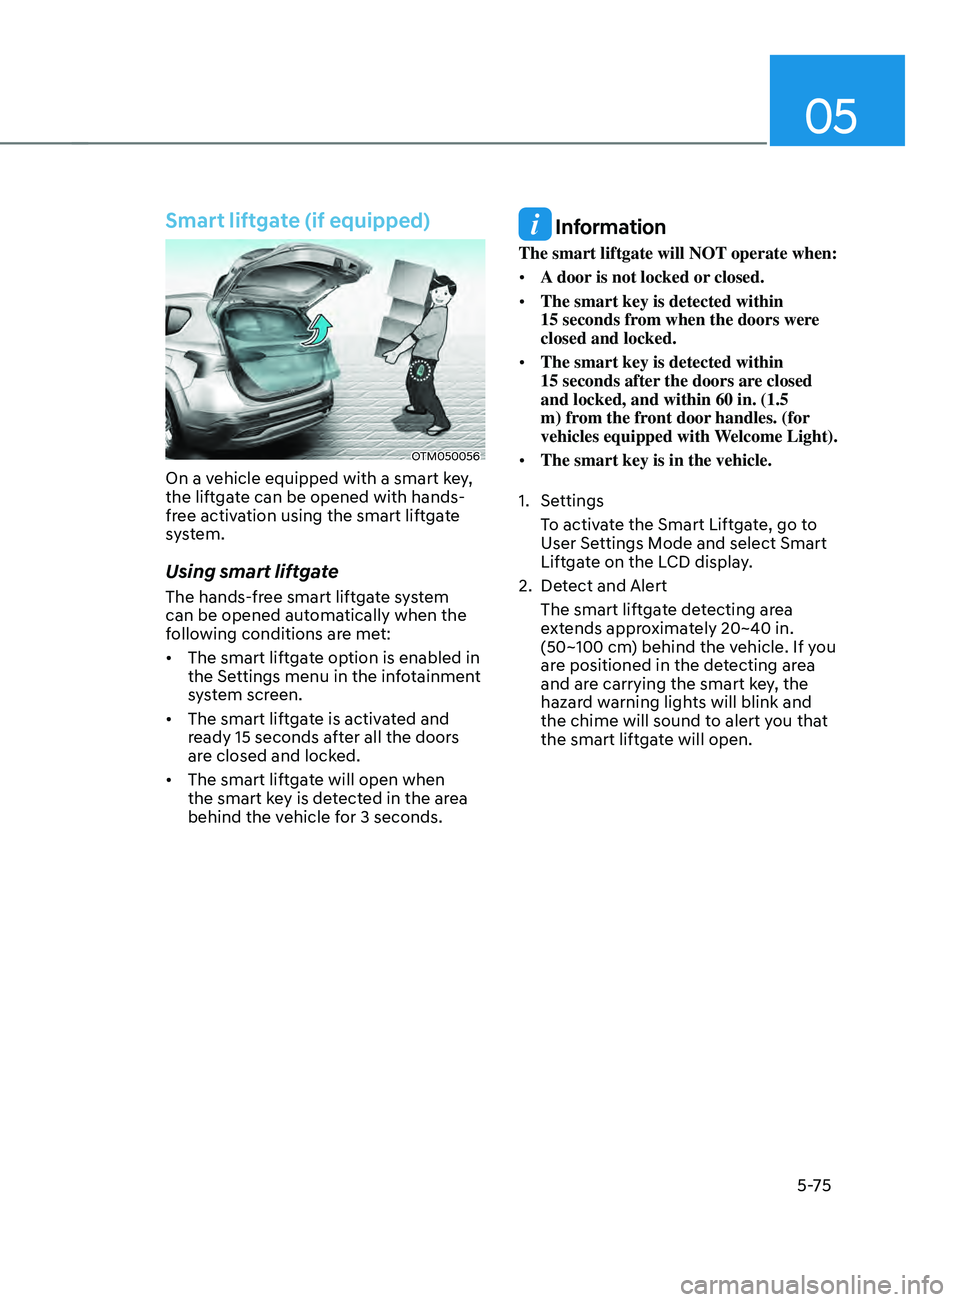
Smart liftgate (if equipped)
OTM050056
On a vehicle equipped with a smart key,
the liftgate can be opened with hands-
free activation using the smart liftgate
system.
Using smart liftgate
The hands-free smart liftgate system
can be opened automatically when the
following conditions are met:
• The smart liftgate option is enabled in
the Settings menu in the infotainment
system screen.
• The smart liftgate is activated and
ready 15 seconds after all the doors
are closed and locked.
• The smart liftgate will open when
the smart key is detected in the area
behind the vehicle for 3 seconds.
Information
The smart liftgate will NOT operate when:
• A door is not locked or closed.
• The smart key is detected within
15
seconds fr
om when the doors were
closed and locked.
• The smart key is detected within
15
seconds after
the doors are closed
and locked, and within 60 in. (1.5
m) from the front door handles. (for
vehicles equipped with Welcome Light).
• The smart key is in the vehicle.
1.
Settings
T
o activate the Smart Liftgate, go to
User Settings Mode and select Smart
Liftgate on the LCD display.
2.
Det
ect and Alert
The smart liftgate detecting area
extends approximately 20~40 in.
(50~100 cm) behind the vehicle. If you
are positioned in the detecting area
and are carrying the smart key, the
hazard warning lights will blink and
the chime will sound to alert you that
the smart liftgate will open.