2021 HYUNDAI SANTA FE tires
[x] Cancel search: tiresPage 362 of 636
Driving your vehicle
6 -74
Driving in flooded areas
Avoid driving through flooded areas
unless you are sure the water is no
higher than the bottom of the wheel hub.
Drive through any water slowly. Allow
adequate stopping distance because
brake performance may be reduced.
After driving through water, dry the
brakes by gently applying them several
times while the vehicle is moving slowly.
Highway driving
Tires
Adjust the tire inflation, as specified.
Under-inflation may overheat or damage
the tires.
Do not install worn-out or damaged tires,
which may reduce traction or fail the
braking operation.
Information
Never over-inflate your tires above the
maximum inflation pressure, as specified
on your tires.
Fuel, engine coolant and engine oil
Driving at higher speeds on the highway
consumes more fuel and is less efficient
than driving at a slower, more moderate
speed. Maintain a moderate speed in
order to conserve fuel when driving on
the highway.
Be sure to check both the engine coolant
level and the engine oil before driving.
Drive belt
A loose or damaged drive belt may
overheat the engine.
Reducing the risk of a rollover
Your multi-purpose passenger vehicle is
defined as a Sports Utility Vehicle (SUV).
SUV’s have higher ground clearance
and a narrower track to make them
capable of performing in a wide variety
of off-road applications. The specific
design characteristics give them a higher
center of gravity than ordinary vehicles
making them more likely to roll over if
you make abrupt turns. Utility vehicles
have a significantly higher rollover rate
than other types of vehicles. Due to this
risk, driver and passengers are strongly
recommended to buckle their seat belts.
In a rollover crash, an unbelted person
is significantly more likely to die than a
person wearing a seat belt.
There are steps that a driver can make
to reduce the risk of a rollover. If at all
possible, avoid sharp turns or abrupt
maneuvers, do not load your vehicle
with heavy cargo on the roof, and never
modify your vehicle in any way.
WARNING
Utility vehicles have a significantly
higher rollover rate than other types of
vehicles. To prevent rollovers or loss of
control:
• Take corners at slower speeds than
you would with a passenger vehicle.
• Avoid sharp turns and abrupt
maneuvers.
• Do not modify your vehicle in any
way that you would raise the center
of gravity.
• Keep tires properly inflated.
• Do not carry heavy cargo on the roof.
WARNING
In a rollover crash, an unbelted person
is significantly more likely to die than a
person wearing a seat belt. Make sure
all passengers are wearing their seat
belts.
Page 363 of 636
06
6-75
The severe weather conditions of winter quickly wear out tires and cause other
problems. To minimize winter driving problems, you should take the following
suggestions:
Snow or icy conditions
You need to keep sufficient distance between your vehicle and the vehicle in front of
you.
Apply the brakes gently. Speeding, rapid acceleration, sudden brake applications, and
sharp turns are potentially very hazardous practices. During deceleration, use engine
braking to the fullest extent. Sudden brake applications on snowy or icy roads may
cause the vehicle to skid.
To drive your vehicle in deep snow, it may be necessary to use snow tires or to install
tire chains on your tires.
Always carry emergency equipment. Some of the items you may want to carry include
tire chains, tow straps or chains, a flashlight, emergency flares, sand, a shovel, jumper
cables, a window scraper, gloves, ground cloth, coveralls, a blanket, etc.
Snow tires
WARNING
Snow tires should be equivalent in size and type to the vehicle’s standard tires.
Otherwise, the safety and handling of your vehicle may be adversely affected.
We recommend that you use snow tires when road temperature is below 45°F (7°C).
Refer to the below chart, and mount the recommended snow tire for your vehicle.
If you mount snow tires on your vehicle, make sure to use the same Inflation pressure
as the original tires. Mount snow tires on all four wheels to balance your vehicle’s
handling in all weather conditions. The traction provided by snow tires on dry roads
may not be as high as your vehicle’s original equipment tires. Check with the tire dealer
for maximum speed recommendations.
WINTER DRIVING
Page 364 of 636
Driving your vehicle
6 -76
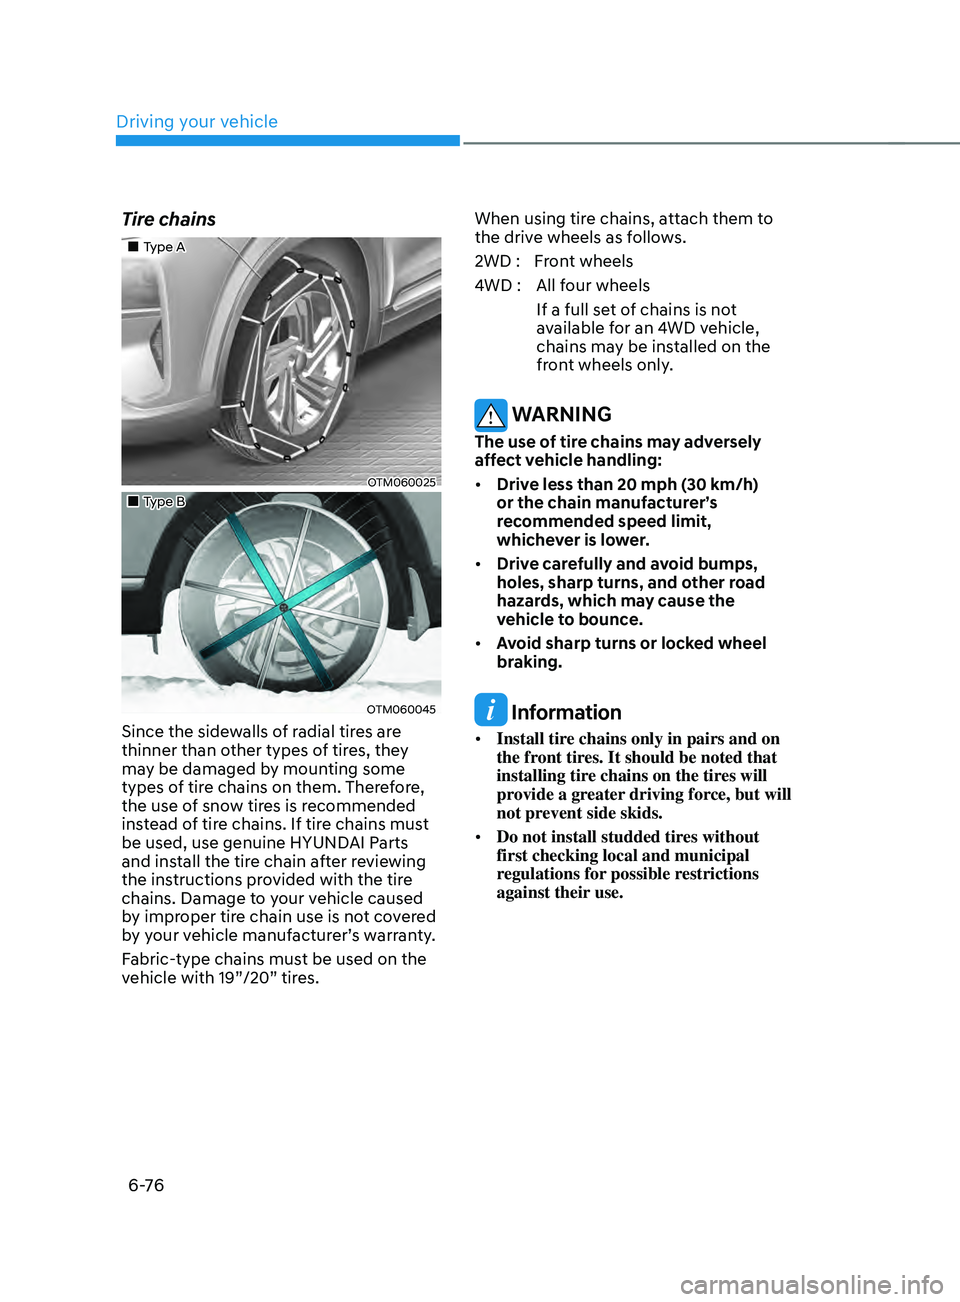
Tire chains
„„Type A
OTM060025
„„Type B
OTM060045
Since the sidewalls of radial tires are
thinner than other types of tires, they
may be damaged by mounting some
types of tire chains on them. Therefore,
the use of snow tires is recommended
instead of tire chains. If tire chains must
be used, use genuine HYUNDAI Parts
and install the tire chain after reviewing
the instructions provided with the tire
chains. Damage to your vehicle caused
by improper tire chain use is not covered
by your vehicle manufacturer’s warranty.
Fabric-type chains must be used on the
vehicle with 19”/20” tires.When using tire chains, attach them to
the drive wheels as follows.
2WD : Front wheels
4WD : All four wheels
If a full set of chains is not
available for an 4WD vehicle,
chains may be installed on the
front wheels only.
WARNING
The use of tire chains may adversely
affect vehicle handling:
• Drive less than 20 mph (30 km/h)
or the chain manufacturer’s
recommended speed limit,
whichever is lower.
• Drive carefully and avoid bumps,
holes, sharp turns, and other road
hazards, which may cause the
vehicle to bounce.
• Avoid sharp turns or locked wheel
braking.
Information
• Install tire chains only in pairs and on
the front tires. It should be noted that
installing tire chains on the tires will
provide a greater driving force, but will
not prevent side skids.
• Do not install studded tires without
first checking local and municipal
regulations for possible restrictions
against their use.
Page 371 of 636
06
6-83
Trailer towing equipment
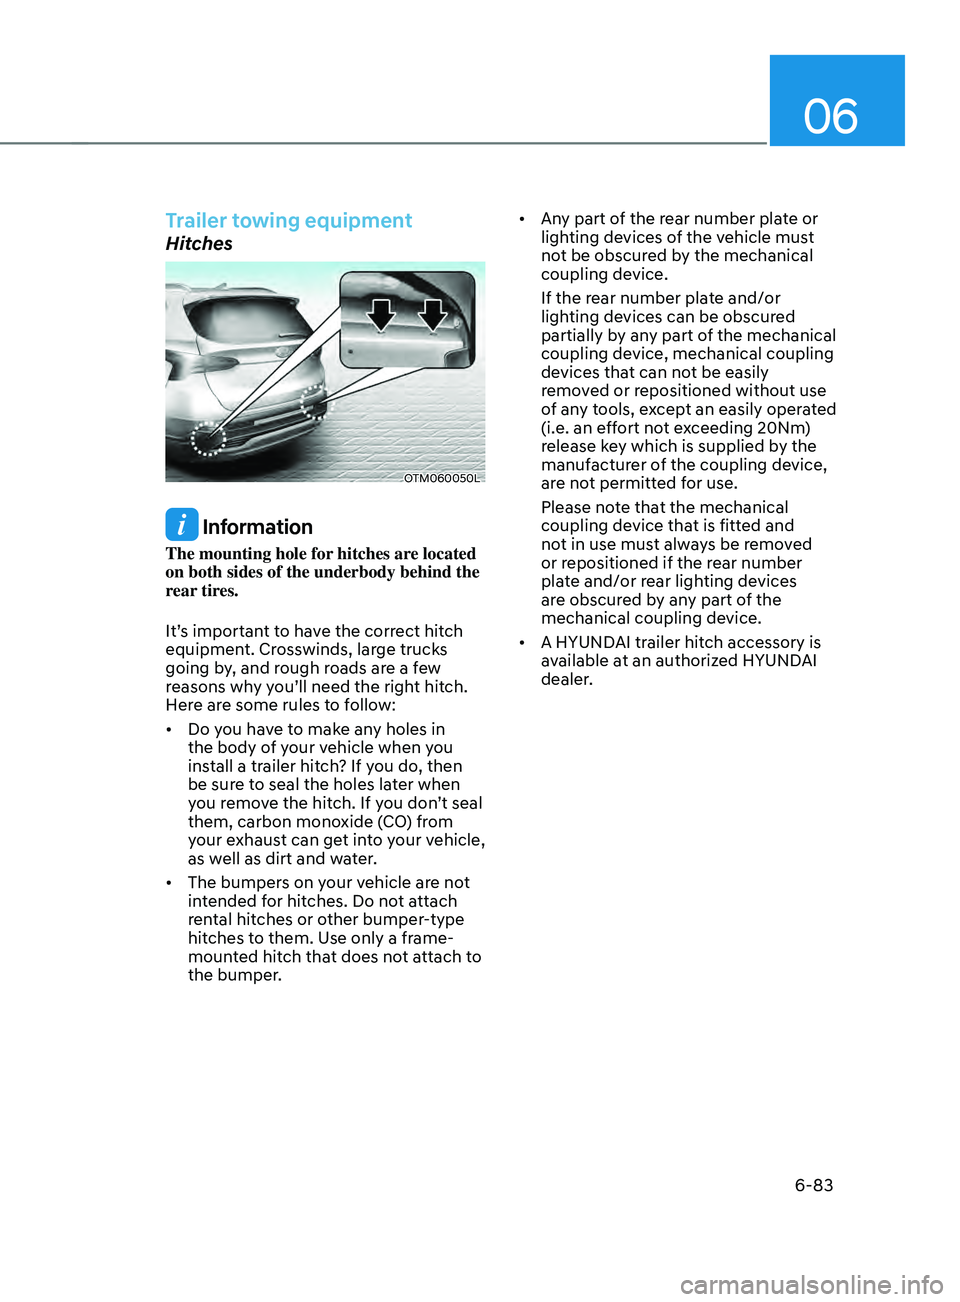
Hitches
OTM060050L
Information
The mounting hole for hitches are located
on both sides of the underbody behind the
rear tires.
It’s important to have the correct hitch
equipment. Crosswinds, large trucks
going by, and rough roads are a few
reasons why you’ll need the right hitch.
Here are some rules to follow:
• Do you have to make any holes in
the body of your vehicle when you
install a trailer hitch? If you do, then
be sure to seal the holes later when
you remove the hitch. If you don’t seal
them, carbon monoxide (CO) from
your exhaust can get into your vehicle,
as well as dirt and water.
• The bumpers on your vehicle are not
intended for hitches. Do not attach
rental hitches or other bumper-type
hitches to them. Use only a frame-
mounted hitch that does not attach to
the bumper. •
Any part of the rear number plate or
lighting devices of the vehicle must
not be obscured by the mechanical
coupling device.
If the rear number plate and/or
lighting devices can be obscured
partially by any part of the mechanical
coupling device, mechanical coupling
devices that can not be easily
removed or repositioned without use
of any tools, except an easily operated
(i.e. an effort not exceeding 20Nm)
release key which is supplied by the
manufacturer of the coupling device,
are not permitted for use.
Please note that the mechanical
coupling device that is fitted and
not in use must always be removed
or repositioned if the rear number
plate and/or rear lighting devices
are obscured by any part of the
mechanical coupling device.
• A HYUNDAI trailer hitch accessory is
available at an authorized HYUNDAI
dealer.
Page 372 of 636
Driving your vehicle
6-84
Safety chains
You should always attach chains between
your vehicle and your trailer.
Instructions about safety chains may
be provided by the hitch manufacturer
or trailer manufacturer. Follow the
manufacturer’s recommendation for
attaching safety chains. Always leave just
enough slack so you can turn with your
trailer. And, never allow safety chains to
drag on the ground.
Trailer brakes
If your trailer is equipped with a braking
system, make sure it conforms to
your country’s regulations and that
it is properly installed and operating
correctly.
If your trailer weighs more than the
maximum trailer weight without trailer
brakes loaded, then it needs its own
brakes and they must be adequate. Be
sure to read and follow the instructions
for the trailer brakes so you’ll be able
to install, adjust and maintain them
properly. Be sure not to modify your
vehicle’s brake system.
WARNING
Do not use a trailer with its own brakes
unless you are absolutely certain that
you have properly set up the brake
system. This is not a task for amateurs.
Use an experienced, competent trailer
shop for this work.
Driving with a trailer
Towing a trailer requires a certain
amount of experience. Before setting
out for the open road, you must get to
know your trailer. Acquaint yourself with
the feel of handling and braking with the
added weight of the trailer. And always
keep in mind that the vehicle you are
driving is now longer and not nearly as
responsive as your vehicle is by itself.
Before you start, check the trailer hitch
and platform, safety chains, electrical
connector(s), lights, tires and brakes.
During your trip, occasionally check
to be sure that the load is secure, and
that the lights and trailer brakes are still
working.
Distance
Stay at least twice as far behind the
vehicle ahead as you would when driving
your vehicle without a trailer. This can
help you avoid situations that require
heavy braking and sudden turns.
Passing
You will need more passing distance up
ahead when you’re towing a trailer. And,
because of the increased vehicle length,
you’ll need to go much farther beyond
the passed vehicle before you can return
to your lane.
Page 381 of 636
06
6-93
Certification label
OBH059070
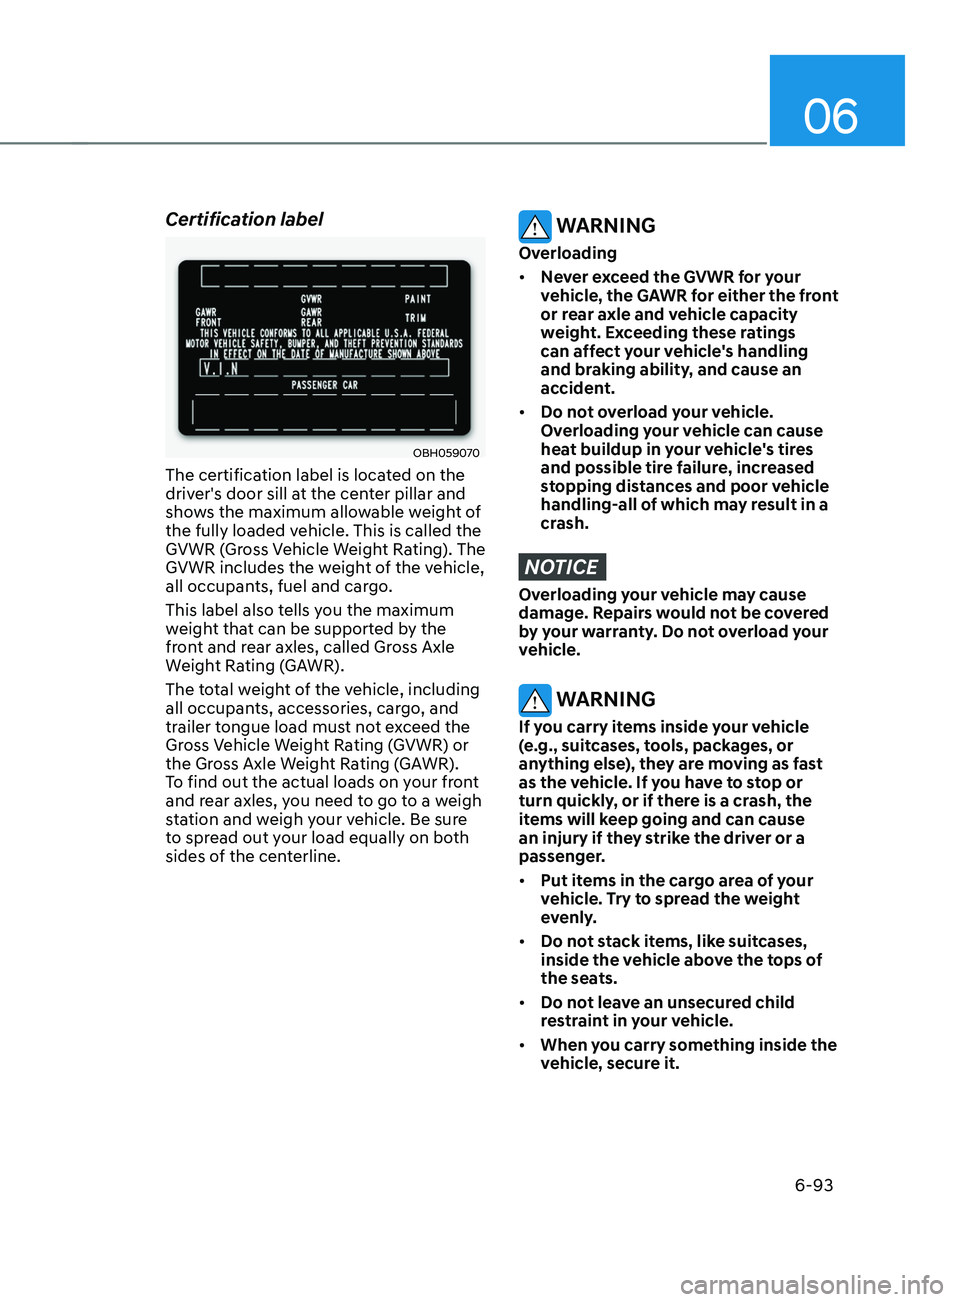
The certification label is located on the
driver's door sill at the center pillar and
shows the maximum allowable weight of
the fully loaded vehicle. This is called the
GVWR (Gross Vehicle Weight Rating). The
GVWR includes the weight of the vehicle,
all occupants, fuel and cargo.
This label also tells you the maximum
weight that can be supported by the
front and rear axles, called Gross Axle
Weight Rating (GAWR).
The total weight of the vehicle, including
all occupants, accessories, cargo, and
trailer tongue load must not exceed the
Gross Vehicle Weight Rating (GVWR) or
the Gross Axle Weight Rating (GAWR).
To find out the actual loads on your front
and rear axles, you need to go to a weigh
station and weigh your vehicle. Be sure
to spread out your load equally on both
sides of the centerline.
WARNING
Overloading
• Never exceed the GVWR for your
vehicle, the GAWR for either the front
or rear axle and vehicle capacity
weight. Exceeding these ratings
can affect your vehicle's handling
and braking ability, and cause an
accident.
• Do not overload your vehicle.
Overloading your vehicle can cause
heat buildup in your vehicle's tires
and possible tire failure, increased
stopping distances and poor vehicle
handling-all of which may result in a
crash.
NOTICE
Overloading your vehicle may cause
damage. Repairs would not be covered
by your warranty. Do not overload your
vehicle.
WARNING
If you carry items inside your vehicle
(e.g., suitcases, tools, packages, or
anything else), they are moving as fast
as the vehicle. If you have to stop or
turn quickly, or if there is a crash, the
items will keep going and can cause
an injury if they strike the driver or a
passenger.
• Put items in the cargo area of your
vehicle. Try to spread the weight
evenly.
• Do not stack items, like suitcases,
inside the vehicle above the tops of
the seats.
• Do not leave an unsecured child
restraint in your vehicle.
• When you carry something inside the
vehicle, secure it.
Page 519 of 636

Emergency situations
Hazard warning flasher........................................................................\
.............8-2
In case of an emergency while driving
............................................................ 8
-2
If the engine stalls while driving ........................................................................\
.........8-2
If the engine s talls at a crossroad or crossing ............................................................ 8
-2
If you have a flat tire while driving
........................................................................\
...... 8
-3
If the engine will not start ........................................................................\
........8-3
Jump s tarting
........................................................................\
............................ 8-4
If the engine o
verheats
........................................................................\
.............. 8
-7
Tire Pressure Monitoring System (TPMS)
........................................................ 8-9
Check tire pressure ........................................................................\
............................. 8-9
Tire pr essure monitoring system ........................................................................\
....... 8-10
L
ow tire pressure warning light
........................................................................\
.......... 8-
11
Low tire pressure position and tire pressure telltale
................................................. 8-
11
TPMS malfunction indicator
........................................................................\
.............. 8-
12
Changing a tire with TPMS
........................................................................\
................ 8-
12
If you have a flat tire (with spare tire) .............................................................8-14Jack and tools........................................................................\
..................................... 8-14
Removing and storing the spare tire........................................................................\
. 8-14
Changing tires
........................................................................\
.................................... 8-
16
Jack label
........................................................................\
.....................................
.......8-21
If you have a flat tire (with Tire Mobility Kit) ................................................. 8-22Introduction ........................................................................\
........................................ 8-22
N otes on the safe use of the Tire Mobility Kit .......................................................... 8-
23
Components of the Tire Mobility Kit
........................................................................\
. 8
-24
Using the Tire Mobility Kit
........................................................................\
................. 8-
25
Checking the tire inflation pressure
........................................................................\
.. 8-
28
Towing ........................................................................\
.....................................8-30Towing service ........................................................................\
...................................8-30
Emergency commodity ........................................................................\
..........8-32Fire extinguisher ........................................................................\
................................. 8-32
Fir st aid kit ........................................................................\
..................................... .....8-32
Triangle reflector
........................................................................\
................................ 8-
32
Tire pressure gauge
........................................................................\
............................ 8-
32
8. Emergency situations
8
Page 528 of 636
Emergency situations
8-10
Tire pressure monitoring system
WARNING
Over-inflation or under-inflation can
reduce tire life, adversely affect vehicle
handling, and lead to sudden tire failure
that may cause loss of vehicle control
resulting in an accident.
Each tire, including the spare (if
provided), should be checked monthly
when cold and inflated to the inflation
pressure recommended by the vehicle
manufacturer on the vehicle placard
or tire inflation pressure label. (If your
vehicle has tires of a different size than
the size indicated on the vehicle placard
or tire inflation pressure label, you should
determine the proper tire inflation
pressure for those tires.)
As an added safety feature, your
vehicle has been equipped with a tire
pressure monitoring system (TPMS)
that illuminates a low tire pressure
telltale when one or more of your tires is
significantly under-inflated. Accordingly,
when the low tire pressure telltale
illuminates, you should stop and check
your tires as soon as possible, and inflate
them to the proper pressure. Driving on
a significantly under-inflated tire causes
the tire to overheat and can lead to tire
failure.
Under-inflation also reduces fuel
efficiency and tire tread life, and may
affect the vehicle’s handling and
stopping ability.
Please note that the TPMS is not a
substitute for proper tire maintenance,
and it is the driver’s responsibility to
maintain correct tire pressure, even if
under-inflation has not reached the level
to trigger illumination of the TPMS low
tire pressure telltale.
Your vehicle has also been equipped with
a TPMS malfunction indicator to indicate
when the system is not operating
properly. The TPMS malfunction
indicator is combined with the low
tire pressure telltale. When the system
detects a malfunction, the telltale will
flash for approximately one minute and
then remain continuously illuminated.
This sequence will continue upon
subsequent vehicle start-ups as long as
the malfunction exists.
When the malfunction indicator is
illuminated, the system may not be able
to detect or signal low tire pressure as
intended. TPMS malfunctions may occur
for a variety of reasons, including the
installation of replacement or alternate
tires or wheels on the vehicle that
prevent the TPMS from functioning
properly.
Always check the TPMS malfunction
telltale after replacing one or more tires
or wheels on your vehicle to ensure that
the replacement or alternate tires and
wheels allow the TPMS to continue to
function properly.
NOTICE
If any of the below happens, we
recommend that you have the system
checked by an authorized HYUNDAI
dealer.
1.
The Lo
w Tire Pressure Telltale/ TPMS
Malfunction Indicator does not
illuminate for 3 seconds when the
Engine Start/Stop button is pressed
to the ON position or when the
engine is running.
2.
The TPMS Malfunction Indica
tor
remains illuminated after blinking for
approximately 1 minute.
3.
The Lo
w Tire Pressure Position
Telltale remains illuminated.