2021 HYUNDAI SANTA FE button
[x] Cancel search: buttonPage 194 of 636
Convenient features
5-50
2. On your garage door opener in your
garage, locate the “Learn” button
(usually near where the hanging
antenna wire is attached to the garage
door opener). If there is difficulty
locating this button, reference the
device’s owner’s manual.
3.
Press and r
elease the “Learn” button.
4.
A light on y
our garage door opener
may flash, and your Two-Way
Communication indicators (4), (6) in
your vehicle may flash, confirming
completion of the process.
5.
Re
turn to the vehicle and firmly
press and release the programmed
HomeLink button to activate
your garage door. The Two-Way
Communication indicators (4), (6)
flash in orange when the door is
moving. Do not make any additional
button presses until AFTER the garage
door has come to a complete stop.
6.
Your T
wo-Way Communication
programming is now complete.
Information
If your garage door opener has Two-
Way Communication functionality,
it is possible for HomeLink to stop
functioning the garage door shortly
after initial programming, IF the Two-
Way Communication Programming
wasn’t properly completed. This
usually happens after the first 10 times
a programmed HomeLink button is
pressed. If you experience this, completing
the “Programming a New HomeLink
Button” and “Two-Way Communication
Programming” will restore door
operation.
4) Canadian Pr ogramming
Canadian radio-frequency laws require
transmitter remote signals to “time-
out” (or quit) after a couple seconds of
transmission, which may not be long
enough for HomeLink to pick up the signal
during programming.
If you live in Canada or you are having
difficulties programming a gate operator
or garage door opener by using the
programming procedures, replace
“Programming a New HomeLink Button”
step 3 with the following:
While the HomeLink indicator light (7) is
flashing orange, press and release (“cycle”)
your device’s handheld remote every two
seconds until the HomeLink indicator light
(7) changes from orange to green. You may
now release the hand-held remote button.
Then proceed with “Programming a New
HomeLink Button” step 4.
Page 195 of 636
05
5-51
2. Operating HomeLink®
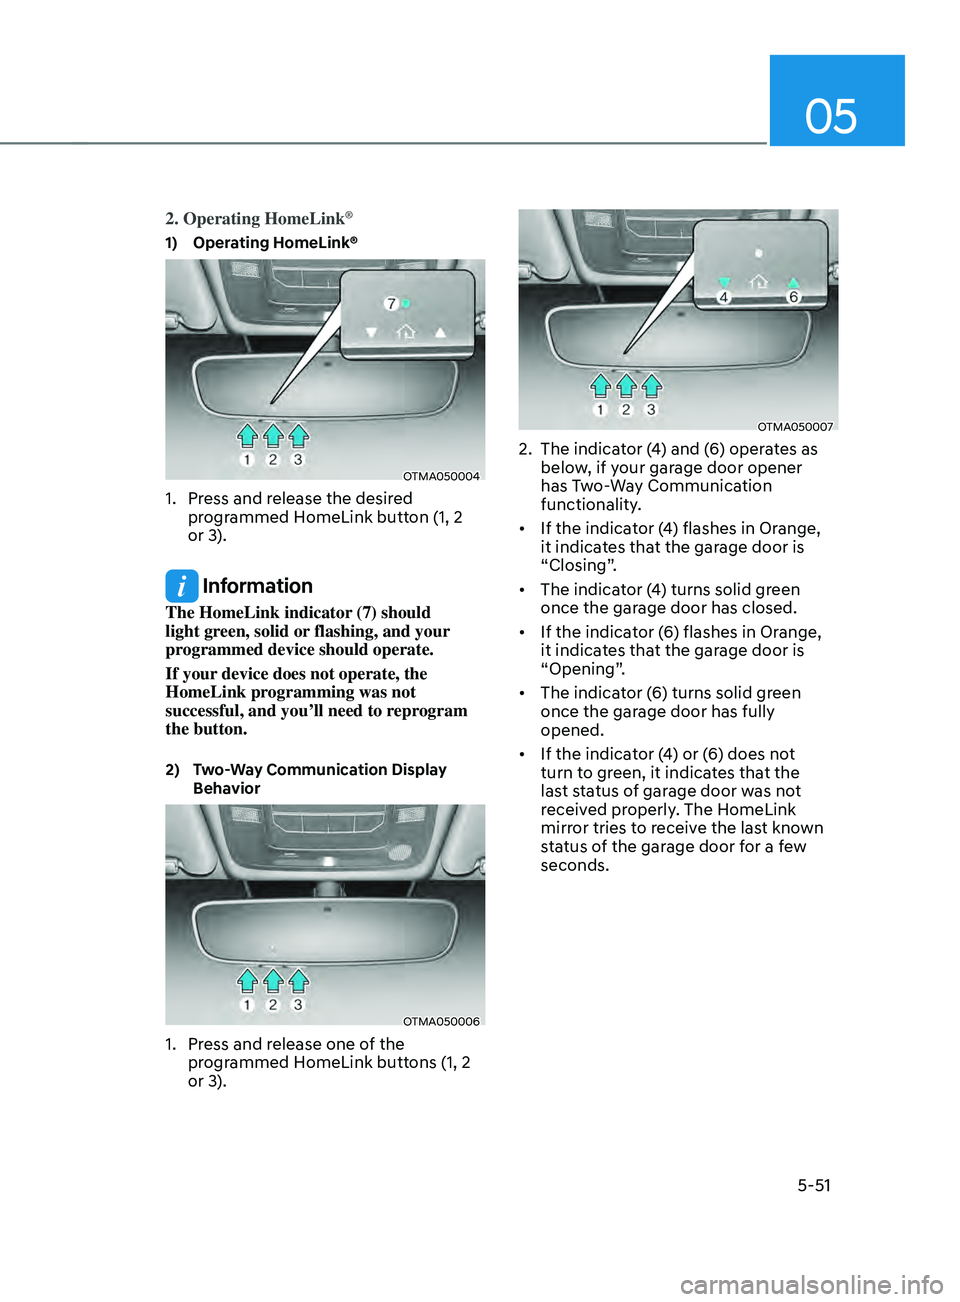
1) Operating HomeLink®
OTMA050004
1. Press and release the desired
programmed HomeLink button (1, 2
or 3).
Information
The HomeLink indicator (7) should
light green, solid or flashing, and your
programmed device should operate.
If your device does not operate, the
HomeLink programming was not
successful, and you’ll need to reprogram
the button.
2) Two-Way Communication Display
Beha
vior
OTMA050006
1. Press and release one of the
programmed HomeLink buttons (1, 2
or 3).
OTMA050007
2. The indicat or (4) and (6) operates as
below, if your garage door opener
has Two-Way Communication
functionality.
• If the indicator (4) flashes in Orange,
it indicates that the garage door is
“Closing”.
• The indicator (4) turns solid green
once the garage door has closed.
• If the indicator (6) flashes in Orange,
it indicates that the garage door is
“Opening”.
• The indicator (6) turns solid green
once the garage door has fully
opened.
• If the indicator (4) or (6) does not
turn to green, it indicates that the
last status of garage door was not
received properly. The HomeLink
mirror tries to receive the last known
status of the garage door for a few
seconds.
Page 196 of 636
Convenient features
5-52
3) Recalling Garage Door Status
HomeLink mirror with Two-Way
Communication provides a way to view
the last stored message from the garage
door opener. In order to recall the last
known status of the last activated device,
press the buttons “1 and 2” OR “2 and 3”
simultaneously.
• If the indicator (4) appears solid
Green, it indicates that the last
activated device was “closed”
properly.
• If the indicator (6) appears solid
Green, it indicates that the last
activated device was “open” properly.
3. Erasing HomeLink® Buttons
1) Erasing and Reprogramming a Single
H omeLink® Button:
1. Press and hold the desired HomeLink
butt on you want to re-program. DO
NOT release the button.
2.
The HomeLink indica
tor light (7) will
illuminate solid green. Release the
button as soon as the HomeLink
indicator light (7) begins to flash
orange, usually about 20 seconds.
3.
Proceed with the s
teps in the
“Programming a New HomeLink
Button” section.
Information
If you do not complete the re-
programming of a new device to the
button, it will revert to the previously
stored programming.
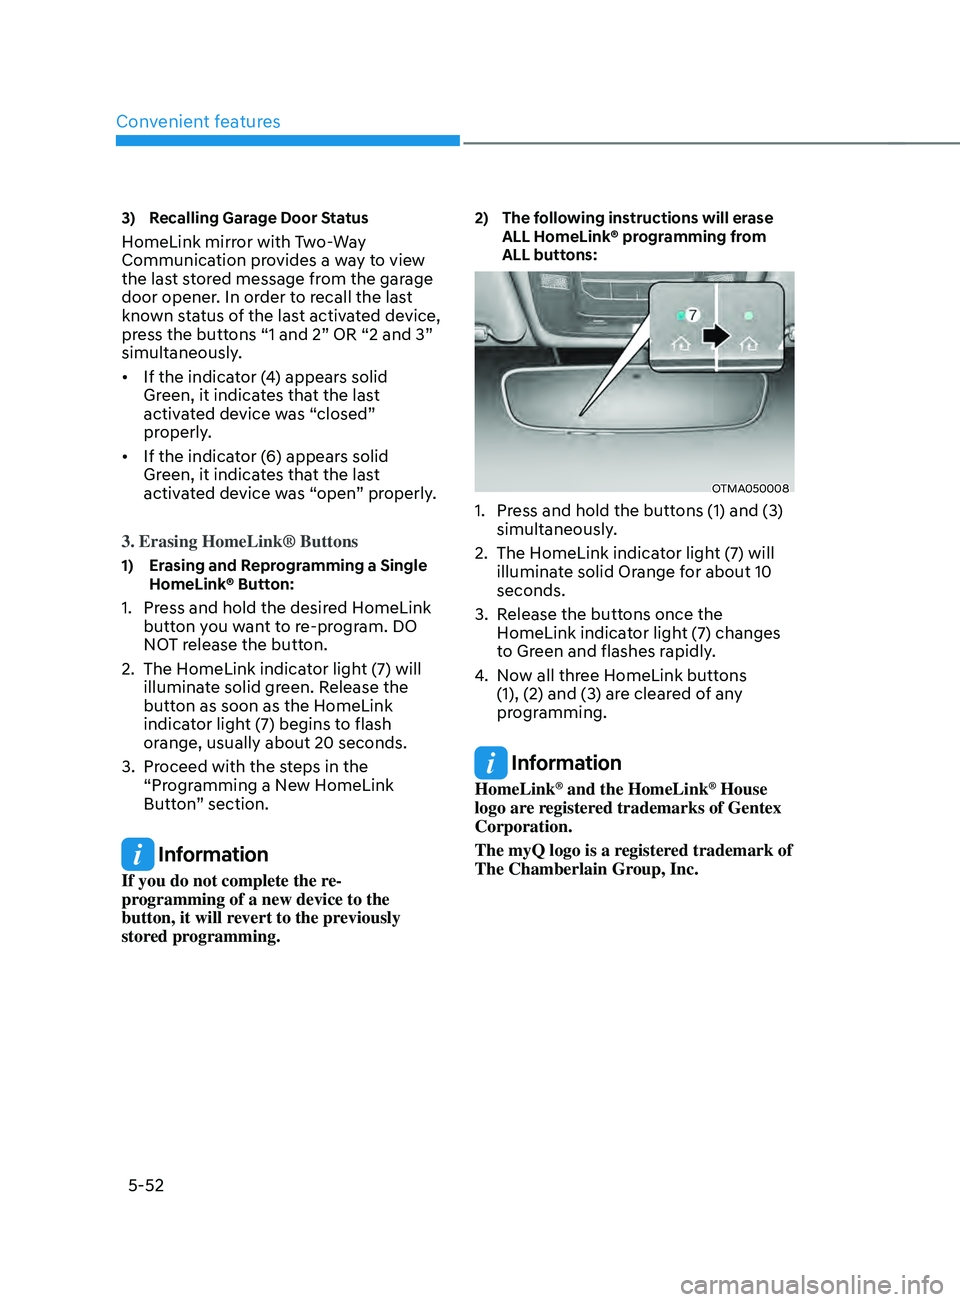
2) The following instructions will erase
ALL H
omeLink® programming from
ALL buttons:
OTMA050008
1. Press and hold the buttons (1) and (3)
simultaneously .
2.
The HomeLink indica
tor light (7) will
illuminate solid Orange for about 10
seconds.
3.
Release the butt
ons once the
HomeLink indicator light (7) changes
to Green and flashes rapidly.
4.
No
w all three HomeLink buttons
(1), (2) and (3) are cleared of any
programming.
Information
HomeLink® and the HomeLink® House
logo are registered trademarks of Gentex
Corporation.
The myQ logo is a registered trademark of
The Chamberlain Group, Inc.
Page 201 of 636
05
5-57
• If ‘Convenience → Welcome mirr or/
light → On door unlock’ is select ed in the User Se
ttings mode on the LCD
display, the outside mirror will fold or
unfold automatically as follows:
- The mirror will f
old or unfold when
the door is locked or unlocked by
the smart key.
- The mirror will f
old or unfold when
the door is locked or unlocked by
the button on the outside door
handle.
• If
‘Con
venience
→ W
elcome
mirror/ligh
t
→ On door unlock’ and ‘Conv
enience
→ W
elcome
mirr
or/light
→ On driv
er
appr
oach’
is select
ed
in the User Se
ttings mode on the LCD
display, the outside mirror will unfold
automatically when you approach the
vehicle (all doors closed and locked)
with a smart key in possession.
NOTICE
The electric type side view mirror
operates even though the ignition
switch is in the OFF position. However,
to prevent unnecessary battery
discharge, do not adjust the mirrors
longer than necessary while the engine
is not running.
NOTICE
Do not fold the electric type side view
mirror by hand. It could cause motor
failure.
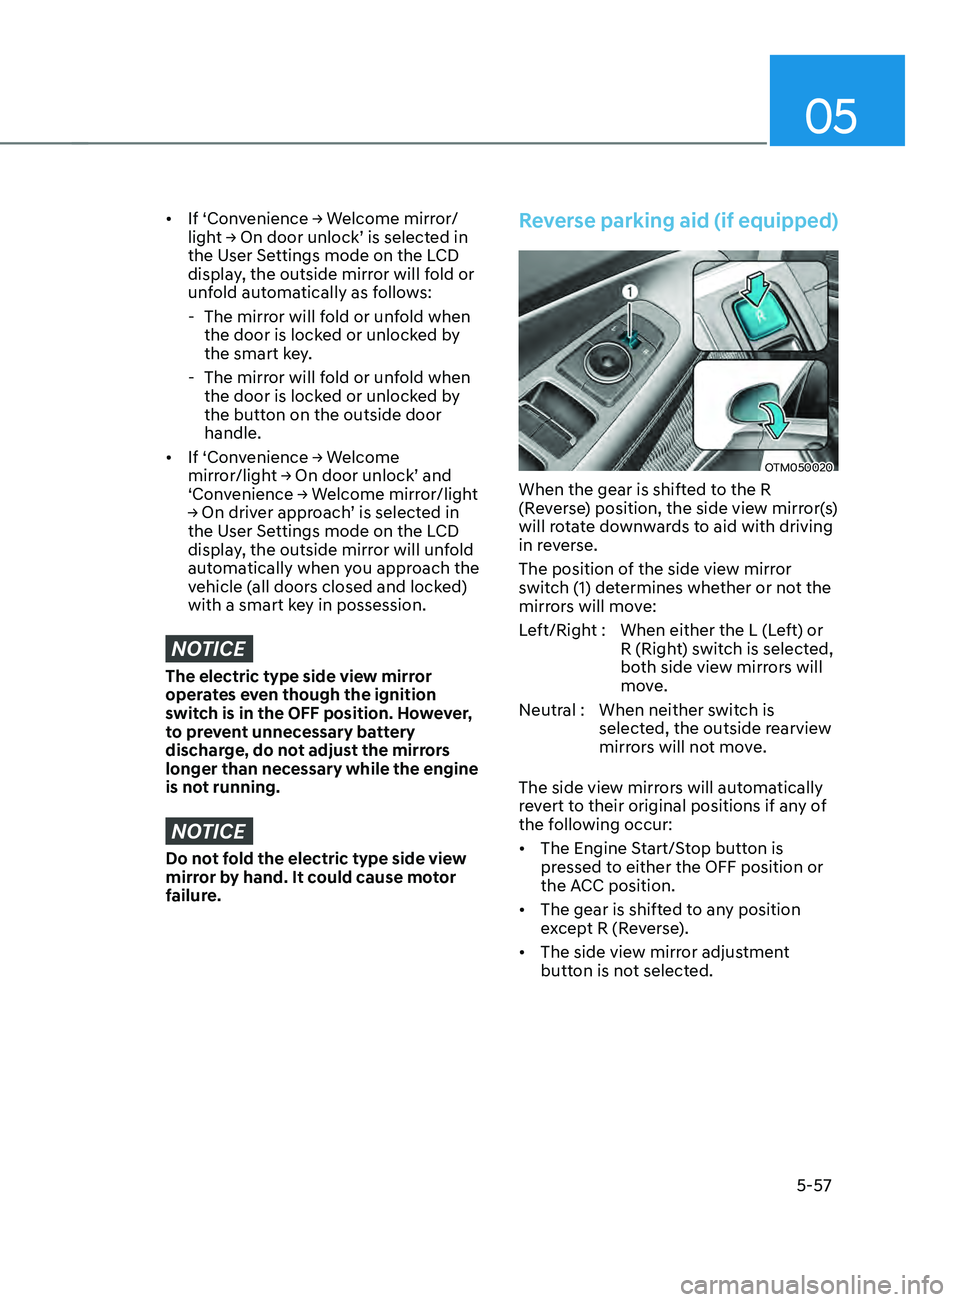
Reverse parking aid (if equipped)
OTM050020
When the gear is shifted to the R
(Reverse) position, the side view mirror(s)
will rotate downwards to aid with driving
in reverse.
The position of the side view mirror
switch (1) determines whether or not the
mirrors will move:
Left/Right : When either the L (Left) or R (Right) switch is selected,
both side view mirrors will
move.
Neutral : When neither switch is selected, the outside rearview
mirrors will not move.
The side view mirrors will automatically
revert to their original positions if any of
the following occur:
• The Engine Start/Stop button is
pressed to either the OFF position or
the ACC position.
• The gear is shifted to any position
except R (Reverse).
• The side view mirror adjustment
button is not selected.
Page 204 of 636
Convenient features
5-60
Automatic reverse (if equipped)
OTM050091
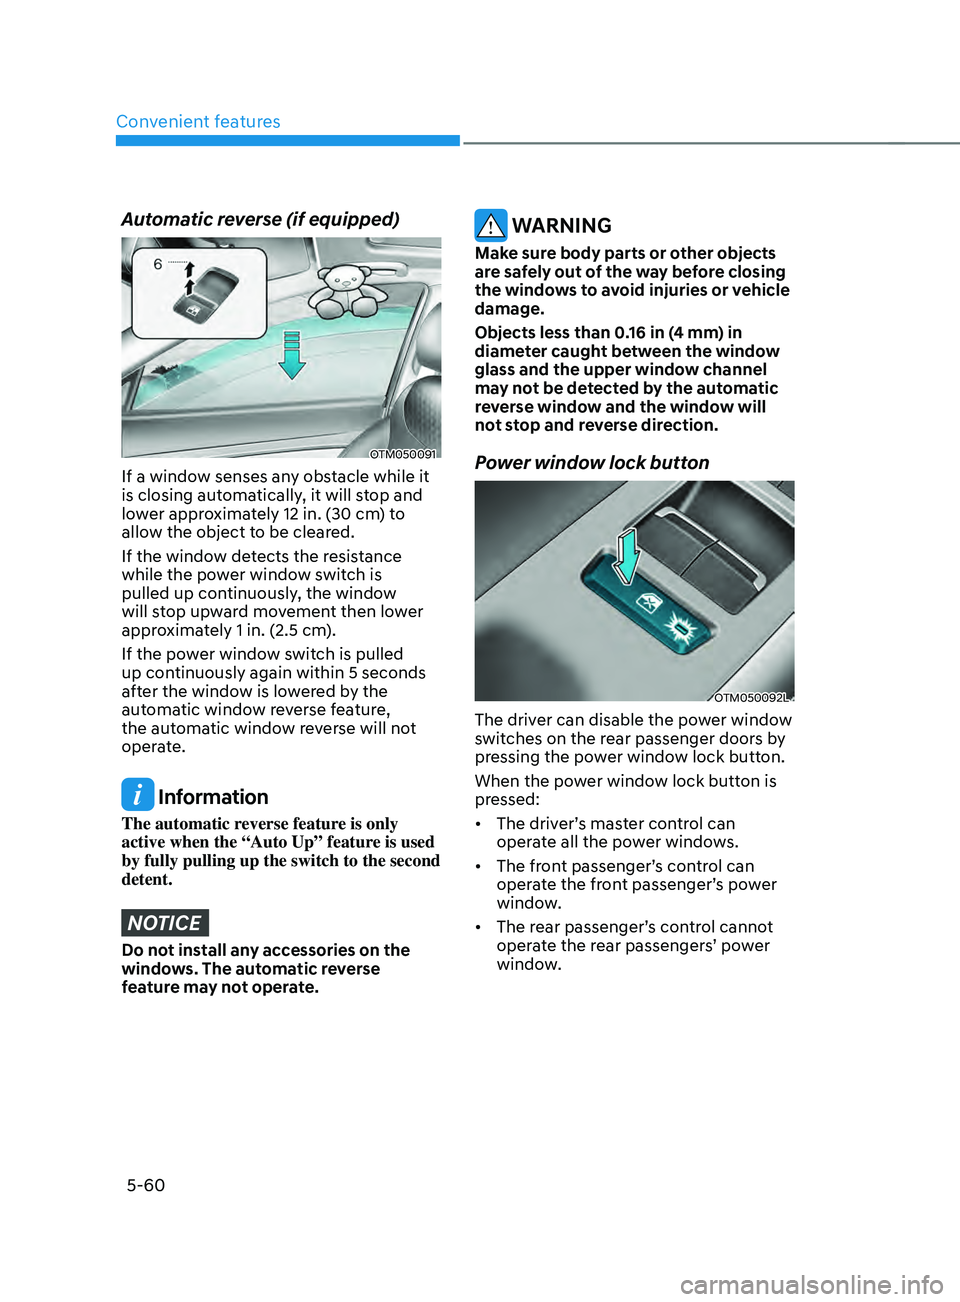
If a window senses any obstacle while it
is closing automatically, it will stop and
lower approximately 12 in. (30 cm) to
allow the object to be cleared.
If the window detects the resistance
while the power window switch is
pulled up continuously, the window
will stop upward movement then lower
approximately 1 in. (2.5 cm).
If the power window switch is pulled
up continuously again within 5 seconds
after the window is lowered by the
automatic window reverse feature,
the automatic window reverse will not
operate.
Information
The automatic reverse feature is only
active when the “Auto Up” feature is used
by fully pulling up the switch to the second
detent.
NOTICE
Do not install any accessories on the
windows. The automatic reverse
feature may not operate.
WARNING
Make sure body parts or other objects
are safely out of the way before closing
the windows to avoid injuries or vehicle
damage.
Objects less than 0.16 in (4 mm) in
diameter caught between the window
glass and the upper window channel
may not be detected by the automatic
reverse window and the window will
not stop and reverse direction.
Power window lock button
OTM050092L
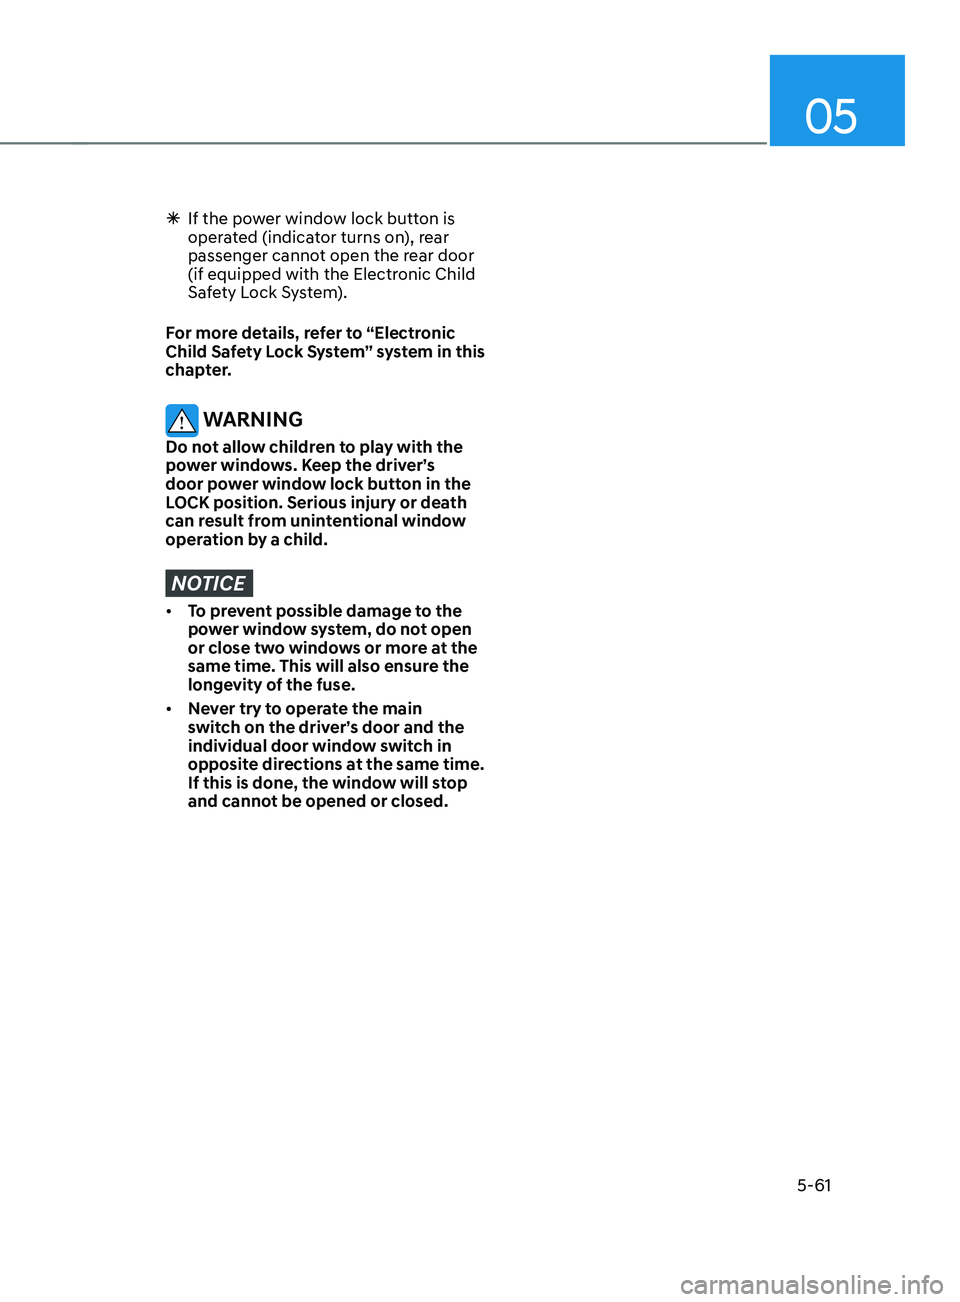
The driver can disable the power window
switches on the rear passenger doors by
pressing the power window lock button.
When the power window lock button is
pressed:
• The driver’s master control can
operate all the power windows.
• The front passenger’s control can
operate the front passenger’s power
window.
• The rear passenger’s control cannot
operate the rear passengers’ power
window.
Page 205 of 636
05
5-61
ÃIf the power window lock button is
oper
ated (indicator turns on), rear
passenger cannot open the rear door
(if equipped with the Electronic Child
Safety Lock System).
For more details, refer to “Electronic
Child Safety Lock System” system in this
chapter.
WARNING
Do not allow children to play with the
power windows. Keep the driver’s
door power window lock button in the
LOCK position. Serious injury or death
can result from unintentional window
operation by a child.
NOTICE
• To prevent possible damage to the
power window system, do not open
or close two windows or more at the
same time. This will also ensure the
longevity of the fuse.
• Never try to operate the main
switch on the driver’s door and the
individual door window switch in
opposite directions at the same time.
If this is done, the window will stop
and cannot be opened or closed.
Page 206 of 636
Convenient features
5-62
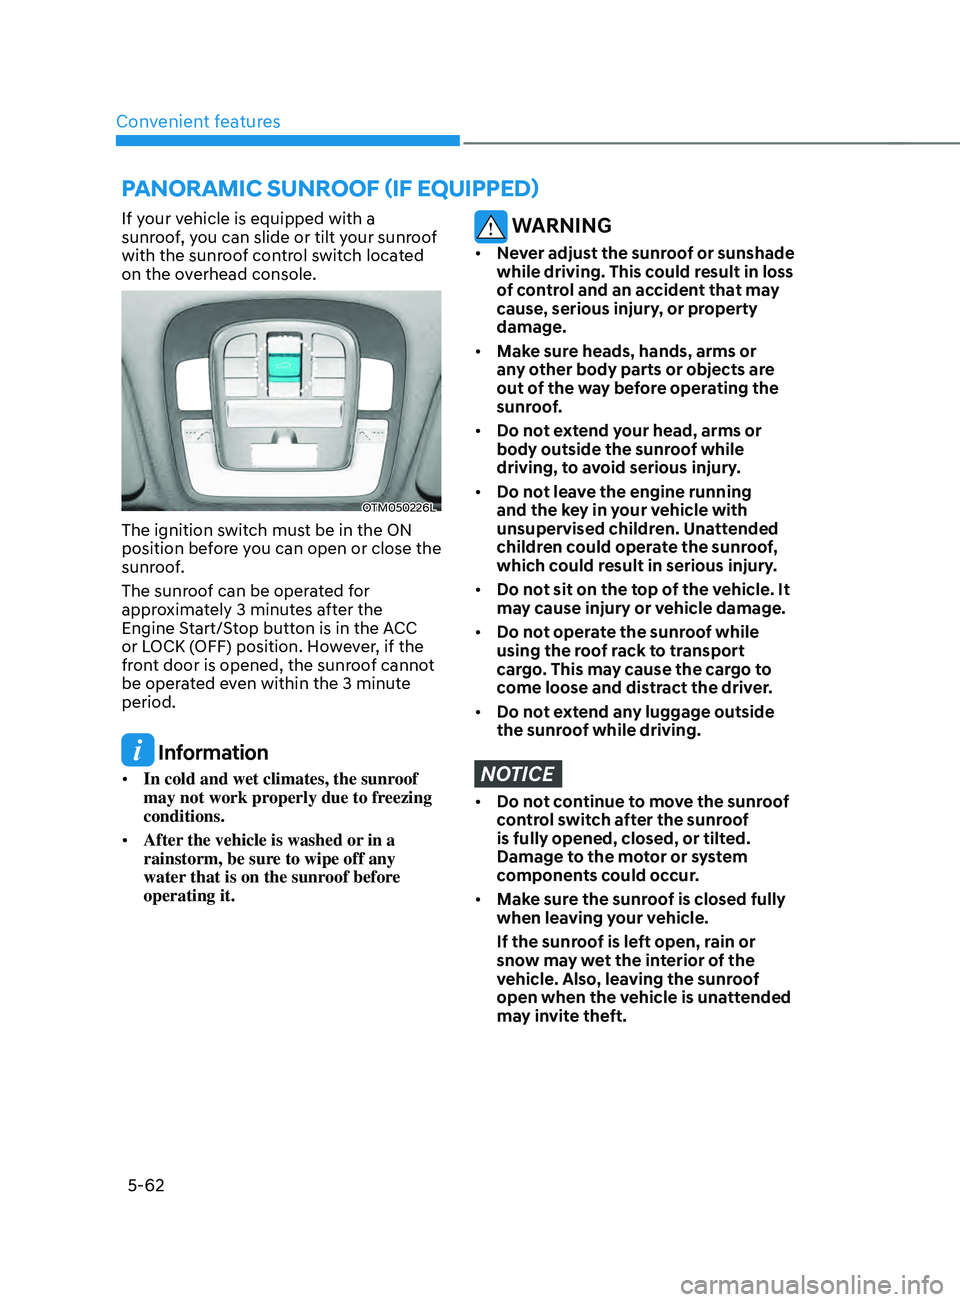
If your vehicle is equipped with a
sunroof, you can slide or tilt your sunroof
with the sunroof control switch located
on the overhead console.
OTM050226L
The ignition switch must be in the ON
position before you can open or close the
sunroof.
The sunroof can be operated for
approximately 3 minutes after the
Engine Start/Stop button is in the ACC
or LOCK (OFF) position. However, if the
front door is opened, the sunroof cannot
be operated even within the 3 minute
period.
Information
• In cold and wet climates, the sunroof
may not work properly due to freezing
conditions.
• After the vehicle is washed or in a
rainstorm, be sure to wipe off any
water that is on the sunroof before
operating it.
WARNING
• Never adjust the sunroof or sunshade
while driving. This could result in loss
of control and an accident that may
cause, serious injury, or property
damage.
• Make sure heads, hands, arms or
any other body parts or objects are
out of the way before operating the
sunroof.
• Do not extend your head, arms or
body outside the sunroof while
driving, to avoid serious injury.
• Do not leave the engine running
and the key in your vehicle with
unsupervised children. Unattended
children could operate the sunroof,
which could result in serious injury.
• Do not sit on the top of the vehicle. It
may cause injury or vehicle damage.
• Do not operate the sunroof while
using the roof rack to transport
cargo. This may cause the cargo to
come loose and distract the driver.
• Do not extend any luggage outside
the sunroof while driving.
NOTICE
• Do not continue to move the sunroof
control switch after the sunroof
is fully opened, closed, or tilted.
Damage to the motor or system
components could occur.
• Make sure the sunroof is closed fully
when leaving your vehicle.
If the sunroof is left open, rain or
snow may wet the interior of the
vehicle. Also, leaving the sunroof
open when the vehicle is unattended
may invite theft.
pAnORAmIC sUnR OOF (IF E QUIppED)
Page 212 of 636
Convenient features
5-68
Liftgate
Opening the liftgate
OTM050047
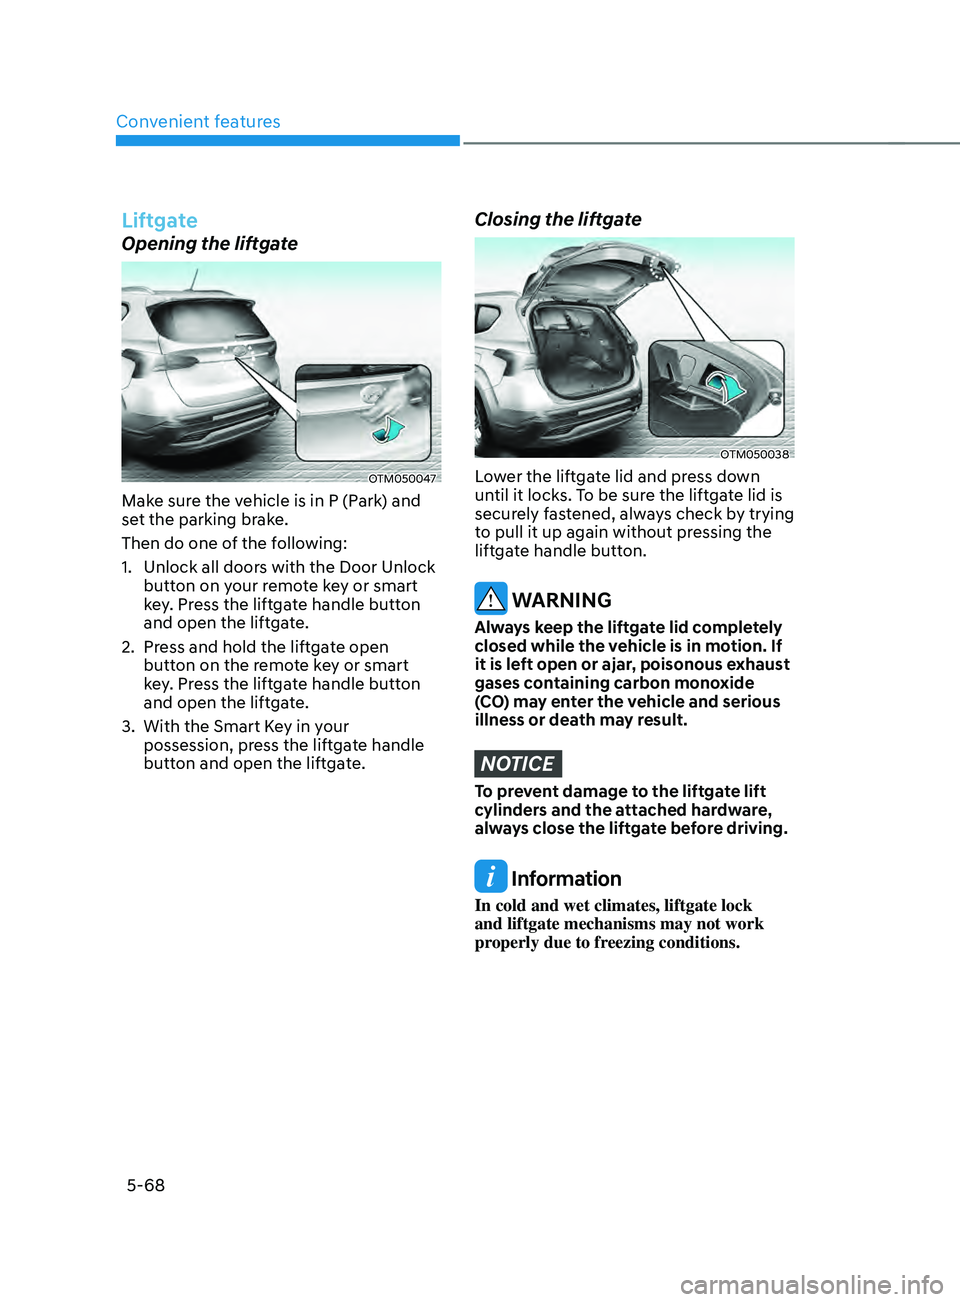
Make sure the vehicle is in P (Park) and
set the parking brake.
Then do one of the following:
1.
Unlock all doors with the Door Unlock
butt
on on your remote key or smart
key. Press the liftgate handle button
and open the liftgate.
2.
Press and hold the lift
gate open
button on the remote key or smart
key. Press the liftgate handle button
and open the liftgate.
3.
With the Smart Ke
y in your
possession, press the liftgate handle
button and open the liftgate.
Closing the liftgate
OTM050038
Lower the liftgate lid and press down
until it locks. To be sure the liftgate lid is
securely fastened, always check by trying
to pull it up again without pressing the
liftgate handle button.
WARNING
Always keep the liftgate lid completely
closed while the vehicle is in motion. If
it is left open or ajar, poisonous exhaust
gases containing carbon monoxide
(CO) may enter the vehicle and serious
illness or death may result.
NOTICE
To prevent damage to the liftgate lift
cylinders and the attached hardware,
always close the liftgate before driving.
Information
In cold and wet climates, liftgate lock
and liftgate mechanisms may not work
properly due to freezing conditions.