2021 HYUNDAI SANTA FE LIMITED height
[x] Cancel search: heightPage 184 of 636
Convenient features
5-40
Recalling memory positions
1. Shift to P (Park) while the Engine
Start/Stop button is in the ON
position.
2.
Press the desir
ed memory button (1
or 2). The system will beep once, and
then the driver’s seat position, side
view mirror position, steering wheel
position, instrument panel illumination
intensity and head-up display height/
brightness will automatically adjust to
the stored positions.
3.
‘Driver 1 (
or 2) settings applied’ will
appear on the cluster LCD display.
Information
• If you press the SET button or the
corresponding button which the
setting is being recalled, the setting will
temporarily deactivate. If you press the
other buttons, the setting of the pressed
button will activate.
For example, if you press the SET
button or number 1 button with the
number 1 setting in operation, the
setting will temporarily deactivate. If
you press the number 2 button, the
number 2 setting will activate.
• If you adjust the seat, rearview mirror,
steering wheel, instrument panel
illumination or head-up display while
recalling the stored positions, the pre-
set settings will become ineffective.
Resetting the system
Take the following procedures to reset
integrated memory system, when it does
not operate properly.
Resetting integrated memory
system
1. Stop the vehicle and open the driver’s
door with the E
ngine Start/Stop
button in the ON position and the
vehicle shifted to P (Park).
2.
Adjus
t the driver’s seat and seatback
to the foremost position.
3.
Press the SET butt
on and push
forward the driver’s seat movement
switch over 2 seconds simultaneously.
While resetting integrated memory
system
1. Resetting starts with a notification
sound.
2.
The driver’
s seat and seatback is
adjusted to the rearward position with
the notification sound.
3.
The driver’
s seat and seatback is
re-adjusted to the default position
(central position) with the notification
sound.
However, in the following cases, the
resetting procedure and the notification
sound may stop.
• The memory button is pressed.
• The seat control switch is operated.
• The gear is shifted out of P (Park).
• The driving speed exceeds
2 mph (3km/h).
• The driver’s door is closed.
Page 187 of 636
05
5-43
Tilt / Telescopic steering
When adjusting the steering wheel to a
comfortable position, adjust the steering
wheel so that it points toward your chest,
not toward your face. Make sure you can
see the instrument cluster warning lights
and gauges. After adjusting, push the
steering wheel both up and down to be
certain it is locked in position.
Always adjust the position of the steering
wheel before driving.
WARNING
NEVER adjust the steering wheel while
driving. This may cause loss of vehicle
control resulting in an accident.
OTM050008
To adjust the steering wheel angle and
height:
1.
Pull down the lock
-release lever (1).
2.
Adjus
t the steering wheel to the
desired angle (2) and distance
forward/back (3).
3.
Pull up the lock-r
elease lever to lock
the steering wheel in place.
Information
Sometimes the lock release lever may not
engage completely. This may occur when
the gears of the locking mechanism do not
completely mesh. If this occurs, pull down
on the lock-release lever, readjust the
steering wheel again, and then pull back
up on the release lever to lock the steering
wheel in place.
Heated steering wheel
(if equipped)
OTM050009
When the ignition switch is in the ON
position or when the engine is running,
press the heated steering wheel button
to warm the steering wheel.
The indicator on the button will
illuminate.
To turn the heated steering wheel off,
press the button again. The indicator on
the button will turn off.
Page 218 of 636
Convenient features
5 -74
Power liftgate opening height
OTM050049
The driver may set the height of a fully
opened liftgate by following the below
instruction.
1.
Position the lift
gate manually to the
height you prefer.
2.
Press the po
wer liftgate inner switch
for more than 3 seconds.
3.
Close the liftga
te manually after
hearing the buzzer sound.
The liftgate will open to the height the
driver has set up.
WARNING
Always keep the liftgate completely
closed while the vehicle is in motion. If
it is left open or ajar, poisonous exhaust
gases containing carbon monoxide
(CO) may enter the vehicle and serious
illness or death may result.
WARNING
Occupants should never ride in the
rear cargo area where no restraints are
available. To avoid injury in the event of
an accident or sudden stops, occupants
should always be properly restrained.
Emergency liftgate safety release
OTM050042
Your vehicle is equipped with the
emergency liftgate safety release lever
located on the bottom of the liftgate
inside the vehicle.
To unlock and open the liftgate manually
from inside the luggage compartment,
perform the following procedure:
1.
Remo
ve the cover.
2.
Push the release le
ver to the right.
3.
Push the liftga
te outward and upward.
WARNING
• Be aware of the location of the
emergency liftgate safety release
lever in your vehicle and know how
to open the liftgate using the safety
release lever.
• No one should be allowed to occupy
the luggage compartment of the
vehicle at any time. The luggage
compartment is a very dangerous
location in the event of a crash.
• Use the release lever for emergencies
only. Use extreme caution, especially
while the vehicle is in motion.
Page 224 of 636
Convenient features
5-80
OTMA050019
The Head-Up Display is an optional
feature that allows the driver to view
information projected onto a transparent
screen while still keeping your eyes
safely on the road ahead while driving.
Head-up display settings
OIK047152N
• Head-up display can be enabled from
the Settings menu in the User Settings
mode on the instrument cluster LCD
display. Select:
-Setup → H
ead-Up
Displa
y
→ E
nable
Head-Up Displa
y
• After turning on the head-up
display, you can change the settings
of ‘Display Height’ and ‘Content
Selection’ of the Head-Up Display.
Head-up display information
OTMA050016
1. Turn by Turn (TBT) navigation
2.
Tr
affic
3.
Speedomet
er
4.
SCC set speed
5.
SCC Vehicle dis
tance
6.
Highw
ay Driving Assist
7.
Lane Follo
wing Assist
8.
Lane Saf
ety
9.
Blind-Spo
t Safety
10. Highway Auto Speed Change
Information
If you select Turn By Turn (TBT)
navigation information as Head-Up
Display contents, the Turn By Turn
(TBT) navigation information will not be
displayed in the instrument cluster LCD
display.
hEAD-Up DIspLAY (hUD) (IF EQUIppED)
Page 225 of 636
05
5-81
Precautions while using the
head-up display
• It may sometimes be difficult to read
information on the Head-Up Display in
the following situations.
- The driver is impr
operly positioned
in the driver’s seat
- The driver w
ears polarizing-filter
sunglasses
- An object is locat
ed above the
head-up display cover
- The vehicle is driv
en on a wet road
- Any impr
oper lighting accessory is
installed inside the vehicle, or there
is incoming light from outside of the
vehicle
- The driver w
ears glasses
- The driver w
ears contact lenses
When it is difficult to read the Head-
Up Display information, adjust the
image height or brightness level from
the Settings menu in the infotainment
system screen. •
For your safety, make sure to stop the
vehicle before adjusting the settings.
• Do not tint the front windshield glass
or add other types of metallic coating.
Otherwise, the Head-Up Display
image may be invisible.
• Do not place any accessories on the
crash pad or attach any objects on the
windshield glass.
• When replacing the front windshield
glass, replace it with a windshield
glass designed for Head-Up Display
operation. Otherwise, duplicated
images may be displayed on the
windshield glass.
WARNING
Blind-Spot Collision Warning
warnings on the Head-Up Display are
supplemental. Do not solely depend on
them to change lanes. Always take a
look around before changing lanes.
Page 331 of 636
06
6-43
Anti-lock Brake System (ABS)
WARNING
Anti-Lock Braking System (ABS) or
Electronic Stability Control (ESC)
system will not prevent accidents
due to improper or dangerous driving
maneuvers. Even though vehicle
control is improved during emergency
braking, always maintain a safe
distance between you and objects
ahead of you. Vehicle speeds should
always be reduced during extreme
road conditions. The braking distance
for vehicles equipped with ABS or ESC
may be longer than for those without
these systems in the following road
conditions.
Drive your vehicle at reduced speeds
during the following conditions:
• Rough, gravel or snow-covered
roads.
• On roads where the road surface is
pitted or has different surface height.
• Tire chains are installed on your
vehicle.
The safety features of ABS or ESC
equipped vehicle should not be tested
by high speed driving or cornering. This
could endanger the safety of yourself or
others.
ABS is an electronic braking system that
helps prevent a braking skid. ABS allows
the driver to steer and brake at the same
time.
Using ABS
To obtain the maximum benefit from
your ABS in an emergency situation,
do not attempt to modulate your brake
pressure and do not try to pump your
brakes. Depress your brake pedal as hard
as possible.
When you apply your brakes under
conditions which may lock the wheels,
you may hear sounds from the brakes,
or feel a corresponding sensation in the
brake pedal. This is normal and it means
your ABS is active.
ABS does not reduce the time or distance
it takes to stop the vehicle.
Always maintain a safe distance from the
vehicle in front of you.
ABS will not prevent a skid that results
from sudden changes in direction, such
as trying to take a corner too fast or
making a sudden lane change. Always
drive at a safe speed for the road and
weather conditions.
ABS cannot prevent a loss of stability.
Always steer moderately when braking
hard. Severe or sharp steering wheel
movement can still cause your vehicle to
veer into oncoming traffic or off the road.
On loose or uneven road surfaces,
operation of the anti-lock brake system
may result in a longer stopping distance
than for vehicles equipped with a
conventional brake system.
The ABS (
) warning light will stay
on for several seconds after the Engine
Start/Stop button is in the ON position.
Page 395 of 636
07
7-13
• The pedestrian or cyclist is not
fully detected, for example, if the
pedestrian is leaning over or is not
fully walking upright
• The pedestrian or cyclist is wearing
clothing or equipment that makes it
difficult to detect as a pedestrian or
cyclist
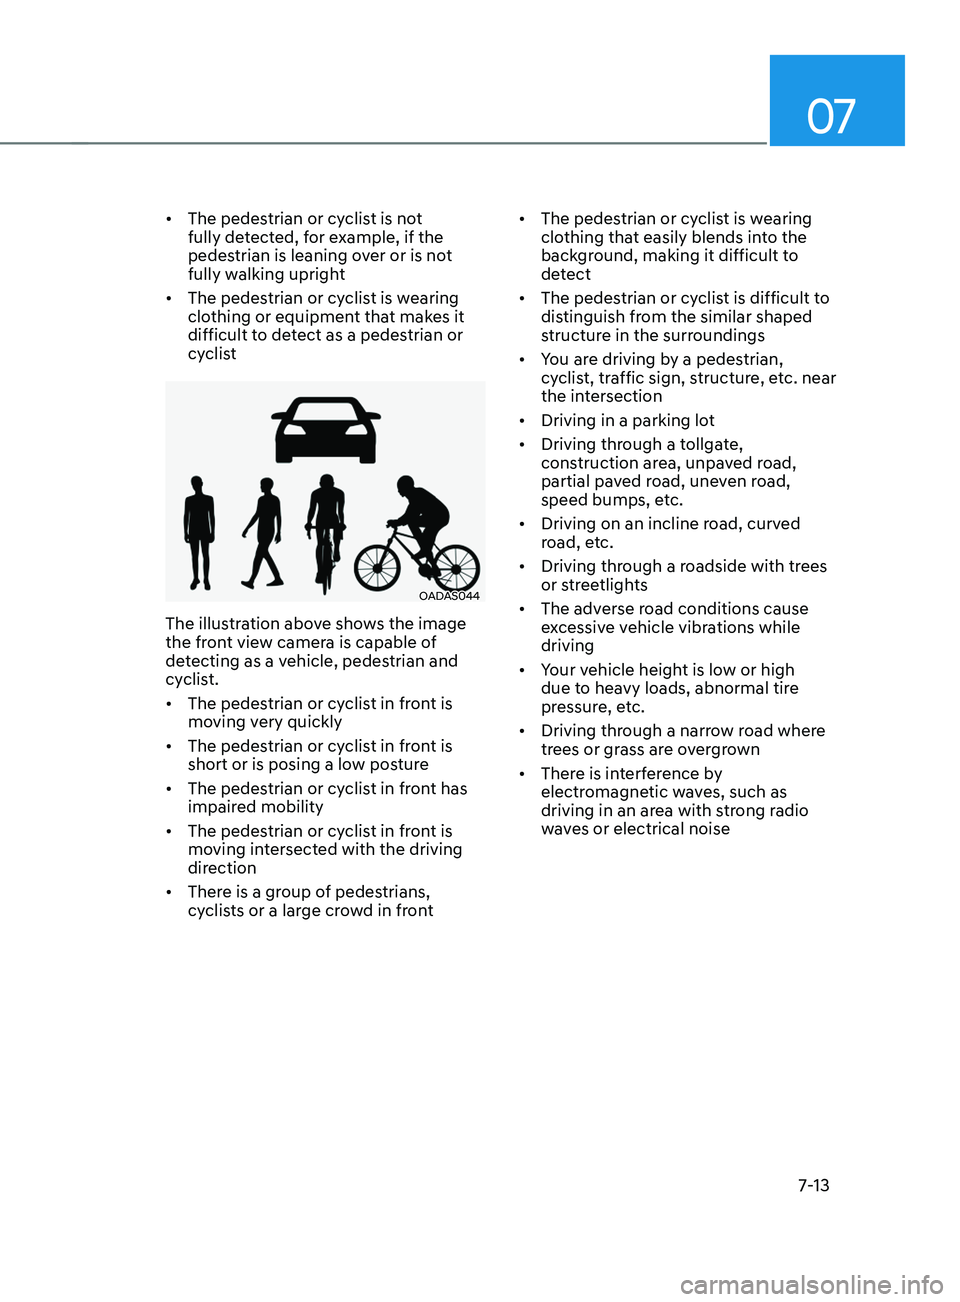
OADAS044
The illustration above shows the image
the front view camera is capable of
detecting as a vehicle, pedestrian and
cyclist.
• The pedestrian or cyclist in front is
moving very quickly
• The pedestrian or cyclist in front is
short or is posing a low posture
• The pedestrian or cyclist in front has
impaired mobility
• The pedestrian or cyclist in front is
moving intersected with the driving
direction
• There is a group of pedestrians,
cyclists or a large crowd in front •
The pedestrian or cyclist is wearing
clothing that easily blends into the
background, making it difficult to
detect
• The pedestrian or cyclist is difficult to
distinguish from the similar shaped
structure in the surroundings
• You are driving by a pedestrian,
cyclist, traffic sign, structure, etc. near
the intersection
• Driving in a parking lot
• Driving through a tollgate,
construction area, unpaved road,
partial paved road, uneven road,
speed bumps, etc.
• Driving on an incline road, curved
road, etc.
• Driving through a roadside with trees
or streetlights
• The adverse road conditions cause
excessive vehicle vibrations while
driving
• Your vehicle height is low or high
due to heavy loads, abnormal tire
pressure, etc.
• Driving through a narrow road where
trees or grass are overgrown
• There is interference by
electromagnetic waves, such as
driving in an area with strong radio
waves or electrical noise
Page 417 of 636
07
7-35
CAUTION
Turn off Blind-Spot Safety system to
install a trailer, carrier, etc., or remove
the trailer, carrier, etc. to use Blind-Spot
Safety system.
Limitations of the system
Blind-Spot Safety system may not
operate normally, or the system may
operate unexpectedly under the
following circumstances:
• There is inclement weather, such as
heavy snow, heavy rain, etc.
• The rear corner radar is covered with
snow, rain, dirt, etc.
• The temperature around the rear
corner radar is high or low
• Driving on a highway (or motorway)
ramp
• The road pavement (or the peripheral
ground) abnormally contains metallic
components (i.e. possibly due to
subway construction)
• There is a fixed object near the
vehicle, such as sound barriers,
guardrails, central dividers, entry
barriers, street lamps, signs,
tunnels, walls, etc. (including double
structures)
• Driving in large areas where there are
few vehicles or structures (i.e. desert,
meadow, suburb, etc.)
• Driving through a narrow road where
trees or grass are overgrown
• Driving on a wet road surface, such as
a puddle on the road
• The other vehicle drives very close
behind your vehicle, or the other
vehicle passes by your vehicle in close
proximity •
The speed of the other vehicle is very
fast that it passes by your vehicle in a
short time
• Your vehicle passes by the other
vehicle
• Your vehicle changes lane
• Your vehicle has started at the same
time as the vehicle next to you and
has accelerated
• The vehicle in the next lane moves
two lanes away from you, or when the
vehicle two lanes away moves to the
next lane from you
• A trailer or carrier is installed around
the rear corner radar
• The bumper around the rear corner
radar is covered with objects, such as
a bumper sticker, bumper guard, bike
rack, etc.
• The bumper around the rear corner
radar is impacted, damaged or the
radar is out of position
• Your vehicle height is low or high
due to heavy loads, abnormal tire
pressure, etc.
Blind-Spot Safety system may not
operate normally, or the system may
operate unexpectedly when the
following objects are detected:
• A motorcycle or bicycle is detected
• A vehicle such as a flat trailer is
detected
• A big vehicle such as a bus or truck is
detected
• A moving obstacle such as a
pedestrian, animal, shopping cart or a
baby stroller is detected
• A vehicle with low height such as a
sports car is detected