Page 223 of 612

3-127
Convenient features of your vehicle
3
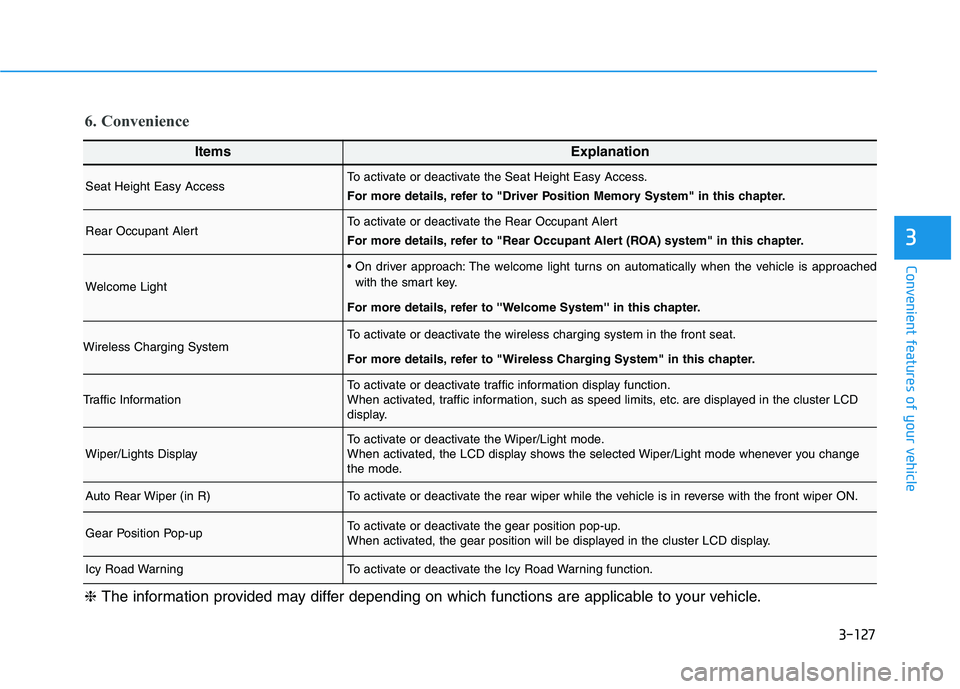
ItemsExplanation
Seat Height Easy AccessTo activate or deactivate the Seat Height Easy Access.
For more details, refer to "Driver Position Memory System" in this chapter.
Rear Occupant AlertTo activate or deactivate the Rear Occupant Alert
For more details, refer to "Rear Occupant Alert (ROA) system" in this chapter.
Welcome Light
The welcome light turns on automatically when the vehicle is approached
with the smart key.
For more details, refer to ''Welcome System'' in this chapter.
Wireless Charging SystemTo activate or deactivate the wireless charging system in the front seat.
For more details, refer to "Wireless Charging System" in this chapter.
Traffic InformationTo activate or deactivate traffic information display function.
When activated, traffic information, such as speed limits, etc. are displayed in the cluster LCD
display.
Wiper/Lights DisplayTo activate or deactivate the Wiper/Light mode.
When activated, the LCD display shows the selected Wiper/Light mode whenever you change
the mode.
Auto Rear Wiper (in R)To activate or deactivate the rear wiper while the vehicle is in reverse with the front wiper ON.
Gear Position Pop-upTo activate or deactivate the gear position pop-up.
When activated, the gear position will be displayed in the cluster LCD display.
Icy Road WarningTo activate or deactivate the Icy Road Warning function.
6. Convenience
❈The information provided may differ depending on which functions are applicable to your vehicle.
Page 227 of 612

3-131
Convenient features of your vehicle
3
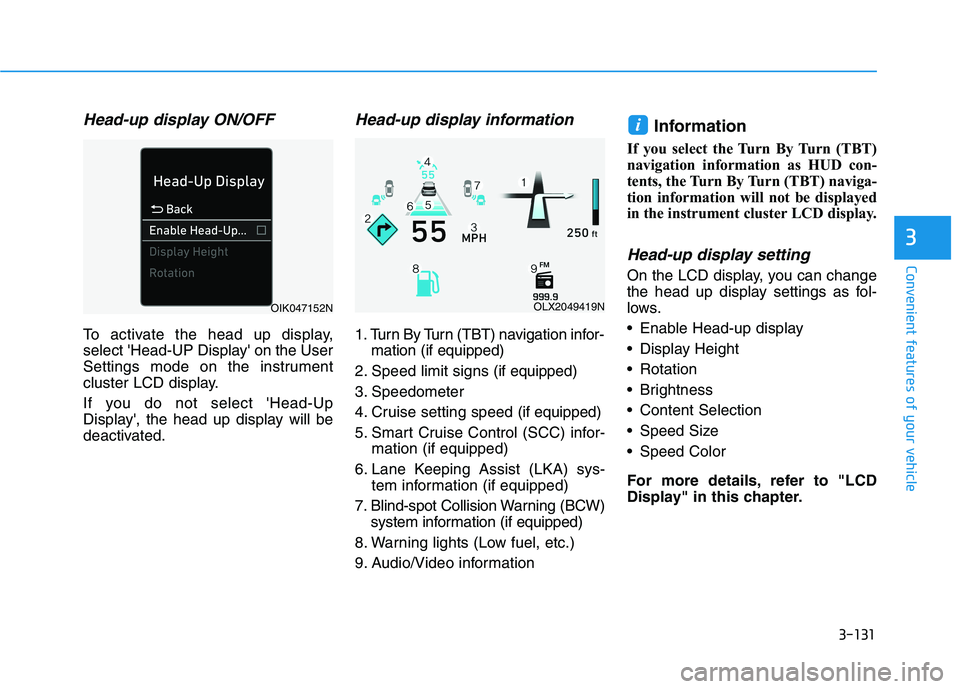
Head-up display ON/OFF
To activate the head up display,
select 'Head-UP Display' on the User
Settings mode on the instrument
cluster LCD display.
If you do not select 'Head-Up
Display', the head up display will be
deactivated.
Head-up display information
1. Turn By Turn (TBT) navigation infor-
mation (if equipped)
2. Speed limit signs (if equipped)
3. Speedometer
4. Cruise setting speed (if equipped)
5. Smart Cruise Control (SCC) infor-
mation (if equipped)
6. Lane Keeping Assist (LKA) sys-
tem information (if equipped)
7. Blind-spot Collision Warning (BCW)
system information (if equipped)
8. Warning lights (Low fuel, etc.)
9. Audio/Video information
Information
If you select the Turn By Turn (TBT)
navigation information as HUD con-
tents, the Turn By Turn (TBT) naviga-
tion information will not be displayed
in the instrument cluster LCD display.
Head-up display setting
On the LCD display, you can change
the head up display settings as fol-
lows.
Enable Head-up display
Display Height
Rotation
Brightness
Content Selection
Speed Size
Speed Color
For more details, refer to "LCD
Display" in this chapter.
i
OLX2049419NOIK047152N
Page 228 of 612
3-132
Convenient features of your vehicle
L LI
IG
GH
HT
TI
IN
NG
G
Exterior Lights
Lighting control
To operate the lights, turn the knob at
the end of the control lever to one of
the following positions:
1. OFF position
2. AUTO headlamp position
3. Parking lamp position
4. Headlamp position
Daytime running light (DRL)
The Daytime Running Lights (DRL)
can make it easier for others to see
the front of your vehicle during the
day, especially after dawn and before
sunset.
The DRL system will turn the dedi-
cated lamp OFF when :
• The headlamps are ON.
The parking lamps are ON.
The vehicle is turned off.
The parking brake is engaged.
AUTO headlamp position
The parking lamp and headlamp will
be turned ON or OFF automatically
depending on the amount of daylight
as measured by the ambient light
sensor (1) on the center dash.
OOS047404N
OTMA048477
OLX2048065
Page 231 of 612

3-135
Convenient features of your vehicle
3
Operating condition
1. Place the headlamp switch in the
AUTO position.
2. Turn on the high beam by pushing
the lever away from you.
The High Beam Assist (HBA) ( )
indicator will illuminate.
3. The High Beam Assist (HBA) will
turn on when vehicle speed is
above 25 mph (40 km/h).
away when the High Beam Assist
(HBA) is operating, the High
Beam Assist (HBA) will turn off
and the high beam will be on con-
tinuously.
towards you when the high beam
is off, the high beam will turn on
without the High Beam Assist
(HBA) canceled. When you let go
of the light switch, the lever will
move to the middle and the high
beam will turn off.
towards you when the high beam
is on by the High Beam Assist
(HBA), the low beam will be on
and the High Beam Assist (HBA)
will turn off.
to the headlamp ON position, the
High Beam Assist (HBA) will turn
off and the low beam will be on
continuously.
When the High Beam Assist (HBA) is
operating, the high beam switches to
low beam if any of the following con-
ditions occur :
- When the headlamp of an on-com-
ing vehicle is detected.
- When the tail lamp of a vehicle in
front is detected.
- When the headlamp or tail lamp of
a motorcycle or a bicycle is detect-
ed.
- When the surrounding ambient
light is bright enough that high
beams are not required.
- When streetlights or other lights
are detected.
- When the headlamp switch is not
in the AUTO position.
- When the High Beam Assist (HBA)
is off.
- When vehicle speed is below 15
mph (24 km/h).
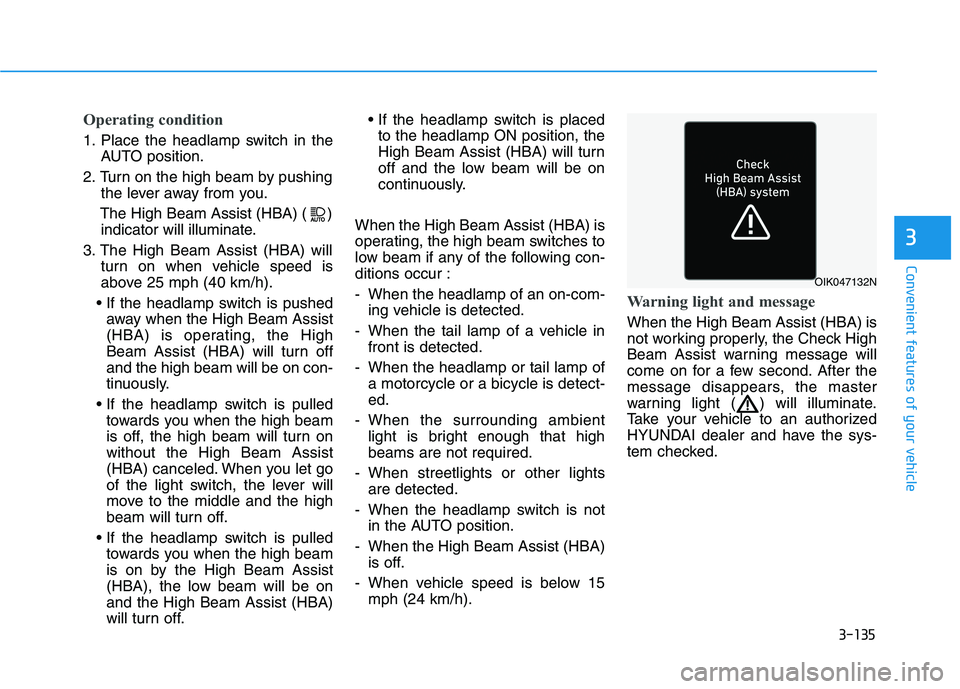
Warning light and message
When the High Beam Assist (HBA) is
not working properly, the Check High
Beam Assist warning message will
come on for a few second. After the
message disappears, the master
warning light ( ) will illuminate.
Take your vehicle to an authorized
HYUNDAI dealer and have the sys-
tem checked.
OIK047132N
Page 234 of 612

3-138
Convenient features of your vehicle
One-touch turn signal function
To activate the One Touch Turn
Signal function, push the turn signal
lever up or down to position (B) and
then release it.
The lane change signals will blink 3,
5 or 7 times.
You can activate or deactivate the
One Touch Turn Signal function or
choose the number of blinks (3, 5, or
7) from the User Settings mode in
the LCD display.
For more details, refer to the "LCD
Display" section in this chapter.
Battery saver function
The purpose of this feature is to help
prevent the battery from being dis-
charged. The system automatically
turns off the parking lamp when the
driver turns the vehicle off and opens
the driver-side door.
With this feature, the parking lamps
will turn off automatically if the driver
parks on the side of road at night.
If necessary, to keep the lamps on
when the vehicle is turned off, perform
the following:
1) Open the driver-side door.
2) Turn the parking lamps OFF and
ON again using the headlamp
switch on the steering column.
Headlamp delay function
If the key is removed from the ignition
switch or placed in the ACC position
or the LOCK/OFF position with the
headlamps ON, the headlamps
(and/or parking lamps) remain on for
about 5 minutes. However, if the dri-
ver's door is opened and closed, the
headlights are turned off after 15
seconds. Also, with the engine off if
the driver's door is opened and
closed, the headlamps (and/or park-
ing lamps) are turned off after 15
seconds.
The headlamps (and/or parking
lamps) can be turned off by pressing
the lock button on the remote key or
smart key twice or turning the head-
lamp switch to the OFF or AUTO
position.
You can activate or deactivate the
Headlamp Delay function from the
User Settings mode in the LCD dis-
play.
For more details, refer to the "LCD
Display" section in this chapter.
Page 235 of 612

3-139
Convenient features of your vehicle
3
If the driver exits the vehicle
through another door besides the
driver door, the battery saver func-
tion does not operate and the
headlamp delay function does not
turn OFF automatically.
This may cause the battery to dis-
charge. To avoid battery dis-
charge, turn OFF the headlamps
manually from the headlamp
switch before exiting the vehicle.
Interior Lights
Do not use the interior lights for
extended periods when the vehi-
cle is turned off or the battery will
discharge.
Interior lamp AUTO cut
The interior lamps will automatically
go off approximately 20 minutes after
the engine is turned off and the
doors are closed. If a door is opened,
the lamp will go off 40 minutes after
the engine is turned off. If the doors
are locked by the remote key or
smart key and the vehicle enters the
armed stage of the theft alarm sys-
tem, the lamps will go off five sec-
onds later.
Front lamps
Front Room Lamp (1) ( ) :
Press the button to turn the front and
rear room lamps on or off.
NOTICE
NOTICE
Do not use the interior lights
when driving in the dark. The
interior lights may obscure your
view and cause an accident.
WARNING
OLX2048066
Page 314 of 612

5-5
Driving your vehicle
5
Before Entering the Vehicle
• Be sure all windows, outside mir-
ror(s), and outside lights are clean
and unobstructed.
Remove frost, snow, or ice.
Visually check the tires for uneven
wear and damage.
Check under the vehicle for any
sign of leaks.
Be sure there are no obstacles
behind you if you intend to back up.
Before Starting
Make sure the hood, the liftgate,
and the doors are securely closed
and locked.
Adjust the position of the seat and
steering wheel.
Adjust the inside and outside
rearview mirrors.
Verify all the lights work.
Fasten your seatbelt. Check that all
passengers have fastened their
seatbelts.
Check the gauges and indicators in
the instrument panel and the mes-
sages on the instrument display
when the ignition switch is in the
ON position.
Check that any items you are car-
rying are stored properly or fas-
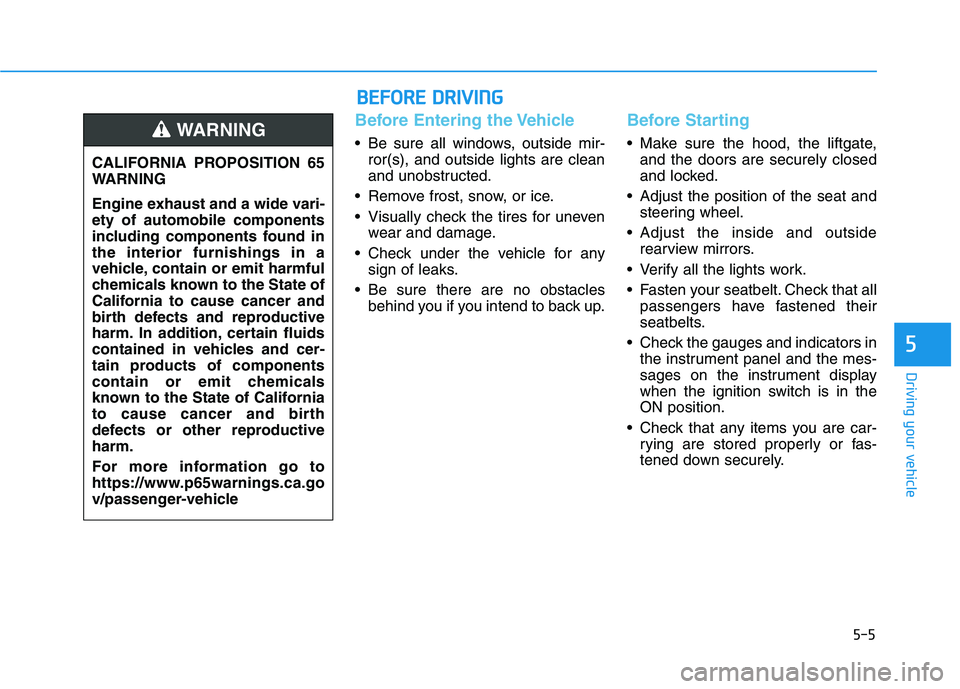
tened down securely. CALIFORNIA PROPOSITION 65
WARNING
Engine exhaust and a wide vari-
ety of automobile components
including components found in
the interior furnishings in a
vehicle, contain or emit harmful
chemicals known to the State of
California to cause cancer and
birth defects and reproductive
harm. In addition, certain fluids
contained in vehicles and cer-
tain products of components
contain or emit chemicals
known to the State of California
to cause cancer and birth
defects or other reproductive
harm.
For more information go to
https://www.p65warnings.ca.go
v/passenger-vehicleWARNING
B BE
EF
FO
OR
RE
E
D
DR
RI
IV
VI
IN
NG
G
Page 317 of 612
5-8
Driving your vehicle
Key ignition switch positions
Switch
PositionActionNotice
LOCK
To turn the ignition switch to the LOCK position, put the
key in at the ACC position and turn the key towards the
LOCK position.
The ignition key can be removed in the LOCK position.
The shift lever must be in the P (Park) position.
ACCSome of the electrical accessories are usable.
ON
This is the normal key position when the engine has
started.
All features and accessories are usable.
The warning lights can be checked when you turn the
ignition switch from ACC to ON.Do not leave the ignition switch in the ON position when
the engine is not running in order to prevent the battery
from discharging.
START
To start the engine, turn the ignition switch to the START
position. The switch returns to the ON position when you
let go of the key.The engine will crank until you release the key.