2021 HYUNDAI PALISADE door lock
[x] Cancel search: door lockPage 133 of 612

3-37
Convenient features of your vehicle
Some gate operators and garage
door openers may require you to
replace step #3 with the "cycling"
procedure noted in the "Canadian
Programming" section of this doc-
ument.
Rolling code programming
To train a garage door opener (or
other rolling code equipped devices)
with the rolling code feature, follow
these instructions after completing
the "Programming" portion of this
text. (A second person may make the
following training procedures quicker
& easier.)
4. Locate the "learn" or "smart" but-
ton on the device's motor head
unit. Exact location and color of
the button may vary by product
brand. If there is difficulty locating
the "learn" or "smart" button, refer-
ence the device's owner's manual
or contact HomeLink at 1-800-
355-3515 or on the internet at
www.homelink.com.5. Press and release the "learn" or
"smart" button on the device’s
motor head unit. You have 30 sec-
onds to complete step number 6.
6. Return to the vehicle and firmly
press and release the pro-
grammed HomeLink button up to
three times. The rolling code
equipped device should now rec-
ognize the HomeLink signal and
activate when the HomeLink but-
ton is pressed. The remaining two
buttons may now be programmed
if this has not previously been
done. Refer to the "Programming"
portion of this text.
Operating HomeLink
To operate, simply press the pro-
grammed HomeLink button.
Activation will now occur for the
trained product (garage door, securi-
ty system, entry door lock, estate
gate, or home or office lighting). For
convenience, the hand-held trans-
mitter of the device may also be used
at any time. The HomeLink Wireless
Controls System (once programmed)
or the original hand-held transmitter
may be used to activate the device
(e.g. garage door, entry door lock,
etc.). In the event that there are still
programming difficulties, contact
HomeLink at 1-800-355-3515 or on
the internet at www.homelink.com.
NOTICE
3
Page 138 of 612

3-42
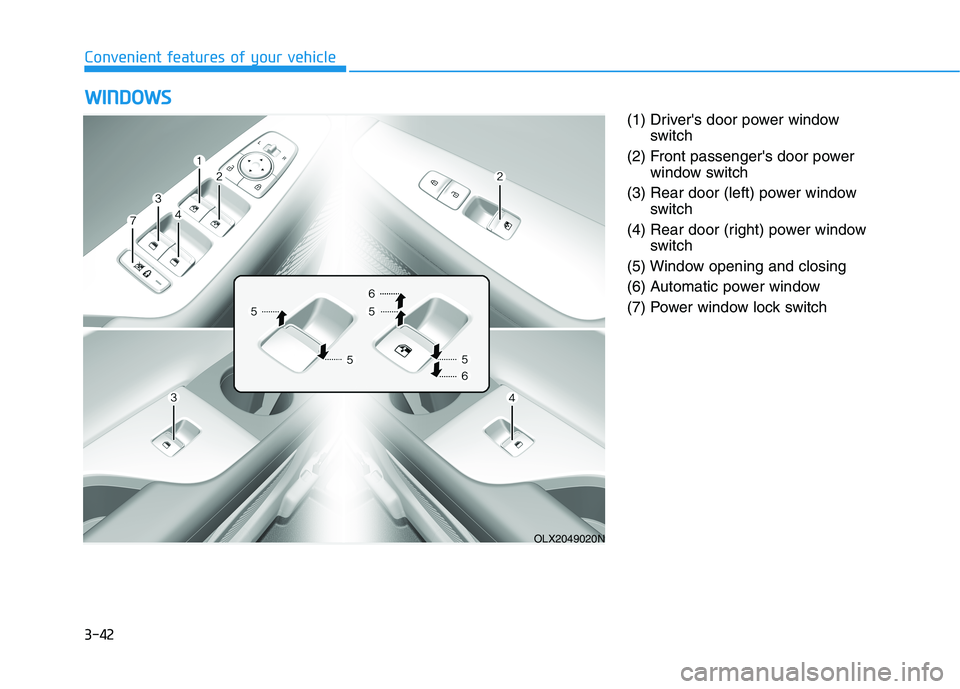
(1) Driver's door power window
switch
(2) Front passenger's door power
window switch
(3) Rear door (left) power window
switch
(4) Rear door (right) power window
switch
(5) Window opening and closing
(6) Automatic power window
(7) Power window lock switch
W WI
IN
ND
DO
OW
WS
S
Convenient features of your vehicle
OLX2049020N
Page 139 of 612

3-43
Convenient features of your vehicle
3
Power Windows
The ignition switch must be in the ON
position to be able to raise or lower
the windows. Each door has a Power
Window switch to control that door’s
window. The driver has a Power
Window Lock switch which can block
the operation of passenger windows.
The power windows will operate for
approximately 10 minutes after the
ignition switch is placed in the ACC
or LOCK/OFF position. However, if
the front doors are opened, the
Power Windows will not operate even
within the 10 minute period.
Information
• In cold and wet climates, power win-
dows may not work properly due to
freezing conditions.
• While driving with the rear win-
dows down or with the sunroof (if
equipped) opened (or partially
opened), your vehicle may demon-
strate a wind buffeting or pulsation
noise. This noise is normal and can
be reduced or eliminated by taking
the following actions. If the noise
occurs with one or both of the rear
windows down, partially lower both
front windows approximately one
inch. If you experience the noise
with the sunroof open, slightly close
the sunroof.
Window opening and closing
To open:
Press the window switch down to the
first detent position (5). Release the
switch when you want the window to
stop.
To close:
Pull the window switch up to the first
detent position (5). Release the win-
dow switch when you want the win-
dow to stop.
i
To avoid serious injury or death,
do not extend your head, arms
or body outside the windows
while driving.
WARNING
OIK047016
Page 141 of 612

3-45
Convenient features of your vehicle
3
Information
The automatic reverse feature is only
active when the "Auto Up" feature is
used by fully pulling up the switch to
the second detent.
Do not install any accessories on
the windows. The automatic reverse
feature may not operate.
Power window lock switch
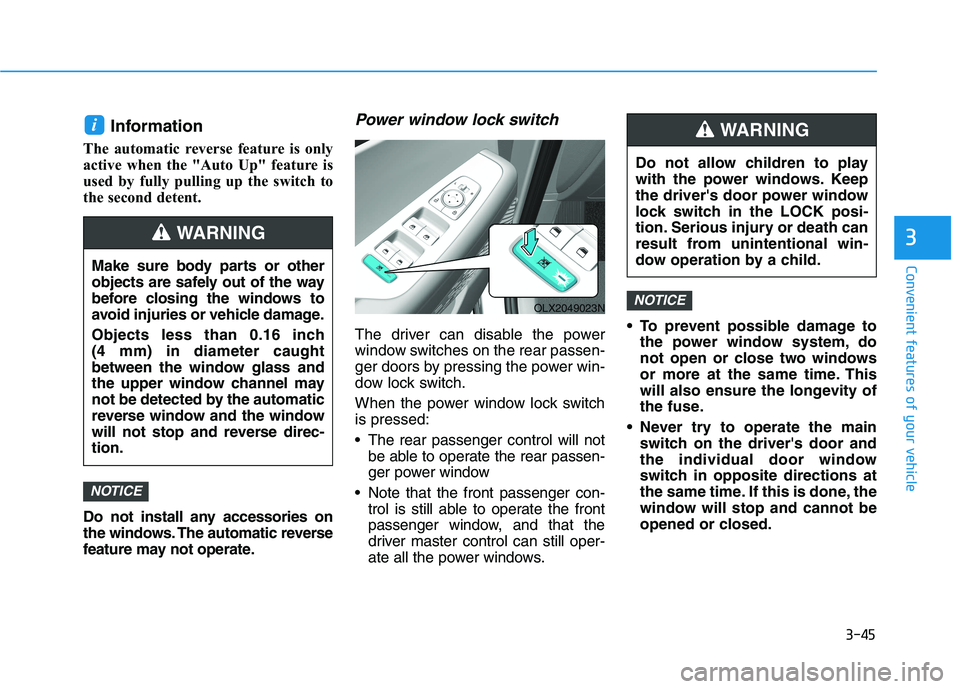
The driver can disable the power
window switches on the rear passen-
ger doors by pressing the power win-
dow lock switch.
When the power window lock switch
is pressed:
The rear passenger control will not
be able to operate the rear passen-
ger power window
Note that the front passenger con-
trol is still able to operate the front
passenger window, and that the
driver master control can still oper-
ate all the power windows. To prevent possible damage to
the power window system, do
not open or close two windows
or more at the same time. This
will also ensure the longevity of
the fuse.
Never try to operate the main
switch on the driver's door and
the individual door window
switch in opposite directions at
the same time. If this is done, the
window will stop and cannot be
opened or closed.
NOTICE
NOTICE
i
Do not allow children to play
with the power windows. Keep
the driver's door power window
lock switch in the LOCK posi-
tion. Serious injury or death can
result from unintentional win-
dow operation by a child.
WARNING
Make sure body parts or other
objects are safely out of the way
before closing the windows to
avoid injuries or vehicle damage.
Objects less than 0.16 inch
(4 mm) in diameter caught
between the window glass and
the upper window channel may
not be detected by the automatic
reverse window and the window
will not stop and reverse direc-
tion.
WARNING
OLX2049023N
Page 142 of 612

3-46
Sunroof (if equipped)
If your vehicle is equipped with a
sunroof, you can slide or tilt your
sunroof with the sunroof control lever
located on the overhead console.
The ignition switch must be in the ON
position before you can open or close
the sunroof.
The sunroof can be operated for
approximately 10 minutes after the
ignition switch is removed or turned
to the ACC or LOCK/OFF position.
However, if the front doors are
opened, the sunroof cannot be
adjusted even within the 10 minutes
period.
Dual wide sunroof
(if equipped)
[A] : Front sunroof control lever,
[B] : Rear blind control button
If your vehicle is equipped with a
dual wide sunroof, you can slide or
tilt your sunroof with the sunroof con-
trol lever located on the overhead
console. And you can slide your rear
blind with the rear blind control but-
ton.
The ignition switch must be in the ON
position before you can open or
close the sunroof.The sunroof can be operated for
approximately 10 minutes after the
ignition key is removed or turned to
the ACC or LOCK (or OFF) position.
However, if the front door is opened,
the sunroof cannot be operated even
within 10 minutes.
Information
• In cold and wet climates, the sun-
roof may not work properly due to
freezing conditions.
• After the vehicle is washed or in a
rainstorm, be sure to wipe off any
water that is on the sunroof before
operating it.
i
S SU
UN
NR
RO
OO
OF
F
(
(I
IF
F
E
EQ
QU
UI
IP
PP
PE
ED
D)
)
Convenient features of your vehicle
Never adjust the sunroof or
sunshade while driving. This
could result in loss of control
and an accident that may
cause death, serious injury, or
property damage.
WARNING
OLX2048025L
OLX2049409L
Page 150 of 612

3-54
Convenient features of your vehicle
Non-Powered Liftgate
(if equipped)
Opening the liftgate
Before attempting to open the lift-
gate, make sure the vehicle is in P
(Park). To open the liftgate, perform
one the following:
1. Unlock all doors with the Door
Unlock button on your remote key
or smart key. From outside press
the liftgate handle switch and
open the liftgate.
2. From outside press the liftgate
handle switch and open the lift-
gate.
Closing the liftgate
Lower the liftgate lid and press down
until it locks. To be sure the liftgate lid
is securely fastened, always check
by trying to pull it up again without
pressing the liftgate handle switch.
Information
In cold and wet climates, door lock
and door mechanisms may not work
properly due to freezing conditions.
i
Before closing the hood,
ensure all obstructions are
removed from around the
hood opening.
Always double check to be
sure that the hood is firmly
latched before driving away.
Check there is no hood open
warning light or message dis-
played on the instrument clus-
ter. Driving with the hood
opened may cause a total loss
of visibility, which might
result in an accident.
Do not move the vehicle with
the hood in the raised posi-
tion, as vision is obstructed,
which might result in an acci-
dent, and the hood could fall
or be damaged.
WARNING
OLX2048035
OLX2048036
Page 159 of 612

3-63
Convenient features of your vehicle
3
How to use the Smart Liftgate
The hands-free smart liftgate system
can be opened automatically when
the following conditions are met:
The Smart Liftgate option is
enabled in the User Settings in the
cluster LCD display
The Smart Liftgate is activated and
ready 15 seconds after all the
doors are closed and locked
The Smart Liftgate will open when
the smart key is detected in the
area behind the vehicle for 3 sec-
ondsInformation
The Smart Liftgate will NOT operate
when:
• Any door is open, or all doors are
closed but not locked
• The smart key is detected within 15
seconds from when the doors were
closed and locked
• For vehicles equipped with illumi-
nated exterior front door handles, if
the smart key is detected within 15
seconds from when the doors were
closed and locked or if the smart key
is within 60 inches (1.5 m) from the
front door handles
• The smart key is in the vehicle.1. Setting
To activate the Smart Liftgate, go to
User Settings mode and select
Smart Liftgate in the cluster LCD dis-
play.
For more details, refer to "LCD
Display" in this chapter.
2. Detect and Alert
The Smart Liftgate detecting area
extends approximately 20-40 in (50-
100 cm) behind the vehicle. If you
are positioned in the detecting area
and are carrying the smart key, the
hazard warning lights will blink and
the chime will sound to alert you that
the smart liftgate will open.
Information
Do not approach the detecting area if
you do not want the liftgate to open. If
you have unintentionally entered the
detecting area and the hazard warn-
ing lights and chime starts to operate,
move away from the area behind the
vehicle with the smart key. The lift-
gate will remain closed.
i
i
Page 160 of 612

3-64
Convenient features of your vehicle
3. Automatic opening
After the hazard warning lights blink
and the chime sounds 6 times, the
power liftgate will open.
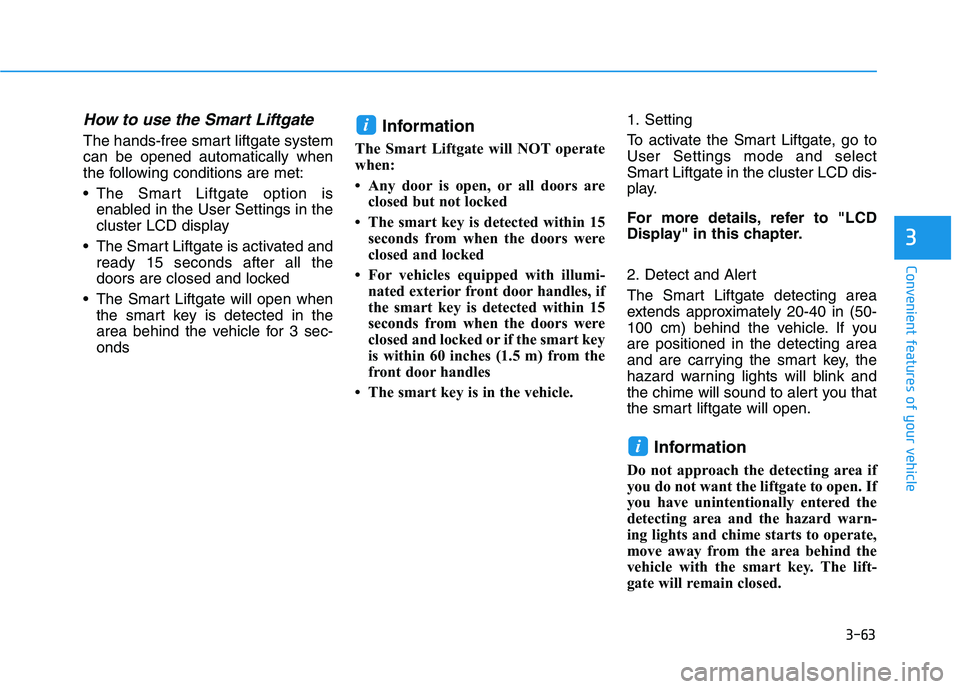
How to deactivate the Smart
Liftgate function using the
smart key
1. Door lock
2. Door unlock
3. Liftgate open
4. Panic
5. Remote start
If you press any button on the smart
key during the Detect and Alert
stage, the Smart Liftgate function will
be deactivated.
Make sure to be aware of how to
deactivate the Smart Liftgate func-
tion for emergency situations.
Make certain that you close
the liftgate before driving your
vehicle.
Make sure there are no people
or objects around the liftgate
before opening or closing the
liftgate.
Make sure objects in the rear
cargo area do not come out
when opening the liftgate,
especially if the vehicle is
parked on a grade or incline.
If you keep your vehicle
parked and locked on your
driveway, you may want to
temporarily deactivate the
Smart Liftgate system.
Otherwise, standing at the
rear of the vehicle with the
smart key may cause the lift-
gate to open unintentionally.
WARNING
The key should be kept out of
reach of children. Children
may inadvertently open the
Smart Liftgate while playing
around the rear area of the
vehicle.
OLX2048003