2021 HYUNDAI KONA remove seat
[x] Cancel search: remove seatPage 31 of 506
2-14
Safety system of your vehicle
When there is no occupant in
the rear seats, adjust the height
of the headrest to the lowest
position. The rear seat headrest
can reduce the visibility of the
rear area.
CAUTION
Head Restraints
The vehicle's front and rear seats
have adjustable head restraints. The
head restraints provide comfort for
passengers, but more importantly
they are designed to help protect
passengers from whiplash and other
neck and spinal injuries during an
accident, especially in a rear impact
collision.To prevent damage, NEVER hit or
pull on the head restraints.
NOTICE
To reduce the risk of serious
injury or death in an accident,
take the following precautions
when adjusting your head
restraints:
Always properly adjust the
head restraints for all passen-
gers BEFORE starting the
vehicle.
NEVER let anyone ride in a
seat with the head restraints
removed or reversed.
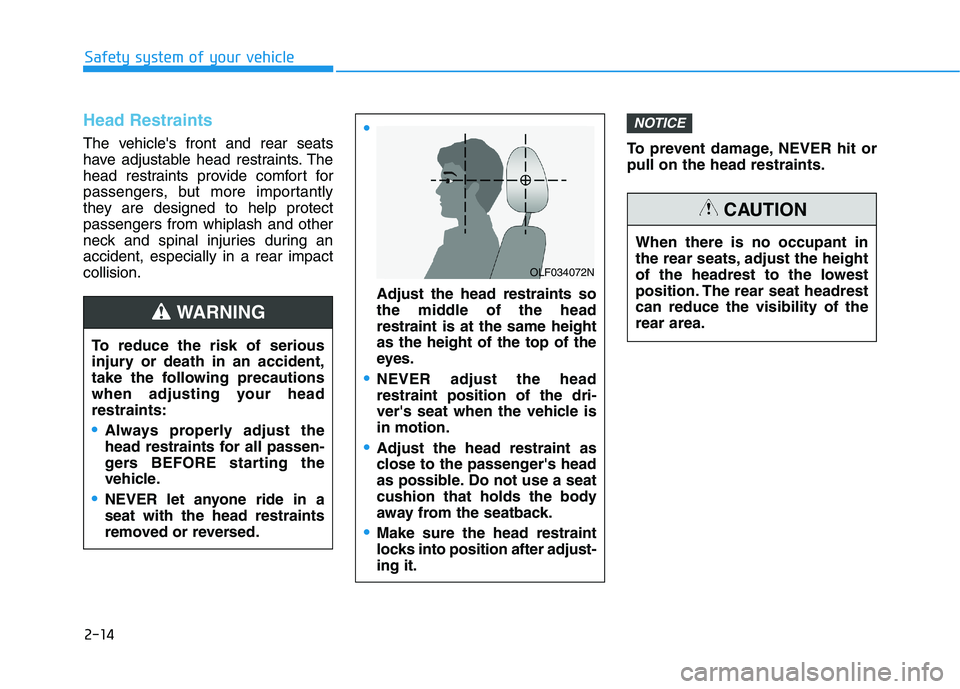
Adjust the head restraints so
the middle of the head
restraint is at the same height
as the height of the top of the
eyes.
NEVER adjust the head
restraint position of the dri-
ver's seat when the vehicle is
in motion.
Adjust the head restraint as
close to the passenger's head
as possible. Do not use a seat
cushion that holds the body
away from the seatback.
Make sure the head restraint
locks into position after adjust-
ing it.
WARNING
OLF034072N
Page 33 of 506
2-16
Safety system of your vehicle
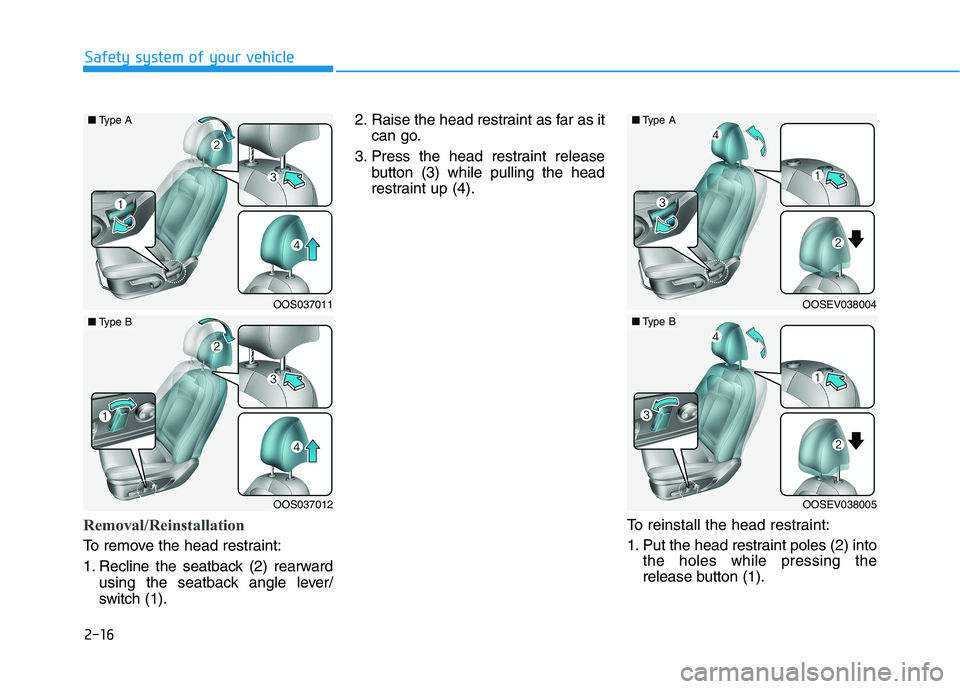
Removal/Reinstallation
To remove the head restraint:
1. Recline the seatback (2) rearward
using the seatback angle lever/
switch (1).2. Raise the head restraint as far as it
can go.
3. Press the head restraint release
button (3) while pulling the head
restraint up (4).
To reinstall the head restraint:
1. Put the head restraint poles (2) into
the holes while pressing the
release button (1).
OOS037011
OOS037012
■Type A
■Type B
OOSEV038004
OOSEV038005
■Type A
■Type B
Page 35 of 506
2-18
Safety system of your vehicle
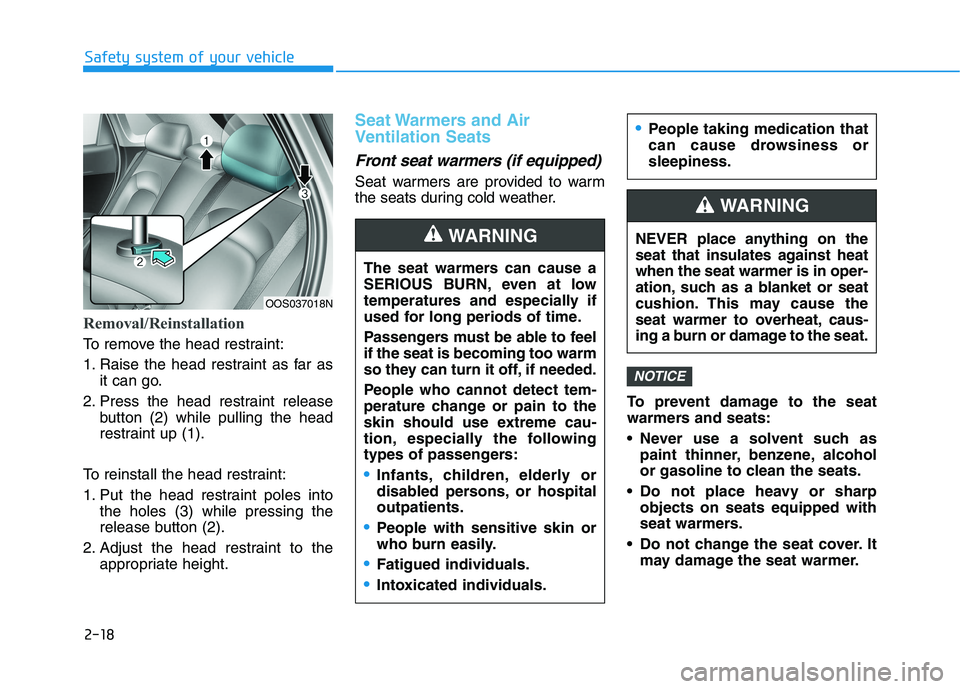
Removal/Reinstallation
To remove the head restraint:
1. Raise the head restraint as far as
it can go.
2. Press the head restraint release
button (2) while pulling the head
restraint up (1).
To reinstall the head restraint:
1. Put the head restraint poles into
the holes (3) while pressing the
release button (2).
2. Adjust the head restraint to the
appropriate height.
Seat Warmers and Air
Ventilation Seats
Front seat warmers (if equipped)
Seat warmers are provided to warm
the seats during cold weather.
To prevent damage to the seat
warmers and seats:
Never use a solvent such as
paint thinner, benzene, alcohol
or gasoline to clean the seats.
Do not place heavy or sharp
objects on seats equipped with
seat warmers.
Do not change the seat cover. It
may damage the seat warmer.
NOTICE
OOS037018N
The seat warmers can cause a
SERIOUS BURN, even at low
temperatures and especially if
used for long periods of time.
Passengers must be able to feel
if the seat is becoming too warm
so they can turn it off, if needed.
People who cannot detect tem-
perature change or pain to the
skin should use extreme cau-
tion, especially the following
types of passengers:
Infants, children, elderly or
disabled persons, or hospital
outpatients.
People with sensitive skin or
who burn easily.
Fatigued individuals.
Intoxicated individuals.
People taking medication that
can cause drowsiness or
sleepiness.
WARNING NEVER place anything on the
seat that insulates against heat
when the seat warmer is in oper-
ation, such as a blanket or seat
cushion. This may cause the
seat warmer to overheat, caus-
ing a burn or damage to the seat.
WARNING
Page 38 of 506
2-21
Safety system of your vehicle
2
This section describes how to use the
seat belts properly. It also describes
some of the things to avoid when
using seat belts.
Seat Belt Safety Precautions
Always fasten your seat belt and
make sure all passengers have fas-
tened their seat belts before starting
any trip. Air bags are designed to
supplement the seat belt as an addi-
tional safety device, but they are not a
substitute. Most states require all
occupants of a vehicle to wear seat
belts.
S SE
EA
AT
T
B
BE
EL
LT
TS
S
Seat belts must be used by ALL
passengers whenever the vehi-
cle is moving. Take the following
precautions when adjusting and
wearing seat belts:
ALWAYS properly restrain
children under age 13 in the
rear seats.
WARNING
NEVER allow children to ride
in the front passenger seat. If
a child age 13 or older must be
seated in the front seat, move
the seat as far back as possi-
ble and properly restrain them
in the seat.
NEVER allow an infant or child
to be carried on an occupant’s
lap.
NEVER ride with the seatback
reclined when the vehicle is
moving.
Do not allow children to share
a seat or seat belt.
Do not wear the shoulder belt
under your arm or behind your
back.
Always wear both the shoul-
der portion and lap portion of
the lap/shoulder belt.
Do not use the seat belt if it is
twisted. A twisted seat belt
will not protect you properly
in an accident.
Do not use a seat belt if the
webbing or hardware is dam-
aged.
Do not latch the seat belt into
the buckles of other seats.
NEVER unfasten the seat belt
while driving. This may cause
loss of vehicle control result-
ing in an accident.
Make sure there is nothing in
the buckle interfering with the
seat belt latch mechanism.
This may prevent the seat belt
from fastening securely.
No modifications or additions
should be made by the user
which will either prevent the
seat belt adjusting devices
from operating to remove
slack, or prevent the seat belt
assembly from being adjusted
to remove slack.
Page 52 of 506
2-35
Safety system of your vehicle
2
Child restraint system (CRS)
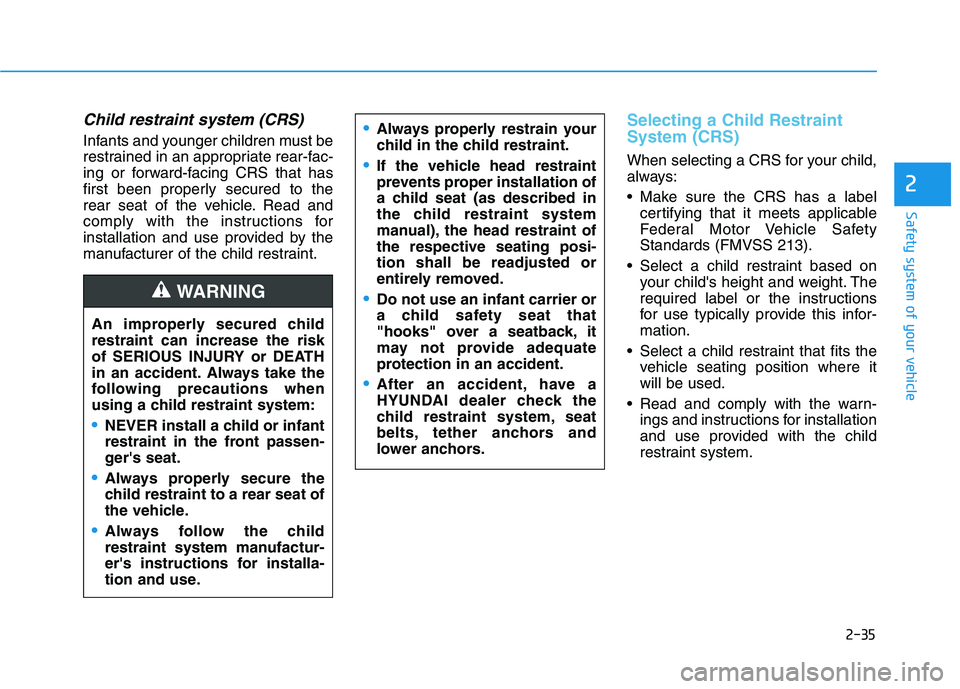
Infants and younger children must be
restrained in an appropriate rear-fac-
ing or forward-facing CRS that has
first been properly secured to the
rear seat of the vehicle. Read and
comply with the instructions for
installation and use provided by the
manufacturer of the child restraint.
Selecting a Child Restraint
System (CRS)
When selecting a CRS for your child,
always:
Make sure the CRS has a label
certifying that it meets applicable
Federal Motor Vehicle Safety
Standards (FMVSS 213).
Select a child restraint based on
your child's height and weight. The
required label or the instructions
for use typically provide this infor-
mation.
Select a child restraint that fits the
vehicle seating position where it
will be used.
Read and comply with the warn-
ings and instructions for installation
and use provided with the child
restraint system.
Always properly restrain your
child in the child restraint.
If the vehicle head restraint
prevents proper installation of
a child seat (as described in
the child restraint system
manual), the head restraint of
the respective seating posi-
tion shall be readjusted or
entirely removed.
Do not use an infant carrier or
a child safety seat that
"hooks" over a seatback, it
may not provide adequate
protection in an accident.
After an accident, have a
HYUNDAI dealer check the
child restraint system, seat
belts, tether anchors and
lower anchors.
An improperly secured child
restraint can increase the risk
of SERIOUS INJURY or DEATH
in an accident. Always take the
following precautions when
using a child restraint system:
NEVER install a child or infant
restraint in the front passen-
ger's seat.
Always properly secure the
child restraint to a rear seat of
the vehicle.
Always follow the child
restraint system manufactur-
er's instructions for installa-
tion and use.
WARNING
Page 54 of 506
2-37
Safety system of your vehicle
2
Forward-facing child restraints
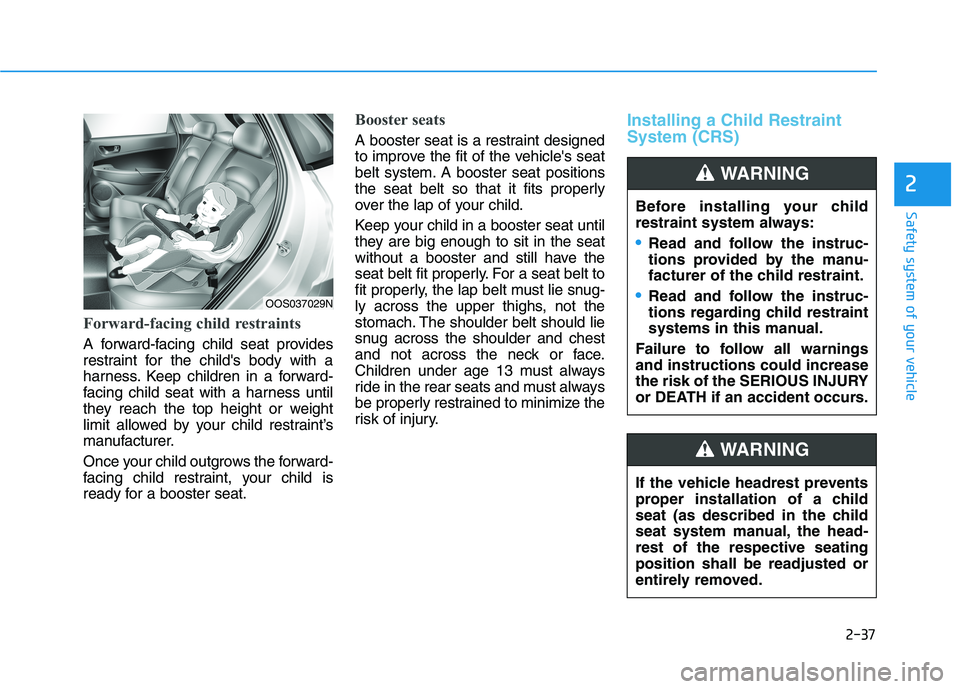
A forward-facing child seat provides
restraint for the child's body with a
harness. Keep children in a forward-
facing child seat with a harness until
they reach the top height or weight
limit allowed by your child restraint’s
manufacturer.
Once your child outgrows the forward-
facing child restraint, your child is
ready for a booster seat.
Booster seats
A booster seat is a restraint designed
to improve the fit of the vehicle's seat
belt system. A booster seat positions
the seat belt so that it fits properly
over the lap of your child.
Keep your child in a booster seat until
they are big enough to sit in the seat
without a booster and still have the
seat belt fit properly. For a seat belt to
fit properly, the lap belt must lie snug-
ly across the upper thighs, not the
stomach. The shoulder belt should lie
snug across the shoulder and chest
and not across the neck or face.
Children under age 13 must always
ride in the rear seats and must always
be properly restrained to minimize the
risk of injury.
Installing a Child Restraint
System (CRS)
Before installing your child
restraint system always:
Read and follow the instruc-
tions provided by the manu-
facturer of the child restraint.
Read and follow the instruc-
tions regarding child restraint
systems in this manual.
Failure to follow all warnings
and instructions could increase
the risk of the SERIOUS INJURY
or DEATH if an accident occurs.
WARNING
If the vehicle headrest prevents
proper installation of a child
seat (as described in the child
seat system manual, the head-
rest of the respective seating
position shall be readjusted or
entirely removed.
WARNING
OOS037029N
Page 61 of 506
2-44
Safety system of your vehicle
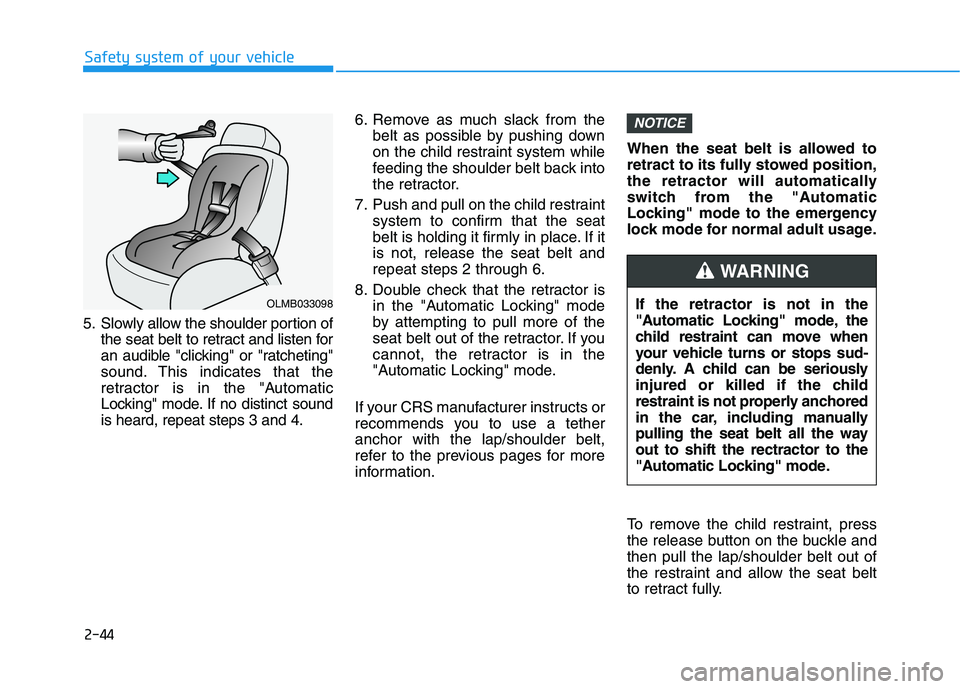
5. Slowly allow the shoulder portion of
the seat belt to retract and listen for
an audible "clicking" or "ratcheting"
sound. This indicates that the
retractor is in the "Automatic
Locking" mode. If no distinct sound
is heard, repeat steps 3 and 4.6. Remove as much slack from the
belt as possible by pushing down
on the child restraint system while
feeding the shoulder belt back into
the retractor.
7. Push and pull on the child restraint
system to confirm that the seat
belt is holding it firmly in place. If it
is not, release the seat belt and
repeat steps 2 through 6.
8. Double check that the retractor is
in the "Automatic Locking" mode
by attempting to pull more of the
seat belt out of the retractor. If you
cannot, the retractor is in the
"Automatic Locking" mode.
If your CRS manufacturer instructs or
recommends you to use a tether
anchor with the lap/shoulder belt,
refer to the previous pages for more
information.When the seat belt is allowed to
retract to its fully stowed position,
the retractor will automatically
switch from the "Automatic
Locking" mode to the emergency
lock mode for normal adult usage.
To remove the child restraint, press
the release button on the buckle and
then pull the lap/shoulder belt out of
the restraint and allow the seat belt
to retract fully.
NOTICE
If the retractor is not in the
"Automatic Locking" mode, the
child restraint can move when
your vehicle turns or stops sud-
denly. A child can be seriously
injured or killed if the child
restraint is not properly anchored
in the car, including manually
pulling the seat belt all the way
out to shift the rectractor to the
"Automatic Locking" mode.
WARNING
OLMB033098
Page 130 of 506
3-46
Convenient features of your vehicle
2. Slide the key or screwdriver to the
right to engage the safety release
lever.
3. Push the liftgate outward and
upward.
Fuel Filler Door
Opening the fuel filler door
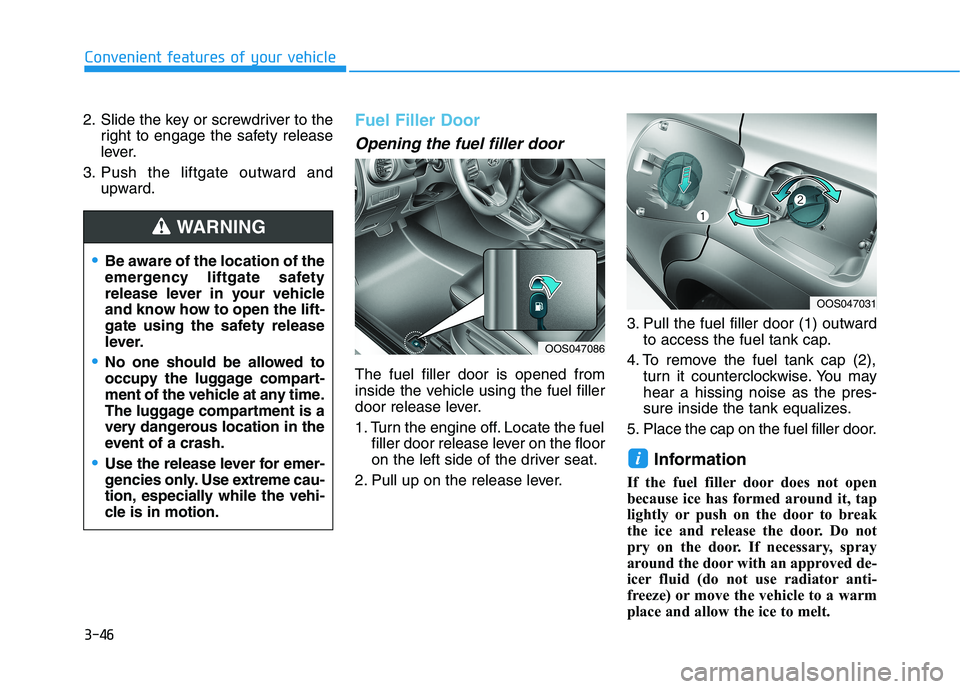
The fuel filler door is opened from
inside the vehicle using the fuel filler
door release lever.
1. Turn the engine off. Locate the fuel
filler door release lever on the floor
on the left side of the driver seat.
2. Pull up on the release lever.3. Pull the fuel filler door (1) outward
to access the fuel tank cap.
4. To remove the fuel tank cap (2),
turn it counterclockwise. You may
hear a hissing noise as the pres-
sure inside the tank equalizes.
5. Place the cap on the fuel filler door.
Information
If the fuel filler door does not open
because ice has formed around it, tap
lightly or push on the door to break
the ice and release the door. Do not
pry on the door. If necessary, spray
around the door with an approved de-
icer fluid (do not use radiator anti-
freeze) or move the vehicle to a warm
place and allow the ice to melt.
i
Be aware of the location of the
emergency liftgate safety
release lever in your vehicle
and know how to open the lift-
gate using the safety release
lever.
No one should be allowed to
occupy the luggage compart-
ment of the vehicle at any time.
The luggage compartment is a
very dangerous location in the
event of a crash.
Use the release lever for emer-
gencies only. Use extreme cau-
tion, especially while the vehi-
cle is in motion.
WARNING
OOS047086
OOS047031