2021 HYUNDAI KONA auto lights
[x] Cancel search: auto lightsPage 85 of 506
Convenient features of your vehicle
Accessing Your Vehicle .........................................3-3
Remote Key.........................................................................3-3
Smart Key ............................................................................3-6
Immobilizer System .........................................................3-11
Door Locks ............................................................3-13
Operating Door Locks from Outside the Vehicle ....3-13
Operating Door Locks from Inside the Vehicle .......3-14
Automatic Door Lock and Unlock Features .............3-16
Child-Protector Rear Door Locks ...............................3-17
Theft-Alarm System ............................................3-18
Steering Wheel .....................................................3-18
Electric Power Steering (EPS) .....................................3-18
Tilt Steering / Telescope Steering ..............................3-19
Heated Steering Wheel (for Canada) .........................3-20
Horn ....................................................................................3-21
Mirrors ...................................................................3-21
Inside Rearview Mirror ..................................................3-21
Side View Mirrors ...........................................................3-32
Windows ................................................................3-35
Power Windows ...............................................................3-36
Sunroof..................................................................3-39
Sunroof opening and closing .......................................3-40
Sliding the sunroof .........................................................3-40
Tilting the sunroof ..........................................................3-40
Sunshade ...........................................................................3-41Resetting the sunroof ....................................................3-41
Sunroof Open Warning ..................................................3-42
Exterior Features .................................................3-43
Hood ...................................................................................3-43
Liftgate ..............................................................................3-44
Fuel Filler Door ................................................................3-46
Instrument Cluster ...............................................3-49
Instrument Cluster Control............................................3-50
Gauges and Meters ........................................................3-51
Transmission shift indicator .........................................3-54
Warning and Indicator Lights .......................................3-55
LCD Display Messages ...................................................3-67
LCD Display ...........................................................3-72
LCD Display Control ........................................................3-72
LCD Display Modes .........................................................3-73
Trip Computer .......................................................3-83
Head Up Display (HUD) .......................................3-87
Lighting..................................................................3-90
Exterior Lights .................................................................3-90
Smart cornering lamp ....................................................3-97
Interior Lights...................................................................3-98
Welcome System ...........................................................3-100
3
Page 88 of 506
3-4
Unlocking your vehicle
To unlock your vehicle :
1. Press the Door Unlock button (2)
on the remote key.
2. The driver's door will unlock. The
hazard warning lights will blink two
times.
Two press unlock setting:
If you press the Door Unlock but-
ton on the remote key again with-
in four seconds, then all the doors
will unlock.
Two press unlock setting can be
changed according to owner's pref-
erence in the cluster User Settings
mode or with the remote key.
• User settings mode method:
Select or deselect the 'Two Press
Unlock' feature in the User
Settings mode on the cluster LCD
display (User Settings ➞Door ➞
Two Press Unlock).
Press and hold both Door Lock (1)
and Door Unlock (2) buttons at the
same time until the hazard warn-
ing lights blink.Now all doors will unlock when the
Door Unlock button is pressed one
time. To change the setting back,
repeat this procedure.
Information
After unlocking the doors, the doors
will automatically relock after 30 sec-
onds unless a door is opened.
Liftgate unlocking
To unlock the liftgate :
1. Press and hold the Liftgate Unlock
button (3) on the remote key for
more than one second.
2. The hazard warning lights will
blink two times and the liftgate will
be unlocked.
Once the liftgate is opened and then
closed, the liftgate will lock automati-
cally.
Information
The word "HOLD" is written on the
button to inform you that you must
press and hold the button for more
than one second.
Panic button (if equipped)
Press and hold the Panic button (4)
for more than one second. The horn
sounds and hazard warning lights
flash for about 30 seconds.
To cancel the panic mode, press any
button on the remote key.
Start-up
For information, refer to the "Key
Ignition Switch" section in chapter 5.
To prevent damaging the remote
key:
• Keep the remote key away from
water or any liquid and fire.
Internal circuits may malfunc-
tion if the inside of the remote
key gets damp (from liquids or
moisture) or if it is heated. This
can exclude the remote key from
being covered under warranty.
Avoid dropping or throwing the
remote key.
Protect the remote key from
extreme temperatures.
NOTICE
i
i
Convenient features of your vehicle
Page 92 of 506
3-8
Convenient features of your vehicle
3. Two Press Unlock Feature
The priority for unlocking the driver
door only, or unlocking all the doors
with one press may be adjusted in
the User Settings menu in the LCD
cluster display.
The Two Press Unlock feature, when
enabled, will require the user to
press the door unlock button once for
driver door only and twice for unlock-
ing all the doors.
Select or Deselect the Two Press
Unlock Feature in the User Settings
menu in the LCD cluster display. The
option can be found under the follow-
ing menu:
USER SETTINGS ➞DOOR ➞TWO
PRESS UNLOCKThe Two Press Unlock Feature can
also be enabled or disabled by
pressing the door lock and unlock
buttons simultaneously on the Key
FOB:
Press and hold both the DOOR
LOCK button and the DOOR
UNLOCK button simultaneously until
the hazard warning lights blink.
This will enable or disable the Two
Press Unlock feature. Repeat this
procedure to enable/disable the
mode again.
Information
• The door handle buttons will only
operate when the smart key is with-
in 28-40 inches (0.7~1m) from the
outside door handle
• Either the driver or front passenger
door can be opened with the door
handle button when the smart key is
within this range
• If you press the front passenger out-
side door handle with the smart key
in your possession, all the doors will
unlock
Opening the liftgate
To unlock and open the liftgate:
1. Make sure you have the smart key
in your possession.
2. Press either the liftgate handle
release button on the vehicle or
press and hold the Liftgate Unlock
button on the smart key for more
than one second. The hazard
warning lights will blink two times
and the liftgate latch will unlock.
The liftgate must be operated
manually to open the liftgate.
Once the liftgate latch is
unlocked, pull upward on the lift-
gate handle to fully open the lift-
gate.
3. Once the liftgate is opened and
then closed, the liftgate will lock
automatically.
NOTICE
i
Page 93 of 506
3-9
Convenient features of your vehicle
Information
• The liftgate handle button will only
operate when the smart key is with-
in 28 inches (0.7 m) from the liftgate
handle.
• The Liftgate Unlock button (3) will
only unlock the liftgate. It will not
release the latch and open the lift-
gate automatically. If the Liftgate
Unlock button is used, someone
must still press the liftgate handle
button to open the liftgate.
Panic button
Press and hold the Panic button (4)
for more than one second. The horn
sounds and hazard warning lights
blink for about 30 seconds. To cancel
the panic mode, press any button on
the Smart Key.
Start-up
You can start the vehicle without
inserting the key.
For information, refer to the
"Engine Start/Stop Button" sec-
tion in chapter 5.
To prevent damaging the smart key:
Keep the smart key in a cool, dry
place to avoid damage or mal-
function. Exposure to moisture
or high temperature may cause
the internal circuit of the smart
key to malfunction which may
not be covered under warranty.
Avoid dropping or throwing the
smart key.
Protect the smart key from
extreme temperatures.
Mechanical key
If the Smart Key does not operate
normally, you can lock or unlock the
driver's door by using the mechanical
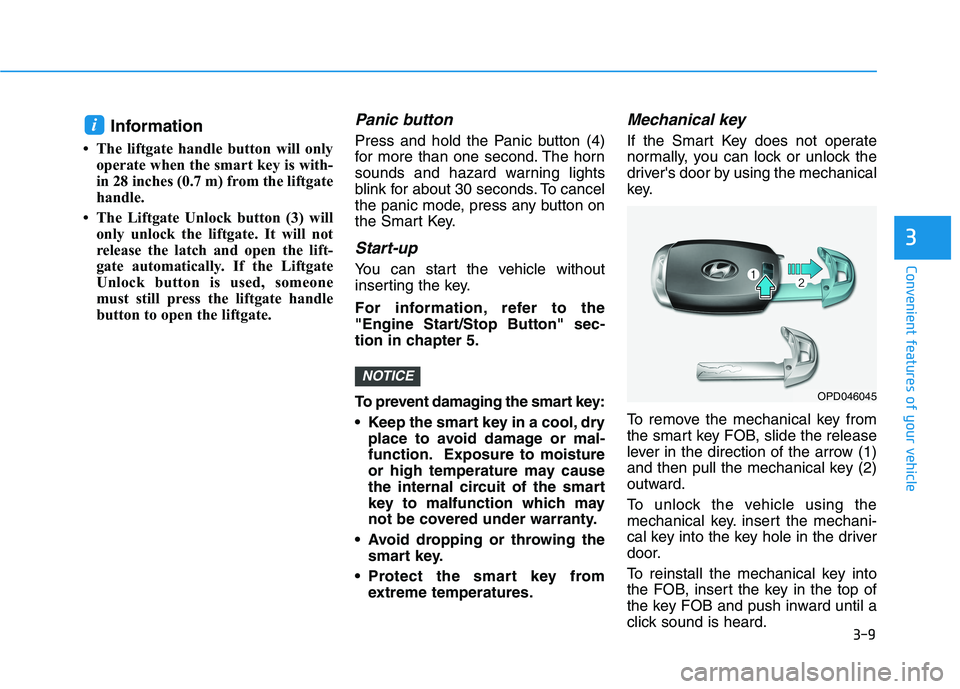
key.
To remove the mechanical key from
the smart key FOB, slide the release
lever in the direction of the arrow (1)
and then pull the mechanical key (2)
outward.
To unlock the vehicle using the
mechanical key. insert the mechani-
cal key into the key hole in the driver
door.
To reinstall the mechanical key into
the FOB, insert the key in the top of
the key FOB and push inward until a
click sound is heard.
NOTICE
i
3
OPD046045
Page 102 of 506

3-18
Convenient features of your vehicle
This system helps to protect your vehi-
cle and valuables. The horn will sound
and the hazard warning lights will blink
continuously if any of the following
occur:
- A door is opened without using the
remote key or smart key.
- The liftgate is opened without using
the remote key or smart key.
- The engine hood is opened.
The alarm continues for 30 seconds,
then the system resets. To turn off the
alarm, unlock the doors with the
remote key or smart key.
The Theft Alarm System automatically
sets 30 seconds after you lock the
doors and the liftgate. For the system
to activate, you must lock the doors
and the liftgate from outside the vehi-
cle with the remote key or smart key or
by pressing the button on the outside
of the door handle with the smart key
in your possession.
The hazard warning lights will blink
and the chime will sound once to indi-
cate the system is armed.
Once the security system is set, open-
ing any door, the liftgate, or the hood
without using the remote key or smart
key will cause the alarm to activate.The Theft Alarm System will not set if
the hood, the liftgate, or any door is
not fully closed. If the system will not
set, check the hood, the liftgate, or the
doors are fully closed.
Do not attempt to alter this system or
add other devices to it.
Information
• Do not lock the doors until all pas-
sengers have left the vehicle. If the
remaining passenger leaves the
vehicle when the system is armed,
the alarm will be activated.
• If the vehicle is not disarmed with the
remote key or smart key, open the
doors by using the mechanical key
and place the ignition switch in the
ON position (for remote key) or start
the engine (for smart key) by direct-
ly pressing the ignition switch with
the smart key.
• If the system is disarmed by unlock-
ing the vehicle, but neither a door or
the liftgate is opened within 30 sec-
onds, the doors will relock and the
system will rearm automatically.
Electric Power Steering (EPS)
The system assists you with steering
the vehicle. If the vehicle is turned off
or if the power steering system
becomes inoperative, you may still
steer the vehicle, but it will require
increased steering effort.
Should you notice any change in the
effort required to steer during normal
vehicle operation, have the system
checked by an authorized HYUNDAI
dealer.
i
T TH
HE
EF
FT
T-
-A
AL
LA
AR
RM
M
S
SY
YS
ST
TE
EM
MS
ST
TE
EE
ER
RI
IN
NG
G
W
WH
HE
EE
EL
L
If the Electric Power Steering
System does not operate nor-
mally, the warning light ( )
will illuminate on the instru-
ment cluster. You may steer
the vehicle, but it will require
increased steering efforts.
Take your vehicle to an
authorized HYUNDAI dealer
and have the system checked
as soon as possible.
CAUTION
Page 106 of 506
3-22
Convenient features of your vehicle
When cleaning the mirror, use a
paper towel or similar material
dampened with glass cleaner. Do
not spray glass cleaner directly on
the mirror as this may cause the
liquid cleaner to enter the mirror
housing.
Day/night rearview mirror
(if equipped)
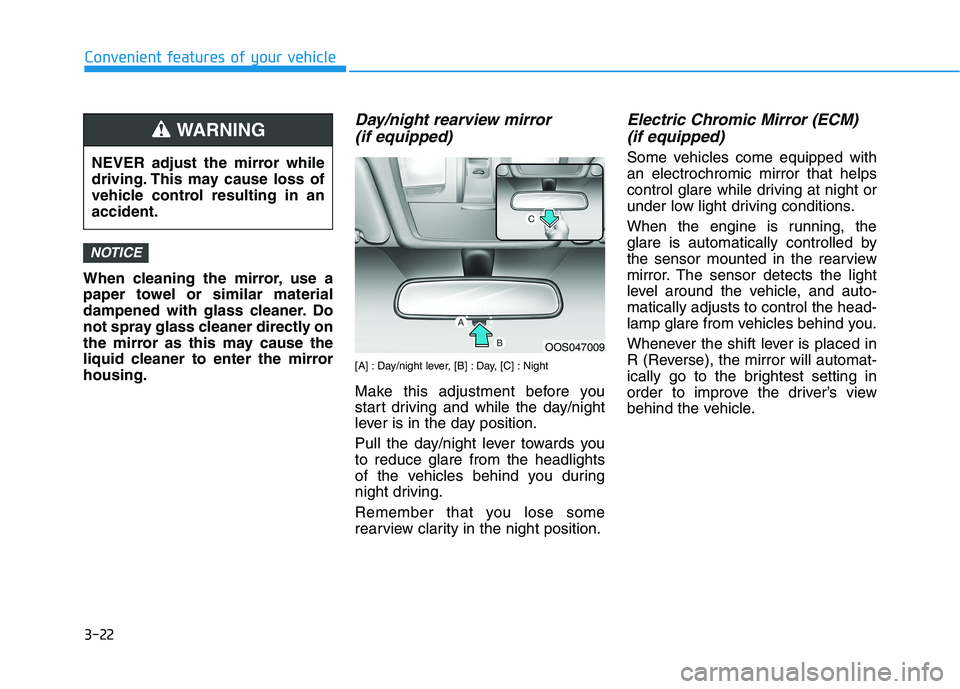
[A] : Day/night lever, [B] : Day, [C] : Night
Make this adjustment before you
start driving and while the day/night
lever is in the day position.
Pull the day/night lever towards you
to reduce glare from the headlights
of the vehicles behind you during
night driving.
Remember that you lose some
rearview clarity in the night position.
Electric Chromic Mirror (ECM)
(if equipped)
Some vehicles come equipped with
an electrochromic mirror that helps
control glare while driving at night or
under low light driving conditions.
When the engine is running, the
glare is automatically controlled by
the sensor mounted in the rearview
mirror. The sensor detects the light
level around the vehicle, and auto-
matically adjusts to control the head-
lamp glare from vehicles behind you.
Whenever the shift lever is placed in
R (Reverse), the mirror will automat-
ically go to the brightest setting in
order to improve the driver’s view
behind the vehicle.
NOTICE
OOS047009
NEVER adjust the mirror while
driving. This may cause loss of
vehicle control resulting in an
accident.
WARNING
Page 174 of 506
3-90
Convenient features of your vehicle
L LI
IG
GH
HT
TI
IN
NG
G
Exterior Lights
Lighting control
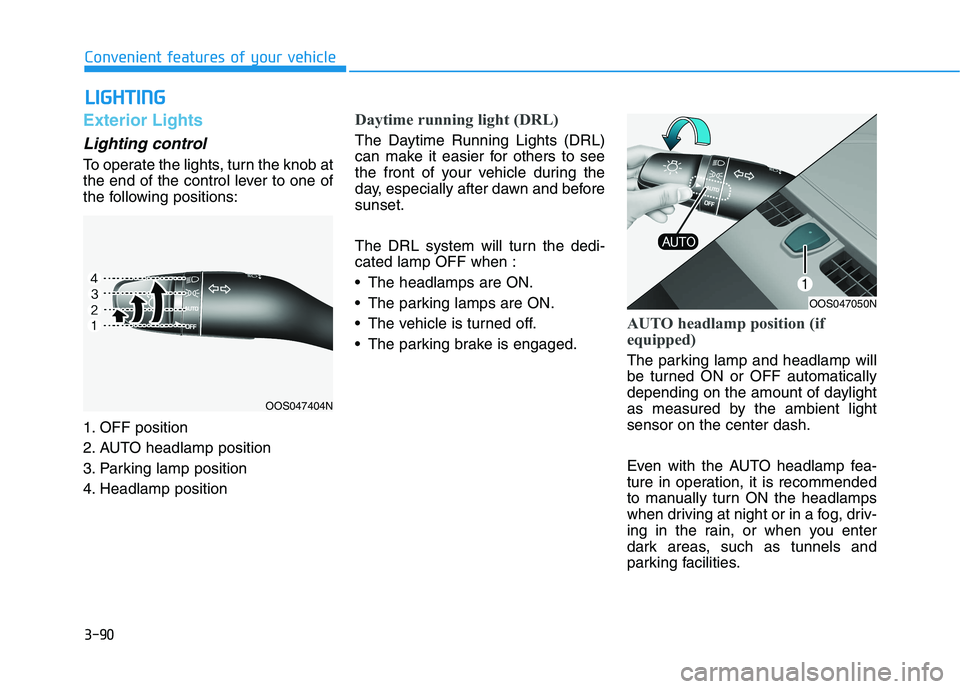
To operate the lights, turn the knob at
the end of the control lever to one of
the following positions:
1. OFF position
2. AUTO headlamp position
3. Parking lamp position
4. Headlamp position
Daytime running light (DRL)
The Daytime Running Lights (DRL)
can make it easier for others to see
the front of your vehicle during the
day, especially after dawn and before
sunset.
The DRL system will turn the dedi-
cated lamp OFF when :
• The headlamps are ON.
The parking lamps are ON.
The vehicle is turned off.
The parking brake is engaged.
AUTO headlamp position (if
equipped)
The parking lamp and headlamp will
be turned ON or OFF automatically
depending on the amount of daylight
as measured by the ambient light
sensor on the center dash.
Even with the AUTO headlamp fea-
ture in operation, it is recommended
to manually turn ON the headlamps
when driving at night or in a fog, driv-
ing in the rain, or when you enter
dark areas, such as tunnels and
parking facilities.
OOS047404N
OOS047050N
Page 177 of 506
3-93
Convenient features of your vehicle
3
3. The High Beam Assist (HBA) will
turn on when vehicle speed is
above 25 mph (40 km/h).
away when the High Beam Assist
(HBA) is operating, the High Beam
Assist (HBA) will turn off and the
high beam will be on continuously.
the headlamp switch is pulled
towards you when the high beam
is off, the high beam will turn on
without the High Beam Assist
(HBA) canceled. When you let go
of the light switch, the lever will
move to the middle and the high
beam will turn off.
the headlamp switch is pulled
towards you when the high beam
is on by the High Beam Assist
(HBA), the low beam will be on
and the High Beam Assist (HBA)
will turn off.
to the headlamp ON position, the
High Beam Assist (HBA) will turn
off and the low beam will be on
continuously.When the High Beam Assist (HBA) is
operating, the high beam switches to
low beamif any of the following condi-
tions occur :
- When the headlamp of an on-com-
ing vehicle is detected.
- When the tail lamp of a vehicle in
front is detected.
- When the headlamp or tail lamp of
a motorcycle or a bicycle is detect-
ed.
- When the surrounding ambient light
is bright enough that high beams
are not required.
- When streetlights or other lights
are detected.
- When the headlamp switch is not in
the AUTO position.
- When the High Beam Assist (HBA)
is off.
- When vehicle speed is below 22mph
(35 km/h).
Warning light and message
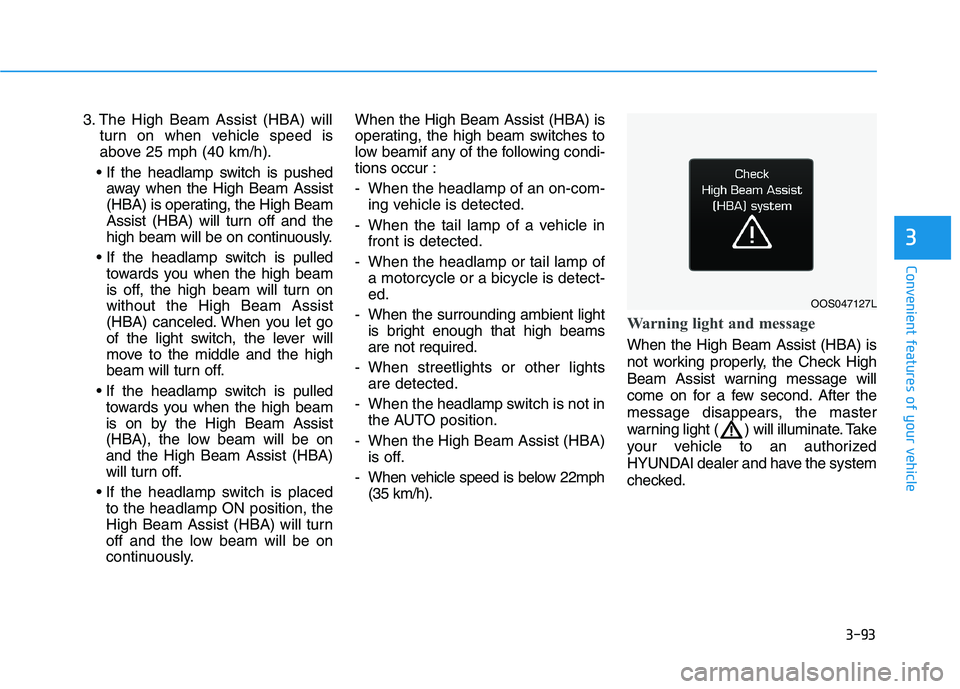
When the High Beam Assist (HBA) is
not working properly, the Check High
Beam Assist warning message will
come on for a few second. After the
message disappears, the master
warning light ( ) will illuminate. Take
your vehicle to an authorized
HYUNDAI dealer and have the system
checked.
OOS047127L