2021 HYUNDAI KONA warning light
[x] Cancel search: warning lightPage 67 of 506

2-50
Safety system of your vehicle
They are designed to help protect the
heads of the front seat occupants
and the rear outboard seat occupants
in certain side impact collisions.
The curtain air bags are designed to
deploy during certain side impact
collisions, depending on the crash
severity.
The side and curtain air bags on
both sides of the vehicle may deploy
if a rollover or possible rollover is
detected.
The curtain air bags are not designed
to deploy in all side impact or rollover
situations.
How Does the Air Bag System
Operate?
The SRS consists of the following
components:
1. Driver's front air bag module
2. Passenger's front air bag module
3. Side air bag modules
4. Curtain air bag modules
5. Retractor pre-tensioner
6. Air bag warning light
7. SRS control module (SRSCM)/
Rollover sensor
8. Front impact sensors
9. Side impact sensors (acceleration) To reduce the risk of serious
injury or death from an inflating
curtain air bag, take the follow-
ing precautions:
All seat occupants must wear
seat belts at all times to help
keep occupants positioned
properly.
Properly secure child
restraints as far away from the
door as possible.
Do not place any objects over
the air bag. Also, do not attach
any objects around the area
the air bag inflates such as the
door, side door glass, front
and rear pillar, roof side rail.
Do not hang other objects
except clothes, especially
hard or breakable objects. In
an accident, it may cause
vehicle damage or personal
injury.
Do not allow passengers to
lean their heads or bodies onto
doors, put their arms on the
doors, stretch their arms out of
the window, or place objects
between the doors and seats.
Do not open or repair the side
curtain air bags.
WARNING
OOS037063N
Page 68 of 506

2-51
Safety system of your vehicle
2
10. Side impact sensors (pressure)
11. Seat belt buckle sensor
12. Emergency Fastening Device
System
13. Occupant classification system
The SRSCM (Supplemental Restraint
System Control Module) continually
monitors all SRS components while
the ignition switch is in the ON position
to determine if a crash impact is
severe enough to require air bag
deployment or pre-tensioner seat belt
deployment.SRS warning light
The SRS (Supplement Restraint
System) air bag warning light on the
instrument panel displays the air bag
symbol depicted in the illustration.
The system checks the air bag elec-
trical system for malfunctions. The
light indicates that there is a potential
malfunction with your air bag system,
which could include your side and
curtain air bags used for rollover pro-
tection.
If your SRS malfunctions, the air
bag may not inflate properly dur-
ing an accident increasing the
risk of serious injury or death.
If any of the following condi-
tions occur, your SRS is mal-
functioning:
The light does not turn on for
approximately six seconds
when the Engine Start/Stop
button is in the ON position.
The light stays on after illumi-
nating for approximately six
seconds.
The light comes on while the
vehicle is in motion.
The light blinks when the
engine is running.
Have an authorized HYUNDAI
dealer inspect the SRS as soon
as possible if any of these con-
ditions occur.
WARNING
Page 74 of 506

2-57
Safety system of your vehicle
2
Always be sure that you and all vehi-
cle occupants are seated properly
and wearing the seat belt properly for
the most effective protection by the
air bag and the seat belt.
The OCS may not function properly if
the passenger takes actions which
can affect the classification system.
These include:
Failing to sit in an upright position.
Leaning against the door or center
console.
Sitting towards the sides of the
front of the seat.
Putting their legs on the dashboard
or resting them on other locations
which reduce the passenger
weight on the front seat.
Wearing the seat belt improperly.
Reclining the seatback.
Wearing a thick cloth like ski wear
or hip protection wear.
Putting an additional thick cushion
on the seat.
Putting electrical devices (e.g.
notebook, satellite radio) on the
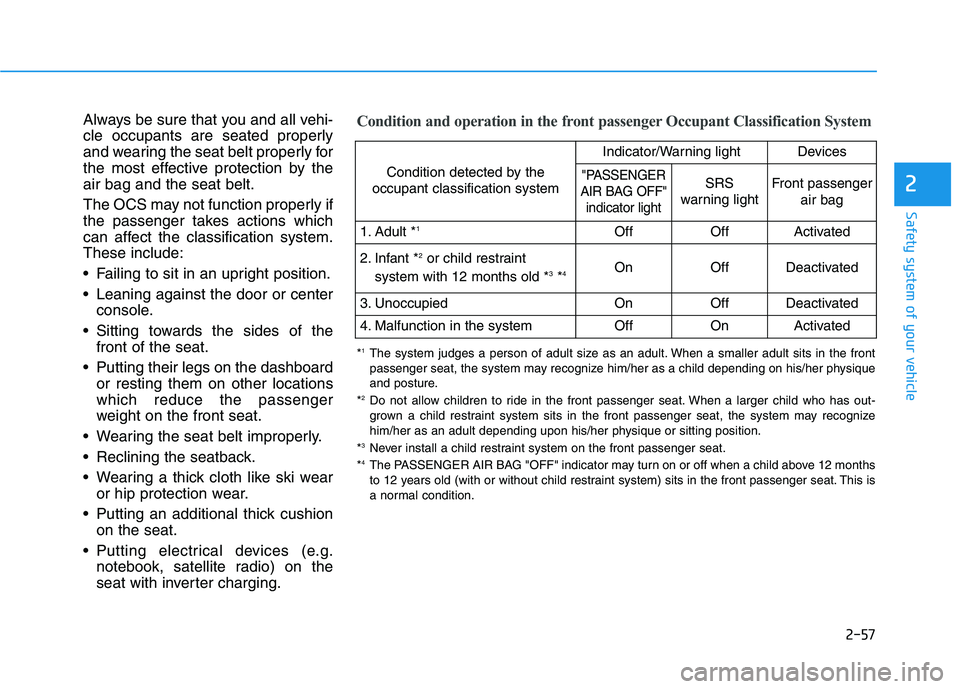
seat with inverter charging.Condition and operation in the front passenger Occupant Classification System
Condition detected by the
occupant classification system
Indicator/Warning lightDevices
"PASSENGER
AIR BAG OFF"
indicator lightSRS
warning lightFront passenger
air bag
1. Adult *1OffOffActivated
2. Infant *2or child restraint
system with 12 months old *3*4 OnOffDeactivated
3. Unoccupied OnOffDeactivated
4. Malfunction in the systemOffOnActivated
*1The system judges a person of adult size as an adult. When a smaller adult sits in the front
passenger seat, the system may recognize him/her as a child depending on his/her physique
and posture.
*
2Do not allow children to ride in the front passenger seat. When a larger child who has out-
grown a child restraint system sits in the front passenger seat, the system may recognize
him/her as an adult depending upon his/her physique or sitting position.
*
3Never install a child restraint system on the front passenger seat.
*4The PASSENGER AIR BAG "OFF" indicator may turn on or off when a child above 12 months
to 12 years old (with or without child restraint system) sits in the front passenger seat. This is
a normal condition.
Page 76 of 506

2-59
Safety system of your vehicle
2
ODH035900K
ODH035901K
ODH035902K
ODH035903K
Do not sit on the passen-
ger seat wearing heavily
padded clothes such as
ski wear and hip protector.
Do not use car seat
accessories such as thick
blankets and cushions
which cover up the car
seat surface.
Do not place electronic
devices such as laptops,
DVD player, or conductive
materials such as water
bottles on the passenger
seat.
Do not use electronic
devices such as laptops
and satellite radios which
use inverter chargers.
If large quantity of liquid
has been spilled on the
passenger seat, the air
bag warning light may
illuminate or malfunction.
Therefore, make sure the
seat has been completely
dried before driving the
vehicle.
Do not place sharp objects on the front passenger seat. These may damage the occupant detection sys-
tem, if they puncture the seat cushion.
Do not place any items under the front passenger seat.
When changing or replacing the seat or seat cover, use original items only. The OCS has been devel-
oped based on using original HYUNDAI car seats only. Altering or changing the authentic parts may
result in system malfunction and increase risk of injury when in collision. Any of the above could inter-
fere with the proper operation of the OCS sensor thereby increasing the risk of an injury in an accident.
Page 83 of 506

2-66
Safety system of your vehicle
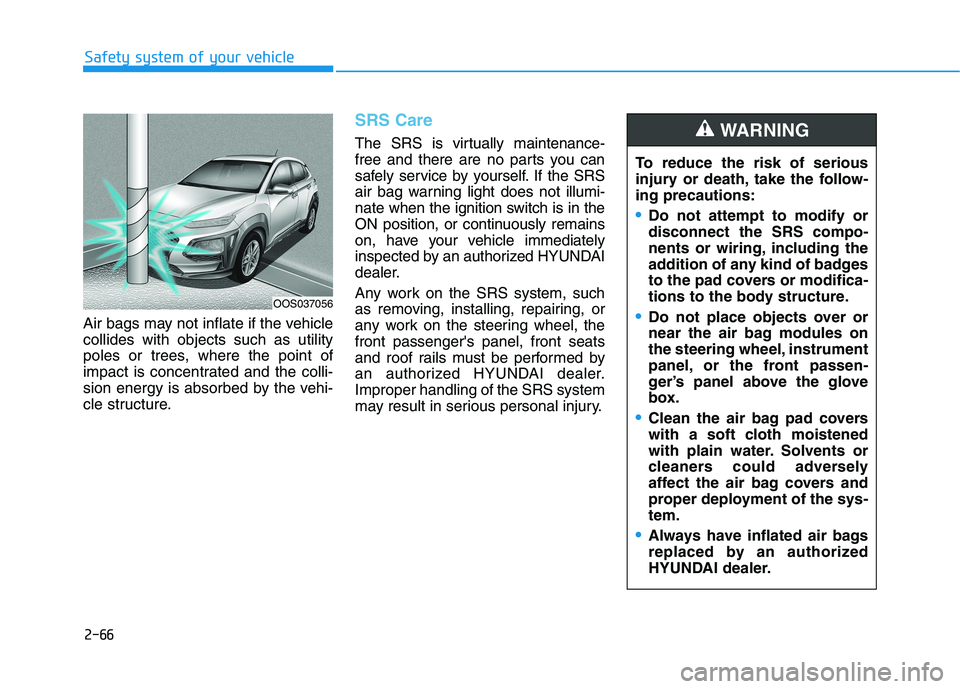
Air bags may not inflate if the vehicle
collides with objects such as utility
poles or trees, where the point of
impact is concentrated and the colli-
sion energy is absorbed by the vehi-
cle structure.
SRS Care
The SRS is virtually maintenance-
free and there are no parts you can
safely service by yourself. If the SRS
air bag warning light does not illumi-
nate when the ignition switch is in the
ON position, or continuously remains
on, have your vehicle immediately
inspected by an authorized HYUNDAI
dealer.
Any work on the SRS system, such
as removing, installing, repairing, or
any work on the steering wheel, the
front passenger's panel, front seats
and roof rails must be performed by
an authorized HYUNDAI dealer.
Improper handling of the SRS system
may result in serious personal injury.To reduce the risk of serious
injury or death, take the follow-
ing precautions:
Do not attempt to modify or
disconnect the SRS compo-
nents or wiring, including the
addition of any kind of badges
to the pad covers or modifica-
tions to the body structure.
Do not place objects over or
near the air bag modules on
the steering wheel, instrument
panel, or the front passen-
ger’s panel above the glove
box.
Clean the air bag pad covers
with a soft cloth moistened
with plain water. Solvents or
cleaners could adversely
affect the air bag covers and
proper deployment of the sys-
tem.
Always have inflated air bags
replaced by an authorized
HYUNDAI dealer.
WARNING
OOS037056
Page 85 of 506

Convenient features of your vehicle
Accessing Your Vehicle .........................................3-3
Remote Key.........................................................................3-3
Smart Key ............................................................................3-6
Immobilizer System .........................................................3-11
Door Locks ............................................................3-13
Operating Door Locks from Outside the Vehicle ....3-13
Operating Door Locks from Inside the Vehicle .......3-14
Automatic Door Lock and Unlock Features .............3-16
Child-Protector Rear Door Locks ...............................3-17
Theft-Alarm System ............................................3-18
Steering Wheel .....................................................3-18
Electric Power Steering (EPS) .....................................3-18
Tilt Steering / Telescope Steering ..............................3-19
Heated Steering Wheel (for Canada) .........................3-20
Horn ....................................................................................3-21
Mirrors ...................................................................3-21
Inside Rearview Mirror ..................................................3-21
Side View Mirrors ...........................................................3-32
Windows ................................................................3-35
Power Windows ...............................................................3-36
Sunroof..................................................................3-39
Sunroof opening and closing .......................................3-40
Sliding the sunroof .........................................................3-40
Tilting the sunroof ..........................................................3-40
Sunshade ...........................................................................3-41Resetting the sunroof ....................................................3-41
Sunroof Open Warning ..................................................3-42
Exterior Features .................................................3-43
Hood ...................................................................................3-43
Liftgate ..............................................................................3-44
Fuel Filler Door ................................................................3-46
Instrument Cluster ...............................................3-49
Instrument Cluster Control............................................3-50
Gauges and Meters ........................................................3-51
Transmission shift indicator .........................................3-54
Warning and Indicator Lights .......................................3-55
LCD Display Messages ...................................................3-67
LCD Display ...........................................................3-72
LCD Display Control ........................................................3-72
LCD Display Modes .........................................................3-73
Trip Computer .......................................................3-83
Head Up Display (HUD) .......................................3-87
Lighting..................................................................3-90
Exterior Lights .................................................................3-90
Smart cornering lamp ....................................................3-97
Interior Lights...................................................................3-98
Welcome System ...........................................................3-100
3
Page 87 of 506

3-3
Convenient features of your vehicle
Remote Key (if equipped)
Your HYUNDAI uses a remote key,
which you can use to lock or unlock
the driver and passenger doors or
the rear liftgate.
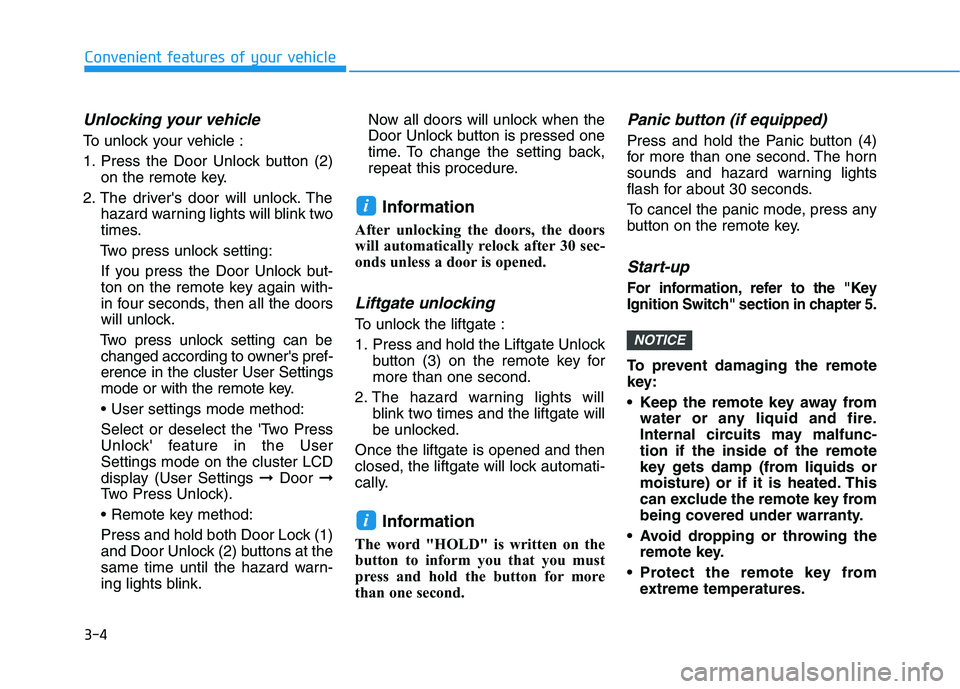
1. Door Lock
2. Door Unlock
3. Liftgate Unlock
4. Panic
Locking Your Vehicle
To lock your vehicle:
1. Make sure all doors, the engine
hood and the liftgate are closed.
2. Press the Door Lock button (1) on
the remote key to lock all doors.
3. If the Door Lock button (1) is
pressed once more within four
seconds, the horn will beep once
and the hazard warning lights will
blink.
4. Make sure the doors are locked by
checking the position of the door
lock button inside the vehicle.
Information
After locking the doors, if you press
the Door Lock button again within
four seconds, the hazard warning
lights will blink and the horn will
sound one time to confirm that the
doors are locked.
i
A AC
CC
CE
ES
SS
SI
IN
NG
G
Y
YO
OU
UR
R
V
VE
EH
HI
IC
CL
LE
E
3
OPD046001
Do not leave the keys in your
vehicle with unsupervised chil-
dren. Unattended children
could place the key in the igni-
tion switch and may operate
power windows or other con-
trols, or even make the vehicle
move, which could result in
serious injury or death.
WARNING
Page 88 of 506

3-4
Unlocking your vehicle
To unlock your vehicle :
1. Press the Door Unlock button (2)
on the remote key.
2. The driver's door will unlock. The
hazard warning lights will blink two
times.
Two press unlock setting:
If you press the Door Unlock but-
ton on the remote key again with-
in four seconds, then all the doors
will unlock.
Two press unlock setting can be
changed according to owner's pref-
erence in the cluster User Settings
mode or with the remote key.
• User settings mode method:
Select or deselect the 'Two Press
Unlock' feature in the User
Settings mode on the cluster LCD
display (User Settings ➞Door ➞
Two Press Unlock).
Press and hold both Door Lock (1)
and Door Unlock (2) buttons at the
same time until the hazard warn-
ing lights blink.Now all doors will unlock when the
Door Unlock button is pressed one
time. To change the setting back,
repeat this procedure.
Information
After unlocking the doors, the doors
will automatically relock after 30 sec-
onds unless a door is opened.
Liftgate unlocking
To unlock the liftgate :
1. Press and hold the Liftgate Unlock
button (3) on the remote key for
more than one second.
2. The hazard warning lights will
blink two times and the liftgate will
be unlocked.
Once the liftgate is opened and then
closed, the liftgate will lock automati-
cally.
Information
The word "HOLD" is written on the
button to inform you that you must
press and hold the button for more
than one second.
Panic button (if equipped)
Press and hold the Panic button (4)
for more than one second. The horn
sounds and hazard warning lights
flash for about 30 seconds.
To cancel the panic mode, press any
button on the remote key.
Start-up
For information, refer to the "Key
Ignition Switch" section in chapter 5.
To prevent damaging the remote
key:
• Keep the remote key away from
water or any liquid and fire.
Internal circuits may malfunc-
tion if the inside of the remote
key gets damp (from liquids or
moisture) or if it is heated. This
can exclude the remote key from
being covered under warranty.
Avoid dropping or throwing the
remote key.
Protect the remote key from
extreme temperatures.
NOTICE
i
i
Convenient features of your vehicle