2021 HYUNDAI KONA EV clock
[x] Cancel search: clockPage 20 of 478
Safety Precautions
Adjusting the seats so that you are sit-
ting in a safe, comfortable position
plays an important role in driver and
passenger safety together with the
seat belts and air bags in an accident.
Air bags
You can take steps to reduce the risk
of being injured by an inflating air
bag. Sitting too close to an air bag
greatly increases the risk of injury in
the event the air bag inflates.
The National Highway Traffic Safety
Administration (NHTSA) recommends
that drivers allow at least 10 inches
(25 cm) between the center of the
steering wheel and their chest. Do not use a cushion that
reduces friction between the seat
and the passenger. The passen-
ger's hips may slide under the
lap portion of the seat belt during
an accident or a sudden stop.
Serious or fatal internal injuries
could result because the seat
belt cannot operate properly.
WARNING
To reduce the risk of serious
injury or death from an inflating
air bag, take the following pre-
cautions:
•Adjust the driver's seat as far to
the rear as possible while main-
taining the ability to maintain
full control of the vehicle.
Adjust the front passenger seat
as far to the rear as possible.
Hold the steering wheel by the
rim with hands at the 9 o'clock
and 3 o'clock positions to mini-
mize the risk of injuries to your
hands and arms.
NEVER place anything or any-
one between the steering wheel
and the air bag.
Do not allow the front passen-
ger to place feet or legs on the
dashboard to minimize the risk
of leg injuries.
WARNING
2-5
Safety system of your vehicle
2
Page 66 of 478
2-51
Safety system of your vehicle
2
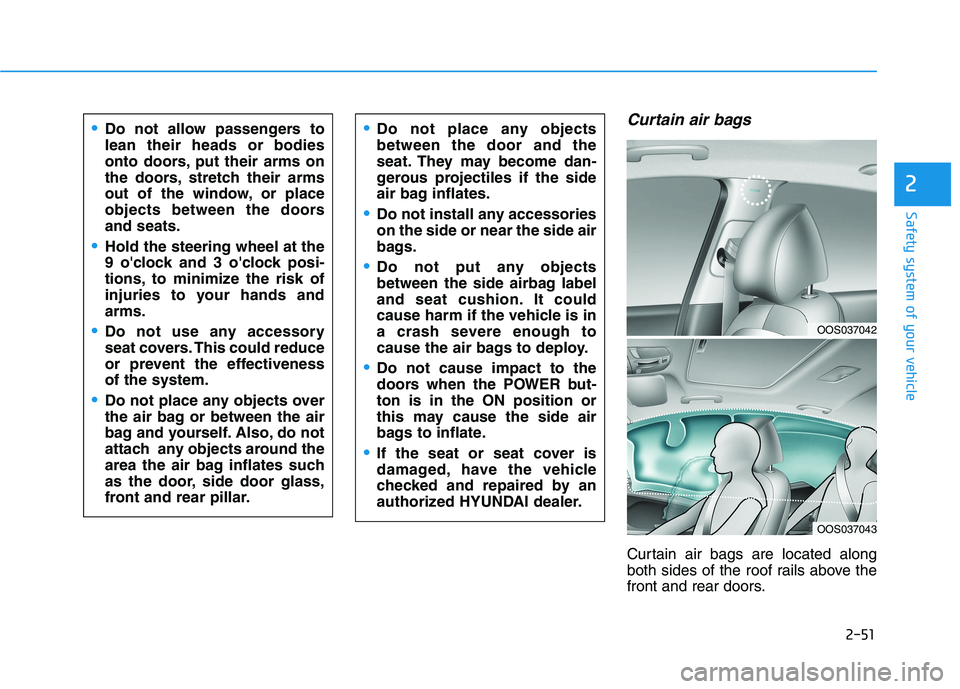
Curtain air bags
Curtain air bags are located along
both sides of the roof rails above the
front and rear doors.
Do not allow passengers to
lean their heads or bodies
onto doors, put their arms on
the doors, stretch their arms
out of the window, or place
objects between the doors
and seats.
Hold the steering wheel at the
9 o'clock and 3 o'clock posi-
tions, to minimize the risk of
injuries to your hands and
arms.
Do not use any accessory
seat covers. This could reduce
or prevent the effectiveness
of the system.
Do not place any objects over
the air bag or between the air
bag and yourself. Also, do not
attach any objects around the
area the air bag inflates such
as the door, side door glass,
front and rear pillar.
Do not place any objects
between the door and the
seat. They may become dan-
gerous projectiles if the side
air bag inflates.
Do not install any accessories
on the side or near the side air
bags.
Do not put any objects
between the side airbag label
and seat cushion. It could
cause harm if the vehicle is in
a crash severe enough to
cause the air bags to deploy.
Do not cause impact to the
doors when the POWER but-
ton is in the ON position or
this may cause the side air
bags to inflate.
If the seat or seat cover is
damaged, have the vehicle
checked and repaired by an
authorized HYUNDAI dealer.
OOS037042
OOS037043
Page 70 of 478
2-55
Safety system of your vehicle
2
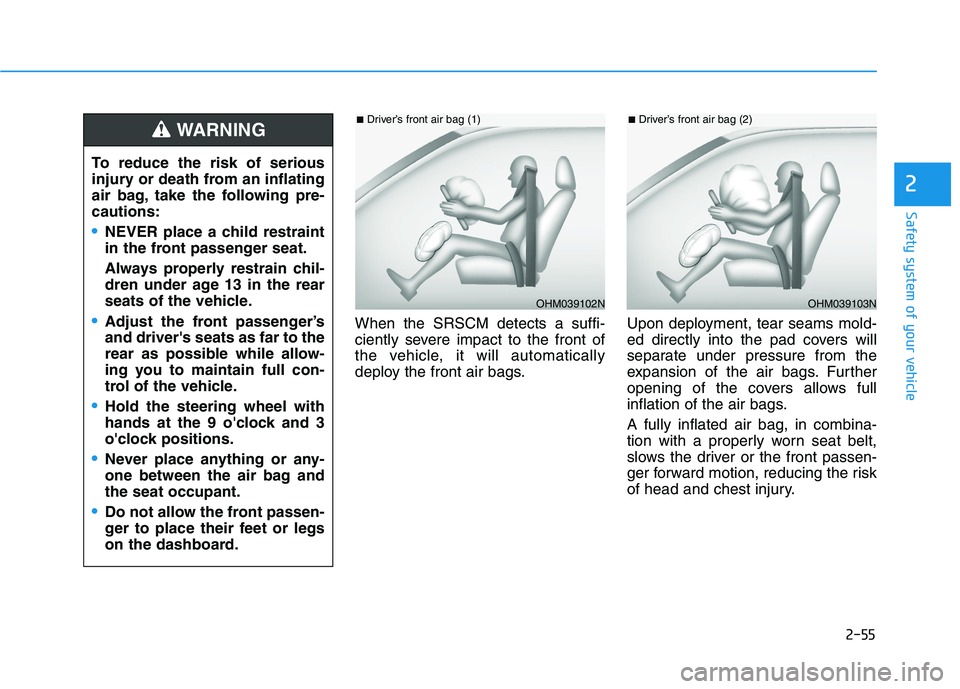
When the SRSCM detects a suffi-
ciently severe impact to the front of
the vehicle, it will automatically
deploy the front air bags.Upon deployment, tear seams mold-
ed directly into the pad covers will
separate under pressure from the
expansion of the air bags. Further
opening of the covers allows full
inflation of the air bags.
A fully inflated air bag, in combina-
tion with a properly worn seat belt,
slows the driver or the front passen-
ger forward motion, reducing the risk
of head and chest injury.
OHM039102N
■Driver’s front air bag (1)
To reduce the risk of serious
injury or death from an inflating
air bag, take the following pre-
cautions:
NEVER place a child restraint
in the front passenger seat.
Always properly restrain chil-
dren under age 13 in the rear
seats of the vehicle.
Adjust the front passenger’s
and driver's seats as far to the
rear as possible while allow-
ing you to maintain full con-
trol of the vehicle.
Hold the steering wheel with
hands at the 9 o'clock and 3
o'clock positions.
Never place anything or any-
one between the air bag and
the seat occupant.
Do not allow the front passen-
ger to place their feet or legs
on the dashboard.
WARNING
OHM039103N
■Driver’s front air bag (2)
Page 86 of 478
Rear view monitor (RVM) ...............................3-114
Reverse parking distance warning (PDW) .....3-115
Operation of Reverse Parking Distance
Warning system .............................................................3-115
To Turn OFF Reverse Parking Distance
Warning system .............................................................3-116
Conditions Where Reverse Parking Distance
Warning system May Not Operate...........................3-117
Reverse Parking Distance Warning system
Precautions.....................................................................3-118
Automatic Climate Control System ..................3-119
Automatic Temperature Control Mode ....................3-120
Manual Temperature Control Mode .........................3-121
System Operation .........................................................3-128
System Maintenance....................................................3-130
Windshield Defrosting and Defogging ............3-132
To Defog Inside Windshield ........................................3-132
To Defrost Outside Windshield ..................................3-133
Defogging logic..............................................................3-133
Auto Defogging System ..............................................3-133
Rear Window Defroster ..............................................3-135
Climate Control Additional Features ...............3-136
Cluster ionizer ................................................................3-136
Automatic Ventilation ...................................................3-136
Storage Compartment .......................................3-137
Center Console Storage ..............................................3-137
Glove Box ........................................................................3-137
Sunglass Holder.............................................................3-137
Interior Features ................................................3-139
Cup Holder ......................................................................3-139
Sunvisor ...........................................................................3-140
Power Outlet ..................................................................3-141
USB Charger ...................................................................3-142
Wireless Cellular Phone Charging System..............3-142
Clock .................................................................................3-144
Coat Hook .......................................................................3-145
Floor Mat Anchor(s).....................................................3-145
Luggage Net Holder .....................................................3-146
Cargo Area Cover..........................................................3-147
3
Page 228 of 478
3-144
Convenient features of your vehicle
The wireless charging process
may temporarily stop, when tem-
perature abnormally increases
inside the wireless cellular phone
charging system. Stop the charg-
ing cellular phone and wait until
temperature falls to a certain level.
The wireless charging process
may temporarily stop when there
is any metallic item, such as a
coin, between the wireless cellular
phone charging system and the
cellular phone.
When charging some cellular
phones with a self-protection fea-
ture, the wireless charging speed
may decrease and the wireless
charging may stop.
If the cellular phone has a thick
cover, the wireless charging may
not be possible.
If the cell phone is not completely
contacting the charging pad, wire-
less charging may not operate
properly.
Some magnetic items like credit
cards, phone cards or rail tickets
may be damaged if left with the
cellular phone during the charging
process. When any cellular phone without a
wireless charging function or a
metallic object is placed on the
charging pad, a small noise may
sound. This small sound is due to
the vehicle discerning compatibil-
ity of the object placed on the
charging pad. It does not affect
your vehicle or the cellular phone
in any way.
Information
If the POWER button is in the OFF
position, the charging also stops.
Information
This device complies with part 15 of
the FCC Rules.
Operation is subject to the following
two conditions:
1. This device may not cause harmful
interference, and
2. This device must accept any inter-
ference received, including inter-
ference that may cause undesired
operation.
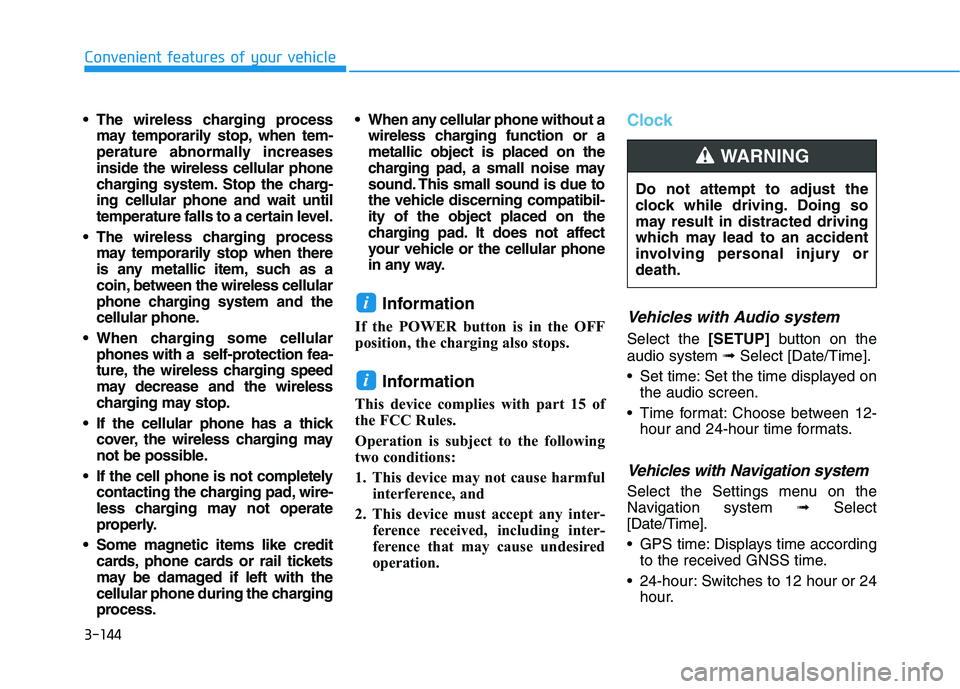
Clock
Vehicles with Audio system
Select the [SETUP]button on the
audio system ➟Select [Date/Time].
Set time: Set the time displayed on
the audio screen.
Time format: Choose between 12-
hour and 24-hour time formats.
Vehicles with Navigation system
Select the Settings menu on the
Navigation system➟Select
[Date/Time].
GPS time: Displays time according
to the received GNSS time.
24-hour: Switches to 12 hour or 24
hour.
i
i
Do not attempt to adjust the
clock while driving. Doing so
may result in distracted driving
which may lead to an accident
involving personal injury or
death.
WARNING
Page 381 of 478
6-22
What to do in an emergency
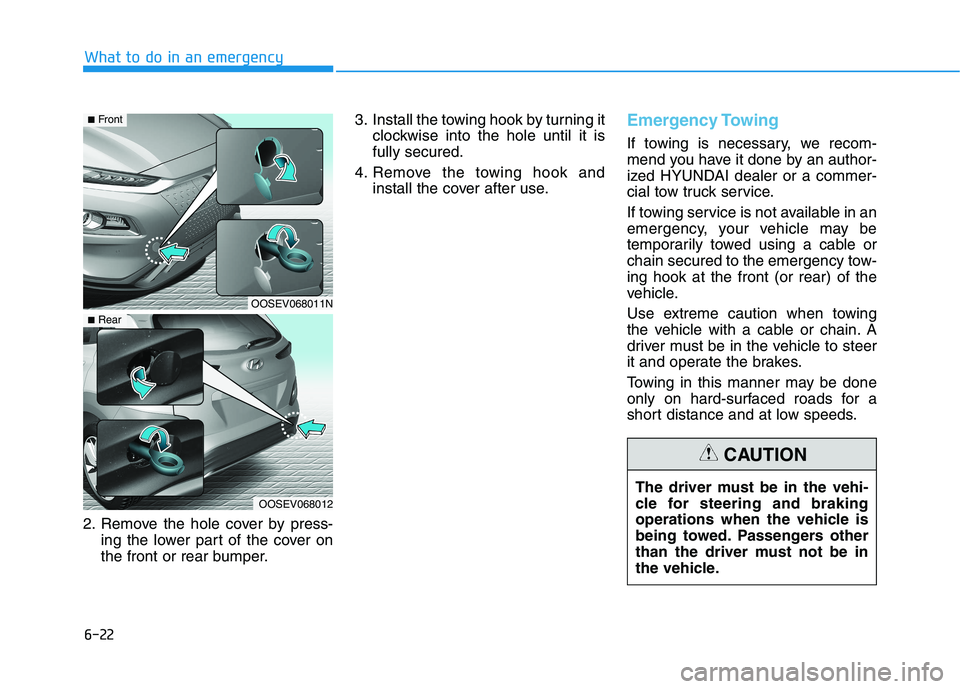
2. Remove the hole cover by press-
ing the lower part of the cover on
the front or rear bumper.3. Install the towing hook by turning it
clockwise into the hole until it is
fully secured.
4. Remove the towing hook and
install the cover after use.
Emergency Towing
If towing is necessary, we recom-
mend you have it done by an author-
ized HYUNDAI dealer or a commer-
cial tow truck service.
If towing service is not available in an
emergency, your vehicle may be
temporarily towed using a cable or
chain secured to the emergency tow-
ing hook at the front (or rear) of the
vehicle.
Use extreme caution when towing
the vehicle with a cable or chain. A
driver must be in the vehicle to steer
it and operate the brakes.
Towing in this manner may be done
only on hard-surfaced roads for a
short distance and at low speeds.
OOSEV068011N
OOSEV068012
■Front
■Rear
The driver must be in the vehi-
cle for steering and braking
operations when the vehicle is
being towed. Passengers other
than the driver must not be in
the vehicle.
CAUTION
Page 405 of 478
7-23
7
Maintenance
By jump starting
After a jump start from a good bat-
tery, drive the vehicle for 20-30 min-
utes before it is shutoff. The vehicle
may not restart if you shut it off
before the battery had a chance to
adequately recharge. See "Jump
Starting" in chapter 6 for more infor-
mation on jump starting procedures.
Information
An inappropriately disposed
battery can be harmful to
the environment and human
health. Dispose of the bat-
tery according to your local
law(s) or regulation.
Reset Features
Some items need to be reset after
the battery has been discharged or
the battery has been disconnected.
Power Windows
Trip Computer
Climate Control System
Clock
Audio System
Sunroof
i
Watch the battery during
charging, and stop or reduce
the charging rate if the battery
cells begin boiling violently.
The negative battery cable
must be removed first and
installed last when the battery
is disconnected. Disconnect
the battery charger in the fol-
lowing order:
(1) Turn off the battery charg-
er main switch.
(2) Unhook the negative
clamp from the negative
battery terminal.
(3) Unhook the positive clamp
from the positive battery
terminal.
Always use a genuine
HYUNDAI approved battery
when you replace the battery.
Page 423 of 478
7-41
7
Maintenance
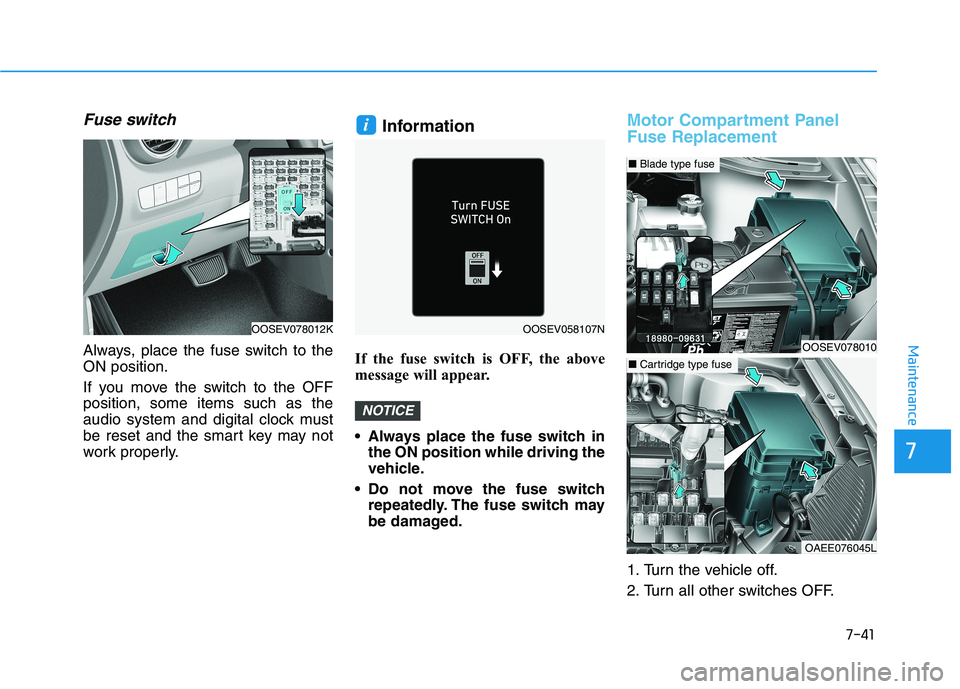
Fuse switch
Always, place the fuse switch to the
ON position.
If you move the switch to the OFF
position, some items such as the
audio system and digital clock must
be reset and the smart key may not
work properly.
Information
If the fuse switch is OFF, the above
message will appear.
Always place the fuse switch in
the ON position while driving the
vehicle.
Do not move the fuse switch
repeatedly. The fuse switch may
be damaged.
Motor Compartment Panel
Fuse Replacement
1. Turn the vehicle off.
2. Turn all other switches OFF.
NOTICE
i
OOSEV078012KOOSEV058107N
OOSEV078010
■Blade type fuse
OAEE076045L
■Cartridge type fuse