2021 HYUNDAI KONA EV charging
[x] Cancel search: chargingPage 243 of 478
5-8
Driving your vehicle
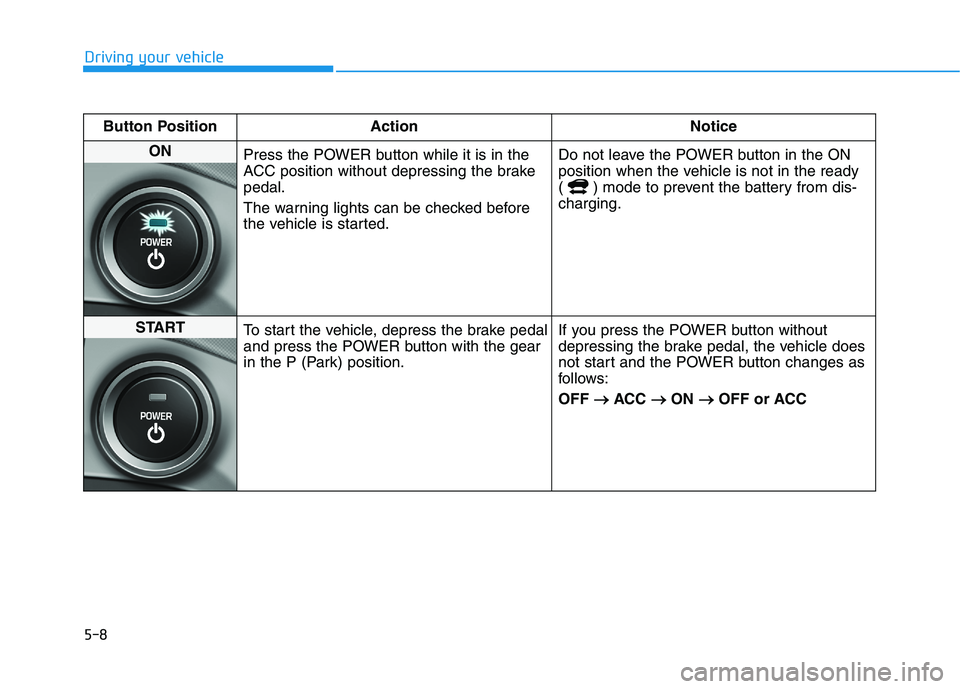
Button Position Action Notice
ON
Press the POWER button while it is in the
ACC position without depressing the brake
pedal.
The warning lights can be checked before
the vehicle is started.Do not leave the POWER button in the ON
position when the vehicle is not in the ready
( ) mode to prevent the battery from dis-
charging.
START
To start the vehicle, depress the brake pedal
and press the POWER button with the gear
in the P (Park) position.If you press the POWER button without
depressing the brake pedal, the vehicle does
not start and the POWER button changes as
follows:
OFF → →
ACC → →
ON → →
OFF or ACC
Page 248 of 478
5-13
Driving your vehicle
5
When the driver's door is opened
within 3 minutes with the POWER
button in the ACC position and the
gear in N (Neutral), the vehicle is
automatically turned OFF and shifted
to the P (Park) position.
D (Drive)
This is the normal driving position.
To shift to D (Drive), press the [D]
button while depressing the brake
pedal.
Shift-lock system
For your safety, your vehicle has a
shift-lock system which prevents
shifting the gear from P (Park) or N
(Neutral) into R (Reverse) or D
(Drive) unless the brake pedal is
depressed.
To shift from P (Park) or N (Neutral)
into R (Reverse) or D (Drive), from R
(Reverse) into D (Drive) or from D
(Drive) into R (Reverse):
1. Depress and hold the brake pedal.
2. Start the vehicle or place the
POWER button in the ON position.
3. Press the R (Reverse) or D (Drive)
button.
Information
For your safety, you cannot shift the
gear while the charging cable is con-
nected.
When the battery (12 V) is dis-
charged
You cannot shift the gear when the
battery is discharged.
Jump start your vehicle (refer to
"Jump Starting" in chapter 6) or con-
tact an authorized HYUNDAI dealer.
Parking
Always come to a complete stop and
continue to depress the brake pedal.
Shift to the P (Park) position, apply
the parking brake, and place the
POWER button in the OFF position.
Take the Key with you when exiting
the vehicle.
i
Page 365 of 478
6-6
What to do in an emergency
7. Connect the other end of the sec-
ond jumper cable to the black,
negative (-) chassis ground of
your vehicle (4).
Do not allow the jumper cables to
contact anything except the cor-
rect battery or jumper terminals or
the correct ground. Do not lean
over the battery when making
connections.
8. Start the motor of the assisting
vehicle and let it run at approxi-
mately 2,000 rpm for a few min-
utes. Then start your vehicle.
9. After your vehicle starts allow it to
operate at least 30 minutes with-
out shutting it down, this will help
charge back the 12V battery.
If your vehicle will not start after a
few attempts, it probably requires
servicing. In this event please seek
qualified assistance. If the cause of
your battery discharging is not
apparent, have your vehicle checked
by an authorized HYUNDAI dealer.Disconnect the jumper cables in the
exact reverse order you connected
them:
1. Disconnect the jumper cable from
the black, negative (-) chassis
ground of your vehicle (4).
2. Disconnect the other end of the
jumper cable from the black, neg-
ative (-) battery/chassis ground of
the assisting vehicle (3).
3. Disconnect the second jumper
cable from the red, positive (+)
battery/jumper terminal of the
assisting vehicle (2).
4. Disconnect the other end of the
jumper cable from the red, positive
(+) jumper terminal of your vehicle
(1).
Page 383 of 478
7
Maintenance
7
Maintenance
EV Drive Motor Compartment ..............................7-3
Maintenance Services ...........................................7-4
Owner's Responsibility .....................................................7-4
Owner Maintenance Precautions..................................7-4
Owner Maintenance ..............................................7-5
Owner Maintenance Schedule .......................................7-5
Scheduled Maintenance Services........................7-7
Normal Maintenance Schedule ......................................7-8
Maintenance Under Severe Usage Conditions ........7-10
Severe Driving Conditions .............................................7-10
Explanation of Scheduled Maintenance Items ..7-11
Coolant...................................................................7-12
Brake Fluid ............................................................7-13
Checking the Brake Fluid Level ...................................7-13
Washer Fluid .........................................................7-14
Checking the Washer Fluid Level................................7-14
Climate Control Air Filter ....................................7-15
Filter Inspection ...............................................................7-15
Wiper Blades.........................................................7-17
Blade Inspection ..............................................................7-17
Blade Replacement .........................................................7-17
12V Auxiliary Battery ..........................................7-21
For Best Battery Service ..............................................7-22
Battery Recharging ........................................................7-22
Reset Features.................................................................7-23
Tires and Wheels .................................................7-24
Tire Care ............................................................................7-24
Recommended Cold Tire Inflation Pressures ...........7-25
Check Tire Inflation Pressure ......................................7-26
Tire Rotation.....................................................................7-27
Wheel Alignment and Tire Balance ............................7-28
Tire Replacement ............................................................7-28
Wheel Replacement ........................................................7-29
Tire Traction .....................................................................7-29
Tire Maintenance ............................................................7-29
Tire Sidewall Labeling ....................................................7-29
Tire Terminology and Definitions................................7-33
All Season Tires ...............................................................7-37
Summer Tires ...................................................................7-37
Snow Tires ........................................................................7-37
Radial-Ply Tires ...............................................................7-37
7
Page 387 of 478
7-5
7
Maintenance
O OW
WN
NE
ER
R
M
MA
AI
IN
NT
TE
EN
NA
AN
NC
CE
E
The following lists are vehicle checks
and inspections that should be per-
formed by the owner or an author-
ized HYUNDAI dealer at the frequen-
cies indicated to help ensure safe,
dependable operation of your vehi-
cle.
Any adverse conditions should be
brought to the attention of your deal-
er as soon as possible.
These Owner Maintenance vehicle
checks are generally not covered by
warranties and you may be charged
for labor, parts and lubricants used.Owner Maintenance Schedule
When you stop for charging:
• Check coolant level in the coolant
reservoir.
Check the windshield washer fluid
level.
Check for low or under-inflated
tires. Performing maintenance work
on a vehicle can be dangerous.
If you lack sufficient knowledge
and experience or the proper
tools and equipment to do the
work, have it done by an author-
ized HYUNDAI dealer.
ALWAYS follow these precau-
tions for performing mainte-
nance work:
•Park your vehicle on level
ground, shift to the P (Park)
position, apply the parking
brake, and place the POWER
button in the OFF position.
Block the tires (front and
back) to prevent the vehicle
from moving.
Remove loose clothing or jew-
elry that can become entan-
gled in moving parts.
Keep flames, sparks, or smok-
ing materials away from the
battery and related compo-
nents.
WARNING
Be careful when checking your
coolant level when the parts in
the motor compartment are hot.
This may result in coolant being
blown out of the opening and
cause serious burns and other
injuries.
WARNING
Page 404 of 478
7-22
Maintenance
When you do not use the vehicle
for a long time in a low tempera-
ture area, disconnect the battery
and keep it indoors.
Always charge the battery fully
to prevent battery case damage
in low temperature areas.
For Best Battery Service
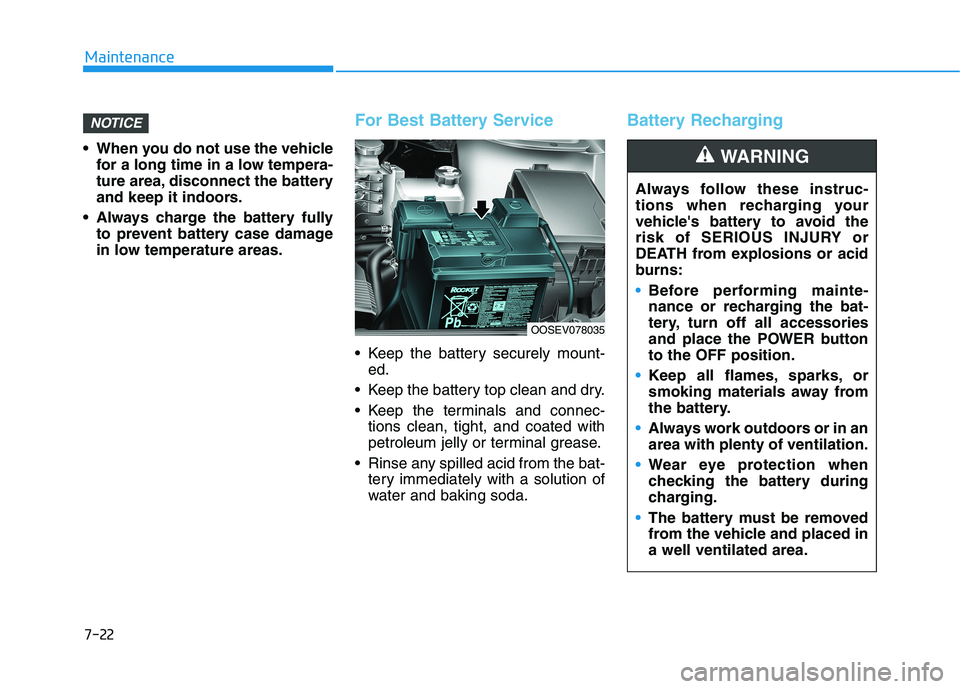
Keep the battery securely mount-
ed.
Keep the battery top clean and dry.
Keep the terminals and connec-
tions clean, tight, and coated with
petroleum jelly or terminal grease.
Rinse any spilled acid from the bat-
tery immediately with a solution of
water and baking soda.
Battery RechargingNOTICE
Always follow these instruc-
tions when recharging your
vehicle's battery to avoid the
risk of SERIOUS INJURY or
DEATH from explosions or acid
burns:
Before performing mainte-
nance or recharging the bat-
tery, turn off all accessories
and place the POWER button
to the OFF position.
Keep all flames, sparks, or
smoking materials away from
the battery.
Always work outdoors or in an
area with plenty of ventilation.
Wear eye protection when
checking the battery during
charging.
The battery must be removed
from the vehicle and placed in
a well ventilated area.
WARNING
OOSEV078035
Page 405 of 478
7-23
7
Maintenance
By jump starting
After a jump start from a good bat-
tery, drive the vehicle for 20-30 min-
utes before it is shutoff. The vehicle
may not restart if you shut it off
before the battery had a chance to
adequately recharge. See "Jump
Starting" in chapter 6 for more infor-
mation on jump starting procedures.
Information
An inappropriately disposed
battery can be harmful to
the environment and human
health. Dispose of the bat-
tery according to your local
law(s) or regulation.
Reset Features
Some items need to be reset after
the battery has been discharged or
the battery has been disconnected.
Power Windows
Trip Computer
Climate Control System
Clock
Audio System
Sunroof
i
Watch the battery during
charging, and stop or reduce
the charging rate if the battery
cells begin boiling violently.
The negative battery cable
must be removed first and
installed last when the battery
is disconnected. Disconnect
the battery charger in the fol-
lowing order:
(1) Turn off the battery charg-
er main switch.
(2) Unhook the negative
clamp from the negative
battery terminal.
(3) Unhook the positive clamp
from the positive battery
terminal.
Always use a genuine
HYUNDAI approved battery
when you replace the battery.
Page 466 of 478
I-2
Air bag warning labels ....................................................2-71
Air bags ...........................................................................2-47
Additional safety precautions .....................................2-69
Air bag collision sensors ............................................2-64
Air bag inflation conditions .......................................2-65
Air bag non-inflation conditions ................................2-66
Air bag warning labels ...............................................2-69
Curtain air bags ..........................................................2-51
Driver's air bag ...........................................................2-49
How does the air bags system operate? .....................2-52
Occupant Classification System (OCS) .....................2-57
Passenger's front air bag.............................................2-49
Side air bags ...............................................................2-50
SRS Care ....................................................................2-68
SRS components and functions..................................2-52
SRS warning light ......................................................2-53
What to expect after an air bag inflates .....................2-56
Why didn't my air bag go off in a collision ...............2-63
Air conditioning system specification ..............................8-5
Air ventilated seats .........................................................2-22
Airconditioning system .................................................3-119
Alarm system ..................................................................3-15
Antenna .............................................................................4-3
Anti-lock Brake System (ABS) ......................................5-40Appearance care..............................................................7-63
Exterior care ...............................................................7-63
Interior care ................................................................7-69
Armrest ...........................................................................2-15
Audio / Video / Navigation system ..................................4-4
Auto defogging system .................................................3-133
Auto hold ........................................................................5-36
Auto light position ..........................................................3-97
Automatic climate control system ................................3-119
Air conditioning .......................................................3-127
Air intake control .....................................................3-125
Automatic heating and air conditioning ...................3-120
Climate control information screen selection button .3-127
Driver only ...............................................................3-126
Fan speed control .....................................................3-126
Fresh mode ...............................................................3-125
HEAT button.............................................................3-127
Manual heating and air conditioning .......................3-121
Mode selection .........................................................3-122
OFF mode.................................................................3-128
Recirculation mode ..................................................3-125
System maintenance .................................................3-130
Temperature control .................................................3-124
Automatic ventilation ...................................................3-136
Auxiliary battery (12 volt)
Battery recharging ......................................................7-21
Index
A