2021 HYUNDAI KONA EV hood open
[x] Cancel search: hood openPage 273 of 478
5-38
Driving your vehicle
Information
• The Auto Hold does not operate
when:
- The driver's door is opened
- The hood is opened
- The liftgate is opened
- The gear is in P (Park)
- The EPB is applied
• For your safety, the Auto Hold auto-
matically switches to EPB when:
- The driver's door is opened
- The hood is opened
- The liftgate is opened
- The vehicle stops for more than 10
minutes
- The vehicle stands on a steep slope
- The vehicle moves several timesIn these cases, the parking brake
warning light comes on, the AUTO
HOLD indicator changes from green
to white, and a warning sounds and
a message will appear to inform you
that EPB has been automatically
engaged. Before driving again,
depress the brake pedal, check the
surrounding area near your vehicle
and release the parking brake man-
ually with the EPB switch.
• While the AUTO HOLD feature is
operating, some mechanical noises
may be audible. This is a normal
condition of the AUTO HOLD fea-
ture.
If the AUTO HOLD indicator
changes to yellow, the Auto Hold
is not working properly. Contact
an authorized HYUNDAI dealer.If there is a malfunction with the
driver's door or hood open detec-
tion system, the Auto Hold may
not work properly. Contact an
authorized HYUNDAI dealer.
NOTICE
NOTICE
i
Depress the accelerator pedal
slowly when you start the
vehicle.
For your safety, cancel the
Auto Hold when you drive
downhill, back up the vehicle
or park the vehicle.
WARNING
Page 436 of 478
7-54
Maintenance
Headlamp, Daytime Running
Light (DRL), Cornering Lamp,
Parking Lamp, Turn Signal
Lamp and Side Marker
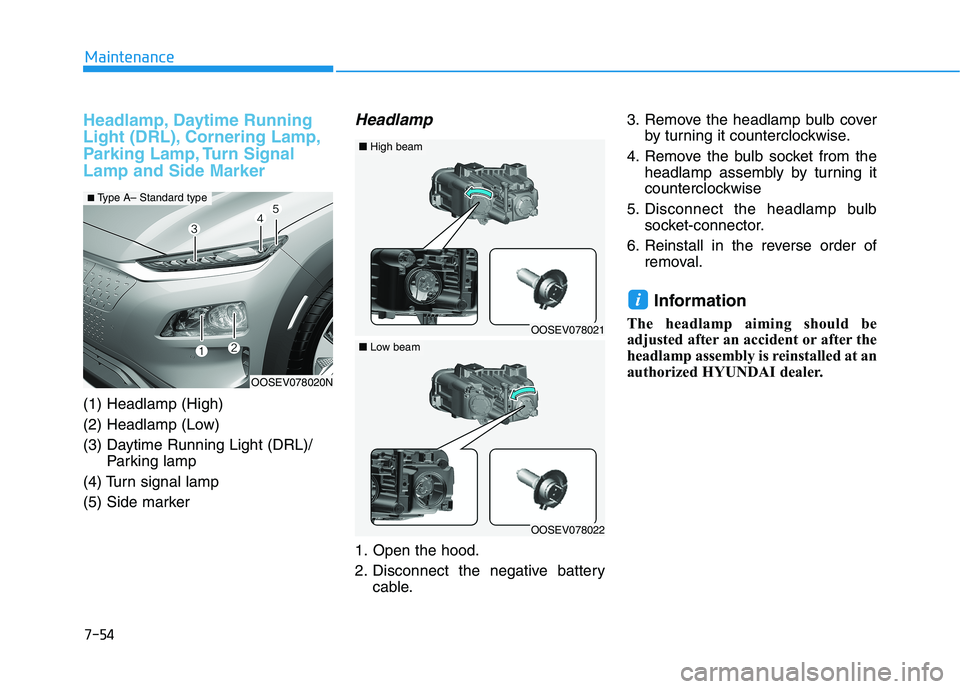
(1) Headlamp (High)
(2) Headlamp (Low)
(3) Daytime Running Light (DRL)/
Parking lamp
(4) Turn signal lamp
(5) Side marker
Headlamp
1. Open the hood.
2. Disconnect the negative battery
cable.3. Remove the headlamp bulb cover
by turning it counterclockwise.
4. Remove the bulb socket from the
headlamp assembly by turning it
counterclockwise
5. Disconnect the headlamp bulb
socket-connector.
6. Reinstall in the reverse order of
removal.
Information
The headlamp aiming should be
adjusted after an accident or after the
headlamp assembly is reinstalled at an
authorized HYUNDAI dealer.
i
OOSEV078020N
■ Type A– Standard type
OOSEV078021
■High beam
OOSEV078022
■Low beam
Page 437 of 478
7-55
7
Maintenance
Always handle them carefully, and
avoid scratches and abrasions. If
the bulbs are lit, avoid contact with
liquids.
Never touch the glass with bare
hands. Residual oil may cause the
bulb to overheat and burst when lit.
A bulb should be operated only
when installed in a headlamp.
If a bulb becomes damaged or
cracked, replace it immediately
and carefully dispose of it.
Daytime running light
(DRL)/Position lamp
If the lamp (LED) does not operate,
have the system checked by an
authorized HYUNDAI dealer.
The LED lamps cannot be replaced
as a single unit because it is an inte-
grated unit. The LED lamps has to be
replaced with the unit.
A skilled technician should check or
repair the LED lamp, for it may dam-
age related parts of the vehicle.
Turn signal lamp
1. Open the hood.
2. Disconnect the negative battery
cable.
3. Remove the socket from the
assembly by turning the socket
counterclockwise until the tabs on
the socket align with the slots on
the assembly.
4. Remove the bulb from the socket
by pressing it in and rotating it
counterclockwise until the tabs on
the bulb align with the slots in the
socket. Pull the bulb out of the
socket.
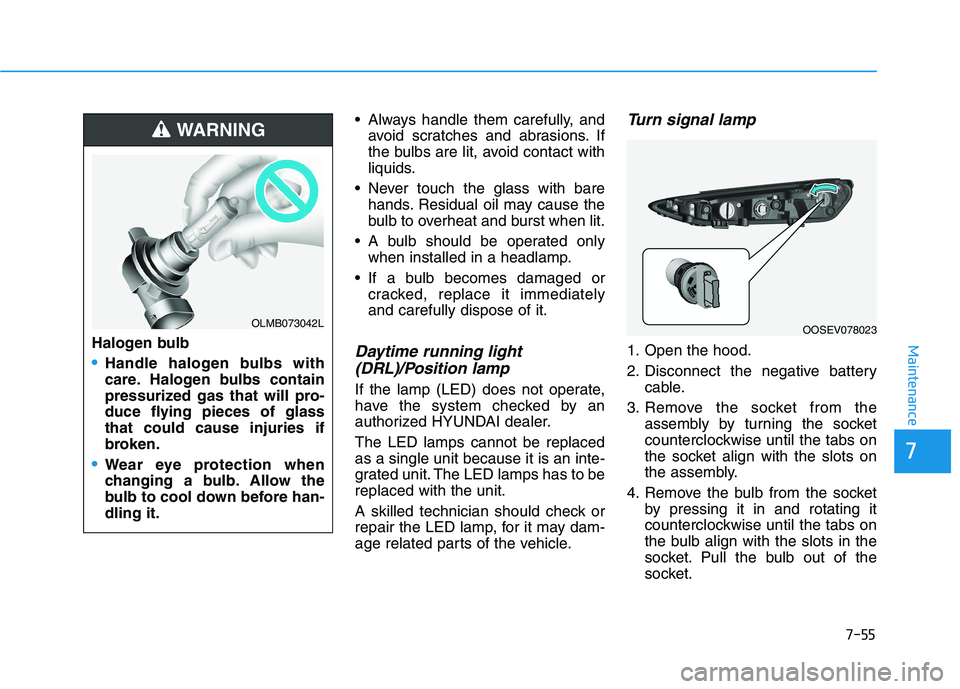
OOSEV078023Halogen bulb
Handle halogen bulbs with
care. Halogen bulbs contain
pressurized gas that will pro-
duce flying pieces of glass
that could cause injuries if
broken.
Wear eye protection when
changing a bulb. Allow the
bulb to cool down before han-
dling it.
WARNING
OLMB073042L
Page 438 of 478
7-56
Maintenance
5. Install a new bulb by inserting it
into the socket and rotating it until
it locks into place.
6. Install the socket in the assembly
by aligning the tabs on the socket
with the slots in the assembly.
7. Push the socket into the assembly
and turn the socket clockwise.
Side marker
1. Open the hood.
2. Disconnect the negative battery
cable.
3. Remove the socket from the
assembly by turning the socket
counterclockwise until the tabs on
the socket align with the slots on
the assembly.
4. Remove the bulb from the socket
by pulling out the bulb.
5. Insert a new bulb.
6. Reinstall in the reverse order of
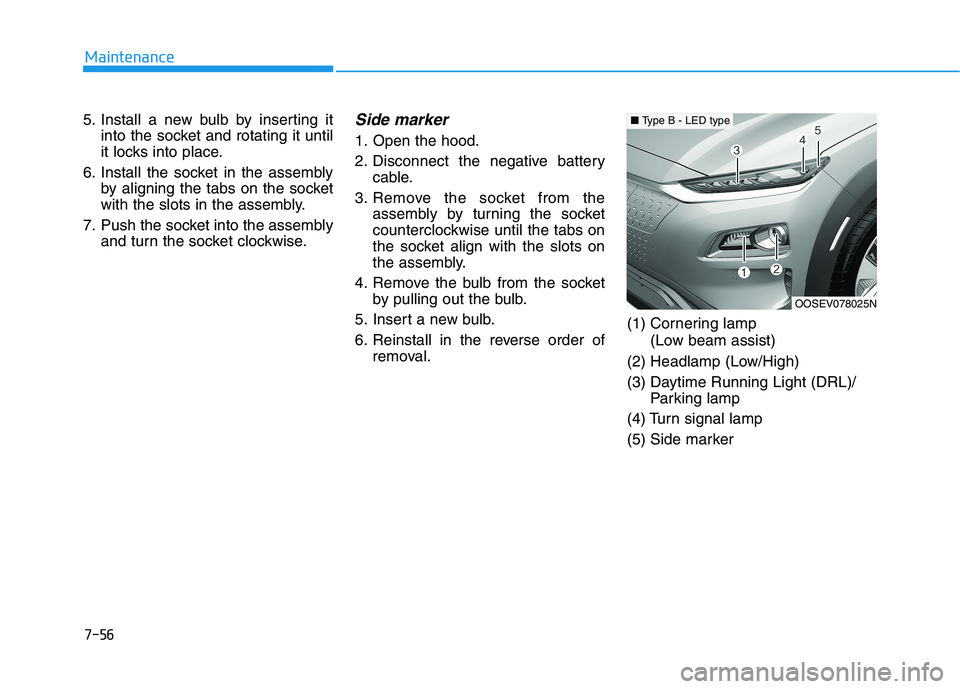
removal.(1) Cornering lamp
(Low beam assist)
(2) Headlamp (Low/High)
(3) Daytime Running Light (DRL)/
Parking lamp
(4) Turn signal lamp
(5) Side marker
OOSEV078025N
■Type B - LED type
Page 439 of 478
7-57
7
Maintenance
Cornering lamp
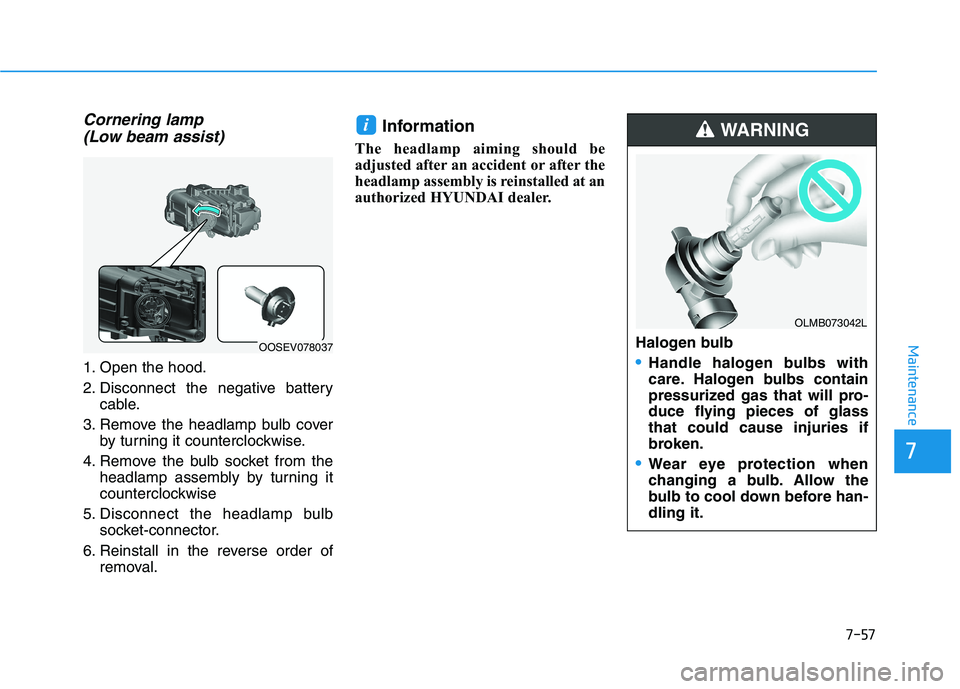
(Low beam assist)
1. Open the hood.
2. Disconnect the negative battery
cable.
3. Remove the headlamp bulb cover
by turning it counterclockwise.
4. Remove the bulb socket from the
headlamp assembly by turning it
counterclockwise
5. Disconnect the headlamp bulb
socket-connector.
6. Reinstall in the reverse order of
removal.
Information
The headlamp aiming should be
adjusted after an accident or after the
headlamp assembly is reinstalled at an
authorized HYUNDAI dealer.
i
Halogen bulb
Handle halogen bulbs with
care. Halogen bulbs contain
pressurized gas that will pro-
duce flying pieces of glass
that could cause injuries if
broken.
Wear eye protection when
changing a bulb. Allow the
bulb to cool down before han-
dling it.
WARNING
OOSEV078037
OLMB073042L
Page 440 of 478
7-58
Maintenance
Always handle them carefully, and
avoid scratches and abrasions. If
the bulbs are lit, avoid contact with
liquids.
Never touch the glass with bare
hands. Residual oil may cause the
bulb to overheat and burst when lit.
A bulb should be operated only
when installed in a headlamp.
If a bulb becomes damaged or
cracked, replace it immediately
and carefully dispose of it.
Headlamp (Low/High) and
Daytime Running Light
(DRL)/Position lamp
If the lamp (LED) does not operate,
have the system checked by an
authorized HYUNDAI dealer.
The LED lamps cannot be replaced
as a single unit because it is an inte-
grated unit. The LED lamps has to be
replaced with the unit.
A skilled technician should check or
repair the LED lamp, for it may dam-
age related parts of the vehicle.
Turn signal lamp
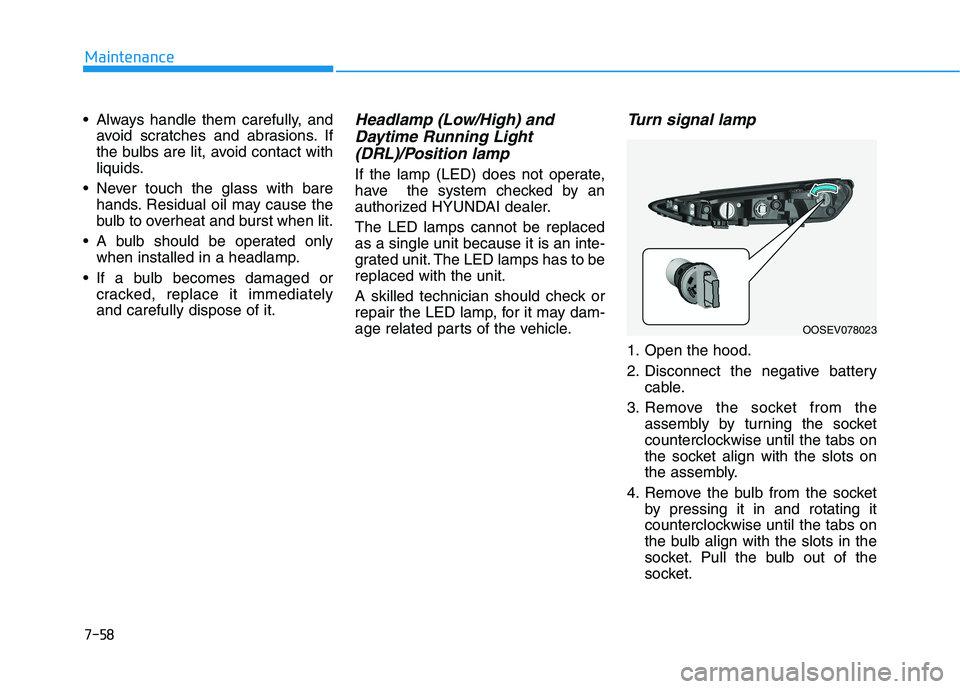
1. Open the hood.
2. Disconnect the negative battery
cable.
3. Remove the socket from the
assembly by turning the socket
counterclockwise until the tabs on
the socket align with the slots on
the assembly.
4. Remove the bulb from the socket
by pressing it in and rotating it
counterclockwise until the tabs on
the bulb align with the slots in the
socket. Pull the bulb out of the
socket.
OOSEV078023
Page 471 of 478
I-7
Jump starting .....................................................................6-4
Label
Refrigerant label ...........................................................8-8
Tire sidewall labeling .................................................7-29
Tire specification and pressure label ............................8-8
Vehicle certification label .............................................8-7
Lane change signals ......................................................3-104
Lane Keeping Assist (LKA) ..........................................5-76
Lap/shoulder belt ............................................................2-26
LCD display
Assist mode ................................................................3-80
Assist mode ................................................................3-80
LCD display modes ....................................................3-79
Master warning mode .................................................3-81
Quick guide help ........................................................3-82
Trip computer mode ...................................................3-80
Turn By Turn (TBT) mode.........................................3-80
User settings mode .....................................................3-82
LCD display control
Assist mode ................................................................3-80
LCD display modes ....................................................3-79
User settings mode .....................................................3-82LCD display messages
Driving info display ...................................................3-65
Aux. Battery Saver+ used while parked ....................3-73
Battery discharging due to external electrical devices .3-66
Charge immediately. Power limited ...........................3-74
Charging door open ....................................................3-72
Charging stopped. Check the AC/DC charger ...........3-72
Charging stopped. Check the cable connection .........3-73
Check Blind-Spot Collision Warning (BCW) system.3-69
Check brake light ......................................................3-69
Check BRAKE SWITCH fuse ...................................3-66
Check cornering lamp ................................................3-69
Check Driver Attention Warning (DAW) system ......3-70
Check electric vehicle system ....................................3-77
Check Forward Collision Avoidance Assist system...3-69
Check headlight ..........................................................3-68
Check headlight LED .................................................3-69
Check High Beam Assist (HBA) system ...................3-69
Check Lane Keep Assist (LKA) system ....................3-70
Check regenerative brakes /
Stop vehicle and check regenerative brakes ............3-74
Check Smart Cruise Control System ........................3-70
Check turn signal........................................................3-69
Check virtual engine sound ........................................3-77
Door, Hood, Liftgate open indicator .........................3-67
EV battery Overheated! Stop vehicle.........................3-75
Heated steering wheel turned off ...............................3-68
Key not detected .........................................................3-66
I
Index
J
L