Page 107 of 478
3-23
Convenient features of your vehicle
3
If you need to recalibrate the com-
pass:
1.Press and hold the Control Button
for more than 6 seconds. When the
compass memory is cleared, a "C"
will appear in the display.
2.Drive the vehicle in 2 complete cir-
cles at less than 5 mph (8 km/h).Integrated HomeLink®Wireless
Control System
The HomeLink®Wireless Control
System can replace up to three
hand-held radio-frequency (RF)
transmitters with a single built-in
device. This innovative feature will
learn the radio frequency codes of
most current transmitters to operate
devices such as gate operators,
garage door openers, entry door
locks, security systems, even home
lighting. Both standard and rolling
code-equipped transmitters can be
programmed by following the out-
lined procedures.
Additional HomeLink
®information
can be found at: www.homelink.com,
www.youtube.com/HomeLinkGentex
or by calling 1-800-355-3515.
Retain the original transmitter of the
RF device you are programming for
use in other vehicles as well as for
future HomeLink
®programming. It is
also suggested that upon the sale of
the vehicle, the programmed
HomeLink
®buttons be erased for
security purposes.Before programming HomeLink
®
to a garage door opener or gate
operator, make sure people and
objects are out of the way of the
device to prevent potential harm
or damage. Do not use the
HomeLink
®with any garage door
opener that lacks the safety stop
and reverse features required by
U.S. federal safety standards
(this includes any garage door
opener model manufactured
before April 1, 1982). A garage
door that cannot detect an object
- signaling the door to stop and
reverse - does not meet current
U.S. federal safety standards.
Using a garage door opener
without these features increases
the risk of serious injury or
death.
WARNING
Page 109 of 478
3-25
Convenient features of your vehicle
3
6. Firmly press and release the
“Learn,” “Smart,” or “Program” but-
ton while the indicator (4) flashes
in Green. Once the button is
pressed, you have approximately
30 seconds to initiate the next
step.
Information
At the garage door opener motor,
(security gate motor, etc.) locate the
“Learn,” “Smart,” or “Program” but-
ton. This can usually be found where
the hanging antenna wire is attached
to the motor-head unit (see the
device’s manual to identify this but-
ton). The name and color of the button
may vary by manufacturer. A ladder
and/or second person may simplify
the following steps. 7. Return to the vehicle and firmly
press, hold for two seconds and
release the HomeLink button up to
three times. Do not press the
HomeLink button rapidly. At this
point programming is complete
and your device should operate
when the HomeLink button is
pressed and released.Information
• Some garage door openers require
to press the programmed button on
the mirror up to three times right
after the programming is just com-
pleted to operate the garage door.
• The indicator (4) is turned ON in
Orange and flashes for about 60sec-
onds, during the programing mode
and if a programing is not succeed-
ed within the 60 seconds, the pro-
graming mode will be abort.
HomeLink
®should now activate your
rolling code equipped device.
Gate operator & Canadian program-
ming
During programming, your handheld
transmitter may automatically stop
transmitting. Continue to press the
Integrated HomeLink
®Wireless
Control System button while you
press and re-press ("cycle") your
handheld transmitter every two sec-
onds until the frequency signal has
been learned. The indicator light will
flash slowly and then rapidly after
several seconds upon successful
training.
i
i
Page 123 of 478
3-39
Convenient features of your vehicle
Sunshade
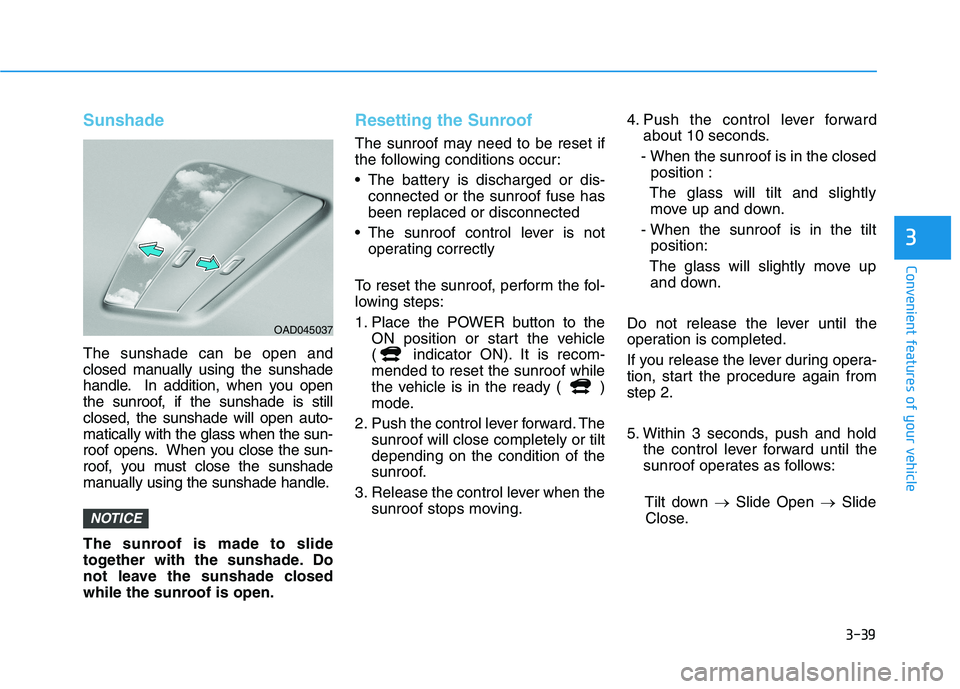
The sunshade can be open and
closed manually using the sunshade
handle. In addition, when you open
the sunroof, if the sunshade is still
closed, the sunshade will open auto-
matically with the glass when the sun-
roof opens. When you close the sun-
roof, you must close the sunshade
manually using the sunshade handle.
The sunroof is made to slide
together with the sunshade. Do
not leave the sunshade closed
while the sunroof is open.
Resetting the Sunroof
The sunroof may need to be reset if
the following conditions occur:
The battery is discharged or dis-
connected or the sunroof fuse has
been replaced or disconnected
The sunroof control lever is not
operating correctly
To reset the sunroof, perform the fol-
lowing steps:
1. Place the POWER button to the
ON position or start the vehicle
( indicator ON). It is recom-
mended to reset the sunroof while
the vehicle is in the ready ( )
mode.
2. Push the control lever forward. The
sunroof will close completely or tilt
depending on the condition of the
sunroof.
3. Release the control lever when the
sunroof stops moving.4. Push the control lever forward
about 10 seconds.
- When the sunroof is in the closed
position :
The glass will tilt and slightly
move up and down.
- When the sunroof is in the tilt
position:
The glass will slightly move up
and down.
Do not release the lever until the
operation is completed.
If you release the lever during opera-
tion, start the procedure again from
step 2.
5. Within 3 seconds, push and hold
the control lever forward until the
sunroof operates as follows:
Tilt down →Slide Open →Slide
Close.
NOTICE
3
OAD045037
Page 132 of 478
3-48
Convenient features of your vehicle
Gauges and Meters
Speedometer
The speedometer indicates the
speed of the vehicle and is calibrated
in miles per hour (mph) and/or kilo-
meters per hour (km/h).
The speedometer is displayed differ-
ently according to the selected drive
mode.
For more details, refer to “Drive
Mode System” in chapter 5.
Sub speedometer
The sub speedometer is displayed
on the cluster when you select ‘Other
features →Speedometer subscale’ in
the User Settings mode. The sub
speedometer is not displayed if you
deselect it in the User Setting mode.
For more details, refer to “LCD
Display Mode” in this chapter.
OOSEV048177N
■SPORT mode
OOSEV048174R
■NORMAL mode
OOSEV048167R
■ECO mode/ECO+ mode (if equipped)
OOSEV048187N
Page 134 of 478
3-50
Convenient features of your vehicle
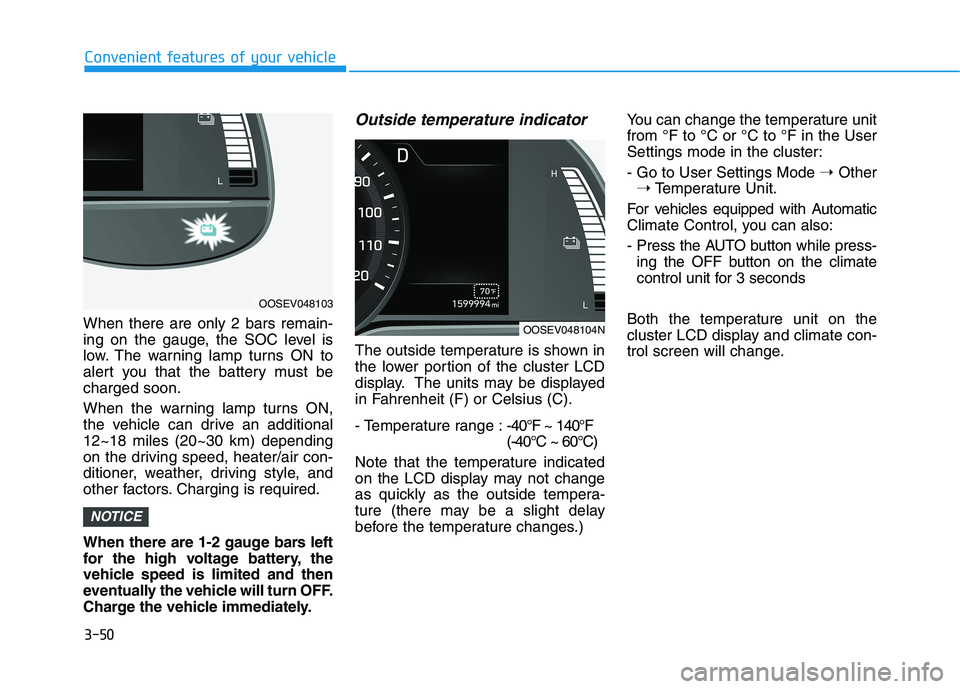
When there are only 2 bars remain-
ing on the gauge, the SOC level is
low. The warning lamp turns ON to
alert you that the battery must be
charged soon.
When the warning lamp turns ON,
the vehicle can drive an additional
12~18 miles (20~30 km) depending
on the driving speed, heater/air con-
ditioner, weather, driving style, and
other factors. Charging is required.
When there are 1-2 gauge bars left
for the high voltage battery, the
vehicle speed is limited and then
eventually the vehicle will turn OFF.
Charge the vehicle immediately.
Outside temperature indicator
The outside temperature is shown in
the lower portion of the cluster LCD
display. The units may be displayed
in Fahrenheit (F) or Celsius (C).
- Temperature range :-40°F ~ 140°F
(-40°C ~ 60°C)
Note that the temperature indicated
on the LCD display may not change
as quickly as the outside tempera-
ture (there may be a slight delay
before the temperature changes.) You can change the temperature unit
from °F to °C or °C to °F in the User
Settings mode in the cluster:
- Go to User Settings Mode ➝Other
➝Temperature Unit.
For vehicles equipped with Automatic
Climate Control, you can also:
- Press the AUTO button while press-
ing the OFF button on the climate
control unit for 3 seconds
Both the temperature unit on the
cluster LCD display and climate con-
trol screen will change.
NOTICE
OOSEV048103
OOSEV048104N
Page 135 of 478
3-51
Convenient features of your vehicle
3
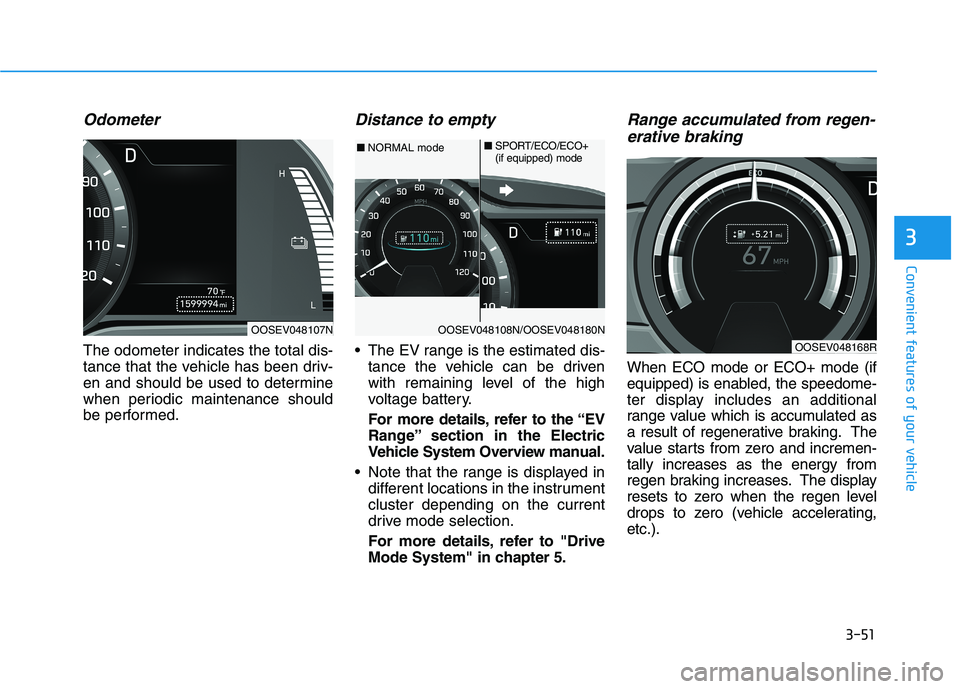
Odometer
The odometer indicates the total dis-
tance that the vehicle has been driv-
en and should be used to determine
when periodic maintenance should
be performed.
Distance to empty
The EV range is the estimated dis-
tance the vehicle can be driven
with remaining level of the high
voltage battery.
For more details, refer to the “EV
Range” section in the Electric
Vehicle System Overview manual.
Note that the range is displayed in
different locations in the instrument
cluster depending on the current
drive mode selection.
For more details, refer to "Drive
Mode System" in chapter 5.
Range accumulated from regen-
erative braking
When ECO mode or ECO+ mode (if
equipped) is enabled, the speedome-
ter display includes an additional
range value which is accumulated as
a result of regenerative braking. The
value starts from zero and incremen-
tally increases as the energy from
regen braking increases. The display
resets to zero when the regen level
drops to zero (vehicle accelerating,
etc.).
OOSEV048107NOOSEV048108N/OOSEV048180N
■NORMAL mode■SPORT/ECO/ECO+
(if equipped) mode
OOSEV048168R
Page 136 of 478
3-52
Convenient features of your vehicle
Gear shift indicator
This indicator displays which gear
position is selected.
Shift indicator pop-up
The pop-up indicates the current
gear position displayed in the cluster
for about 2 seconds when shifting
into other positions (P/R/N/D).
The shift indicator pop-up function
can be activated or deactivated from
the User Settings mode in the cluster
LCD display.
Regenerative braking level indi-
cator
The level of regenerative braking can
be selected by using the paddle
shifters on the steering wheel. The
level (0 to 3) is displayed in the lower
portion of the cluster LCD display.
For more details, refer to
“Regenerative Braking System” in
chapter 5.
OOSEV048105R
OOSEV048106N
OOSEV048109N
Page 137 of 478
3-53
Convenient features of your vehicle
3
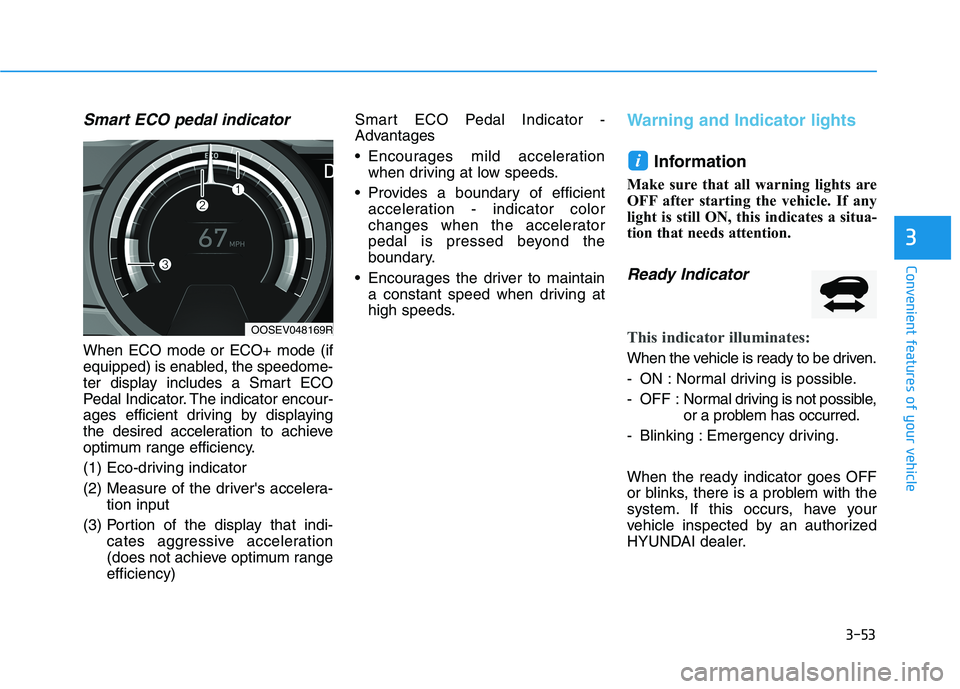
Smart ECO pedal indicator
When ECO mode or ECO+ mode (if
equipped) is enabled, the speedome-
ter display includes a Smart ECO
Pedal Indicator. The indicator encour-
ages efficient driving by displaying
the desired acceleration to achieve
optimum range efficiency.
(1) Eco-driving indicator
(2) Measure of the driver's accelera-
tion input
(3) Portion of the display that indi-
cates aggressive acceleration
(does not achieve optimum range
efficiency)Smart ECO Pedal Indicator -
Advantages
Encourages mild acceleration
when driving at low speeds.
Provides a boundary of efficient
acceleration - indicator color
changes when the accelerator
pedal is pressed beyond the
boundary.
Encourages the driver to maintain
a constant speed when driving at
high speeds.
Warning and Indicator lights
Information
Make sure that all warning lights are
OFF after starting the vehicle. If any
light is still ON, this indicates a situa-
tion that needs attention.
Ready Indicator
This indicator illuminates:
When the vehicle is ready to be driven.
- ON : Normal driving is possible.
- OFF : Normal driving is not possible,
or a problem has occurred.
- Blinking : Emergency driving.
When the ready indicator goes OFF
or blinks, there is a problem with the
system. If this occurs, have your
vehicle inspected by an authorized
HYUNDAI dealer.
i
OOSEV048169R