Page 257 of 632
05
5-115
Sunvisor
OHI048444OHI048444
To use the sunvisor, pull it rearward.
To use the sunvisor to block the sun from
the side window, pull it rearward, release
it from the bracket (1) and swing it to the
side (2) towards the window.
To use the vanity mirror, pull down the
sunvisor and slide the mirror cover (3).
Adjust the sunvisor forward or backward
(4) as needed (if equipped). Use the
ticket holder (5) to hold tickets.
Close the vanity mirror cover securely
and return the sunvisor to its original
position after use.
WARNING
For your safety, do not block your view
when using the sunvisor.
NOTICE
The tab (5) adjacent to the vanity mirror
on the sunvisor can be used for toll
road tickets or self parking tickets. Use
caution when inserting tickets into the
ticket holder to avoid damage. Refrain
from putting several tickets in the ticket
holder as this could also damage the
retaining tab.
Page 258 of 632
Convenient Features
5-116
Rear Mirror (if equipped)
OHI048562OHI048562
To open:
Press the cover and it will slowly open
and the mirror lamp will turn on.
To close:
Push back into position.
NOTICE
Make sure to close the rear mirror
cover after use. If not, the rear mirror
lamp remains ON, possibly draining the
battery or damaging the rear mirror.
Power Outlet
�
Page 259 of 632
05
5-117
WARNING
Avoid electrical shocks. Do not place
your fingers or foreign objects (pin, etc.)
into a power outlet or touch the power
outlet with a wet hand.
NOTICE
To prevent damage to the power
outlets:
• Use the power outlet only when the
engine is running and remove the
accessory plug after use. Using the
accessory plug for prolonged periods
of time with the engine off could
cause the battery to discharge.
• Only use 12 volts electric accessories
which are less than 180 watts in
electric capacity.
• Adjust the air-conditioner or heater
to the lowest operating level when
using the power outlet.
• Close the cover when not in use.
• Some electronic devices can
cause electronic interference
when plugged into a vehicle’s
power outlet. These devices may
cause excessive audio static and
malfunctions in other electronic
systems or devices used in your
vehicle.
• Push the plug in as far as it will go. If
good contact is not made, the plug
may overheat and the fuse may open.
• Plug in battery equipped electrical/
electronic devices with reverse
current protection. The current
from the battery may flow into the
vehicle’s electrical/electronic system
and cause system malfunction.
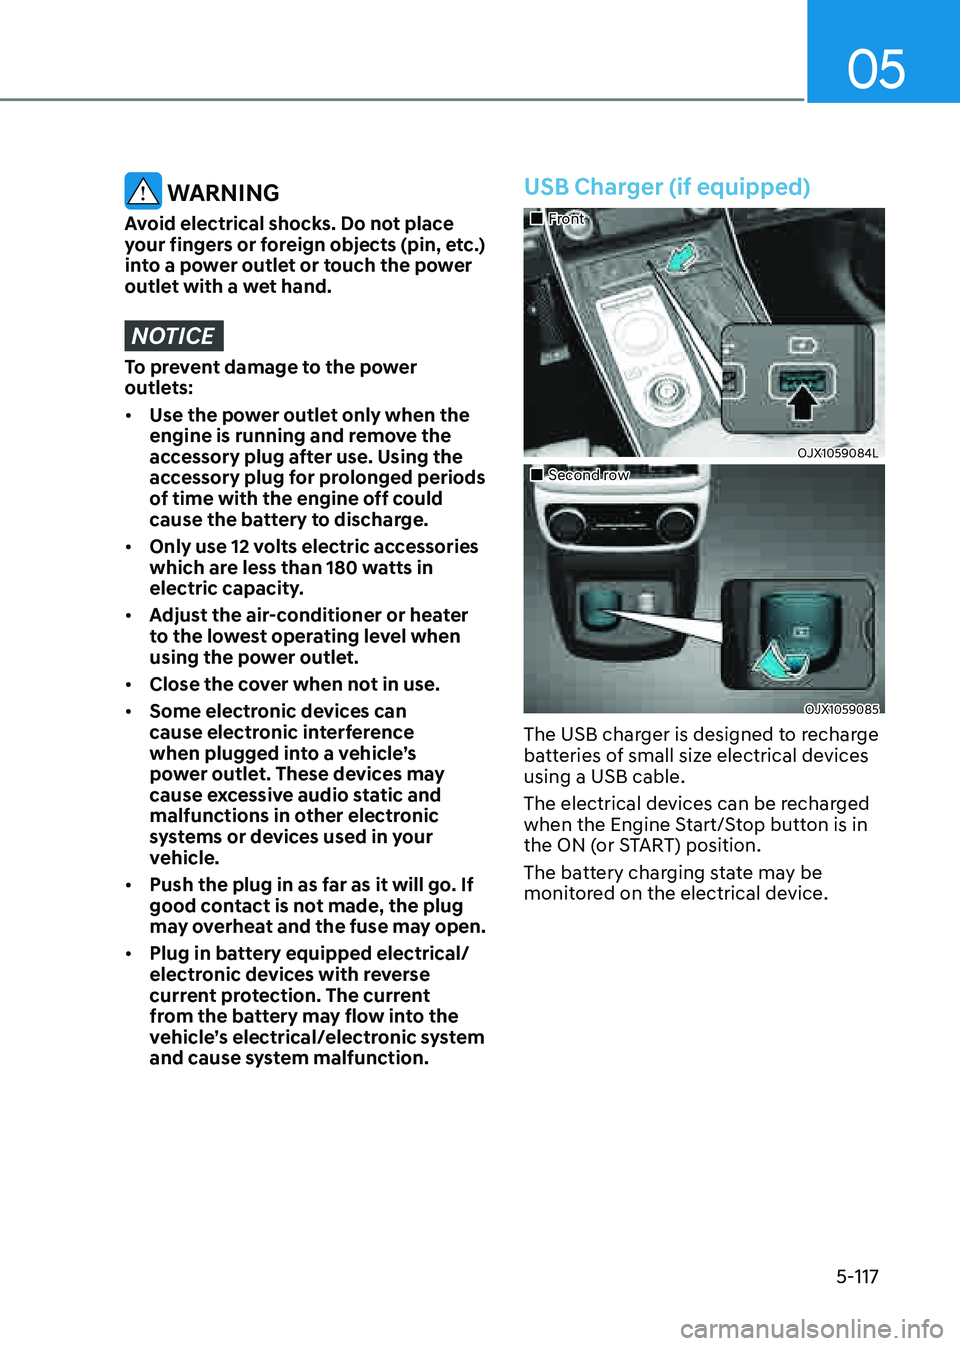
USB Charger (if equipped)
�
Page 260 of 632
Convenient Features
5-118
Disconnect the USB cable from the USB
port after use.
• A smart phone or a tablet PC may
get warmer during the re-charging
process. It does not indicate any
malfunction with the charging system.
• A smart phone or a tablet PC, which
adopts a different re-charging
method, may not be properly re-
charged. In this case, use an exclusive
charger of your device.
• The charging terminal is only to
recharge a device. Do not use the
charging terminal either to turn ON
an audio or to play media In the
infotainment system.
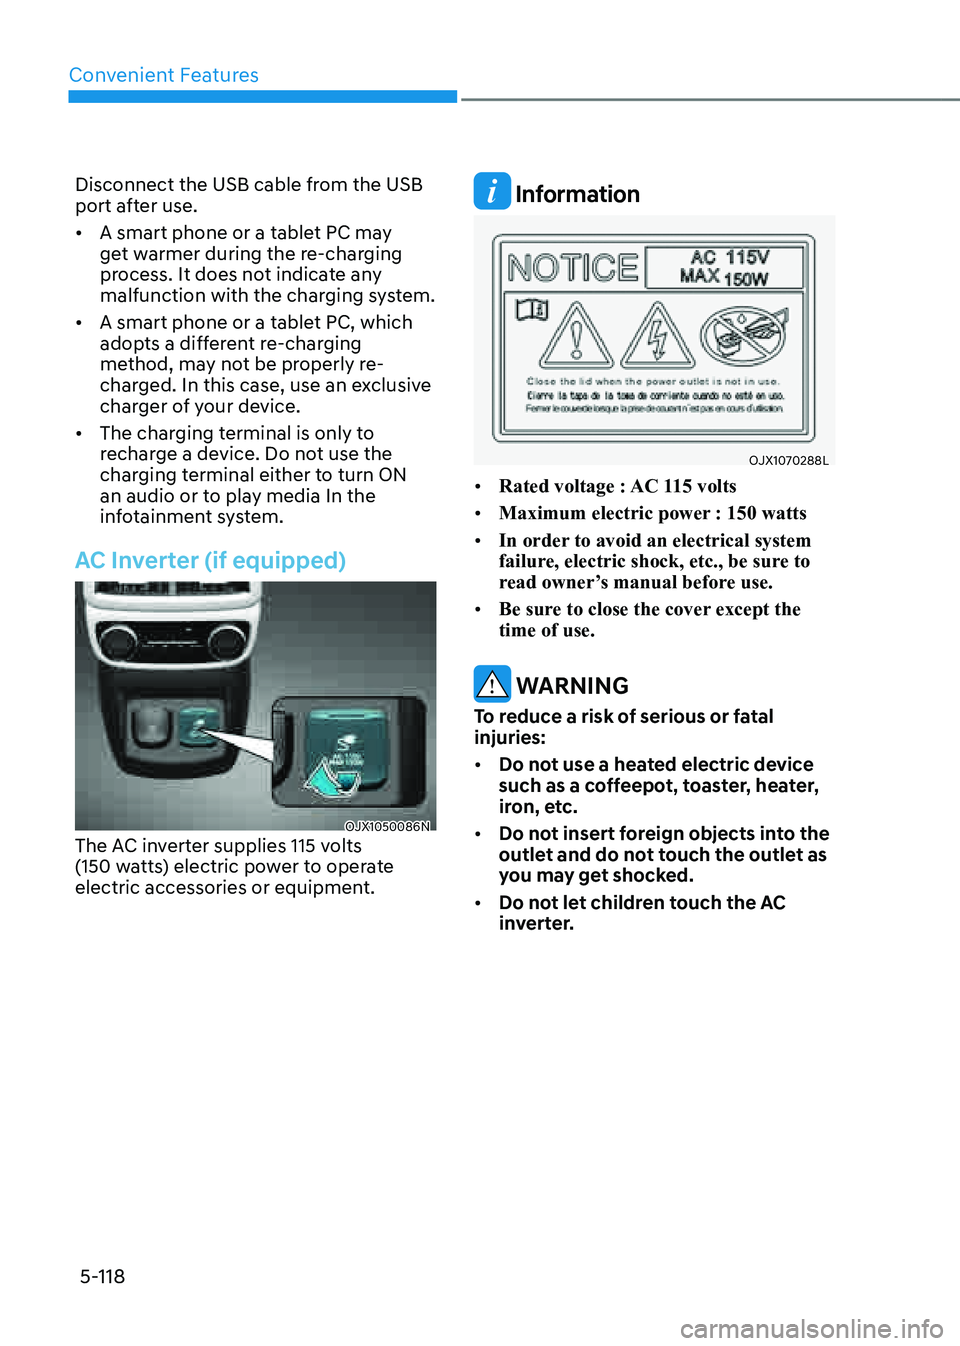
AC Inverter (if equipped)
OJX1050086NOJX1050086NThe AC inverter supplies 115 volts (150 watts) electric power to operate electric accessories or equipment.
Information
OJX1070288LOJX1070288L
• Rated voltage : AC 115 volts
• Maximum electric power : 150 watts
• In order to avoid an electrical system
failure, electric shock, etc., be sure to
read owner’s manual before use.
• Be sure to close the cover except the
time of use.
WARNING
To reduce a risk of serious or fatal
injuries:
• Do not use a heated electric device
such as a coffeepot, toaster, heater,
iron, etc.
• Do not insert foreign objects into the
outlet and do not touch the outlet as
you may get shocked.
• Do not let children touch the AC
inverter.
Page 261 of 632
05
5-119
NOTICE
• To prevent the battery from being
discharged, do not use the AC
inverter while the engine is not
running.
• When not using the AC inverter,
make sure to close the AC inverter
cover.
• After using an electric accessory
or equipment, pull the plug out.
Leaving the accessory or equipment
plugged in for a long time may cause
battery discharge.
• Do not use an electric accessory or
equipment the power consumption
of which is greater than 115 volts
(150 watts).
• Some electric accessories or
equipment can cause electronic
interference. It may cause excessive
audio noise and malfunctions in
other electric systems or devices in
the vehicle.
• Do not use broken electric
accessories or equipment, which
may damage the AC inverter and
electrical systems of the vehicle.
• Do not use two or more electric
accessories or equipment at the
same time. It may cause damage to
the electrical systems of the vehicle.
• When the input voltage is lower,
outlet LED will blink and the AC
inverter will turn off automatically. If
the input voltage goes up to normal,
the AC inverter will turn on again.
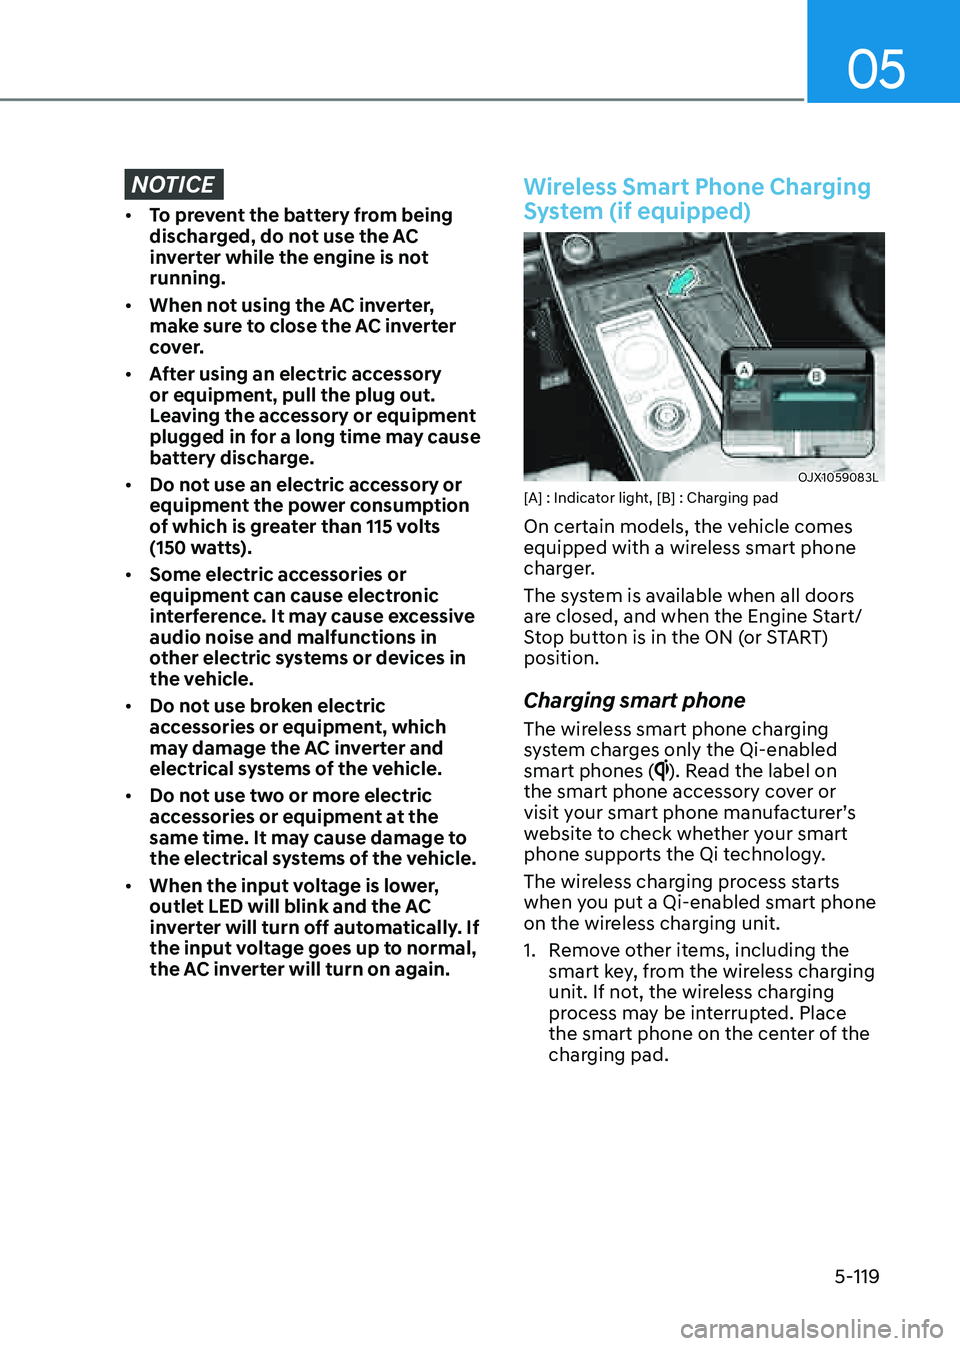
Wireless Smart Phone Charging
System (if equipped)
OJX1059083LOJX1059083L[A] : Indicator light, [B] : Charging pad
On certain models, the vehicle comes
equipped with a wireless smart phone
charger.
The system is available when all doors
are closed, and when the Engine Start/
Stop button is in the ON (or START)
position.
Charging smart phone
The wireless smart phone charging
system charges only the Qi-enabled
smart phones (
). Read the label on
the smart phone accessory cover or
visit your smart phone manufacturer’s
website to check whether your smart
phone supports the Qi technology.
The wireless charging process starts
when you put a Qi-enabled smart phone
on the wireless charging unit.
1. Remove other items, including the
smart key, from the wireless charging
unit. If not, the wireless charging
process may be interrupted. Place
the smart phone on the center of the
charging pad.
Page 262 of 632
Convenient Features
5-120
2. The indicator light is orange when the
smart phone is charging. The indicator
light will turn blue when phone
charging is complete.
3. You can turn ON or OFF the wireless
charging function from the Settings
menu in the infotainment system
screen. Select:
-Setup → Vehicle → Convenience →
Wireless Charging
See additional information in
supplied Infotainment Manual.
If your smart phone is not charging:
- Slightly change the position of the
smart phone on the charging pad.
-Make sure the indicator light is
orange.
The indicator light will blink orange for 10
seconds if there is a malfunction in the
wireless charging system.
In this case, temporarily stop the
charging process, and re-attempt to
charge your smart phone again.
The system warns you with a message on
the LCD display if the smart phone is still
on the wireless charging unit after the
vehicle is turned OFF and the front door
is opened.
For some manufacturer’s smart phones,
the system may not warn you even
though the smart phone is left on the
wireless charging unit. This is due to the
particular characteristic of the smart
phone and not a malfunction of the
wireless charging.
NOTICE
• The wireless smart phone charging
system may not support certain
smart phones, which are not verified
for the Qi specification (
).
• When placing your smart phone on
the charging pad, position the phone
in the middle of the mat for optimal
charging performance. If your smart
phone is off to the side, the charging
rate may be less and in some cases
the smart phone may experience
higher heat conduction.
• In some cases, the wireless charging
may stop temporarily when the
smart key is used, either when
starting the vehicle or locking/
unlocking the doors, etc.
• When charging certain smart
phones, the charging indicator may
not change to blue when the smart
phone is fully charged.
• The wireless charging process may
temporarily stop, when temperature
abnormally increases inside the
wireless smart phone charging
system. The wireless charging
process restarts, when temperature
falls to a certain level.
• The wireless charging process may
temporarily stop when there is
any metallic item, such as a coin,
between the wireless smart phone
charging system and smart phone.
Page 263 of 632
05
5-121
• When charging some smart phones
with a self-protection feature,
the wireless charging speed may
decrease and the wireless charging
may stop.
• If the smart phone has a thick cover,
the wireless charging may not be
possible.
• If the smart phone is not completely
contacting the charging pad,
wireless charging may not operate
properly.
• Some magnetic items like credit
cards, phone cards or rail tickets may
be damaged if left with the smart
phone during the charging process.
• When any smart phone without
a wireless charging function or a
metallic object is placed on the
charging pad, a small noise may
sound. This small sound is due to the
vehicle discerning compatibility of
the object placed on the charging
pad. It does not affect your vehicle or
the smart phone in any way.
Information
If the Engine Start/Stop button is in the
OFF position, the charging also stops.
Clock
The clock can be set from the
infotainment system.
See additional information in supplied
Infotainment Manual.
WARNING
Do not attempt to adjust the clock
while driving. Doing so may result in
distracted driving which may lead to
an accident involving personal injury or
death.
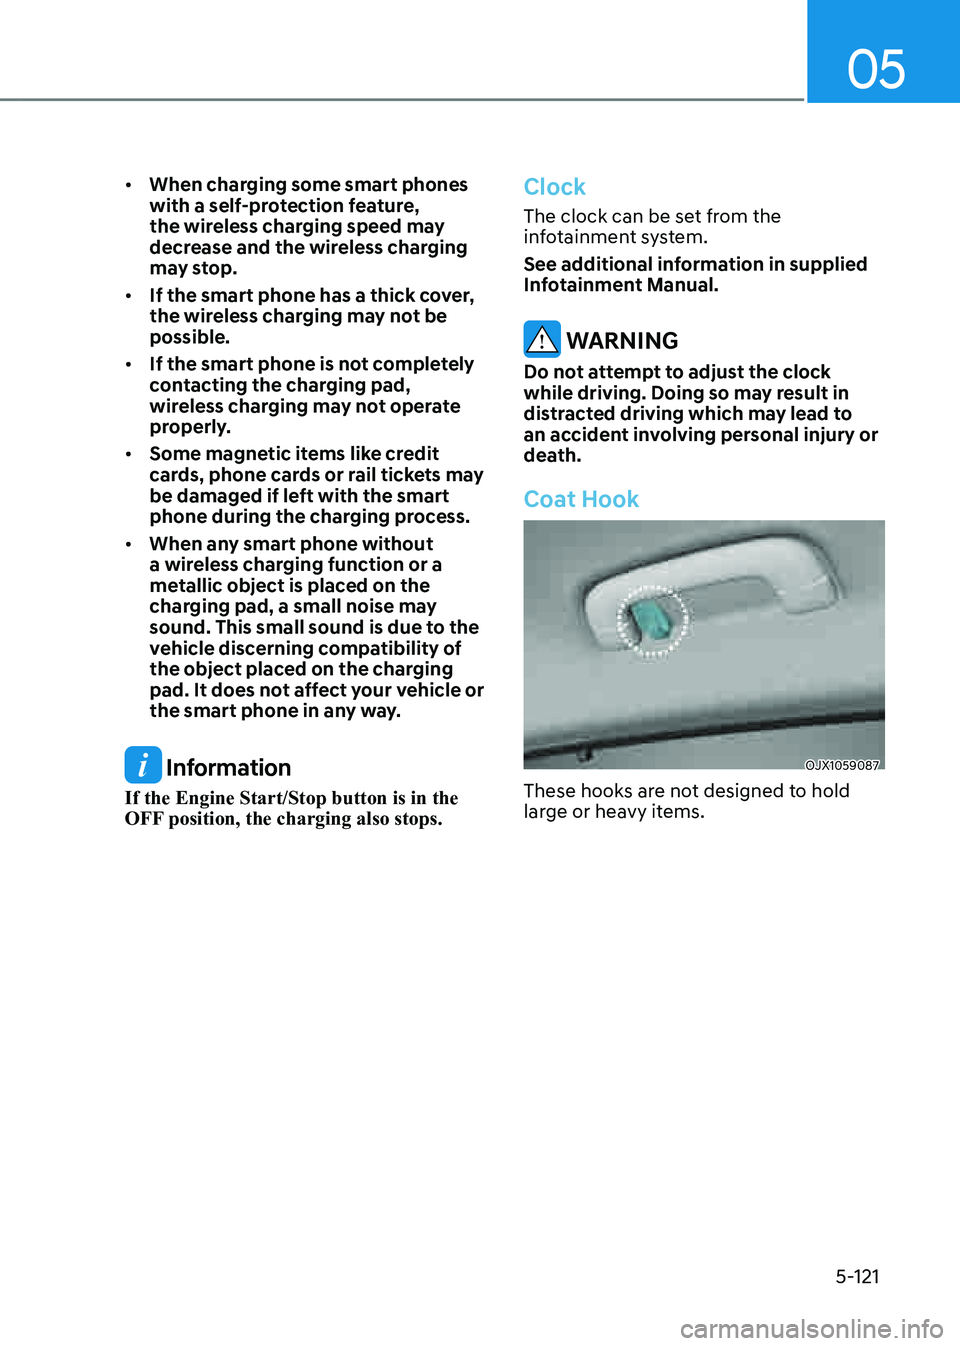
Coat Hook
OJX1059087OJX1059087
These hooks are not designed to hold
large or heavy items.
Page 264 of 632
Convenient Features
5-122
WARNING
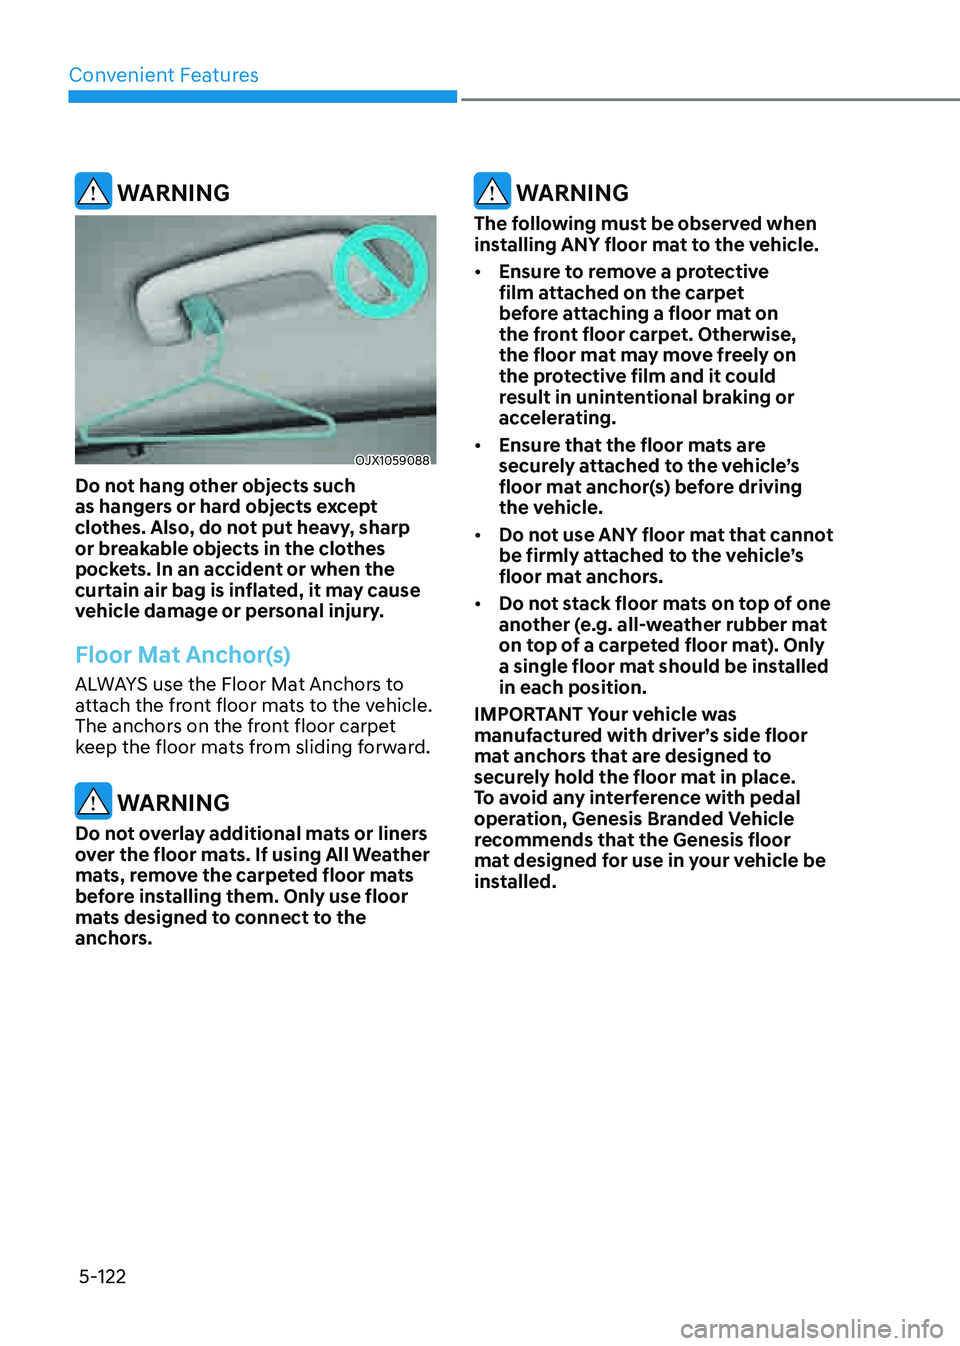
OJX1059088OJX1059088
Do not hang other objects such
as hangers or hard objects except
clothes. Also, do not put heavy, sharp
or breakable objects in the clothes
pockets. In an accident or when the
curtain air bag is inflated, it may cause
vehicle damage or personal injury.
Floor Mat Anchor(s)
ALWAYS use the Floor Mat Anchors to
attach the front floor mats to the vehicle.
The anchors on the front floor carpet
keep the floor mats from sliding forward.
WARNING
Do not overlay additional mats or liners
over the floor mats. If using All Weather
mats, remove the carpeted floor mats
before installing them. Only use floor
mats designed to connect to the
anchors.
WARNING
The following must be observed when
installing ANY floor mat to the vehicle.
• Ensure to remove a protective
film attached on the carpet
before attaching a floor mat on
the front floor carpet. Otherwise,
the floor mat may move freely on
the protective film and it could
result in unintentional braking or
accelerating.
• Ensure that the floor mats are
securely attached to the vehicle’s
floor mat anchor(s) before driving
the vehicle.
• Do not use ANY floor mat that cannot
be firmly attached to the vehicle’s
floor mat anchors.
• Do not stack floor mats on top of one
another (e.g. all-weather rubber mat
on top of a carpeted floor mat). Only
a single floor mat should be installed
in each position.
IMPORTANT Your vehicle was
manufactured with driver’s side floor
mat anchors that are designed to
securely hold the floor mat in place.
To avoid any interference with pedal
operation, Genesis Branded Vehicle
recommends that the Genesis floor
mat designed for use in your vehicle be
installed.