2021 FORD MUSTANG clock
[x] Cancel search: clockPage 73 of 530
Autounlock
Autounlock unlocks all the doors when:
•
The ignition is on, you have closed all
the doors, and your vehicle has been
moving at a speed greater than 12 mph
(20 km/h).
• Your vehicle comes to a stop and you
switch the ignition off or to the
accessory position.
• You open the driver door within 10
minutes of switching the ignition off or
to accessory.
Note: The doors do not autounlock if you
electronically lock your vehicle after you
switch the ignition off and before you open
the driver door.
Enabling or Disabling Autounlock
You can enable or disable the autounlock
feature in the information display or an
authorized dealer can do it for you. See
General Information
(page 103).
Locking and Unlocking the Doors
with the Key Blade
Turn the top of the key toward the front of
your vehicle once to lock all doors.
Turn the top of the key toward the rear of
your vehicle once to unlock the driver door
only. See
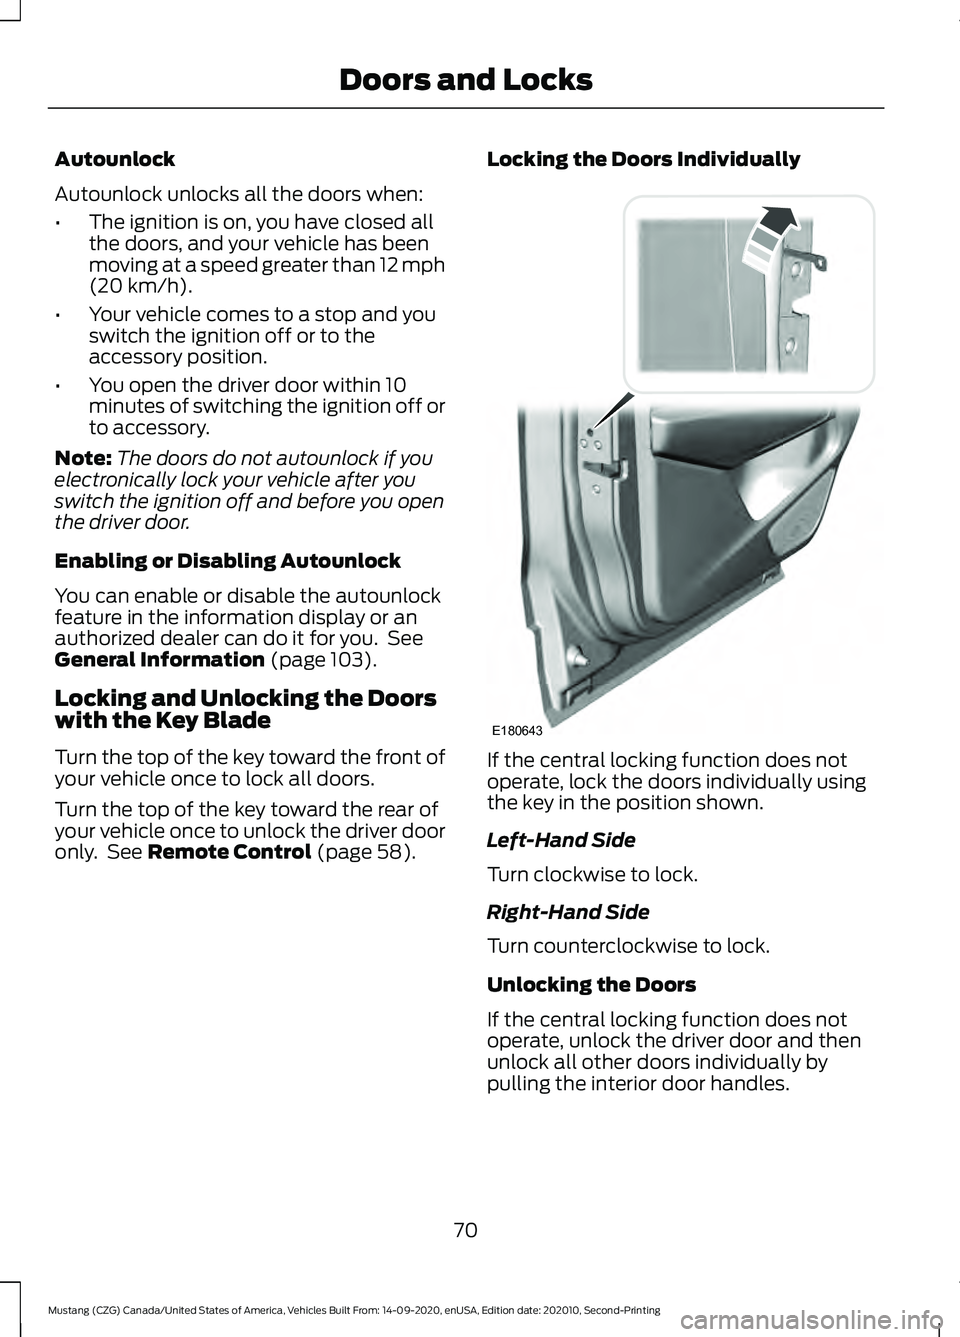
Remote Control (page 58). Locking the Doors Individually
If the central locking function does not
operate, lock the doors individually using
the key in the position shown.
Left-Hand Side
Turn clockwise to lock.
Right-Hand Side
Turn counterclockwise to lock.
Unlocking the Doors
If the central locking function does not
operate, unlock the driver door and then
unlock all other doors individually by
pulling the interior door handles.
70
Mustang (CZG) Canada/United States of America, Vehicles Built From: 14-09-2020, enUSA, Edition date: 202010, Second-Printing Doors and LocksE180643
Page 131 of 530
Use air conditioning with recirculated air
to improve cooling performance and
efficiency.
Note:
In certain conditions such as
maximum defrost, the air conditioning
compressor may continue to operate even
though you switch off the air conditioning.
Switching the Climate Control On
and Off Press and release the button.
Switching Maximum Air
Conditioning On and Off Turn the temperature control
counterclockwise to the lowest
setting.
Note: Recirculated air flows through the
instrument panel air vents, air conditioning
turns on and the blower motor adjusts to
the highest speed.
Switching Maximum Defrost On
and Off Turn the temperature control
clockwise to the highest setting.
Note: Air flows through the windshield air
vents, and the blower motor adjusts to the
highest speed.
You can also use this setting to defog and
clear the windshield of a thin covering of
ice. The heated rear window also turns on
when you select maximum defrost.
Note: To prevent window fogging, you
cannot select recirculated air when
maximum defrost is on. Switching Recirculated Air On and
Off Press and release the button to
switch between outside air and
recirculated air.
The air currently in the passenger
compartment recirculates. This may
reduce the time needed to cool the interior,
when used with A/C, and reduce unwanted
odors from entering your vehicle.
Note: Recirculated air may turn off, or
prevent you from switching on, in all air flow
modes except MAX A/C to reduce the risk
of fogging. Recirculation may also turn on
and off in various air distribution control
combinations during hot weather to improve
cooling efficiency.
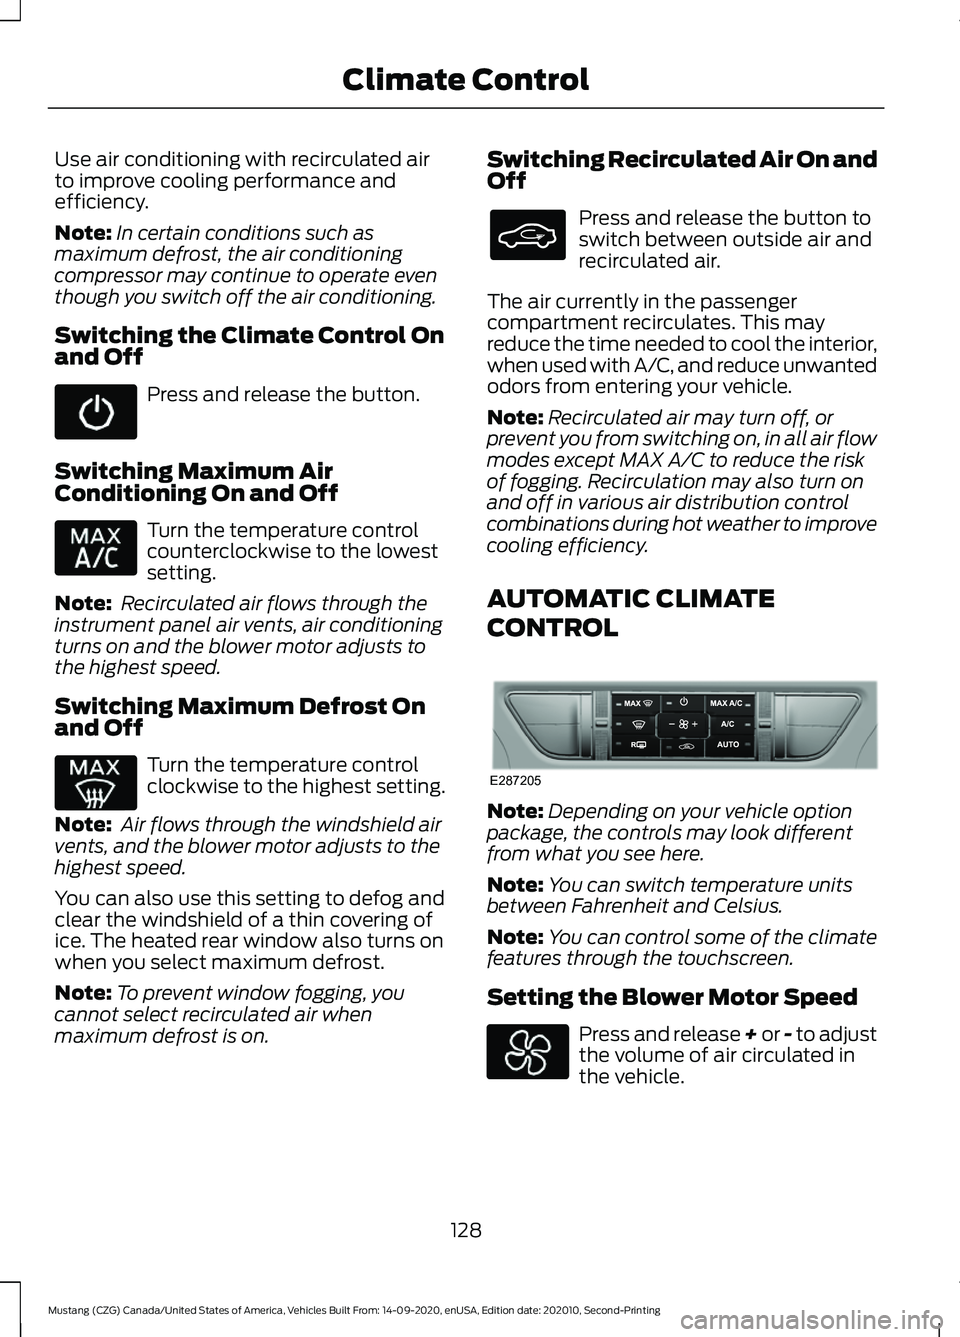
AUTOMATIC CLIMATE
CONTROL Note:
Depending on your vehicle option
package, the controls may look different
from what you see here.
Note: You can switch temperature units
between Fahrenheit and Celsius.
Note: You can control some of the climate
features through the touchscreen.
Setting the Blower Motor Speed Press and release + or - to adjust
the volume of air circulated in
the vehicle.
128
Mustang (CZG) Canada/United States of America, Vehicles Built From: 14-09-2020, enUSA, Edition date: 202010, Second-Printing Climate Control E287205
Page 229 of 530
OPENING THE CONVERTIBLE
TOP
When you use the top, you must first
unlatch it from the windshield and then
use the convertible top control.
Note:
The convertible top does not operate
unless the vehicle is stationary or traveling
under 3 mph (5 km/h). A chime sounds and
a warning message appears in the
instrument panel. When you slow down, the
top operates.
Note: When you latch or unlatch the
convertible top, the audio system mutes
briefly. This allows the vehicle to optimize
the cabin ’s sound quality depending on the
position of the convertible top.
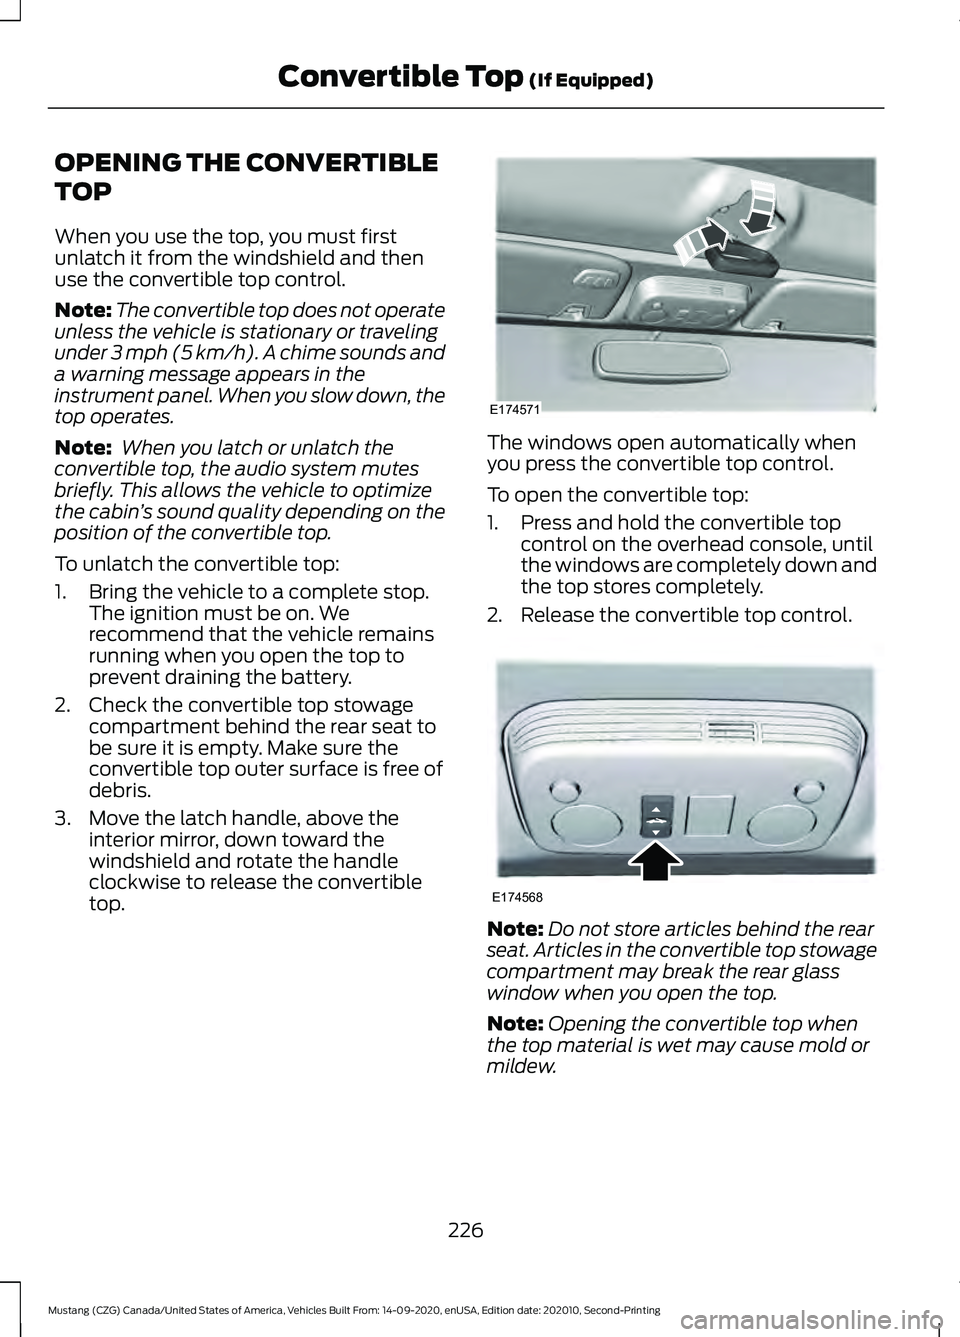
To unlatch the convertible top:
1. Bring the vehicle to a complete stop. The ignition must be on. We
recommend that the vehicle remains
running when you open the top to
prevent draining the battery.
2. Check the convertible top stowage compartment behind the rear seat to
be sure it is empty. Make sure the
convertible top outer surface is free of
debris.
3. Move the latch handle, above the interior mirror, down toward the
windshield and rotate the handle
clockwise to release the convertible
top. The windows open automatically when
you press the convertible top control.
To open the convertible top:
1. Press and hold the convertible top
control on the overhead console, until
the windows are completely down and
the top stores completely.
2. Release the convertible top control. Note:
Do not store articles behind the rear
seat. Articles in the convertible top stowage
compartment may break the rear glass
window when you open the top.
Note: Opening the convertible top when
the top material is wet may cause mold or
mildew.
226
Mustang (CZG) Canada/United States of America, Vehicles Built From: 14-09-2020, enUSA, Edition date: 202010, Second-Printing Convertible Top
(If Equipped)E174571 E174568
Page 231 of 530
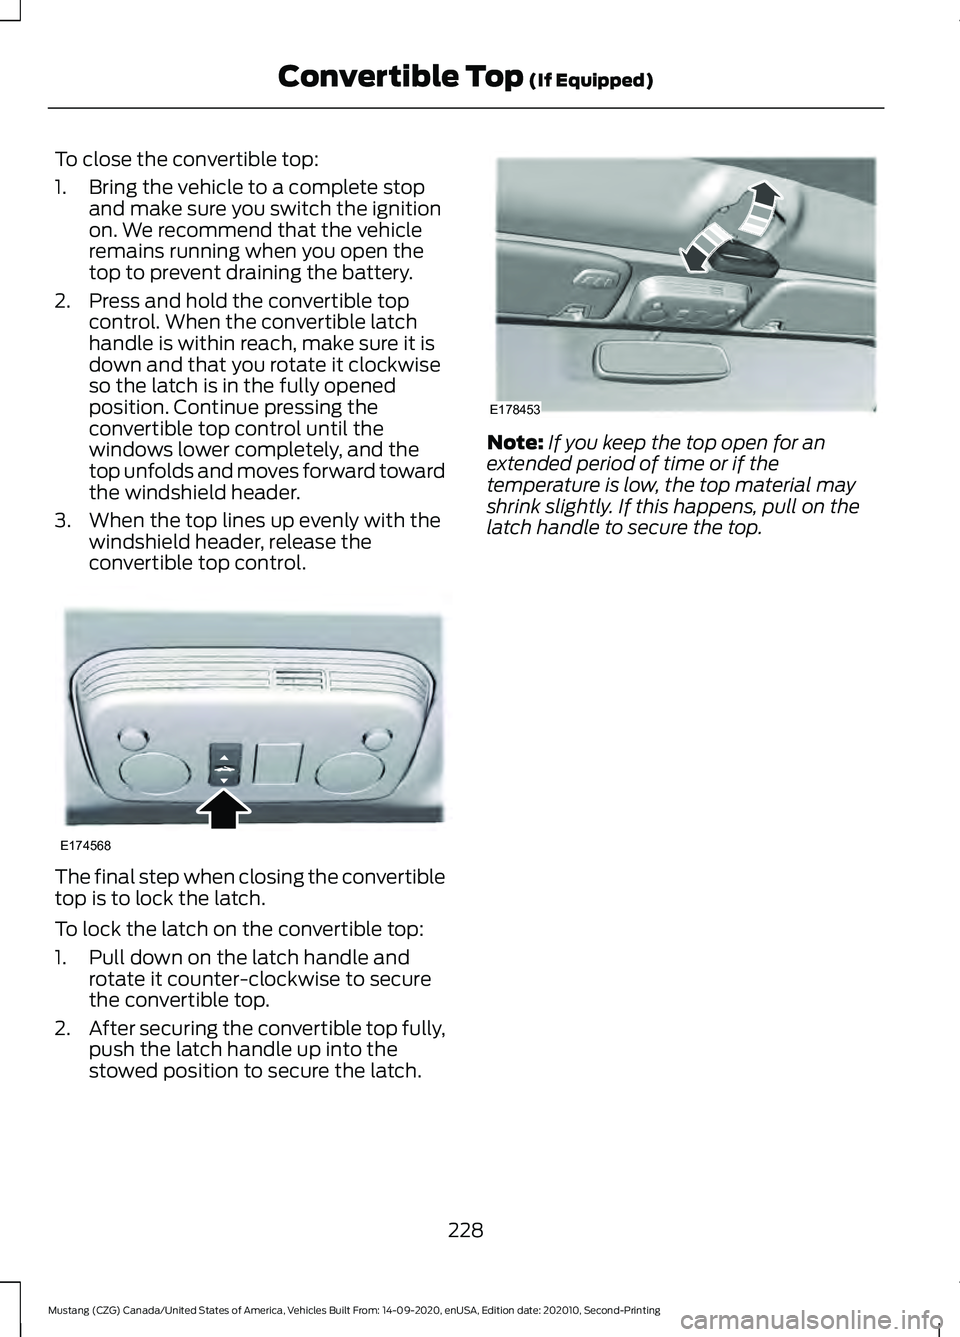
To close the convertible top:
1. Bring the vehicle to a complete stop
and make sure you switch the ignition
on. We recommend that the vehicle
remains running when you open the
top to prevent draining the battery.
2. Press and hold the convertible top control. When the convertible latch
handle is within reach, make sure it is
down and that you rotate it clockwise
so the latch is in the fully opened
position. Continue pressing the
convertible top control until the
windows lower completely, and the
top unfolds and moves forward toward
the windshield header.
3. When the top lines up evenly with the windshield header, release the
convertible top control. The final step when closing the convertible
top is to lock the latch.
To lock the latch on the convertible top:
1. Pull down on the latch handle and
rotate it counter-clockwise to secure
the convertible top.
2. After securing the convertible top fully,
push the latch handle up into the
stowed position to secure the latch. Note:
If you keep the top open for an
extended period of time or if the
temperature is low, the top material may
shrink slightly. If this happens, pull on the
latch handle to secure the top.
228
Mustang (CZG) Canada/United States of America, Vehicles Built From: 14-09-2020, enUSA, Edition date: 202010, Second-Printing Convertible Top (If Equipped)E174568 E178453
Page 264 of 530
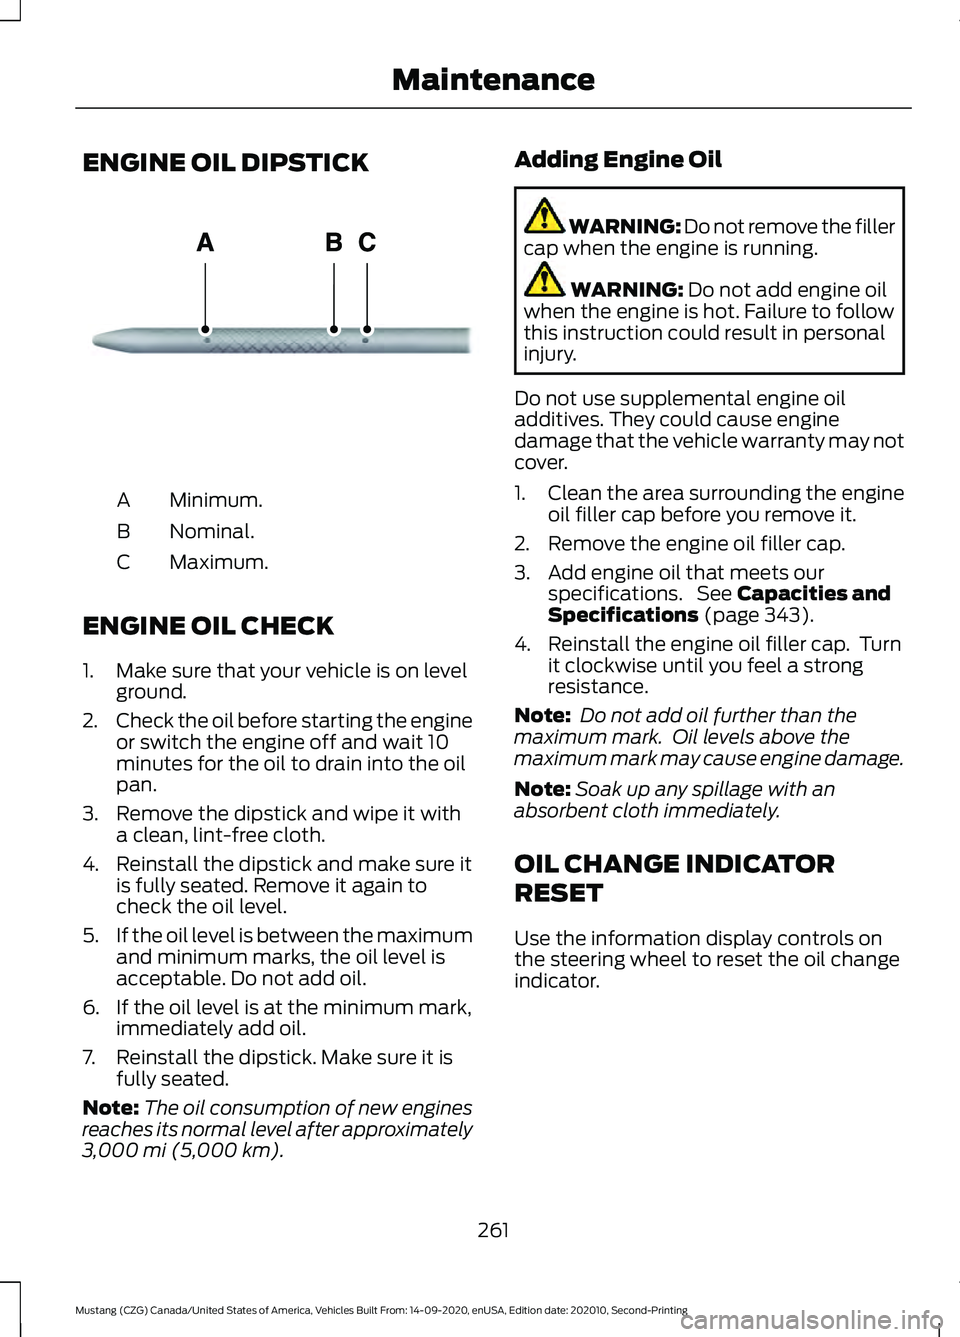
ENGINE OIL DIPSTICK
Minimum.
A
Nominal.
B
Maximum.
C
ENGINE OIL CHECK
1. Make sure that your vehicle is on level ground.
2. Check the oil before starting the engine
or switch the engine off and wait 10
minutes for the oil to drain into the oil
pan.
3. Remove the dipstick and wipe it with a clean, lint-free cloth.
4. Reinstall the dipstick and make sure it is fully seated. Remove it again to
check the oil level.
5. If the oil level is between the maximum
and minimum marks, the oil level is
acceptable. Do not add oil.
6. If the oil level is at the minimum mark, immediately add oil.
7. Reinstall the dipstick. Make sure it is fully seated.
Note: The oil consumption of new engines
reaches its normal level after approximately
3,000 mi (5,000 km). Adding Engine Oil WARNING: Do not remove the filler
cap when the engine is running. WARNING:
Do not add engine oil
when the engine is hot. Failure to follow
this instruction could result in personal
injury.
Do not use supplemental engine oil
additives. They could cause engine
damage that the vehicle warranty may not
cover.
1. Clean the area surrounding the engine oil filler cap before you remove it.
2. Remove the engine oil filler cap.
3. Add engine oil that meets our specifications. See
Capacities and
Specifications (page 343).
4. Reinstall the engine oil filler cap. Turn it clockwise until you feel a strong
resistance.
Note: Do not add oil further than the
maximum mark. Oil levels above the
maximum mark may cause engine damage.
Note: Soak up any spillage with an
absorbent cloth immediately.
OIL CHANGE INDICATOR
RESET
Use the information display controls on
the steering wheel to reset the oil change
indicator.
261
Mustang (CZG) Canada/United States of America, Vehicles Built From: 14-09-2020, enUSA, Edition date: 202010, Second-Printing MaintenanceE270482
Page 268 of 530
It is very important to use prediluted
coolant approved to the correct
specification in order to avoid plugging the
small passageways in the engine cooling
system. See Capacities and
Specifications (page 335). Do not mix
different colors or types of coolant in your
vehicle. Mixing of engine coolants or using
an incorrect coolant may harm the engine
or cooling system components and may
not be covered by the vehicle Warranty.
Note: If prediluted coolant is not available,
use the approved concentrated coolant
diluting it to 50/50 with distilled water. See
Capacities and Specifications (page 335).
Using water that has not been deionised
may contribute to deposit formation,
corrosion and plugging of the small cooling
system passageways.
Note: Coolants marketed for all makes and
models may not be approved to our
specifications and may cause damage to
the cooling system. Resulting component
damage may not be covered by the vehicle
Warranty.
If the coolant level is at or below the
minimum mark, add prediluted coolant
immediately.
To top up the coolant level do the
following:
1. Unscrew the cap slowly. Any pressure escapes as you unscrew the cap.
2. Add prediluted coolant approved to the correct specification. See
Capacities and Specifications (page
335
).
3. Add enough prediluted coolant to reach the correct level.
4. Replace the coolant reservoir cap. Turn
the cap clockwise until it contacts the
hard stop. 5. Check the coolant level in the coolant
reservoir the next few times you drive
your vehicle. If necessary, add enough
prediluted engine coolant to bring the
coolant level to the correct level.
If you have to add more than
1.1 qt (1 L) of
engine coolant per month, have your
vehicle checked as soon as possible.
Operating an engine with a low level of
coolant can result in engine overheating
and possible engine damage.
In case of emergency, you can add a large
amount of water without engine coolant
in order to reach a vehicle service location.
In this instance, qualified personnel:
1. Must drain the cooling system.
2. Chemically clean the coolant system.
3. Refill with engine coolant as soon as possible.
Water alone, without engine coolant, can
cause engine damage from corrosion,
overheating or freezing.
Do not use the following as a coolant
substitute:
• Alcohol.
• Methanol.
• Brine.
• Any coolant mixed with alcohol or
methanol antifreeze.
Alcohol and other liquids can cause engine
damage from overheating or freezing.
Do not add extra inhibitors or additives to
the coolant. These can be harmful and
compromise the corrosion protection of
the coolant.
Recycled Coolant
We do not recommend the use of recycled
coolant as an approved recycling process
is not yet available.
Note: Dispose of used coolant in the
appropriate manner.
265
Mustang (CZG) Canada/United States of America, Vehicles Built From: 14-09-2020, enUSA, Edition date: 202010, Second-Printing Maintenance
Page 275 of 530

Note:
Prior to relearning the battery state
of charge, the battery management system
may temporarily disable some electrical
systems.
Electrical Accessory Installation
To make sure the battery management
system works correctly, do not connect an
electrical device ground connection
directly to the battery negative post. This
can cause inaccurate measurements of
the battery condition and potential
incorrect system operation.
Note: If you add electrical accessories or
components to the vehicle, it may adversely
affect battery performance and durability.
This may also affect the performance of
other electrical systems in the vehicle.
Remove and Reinstall the Battery
To disconnect or remove the battery, do
the following:
1. Apply the parking brake and switch the
ignition off.
2. Switch all electrical equipment off, for
example lights and radio.
3. Wait a minimum of two minutes before
disconnecting the battery.
Note: The engine management system has
a power hold function and remains powered
for a period of time after you switch the
ignition off. This is to allow diagnostic and
adaptive tables to be stored. Disconnecting
the battery without waiting can cause
damage not covered by the vehicle
Warranty.
4. Disconnect the negative battery cable terminal.
5. Disconnect the positive battery cable terminal.
6. Remove the battery securing clamp.
7. Remove the battery. 8. To install, reverse the removal
procedure.
Note: Before reconnecting the battery,
make sure the ignition remains switched off.
Note: Make sure the battery cable terminals
are fully tightened.
If you disconnect or replace the vehicle
battery, you must reset the following
features:
• Window bounce-back. See Power
Windows (page 86).
• Clock Settings.
• Pre-set radio stations.
Battery Disposal Make sure that you dispose of
old batteries in an
environmentally friendly way.
Seek advice from your local authority
about recycling old batteries.
ADJUSTING THE HEADLAMPS
Vertical Aim Adjustment
The headlamps on your vehicle are
properly aimed at the assembly plant. If
your vehicle has been in an accident, have
the alignment of your headlamps checked
by an authorized dealer.
272
Mustang (CZG) Canada/United States of America, Vehicles Built From: 14-09-2020, enUSA, Edition date: 202010, Second-Printing MaintenanceE107998
Page 276 of 530

Headlamp Aiming Target
8 ft (2.4 m).
A
Center height of lamp to ground.
B
25 ft (7.6 m).
C
Horizontal reference line.
D
Vertical Aim Adjustment
1. Park the vehicle directly in front of a wall or screen on a level surface,
approximately 25 ft (7.6 m) away.
2. Measure the height from the center of your headlamp indicated by a 3 mm
circle on the lens to the ground and
mark an
8 ft (2.4 m) horizontal
reference line on the vertical wall or
screen at this height, a piece of
masking tape works well.
Note: To see a clearer light pattern for
adjusting, you may want to block the light
from one headlamp while adjusting the
other.
3. Turn on the low beam headlamps to illuminate the wall or screen and open
the hood. Cover one of the headlamps
so no light hits the wall. 4. On the wall or screen you will observe
a flat zone of high intensity light at the
top of the right-hand portion of the
beam pattern. If the top edge of the
high intensity light zone is not at the
horizontal reference line, the headlamp
needs to be adjusted. 5. Locate the vertical adjuster on each
headlamp. Use a Phillips #2
screwdriver to turn the adjuster either
clockwise or counterclockwise to
adjust the vertical aim of the
headlamp.
6. Repeat Steps 3 through 7 to adjust the
other headlamp.
7. Close the hood and turn off the lamps.
273
Mustang (CZG) Canada/United States of America, Vehicles Built From: 14-09-2020, enUSA, Edition date: 202010, Second-Printing MaintenanceE142592 E142465 E250054