2021 FORD F650/750 2 speed trans
[x] Cancel search: 2 speed transPage 97 of 390

III (start) - Cranks the engine.
STARTING A GASOLINE
ENGINE
(IF EQUIPPED)
When you start the engine, the idle speed
increases, this helps to warm up the
engine. If the engine idle speed does not
slow down automatically, have your
vehicle checked by an authorized dealer.
Before starting the engine check the
following:
• Make sure all occupants have fastened
their safety belts.
• Make sure the headlamps and
electrical accessories are off.
• Make sure the parking brake is on.
• Make sure the transmission is in park
(P) or neutral (N).
• Turn the ignition key to the on position.
Note: Do not touch the accelerator pedal.
1. Fully press the brake pedal.
2. Turn the key to the start position to start the engine. Release the key when
the engine starts.
Note: The engine may continue cranking
for up to 15 seconds or until it starts.
Note: If you cannot start the engine on the
first try, wait for a short period and try again.
Failure to Start
If you cannot start the engine after three
attempts, wait 10 seconds and follow this
procedure:
1. Fully press the brake pedal.
2. Fully press the accelerator pedal and hold it there.
3. Start the engine. Stopping the Engine When Your
Vehicle is Stationary
1. Shift into park (P) or neutral (N).
2. Turn the key to the off position.
3. Apply the parking brake.
Stopping the Engine When Your
Vehicle is Moving
WARNING:
Switching off the
engine when the vehicle is still moving
will result in a loss of brake and steering
assistance. The steering will not lock, but
higher effort will be required. When the
ignition is switched off, some electrical
circuits, including air bags, warning lamps
and indicators may also be off. If the
ignition was turned off accidentally, you
can shift into neutral (N) and re-start the
engine.
1. Put the transmission into neutral (N) and use the brakes to bring your vehicle
to a safe stop.
2. When your vehicle has stopped, shift into park (P) or neutral (N) and switch
the ignition off.
3. Apply the parking brake.
Guarding Against Exhaust Fumes WARNING:
If you smell exhaust
fumes inside your vehicle, have your
vehicle checked by your authorized
dealer immediately. Do not drive your
vehicle if you smell exhaust fumes.
Carbon monoxide is present in exhaust
fumes. Take precautions to avoid its
dangerous effects.
94
F650750 (TBC) , enUSA, Edition date: 202010, Second-Printing Starting and Stopping the Engine
Page 125 of 390

AUTOMATIC TRANSMISSION
WARNING: Apply the parking
brake, shift into park (P), switch the
ignition off and remove the key before
you leave your vehicle. Failure to follow
this instruction could result in personal
injury or death.
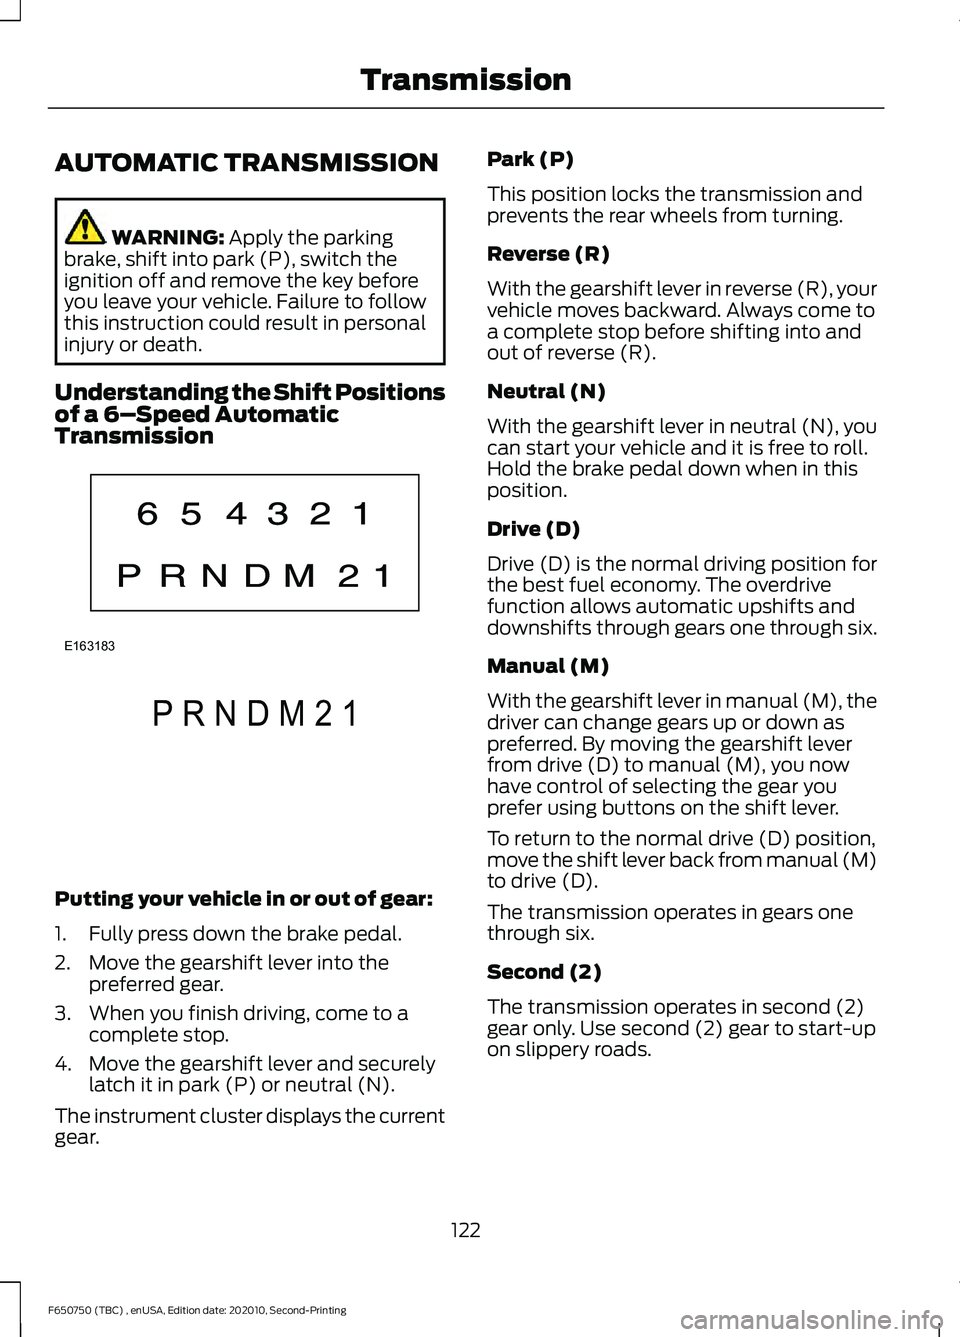
Understanding the Shift Positions
of a 6– Speed Automatic
Transmission Putting your vehicle in or out of gear:
1. Fully press down the brake pedal.
2. Move the gearshift lever into the
preferred gear.
3. When you finish driving, come to a complete stop.
4. Move the gearshift lever and securely latch it in park (P) or neutral (N).
The instrument cluster displays the current
gear. Park (P)
This position locks the transmission and
prevents the rear wheels from turning.
Reverse (R)
With the gearshift lever in reverse (R), your
vehicle moves backward. Always come to
a complete stop before shifting into and
out of reverse (R).
Neutral (N)
With the gearshift lever in neutral (N), you
can start your vehicle and it is free to roll.
Hold the brake pedal down when in this
position.
Drive (D)
Drive (D) is the normal driving position for
the best fuel economy. The overdrive
function allows automatic upshifts and
downshifts through gears one through six.
Manual (M)
With the gearshift lever in manual (M), the
driver can change gears up or down as
preferred. By moving the gearshift lever
from drive (D) to manual (M), you now
have control of selecting the gear you
prefer using buttons on the shift lever.
To return to the normal drive (D) position,
move the shift lever back from manual (M)
to drive (D).
The transmission operates in gears one
through six.
Second (2)
The transmission operates in second (2)
gear only. Use second (2) gear to start-up
on slippery roads.
122
F650750 (TBC) , enUSA, Edition date: 202010, Second-Printing TransmissionE163183 P R N D M 2 1E307627
Page 126 of 390

First (1)
•
The transmission operates in first (1)
gear only.
• Provides maximum engine braking.
• Allows upshifts by moving the gearshift
lever.
• Does not downshift into first (1) gear
at high speeds but allows for first (1)
gear when vehicle reaches slower
speeds.
Forced downshifts
• Allowed in drive (D) with the tow/haul
feature on or off.
• Press the accelerator to the floor.
• Allows the transmission to select an
appropriate gear.
Tow/Haul Mode WARNING: Do not use tow/haul
when the road surface is slippery. Failure
to follow this instruction could result in
the loss of control of your vehicle. WARNING:
Do not use diesel
engine exhaust braking when the road
surface is slippery. Failure to follow this
instruction could result in the loss of
control of your vehicle. To activate tow/haul, press the
button on the gearshift lever
once. An indicator light
illuminates in the instrument cluster. The tow/haul feature:
•
Delays upshifts to reduce the frequency
of transmission shifting.
• Provides engine braking in all forward
gears, which slows your vehicle and
assists you in controlling your vehicle
when descending a slope.
• Depending on driving conditions and
load conditions, could downshift the
transmission to slow your vehicle and
help to control the vehicle speed when
descending a hill without pressing the
accelerator pedal. Tapping the brake
pedal downshifts the transmission to
provide additional braking, but only if
the downshift does not cause an
engine overspeed condition.
The tow/haul feature improves
transmission operation when towing a
trailer or a heavy load. All transmission
gear ranges are available when using
tow/haul.
To deactivate the tow/haul feature and
return to normal driving mode, press the
button on the gearshift lever twice. The
indicator light deactivates. Tow/haul also
deactivates when you power down your
vehicle.
Note: Under certain conditions, the
automatic tow/haul feature engages, and
the indicator comes on without pressing the
tow/haul button.
Understanding Your SelectShift™
Automatic Transmission
Your vehicle has a SelectShift automatic
transmission gearshift lever. SelectShift
automatic transmission gives you the
ability to change gears up or down, without
a clutch, as you prefer.
123
F650750 (TBC) , enUSA, Edition date: 202010, Second-Printing TransmissionE161509
Page 127 of 390

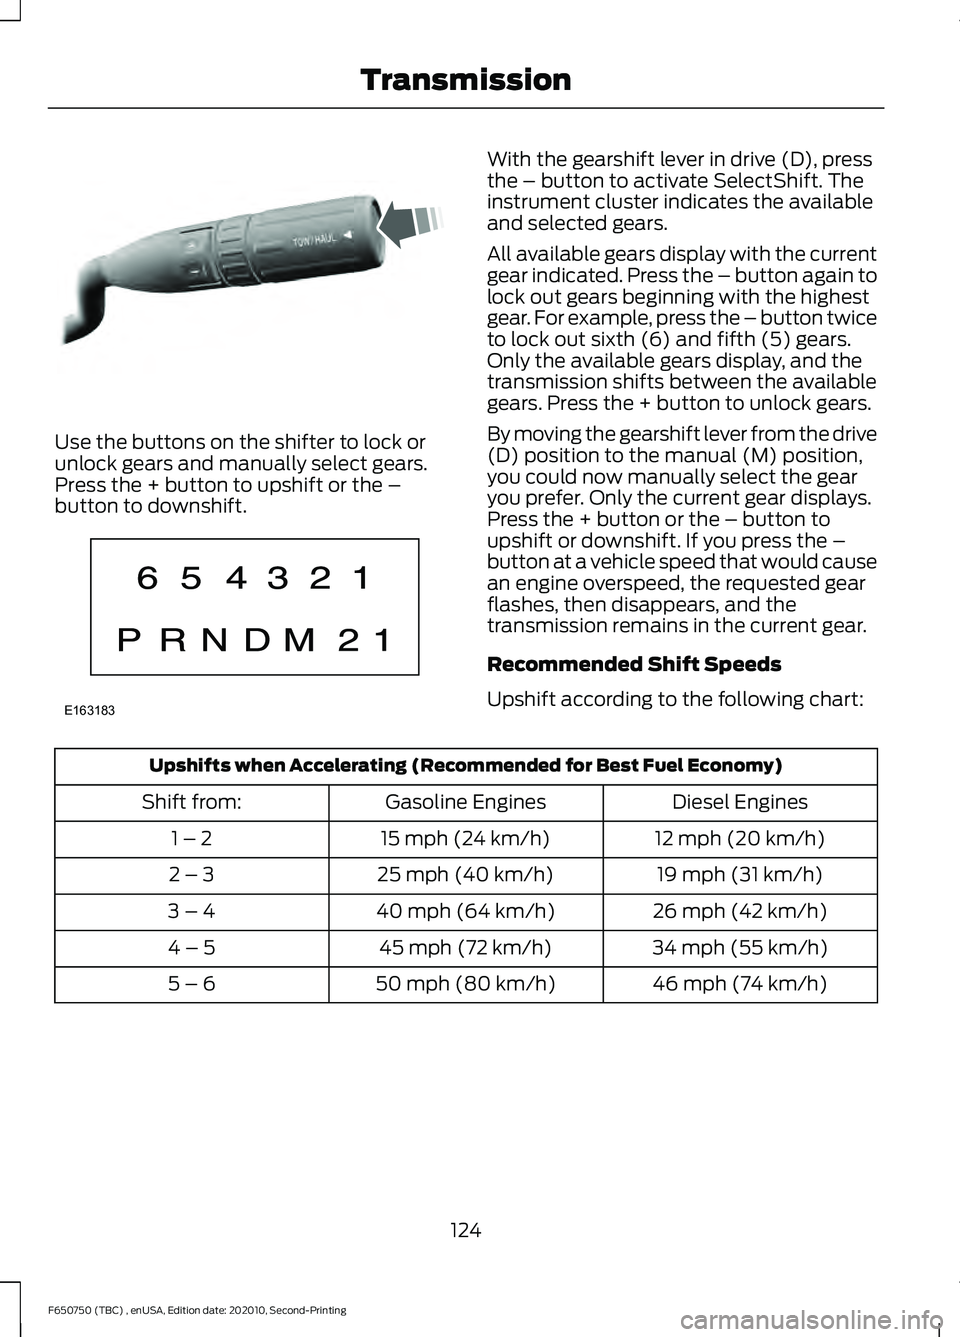
Use the buttons on the shifter to lock or
unlock gears and manually select gears.
Press the + button to upshift or the –
button to downshift. With the gearshift lever in drive (D), press
the – button to activate SelectShift. The
instrument cluster indicates the available
and selected gears.
All available gears display with the current
gear indicated. Press the – button again to
lock out gears beginning with the highest
gear. For example, press the – button twice
to lock out sixth (6) and fifth (5) gears.
Only the available gears display, and the
transmission shifts between the available
gears. Press the + button to unlock gears.
By moving the gearshift lever from the drive
(D) position to the manual (M) position,
you could now manually select the gear
you prefer. Only the current gear displays.
Press the + button or the – button to
upshift or downshift. If you press the –
button at a vehicle speed that would cause
an engine overspeed, the requested gear
flashes, then disappears, and the
transmission remains in the current gear.
Recommended Shift Speeds
Upshift according to the following chart:
Upshifts when Accelerating (Recommended for Best Fuel Economy)
Diesel Engines
Gasoline Engines
Shift from:
12 mph (20 km/h)
15 mph (24 km/h)
1 – 2
19 mph (31 km/h)
25 mph (40 km/h)
2 – 3
26 mph (42 km/h)
40 mph (64 km/h)
3 – 4
34 mph (55 km/h)
45 mph (72 km/h)
4 – 5
46 mph (74 km/h)
50 mph (80 km/h)
5 – 6
124
F650750 (TBC) , enUSA, Edition date: 202010, Second-Printing TransmissionE318028 E163183
Page 131 of 390

GENERAL INFORMATION
WARNING: Exceeding these ratings
by overloading can cause component
failure resulting in property damage,
personal injury or death.
Fluid Temperature
If the operating temperature exceeds
250°F (121°C), the rate of axle lubrication
oxidation increases and shortens the life
of the lubricant and seals, requiring axle
lubrication changes to become more
frequent to preserve the axle. Do not
consistently run extreme pressure (EP)
lubricants above
250°F (121°C).
Axle Conversions WARNING:
When operating a
loaded vehicle, the driver must keep all
adjustable axles on the ground at all
times, supporting their share of the
vehicle ’s load. Failure to do so can
overload other axles, tires, wheels,
springs, steering components, brakes
and frames, resulting in early component
failure, loss of vehicle control, possible
property damage and personal injury.
We do not recommend, or approve,
performing axle conversions. However, we
understand that, on occasion, others install
aftermarket add-on axles on the truck
chassis that allow operator control for
weight transfer from other axles (such as
air lift axles). ELECTRONIC LOCKING
DIFFERENTIAL
(IF EQUIPPED)
Driver-Controlled Electronic
Locking Differential
Note: Never use the differential lock at
vehicle speeds above
25 mph (40 km/h).
Some drive axles have a driver-controlled
differential lock. The differential lock can
lock or unlock the differential when your
vehicle is moving or stopped. When you
require extra traction, the differential lock
provides full power to both wheels.
When you lock the differential, your
vehicle ’s turning radius increases
(under-steer).
Take care to avoid sudden accelerations
when both drive wheels are on a slippery
surface. WARNING:
Sudden acceleration
on slippery surfaces could cause the
wheels to spin, the vehicle to turn
sideways on a crowned road surface or
in a turn, possibly resulting in loss of
vehicle control and personal injury.
Activating the Electronic Locking
Differential
You can lock and unlock the differential
when your vehicle is moving at a constant
speed of less than 25 mph (40 km/h) and
while the wheels are not slipping. Do not
lock the differential when your vehicle is
traveling down steep grades and when
traction is minimal.
The differential lock and differential lock
light automatically disengage at speeds
above
25 mph (40 km/h). The differential
lock remains off until either you restart your
vehicle, or you turn the differential lock
switch off then back on.
128
F650750 (TBC) , enUSA, Edition date: 202010, Second-Printing Rear Axle
Page 132 of 390

Servicing a Vehicle with an
Electronic Locking Differential
Turn the engine off and raise all drive
wheels of the locker differential axle to
prevent your vehicle from moving when
servicing the wheels, tires or brakes. Axles
equipped with a driver-controlled
differential deliver power to both wheels
even when only one wheel is on the ground.
WARNING: Failure to raise all drive
wheels with this type of differential could
cause the vehicle to move unexpectedly,
resulting in property damage, personal
injury or death.
2-SPEED REAR AXLE (IF EQUIPPED) WARNING: Never shift a
two-speed axle when descending a
steep grade as this may cause loss of
vehicle control and result in personal
injury.
Note: Do not shift between ranges when
the speed control is on.
A two-speed rear axle allows the driver to
select a low range for greater pulling power
and a high range for greater road speed
and fuel economy. You can also use these
ranges to provide extra steps between
transmission shifts when driving on steep
grades or fuel economy may be factors. Axle Shifting Note:
Do not shift the axle to LOW when
your vehicle is moving. Use LOW when you
drive a fully loaded vehicle on a severe grade
or in congested traffic. Use HIGH for all
normal driving conditions with a lightly
loaded or partially loaded vehicle.
Note: The axle is set to HIGH by default.
To shift the axle between HIGH and LOW
with the vehicle stopped, place the
transmission in position N, then press and
hold the button for two seconds.
129
F650750 (TBC) , enUSA, Edition date: 202010, Second-Printing Rear AxleE208228
Page 133 of 390

GENERAL INFORMATION
WARNING: Do not apply the brake
pedal and accelerator pedal
simultaneously. Applying both pedals
simultaneously for more than a few
seconds will limit engine performance,
which may result in difficulty maintaining
speed in traffic and could lead to serious
injury.
Note: Occasional brake noise is normal. If
a metal-to-metal, continuous grinding or
continuous squeal sound is present, the
brake linings may be worn-out. Have the
system checked as soon as possible. If your
vehicle has continuous vibration or shudder
in the steering wheel while braking, have it
checked by an authorized dealer.
All standard equipment brakes are
self-adjusting. Automatic adjustment,
when required, occurs whenever you apply
and release the brakes during forward or
reverse operation.
Know the required stopping distances for
all driving conditions you may encounter.
For longer brake lining life, take full
advantage of engine braking power when
coming to a stop.
Wet brakes result in reduced braking
efficiency. Gently press the brake pedal a
few times when driving from a car wash or
standing water to dry the brakes.
If the brakes do not grip well:
• Check brake adjustment.
• Check the brake linings for excessive
wear.
• Check the system air pressure on
vehicles with air brakes. •
Let the brakes cool if you have been
using them excessively, as in mountain
driving or after several fast, high-speed
stops.
• If you have been driving through deep
water, gently apply the brakes several
times while your vehicle is moving
slowly.
Brake Over Accelerator
In the event the accelerator pedal
becomes stuck or entrapped, apply steady
and firm pressure to the brake pedal to
slow the vehicle and reduce engine power.
If you experience this condition, apply the
brakes and bring your vehicle to a safe
stop. Move the transmission to park (P),
switch the engine off and apply the parking
brake. Inspect the accelerator pedal for
any interference. If none are found and the
condition persists, have your vehicle towed
to the nearest authorized dealer
Anti-lock Brake System
This system helps you maintain steering
control during emergency stops by keeping
the brakes from locking. This lamp momentarily
illuminates when you switch the
ignition on. If the light does not
illuminate during start up, remains on or
flashes, the system may be disabled. Have
the system checked by an authorized
dealer. If you connect a PLC trailer with
the ignition on, the trailer ABS
light also illuminates. If the light
fails to illuminate, if it remains on after you
start the vehicle or continues to flash, have
the system serviced immediately.
See
Warning Lamps and Indicators
(page 66).
130
F650750 (TBC) , enUSA, Edition date: 202010, Second-Printing Brakes E210335
Page 138 of 390

Vehicles with Automatic Transmission
You cannot turn the system on or off.
When you switch the ignition on, the
system automatically turns on.
AIR BRAKES (IF EQUIPPED)
WARNING: Do not drive or continue
to drive if the low air pressure buzzer is
sounding or the brake warning light is lit.
These warnings indicate that air pressure
is not to normal operating level.
Continued use of the vehicle could result
in loss of braking ability. WARNING:
Avoid repeated light
application of the brake pedal. This
depletes air pressure faster and could
result in loss of braking capability. WARNING:
Do not move the
vehicle when the air pressure is
insufficient because the brake system
may be inoperative.
After starting the engine, give the air
compressor time to build up the air
pressure to
60 psi (414 kPa) before moving
your vehicle. Periodically check the air pressure gauge
while driving. Pressure should range
between approximately 100 psi (690 kPa)
to
130 psi (896 kPa). The air compressor
governor cut-in and cutout pressure
settings are set at the factory and are not
adjustable. When air pressure is insufficient
(below
60 psi (414 kPa)), a
warning light illuminates and a
buzzer sounds when the ignition is in the
on position. This may happen because
excessive brake applications are depleting
the system air pressure. If this condition
occurs, stop driving your vehicle until the
compressor has fully recharged the air
system.
Select a gear ratio to help slow your vehicle
before descending grades. Supplementing
with brakes, as required, help to safely slow
the vehicle and avoids overspeeding the
engine.
Air Chamber Stroke Indication
Air chamber push rods have orange stroke
indicator markers that warn when the
braking system requires adjustment or
repair. The painted orange indicator is on
the air chamber push rod at the slack
adjuster stroke dimension that requires
service when visible during brake
application.
A qualified service technician should
perform air brake inspection and
adjustment or repairs keeping to the
instructions in the service manual.
135
F650750 (TBC) , enUSA, Edition date: 202010, Second-Printing BrakesE210336 E206772