2021 FORD F-550 center console
[x] Cancel search: center consolePage 7 of 666

Rear Occupant Alert System Audible
Warnings .....................................................163
Garage Door Opener
Universal Garage Door Opener ..............
164
Auxiliary Power Points
Auxiliary Power Points ...............................
168
Wireless Accessory Charger ....................
169
Storage Compartments
Center Console ...............................................
171
Overhead Console ........................................
171
Under Seat Storage ......................................
171
Starting and Stopping the Engine
General Information ...................................
174
Ignition Switch ..............................................
174
Keyless Starting ............................................
175
Starting a Gasoline Engine - 6.2L/7.3L ........................................................................\
.
175
Starting a Diesel Engine - 6.7L Diesel ........................................................................\
..
177
Switching Off the Engine - 6.7L Diesel ........................................................................\
.
182
Engine Idle Shutdown ................................
182
Engine Block Heater ...................................
182
Fuel and Refueling
Safety Precautions .....................................
184
Fuel Quality - E85 .......................................
185
Fuel Quality - Gasoline .............................
186
Fuel Quality - Diesel ...................................
187
Running Out of Fuel ...................................
189
Refueling - Gasoline ...................................
189
Refueling - Diesel ........................................
190
Fuel Consumption .......................................
193Engine Emission Control
Emission Law
................................................
194
Catalytic Converter .....................................
195
Selective Catalytic Reductant System - Diesel ............................................................
197
Diesel Particulate Filter ............................
202
Transmission
Automatic Transmission ..........................
207
Power Take-Off ............................................
212
Four-Wheel Drive
Using Four-Wheel Drive ............................
213
Rear Axle
Limited Slip Differential .............................
221
Electronic Locking Differential ................
221
Brakes
General Information ...................................
223
Hints on Driving With Anti-Lock Brakes ........................................................................\
225
Parking Brake ................................................
225
Hill Start Assist ............................................
225
Traction Control
Principle of Operation ................................
227
Using Traction Control ...............................
227
Stability Control
Principle of Operation ...............................
228
Using Stability Control ..............................
229
Trail Control
What Is Trail Control ...................................
231
Switching Trail Control On and Off .......
231
Setting the Trail Control Speed ..............
231
Canceling the Set Speed ..........................
231
Trail Control Indicators ...............................
231
4
Super Duty (TFE) Canada/United States of America, enUSA, Edition date: 202008, Third-Printing- Table of Contents
Page 65 of 666

WARNING: Do not set MyKey
maximum speed limit to a limit that will
prevent the driver from maintaining a
safe speed considering posted speed
limits and prevailing road conditions. The
driver is always responsible to drive in
accordance with local laws and
prevailing conditions. Failure to do so
could result in accident or injury.
• Various vehicle speed reminders so
MyKey drivers know when their vehicle
speed approaches the limits. Warnings
appear in your information display and
a tone sounds when the MyKey drivers
exceed the set vehicle speed.
• The audio system's maximum volume
limits to 45% so MyKey drivers can
concentrate on the road. A message
appears in the information display
when MyKey drivers attempt to exceed
the limited volume. MyKey also
disables the automatic volume control.
• Always on setting. This setting forces
certain features to remain on and
active for MyKey drivers. For example,
E911 or emergency assistance and the
do not disturb features stay on even if
a MyKey driver uses the feature's
control to switch it off.
Note: If your vehicle includes an AM/FM
radio or a very basic audio system, then the
radio may not mute.
CREATING A MYKEY
Use the information display to create a
MyKey.
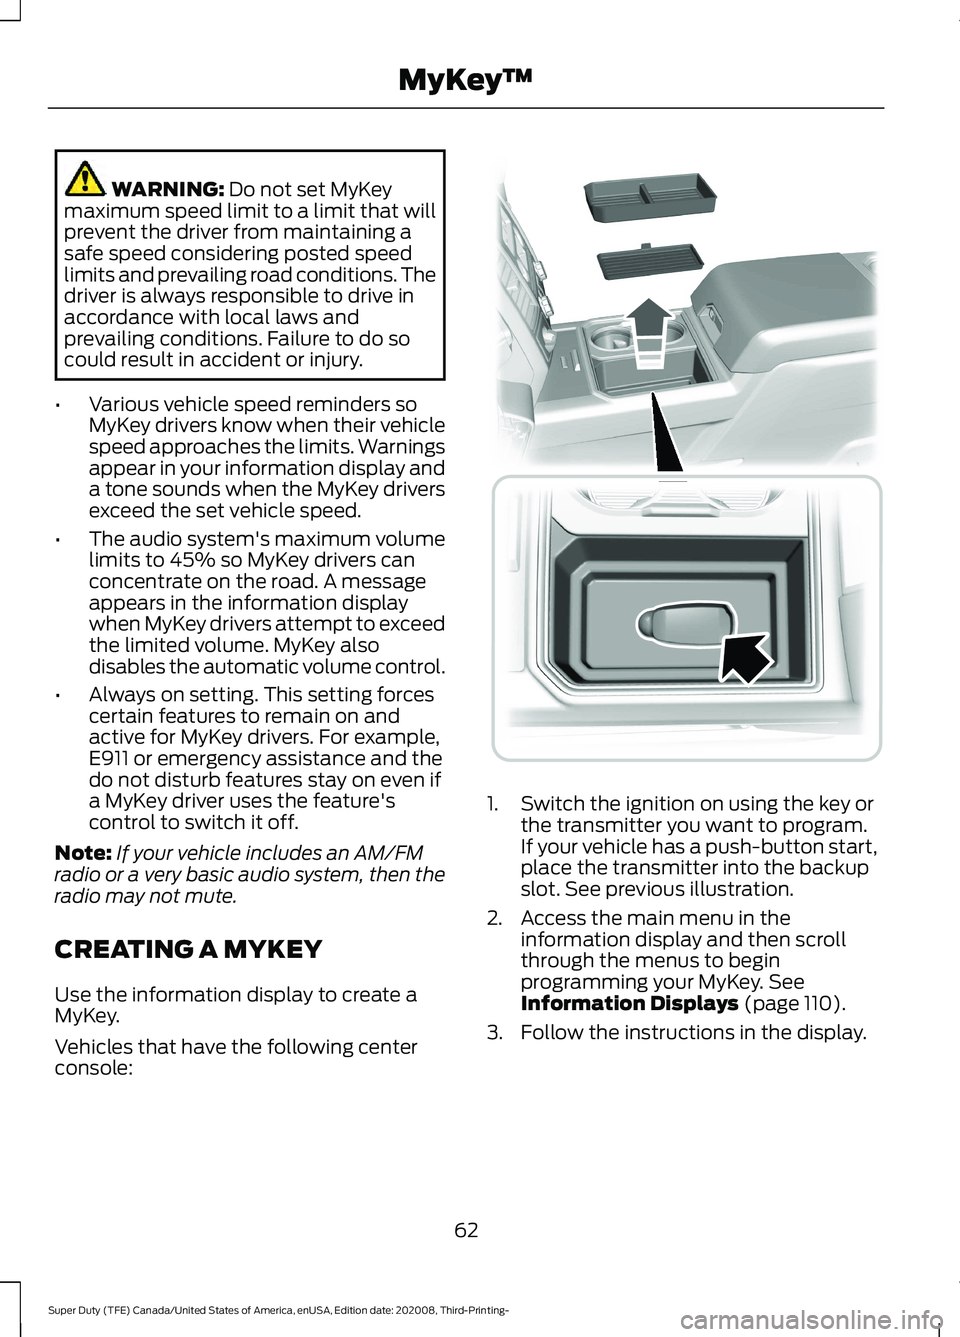
Vehicles that have the following center
console: 1. Switch the ignition on using the key or
the transmitter you want to program.
If your vehicle has a push-button start,
place the transmitter into the backup
slot. See previous illustration.
2. Access the main menu in the information display and then scroll
through the menus to begin
programming your MyKey.
See
Information Displays (page 110).
3. Follow the instructions in the display.
62
Super Duty (TFE) Canada/United States of America, enUSA, Edition date: 202008, Third-Printing- MyKey
™ E226701
Page 66 of 666

4.
A confirmation message appears in the
display after you finish programming
your MyKey. The programmed
restrictions apply when you key off,
open and close driver door and restart
your vehicle with the programmed key
or transmitter.
Note: Make sure you label the programmed
MyKey so you can distinguish it from the
original admin keys.
You can also program the optional MyKey
settings.
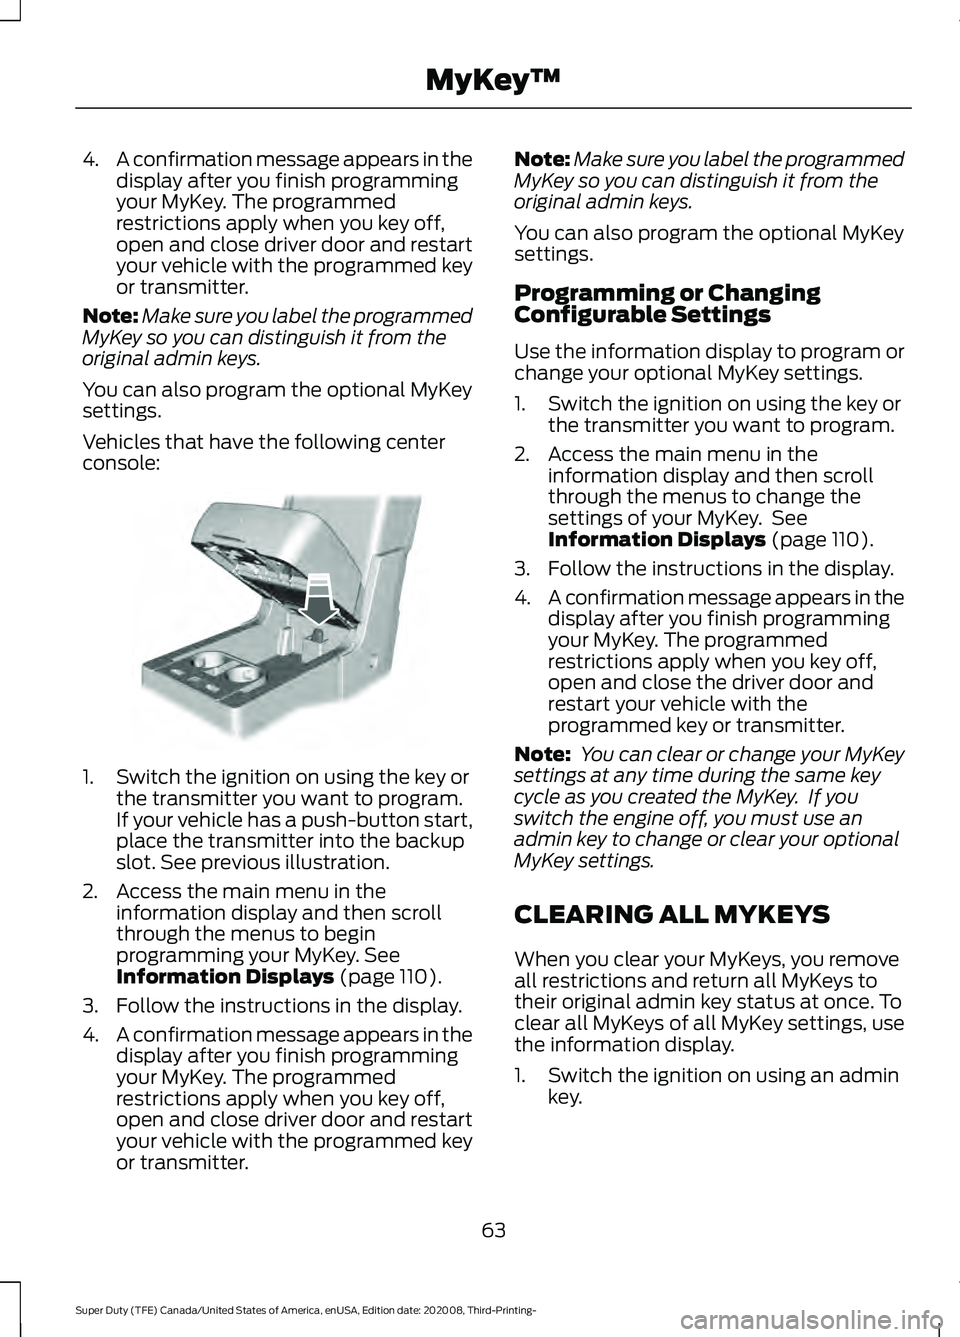
Vehicles that have the following center
console: 1. Switch the ignition on using the key or
the transmitter you want to program.
If your vehicle has a push-button start,
place the transmitter into the backup
slot. See previous illustration.
2. Access the main menu in the information display and then scroll
through the menus to begin
programming your MyKey. See
Information Displays (page 110).
3. Follow the instructions in the display.
4. A confirmation message appears in the
display after you finish programming
your MyKey. The programmed
restrictions apply when you key off,
open and close driver door and restart
your vehicle with the programmed key
or transmitter. Note:
Make sure you label the programmed
MyKey so you can distinguish it from the
original admin keys.
You can also program the optional MyKey
settings.
Programming or Changing
Configurable Settings
Use the information display to program or
change your optional MyKey settings.
1. Switch the ignition on using the key or the transmitter you want to program.
2. Access the main menu in the information display and then scroll
through the menus to change the
settings of your MyKey. See
Information Displays
(page 110).
3. Follow the instructions in the display.
4. A confirmation message appears in the
display after you finish programming
your MyKey. The programmed
restrictions apply when you key off,
open and close the driver door and
restart your vehicle with the
programmed key or transmitter.
Note: You can clear or change your MyKey
settings at any time during the same key
cycle as you created the MyKey. If you
switch the engine off, you must use an
admin key to change or clear your optional
MyKey settings.
CLEARING ALL MYKEYS
When you clear your MyKeys, you remove
all restrictions and return all MyKeys to
their original admin key status at once. To
clear all MyKeys of all MyKey settings, use
the information display.
1. Switch the ignition on using an admin key.
63
Super Duty (TFE) Canada/United States of America, enUSA, Edition date: 202008, Third-Printing- MyKey
™E269950
Page 102 of 666

Blind Spot Information System (If
Equipped)
See
Blind Spot Information System
(page 254).
INTERIOR MIRROR WARNING:
Do not adjust the
mirrors when your vehicle is moving. This
could result in the loss of control of your
vehicle, serious personal injury or death.
Note: Do not clean the mirror housing or
glass with harsh abrasives, fuel or other
petroleum-based cleaning products.
You can adjust the interior mirror to your
preference. Some mirrors also have a
second pivot point. This lets you move the
mirror hear up or down and from side to
side.
Manual Dimming Mirror
Pull the tab below the mirror toward you
to reduce the effect of bright light from
behind.
Auto-Dimming Mirror
(If Equipped)
Note: Do not block the sensors on the front
and back of the mirror. A rear center
passenger or raised rear center head
restraint may also block light from reaching
the sensor.
The mirror dims to reduce glare when
bright lights are detected from behind your
vehicle. It automatically returns to normal
reflection when you shift the transmission
into reverse (R) to make sure you have a
clear view when backing up. SLIDING WINDOWS
(IF EQUIPPED)
Power Sliding Back Window
(If
Equipped) WARNING:
When operating the
power sliding back window, you must
make sure all rear seat occupants and
cargo are not in the proximity of the back
window. WARNING:
Do not leave children
unattended in your vehicle and do not
let them play with the power sliding back
window. They may seriously injure
themselves. The control is on the overhead console.
Press and hold the control to open the
window. Pull and hold the control to close
the window.
99
Super Duty (TFE) Canada/United States of America, enUSA, Edition date: 202008, Third-Printing- Windows and MirrorsE176217
Page 163 of 666

Use your vehicle key to lock the storage
space. See Keys and Remote Controls
(page 55).
HEATED SEATS
(IF EQUIPPED) WARNING: People who are unable
to feel pain to their skin because of
advanced age, chronic illness, diabetes,
spinal cord injury, medication, alcohol
use, exhaustion or other physical
conditions, must exercise care when
using the heated seat. The heated seat
may cause burns even at low
temperatures, especially if used for long
periods of time. Do not place anything
on the seat that insulates against heat,
such as a blanket or cushion. This may
cause the heated seat to overheat. Do
not puncture the seat with pins, needles
or other pointed objects. This may
damage the heating element which may
cause the heated seat to overheat. An
overheated seat may cause serious
personal injury.
Do not do the following:
• Place heavy objects on the seat.
• Operate the heated seat if water or any
other liquid spills on the seat. Allow the
seat to dry thoroughly.
Note: The engine must be running to use
this feature. Press the heated seat symbol to cycle
through the various heat settings and off.
More indicator lights indicate warmer
settings.
Note:
The heated seats may remain on
after you remote start your vehicle, based
on your remote start settings. The heated
seats may also turn on when you start your
vehicle if they were on when you switched
your vehicle off.
Rear Heated Seats
(If Equipped) WARNING: People who are unable
to feel pain to their skin because of
advanced age, chronic illness, diabetes,
spinal cord injury, medication, alcohol
use, exhaustion or other physical
conditions, must exercise care when
using the heated seat. The heated seat
may cause burns even at low
temperatures, especially if used for long
periods of time. Do not place anything
on the seat that insulates against heat,
such as a blanket or cushion. This may
cause the heated seat to overheat. Do
not puncture the seat with pins, needles
or other pointed objects. This may
damage the heating element which may
cause the heated seat to overheat. An
overheated seat may cause serious
personal injury.
Do not do the following:
• Place heavy objects on the seat.
• Operate the heated seat if water or any
other liquid spills on the seat. Allow the
seat to dry thoroughly.
Note: The engine must be running to use
this feature.
The rear seat heat controls are on the rear
of the center console.
160
Super Duty (TFE) Canada/United States of America, enUSA, Edition date: 202008, Third-Printing- SeatsE146322
Page 171 of 666

12 V DC Power Point
WARNING: Do not plug optional
electrical accessories into the cigar
lighter socket. Incorrect use of the cigar
lighter can cause damage not covered
by the vehicle warranty, and can result
in fire or serious injury.
Note: When you switch the ignition on, you
can use the socket to power
12 V appliances
with a maximum current rating of 20 A20
amps.
Note: Do not plug in any device that
supplies power to the vehicle through the
power points, this may result in damage to
vehicle systems.
Note: Do not hang any accessory from the
accessory plug.
Note: Do not use the power point over the
vehicle capacity of 12 V DC 240 W or a fuse
may blow.
Note: Always keep the power point caps
closed when not in use.
Do not insert objects other than an
accessory plug into the power point. This
damages the power point and may blow
the fuse.
Run the vehicle for full capacity use of the
power point.
To prevent the battery from running out of
charge:
• Do not use the power point longer than
necessary when the engine is off.
• Do not leave devices plugged in
overnight or when you park your vehicle
for extended periods. 110 V 400 Watt AC Power Point
(If
Equipped) WARNING:
Do not keep electrical
devices plugged in the power point
whenever the device is not in use. Do not
use any extension cord with the 110 volt
AC power point, since it will defeat the
safety protection design. Doing so may
cause the power point to overload due
to powering multiple devices that can
reach beyond the 400 watt load limit
and could result in fire or serious injury.
Note: This feature works only when you
have the ignition switched on.
Note: This feature has a maximum output
of 400 watts when the vehicle is in park (P).
Note: While in drive (D), the maximum
outlet output is 300 watts.
Note: When powering electric devices that
require more than 10 watts in vehicles
equipped with keyless start, the engine must
remain running. If the engine is turned off or
you switch the ignition to accessory mode,
plugged in devices will not be charged.
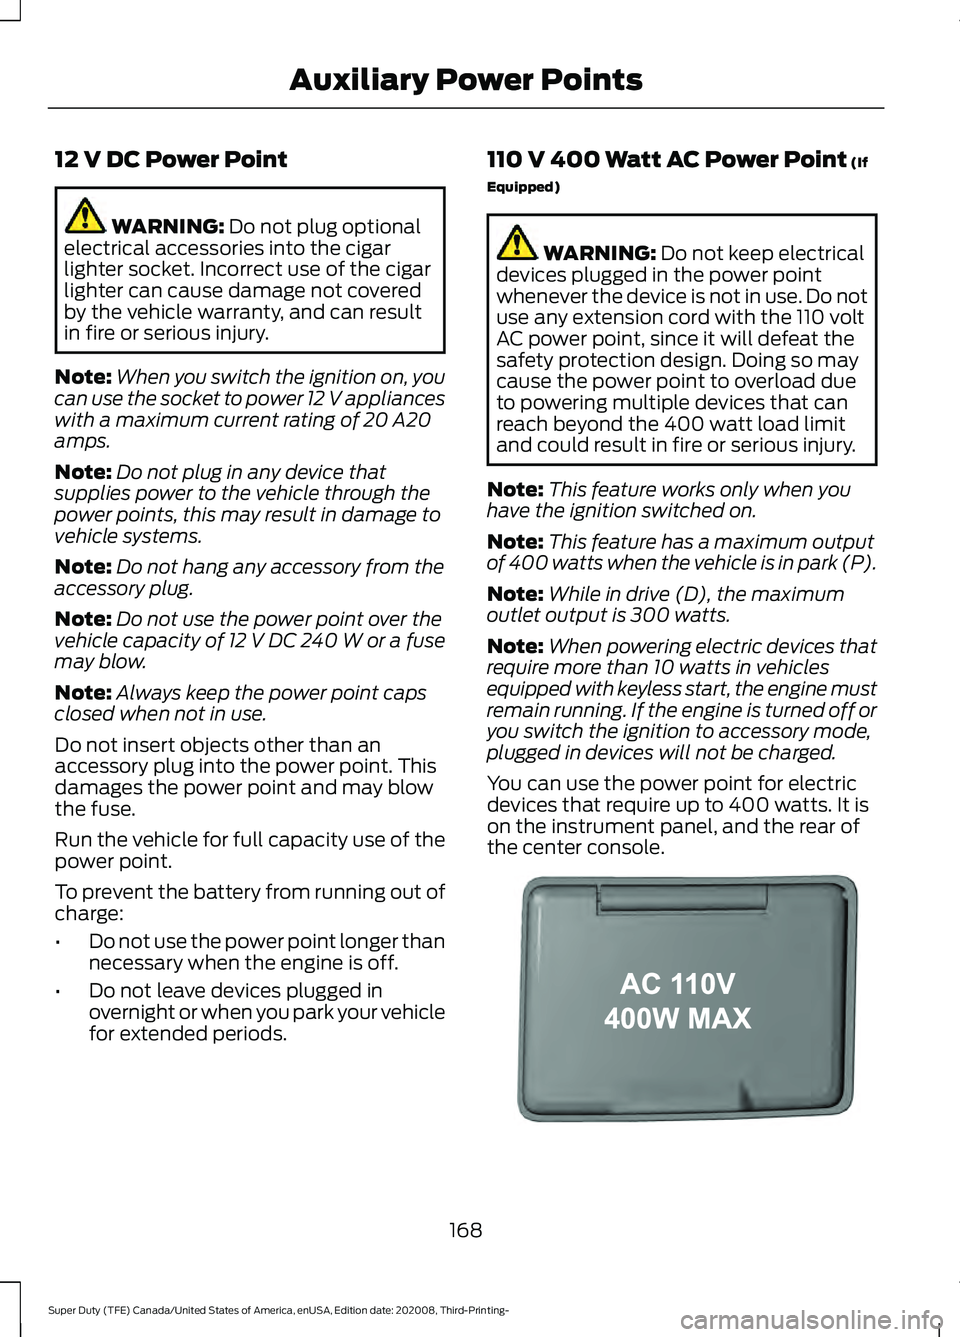
You can use the power point for electric
devices that require up to 400 watts. It is
on the instrument panel, and the rear of
the center console. 168
Super Duty (TFE) Canada/United States of America, enUSA, Edition date: 202008, Third-Printing- Auxiliary Power PointsE191617
Page 172 of 666

When the indicator light on the power point
is:
•
On: The power point is working, the
ignition is on and a device is plugged
in.
• Off: The power point is off, the ignition
is off or no device is plugged in.
• Flashing: The power point is in fault
mode.
The power outlet temporarily turns off
power when in fault mode if the device
exceeds the 400 watt limit. Unplug your
device and switch the ignition off. Switch
the ignition back on, but do not plug your
device back in. Let the system cool off and
switch the ignition off to reset the fault
mode. Switch the ignition back on and
make sure the indicator light remains on.
You can use the 400 watt power outlet for
these types of electric devices:
• Electric hand drills.
• Rechargeable power tools.
• Video games.
• Laptops.
• Televisions.
Note: Max 400W - when the vehicle is
parked and 300W - when the vehicle is
driving.
Do not use the power point for certain
electric devices, including:
• Cathode-ray, tube-type televisions.
• Motor loads, such as vacuum cleaners,
electric saws and other electric power
tools or compressor-driven
refrigerators.
• Measuring devices, which process
precise data, such as medical
equipment or measuring equipment.
• Other appliances requiring an
extremely stable power supply such as
microcomputer-controlled electric
blankets or touch-sensor lamps. Locations
Note:
Timed power points remain on for 30
minutes if the vehicle is in accessory mode.
If you switch the vehicle off, the timed
power points remain on for 75 minutes.
Power points may be in the following
locations:
• On the instrument panel.
• Inside the center console.
• On the rear of the center console.
• In the seat bin.
WIRELESS ACCESSORY
CHARGER (IF EQUIPPED) WARNING:
Wireless charging
devices can affect the operation of
implanted medical devices, including
cardiac pacemakers. If you have any
implanted medical devices, we
recommend that you consult with your
physician.
Tests on this equipment show that it
complies with part 18 of the FCC Rules.
• This equipment generates, uses and
can radiate radio frequency energy and
may cause harmful interference to
radio communications. There is no
guarantee that the interference will not
occur in a particular installation. If this
equipment does cause harmful
interference to radio or television
reception, please consult the dealer.
• This product is not end-user
serviceable.
169
Super Duty (TFE) Canada/United States of America, enUSA, Edition date: 202008, Third-Printing- Auxiliary Power Points
Page 173 of 666

WARNING: Changes or
modifications not expressively approved
by the party responsible for compliance
could void the user's authority to operate
the equipment. The term "IC:" before the
radio certification number only signifies
that Industry Canada technical
specifications were met.
This device complies with Industry Canada
licence-exempt RSS standard(s).
Operation is subject to:
• This device may not cause interference.
• This device must accept any
interference, including interference that
may cause undesired operation of the
device.
Note: The charging performance may be
affected if your device is in a case. It may be
necessary to remove the case to wirelessly
charge your device.
The system supports one Qi wireless
charging compatible device on the
charging area.
Keep the charging area clean and remove
foreign objects prior to charging a device.
Do not place items with a magnetic strip,
for example passports, parking tickets or
credit cards, near the charging area when
charging a device. Damage may occur to
the magnetic strip. Do not place metal objects, for example
remote controls, coins and candy
wrappers, on or near the charging area
when charging a device. Metal objects may
heat up and degrade the charging
performance.
Note:
The rate of charge, or charging power,
is controlled by the device. During charging,
the device and the charger may heat up, this
is normal. If the battery gets hotter than
usual, the charger may stop charging. The charging area is on the
center console or lower
instrument panel.
See Center
Console (page 171).
You can charge a device if the vehicle is
on, when in accessory mode, or anytime
SYNC is on.
To begin charging, place the device on the
center of the charging surface with the
charging side down. The charging stops
after your device reaches a full charge.
Note: If the system detects a foreign object
or if the device is misaligned on the charging
area, a message appears in the display.
Note: Software and firmware updates may
affect device compatibility, including the
use of unofficial software or firmware. You
should verify charging functionality with your
specific devices when in your vehicle. Description
Behavior
Message
This message appears whenwireless charging begins.
Message on screen display
or pop-up window.
Wireless Charger Active
The system stops chargingyour device if the system detects the phone is
misaligned, or a foreign
metal object is on the char- ging surface.
Pop-up window.
Phone misaligned or object
between phone and charger
detected. Correct the condi- tion to resume charging.
170
Super Duty (TFE) Canada/United States of America, enUSA, Edition date: 202008, Third-Printing- Auxiliary Power PointsE297549